Pre Flashing.
A technique for controlling contrast.

The technique of pre flashing paper is an old one and some of you may not have heard of it.
Perhaps a brief explanation of what it is and how it works for those who have no idea what I am talking about would be a good idea:
When you expose photographic paper to light you need to reach a certain threshold of exposure before a noticeable change in tone appears on the paper, from pure white to just showing the faintest tone. When you print a negative, you will obviously be well beyond the threshold for your shadows, your mid tones and some lighter areas to show, but sometimes you are not getting enough exposure through the dense parts of the negative to affect the paper, so you have no detail in the highlights.
If you are printing a negative that has been overdeveloped, you will most likely have one which is higher contrast than you would like, and then you find it difficult to get the image to have a full range of tones with any kind of subtle tone in the whites.
You may have chosen an exposure time from your test that you feel makes the majority of the image look about right, but the very brightest areas, such as the sky and clouds are showing no tone at all. This is because the light passing through the darkest parts of the negative is not enough to get beyond the exposure threshold.
What if we gave it a little boost?
The idea behind pre flashing is that a short exposure is given to the whole of the paper before the main print exposure to bring it just up to the threshold. Then when you print your negative, the little amount of light that is struggling through the dense parts of your neg is now enough to push the paper into producing a tone. The pre flash improves the highlights without appreciably affecting the shadows because the exposure is usually so short or dim.
With the example picture here, I chose an old infra red negative which I had over processed. The old Kodak infra red film got really dense if you over processed it and in my early days I had a few really contrasty films until I figured out what was happening. The first print shows shadows and mids, but the highlights are blown out.
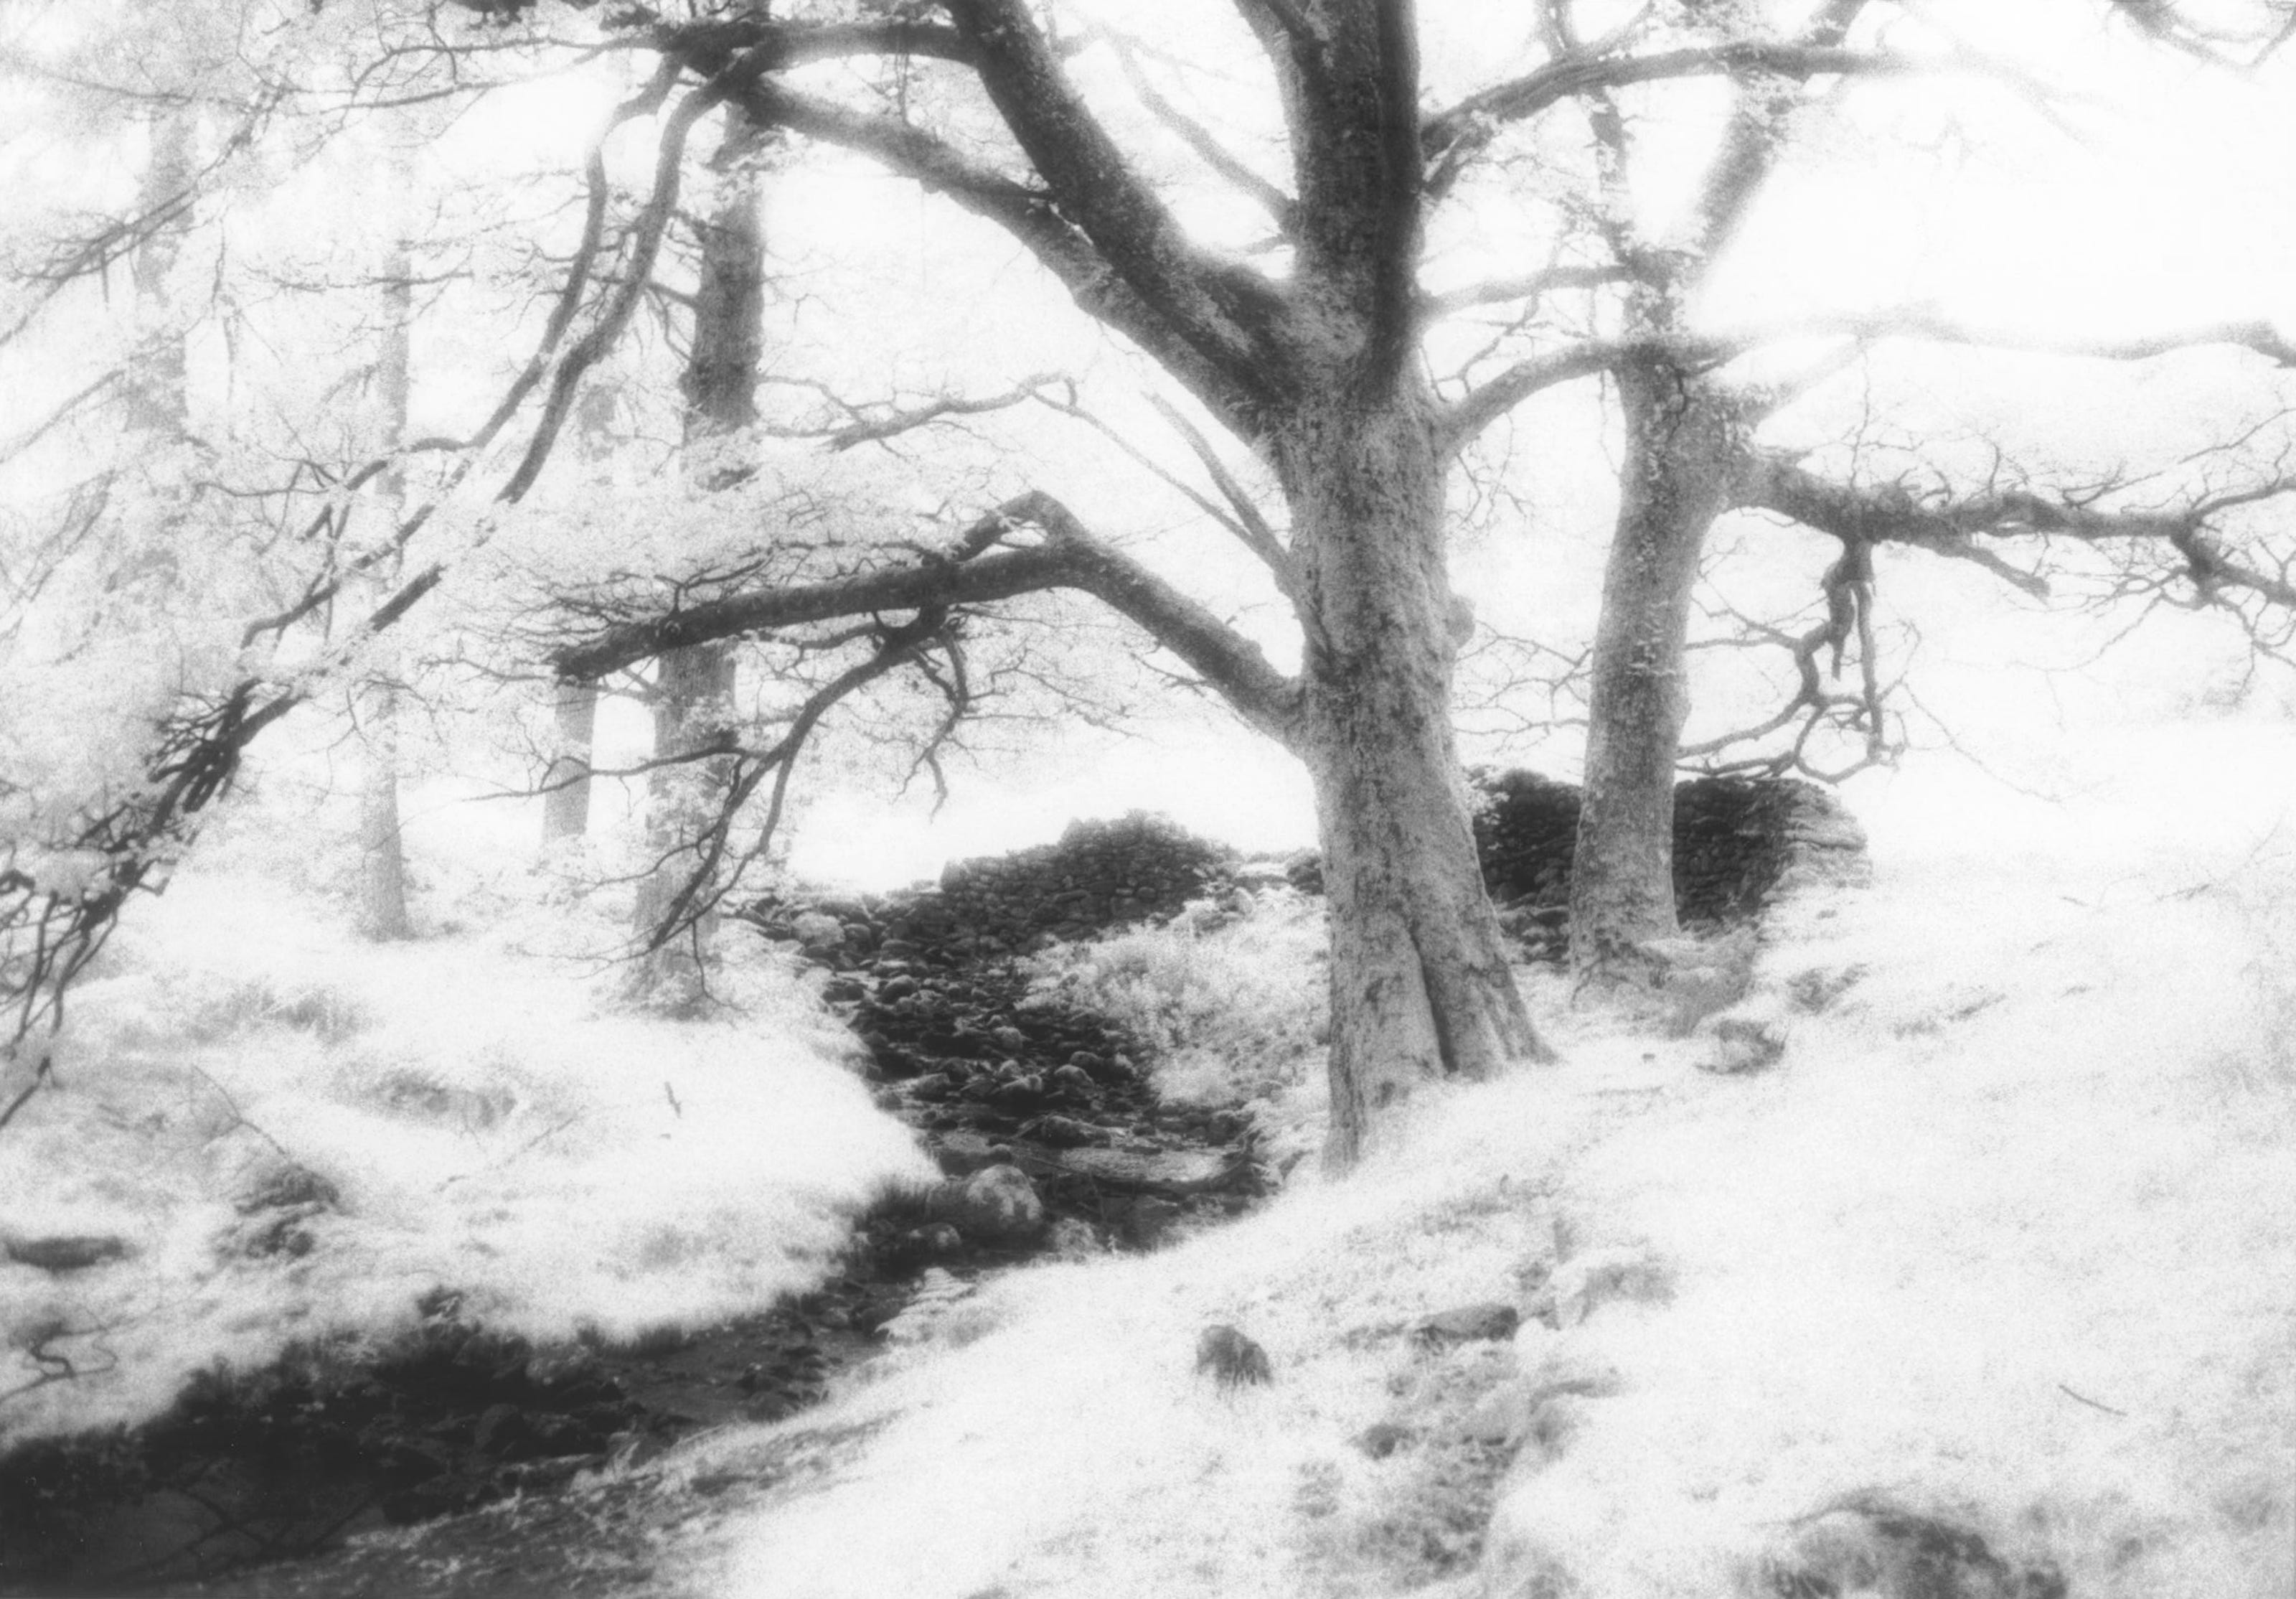
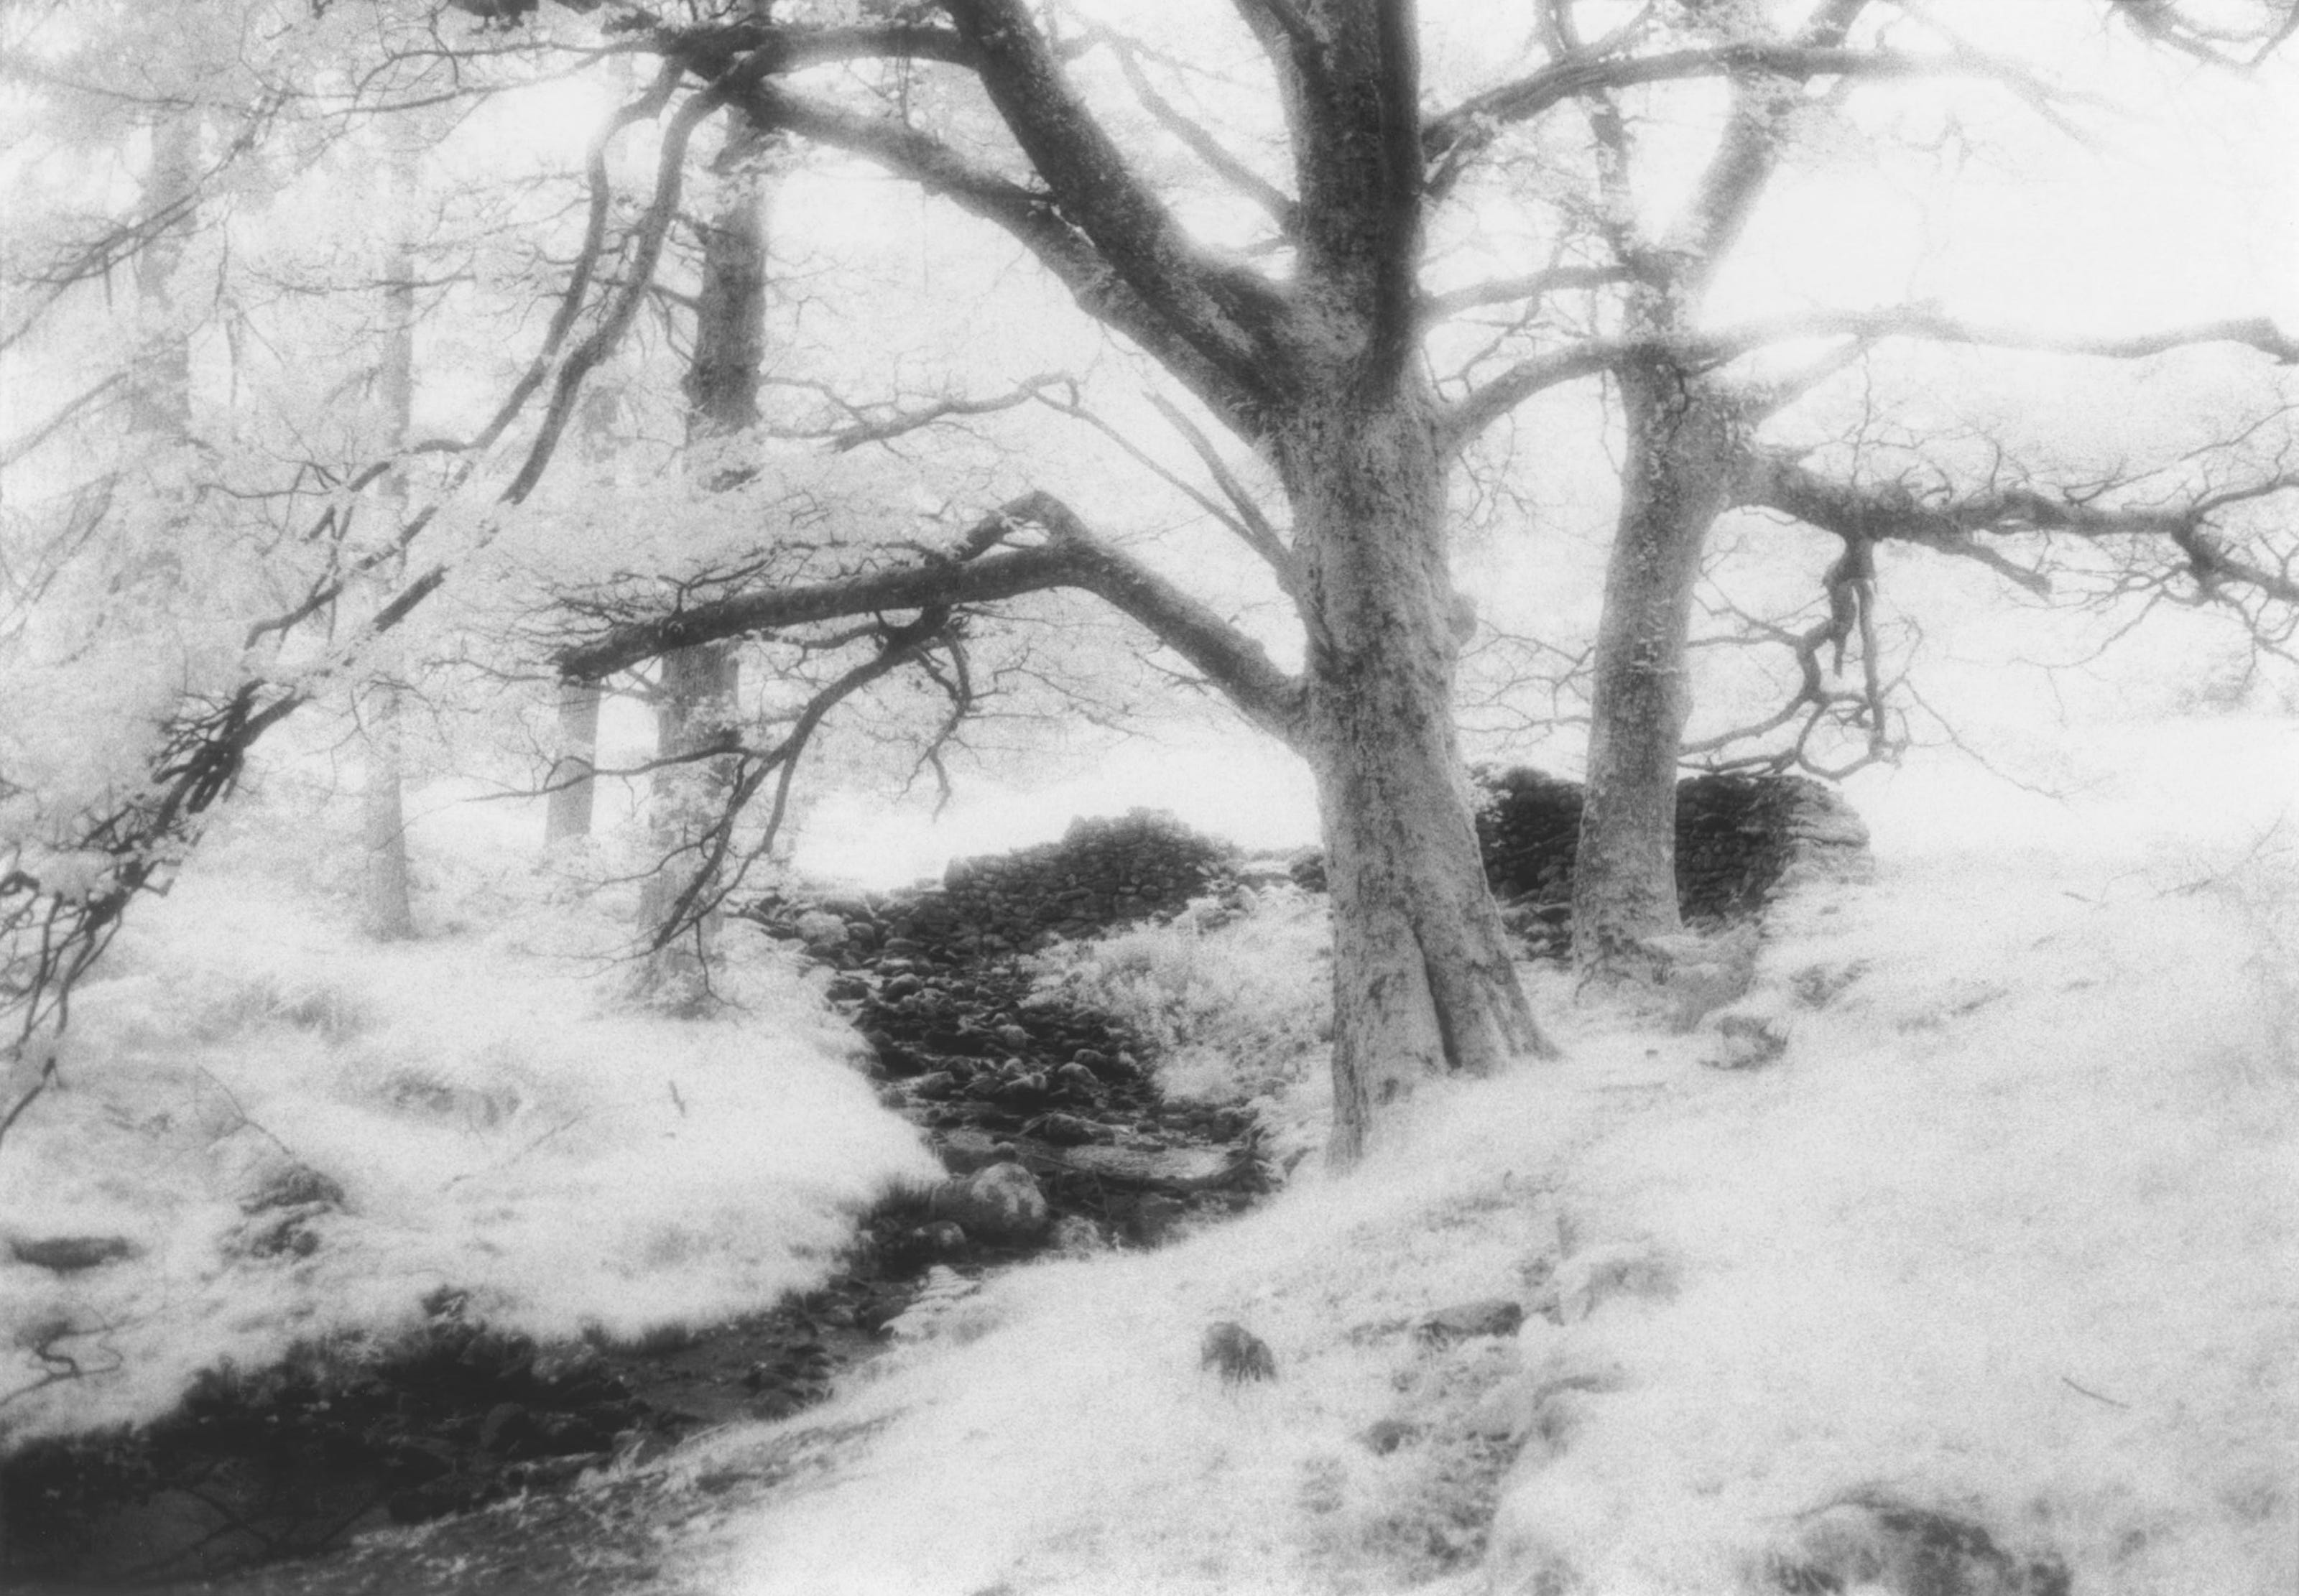
The second print was done with split grade filtration and this has brought much more out.
The final print had pre flash and split grade filtration and this brought out all of the upper tones, most noticeably in the upper right.
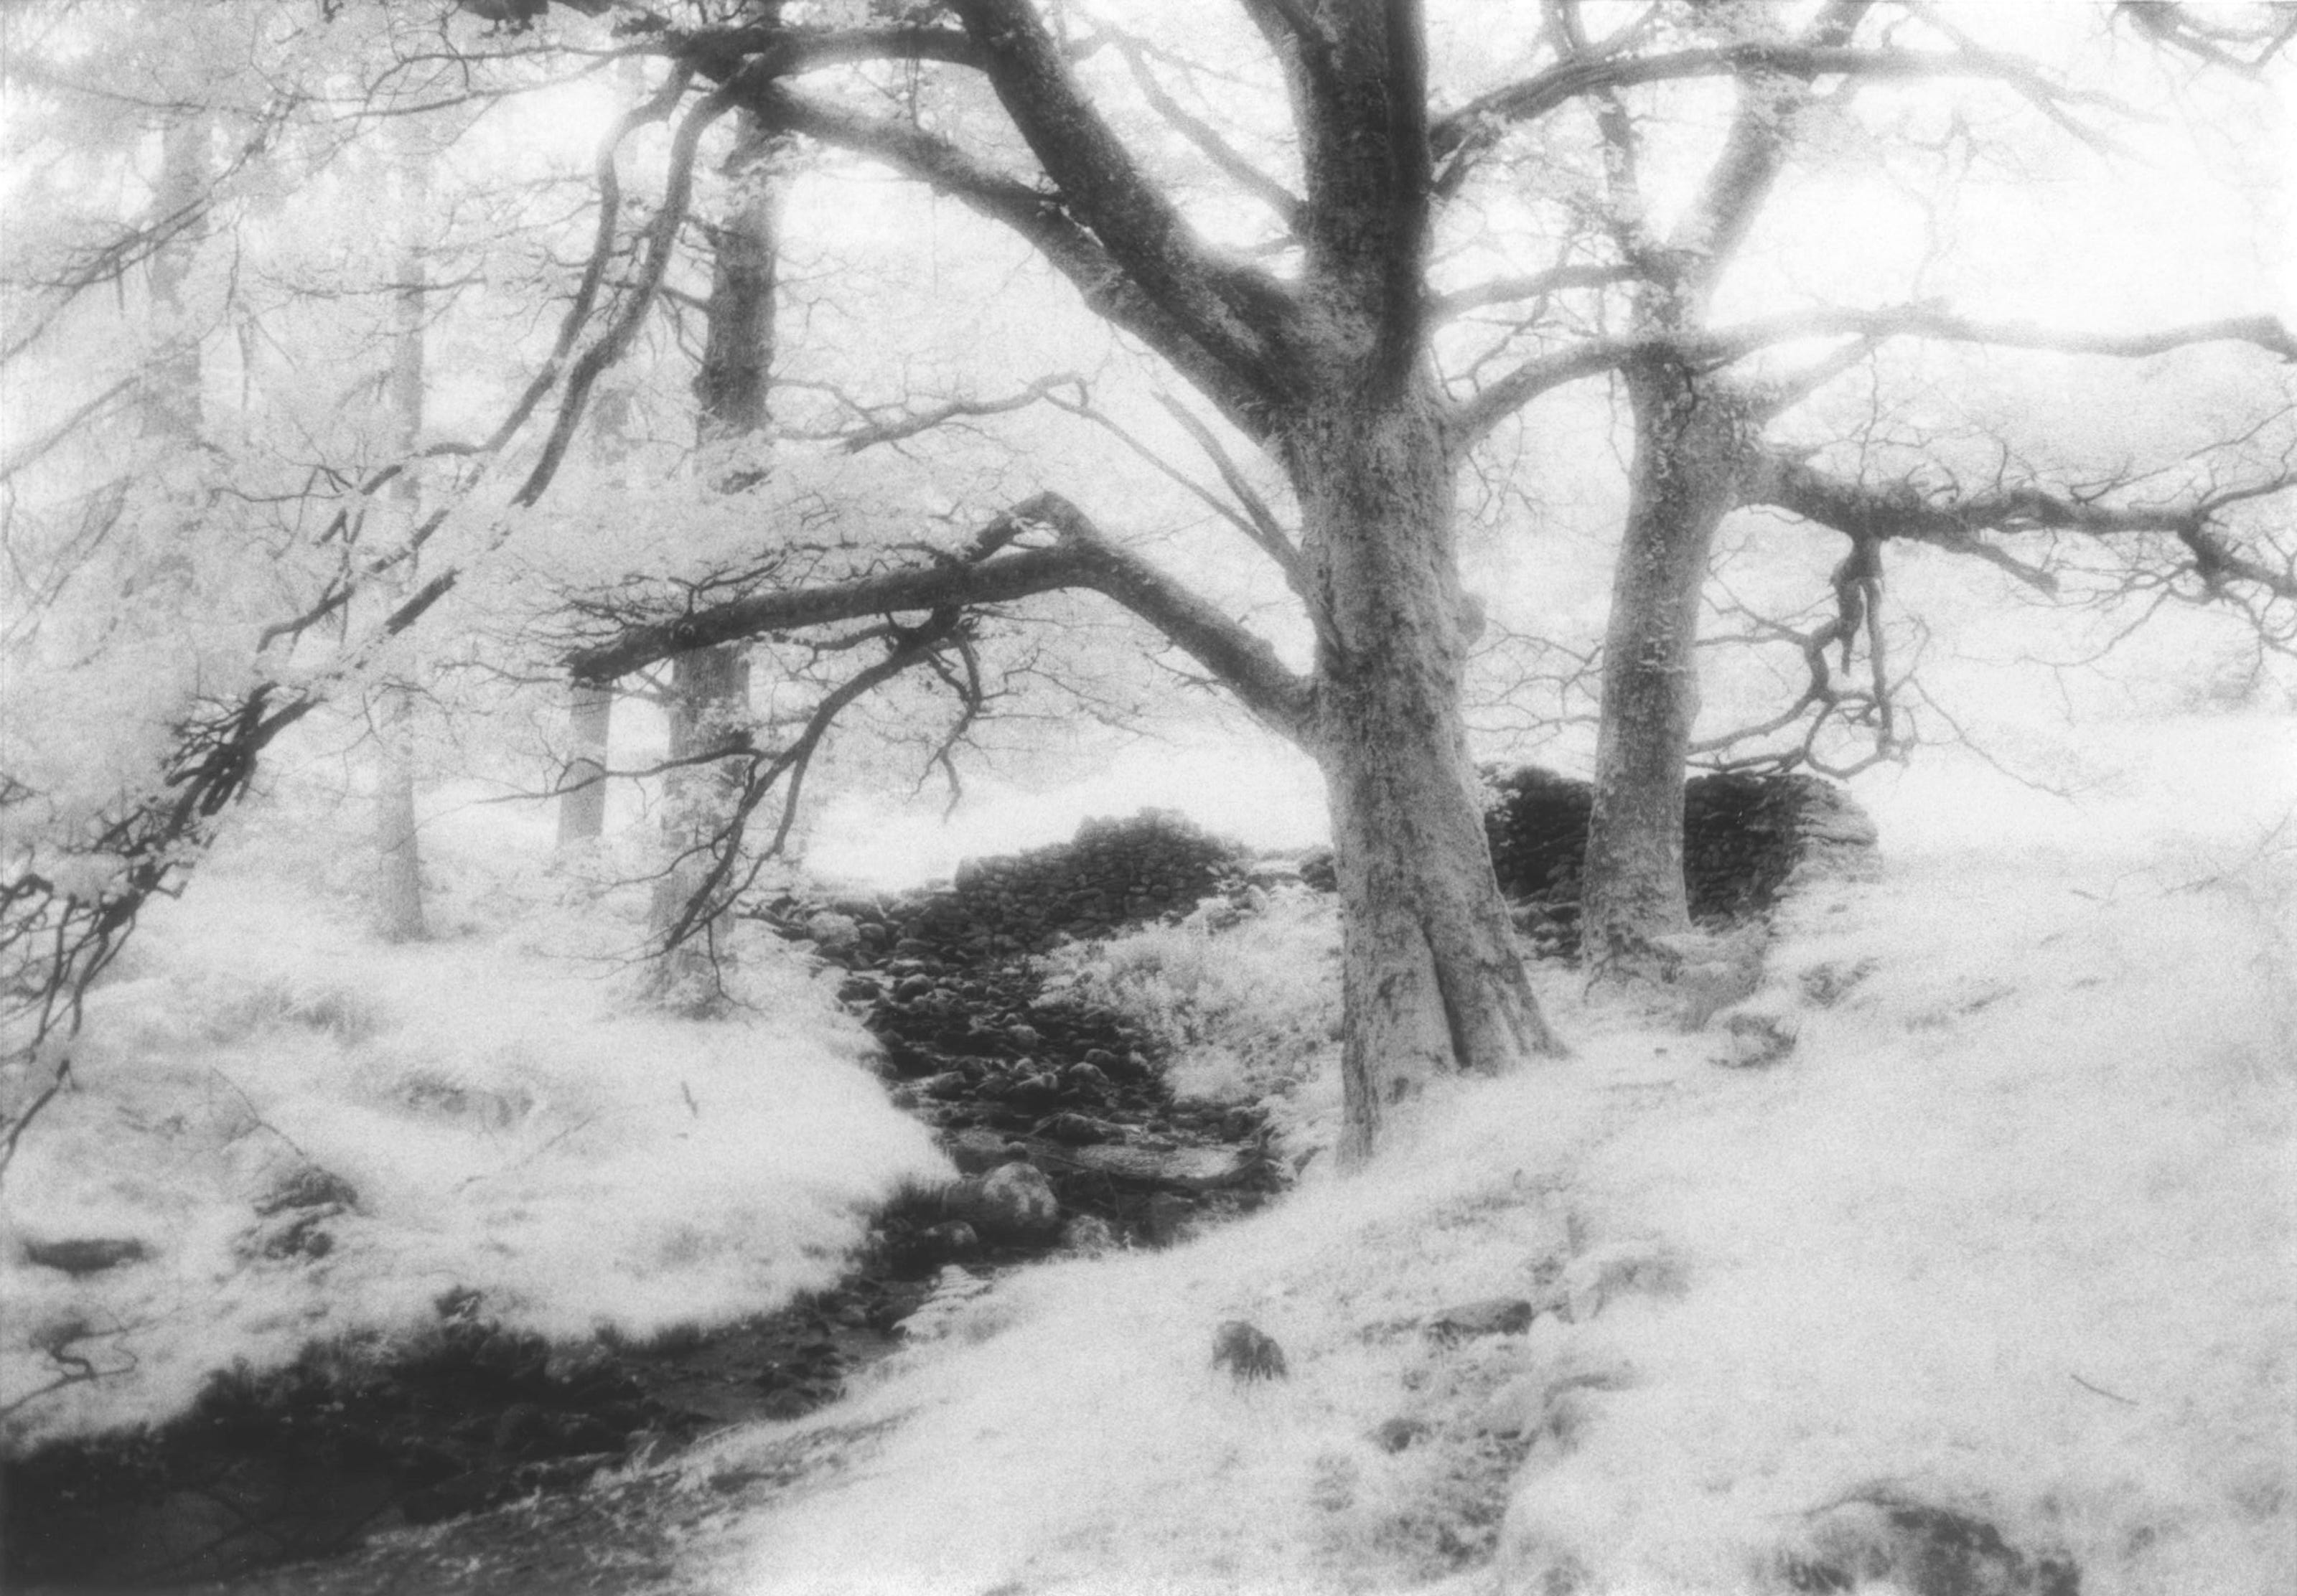
So a bit of overall, subdued light brings the exposure threshold up to a workable point. That’s the idea, but how do you make it of practical use in your darkroom and how much pre flash should you give? Well you need to test that, but don’t panic, the test is simple. Here I will show a simple method for trying it and a very useful variation of it.
Let’s run through the normal sequence of events: Choose a negative that is a bit dense, or one that has produced a contrasty image previously. Put it in the enlarger, set the size of the image, focus and stop the lens down (Usually two stops).
Make a test strip the normal way, in a series of exposures and process the strip normally. (see my article on darkroom printing from Feb this year. https://substack.com/@masterprinter/p-186508603
Choose an exposure that gives you correct shadow and mid tones, then look at the highlights. Are there shapes and tones that you can see on the negative that are not showing up in the highlights?
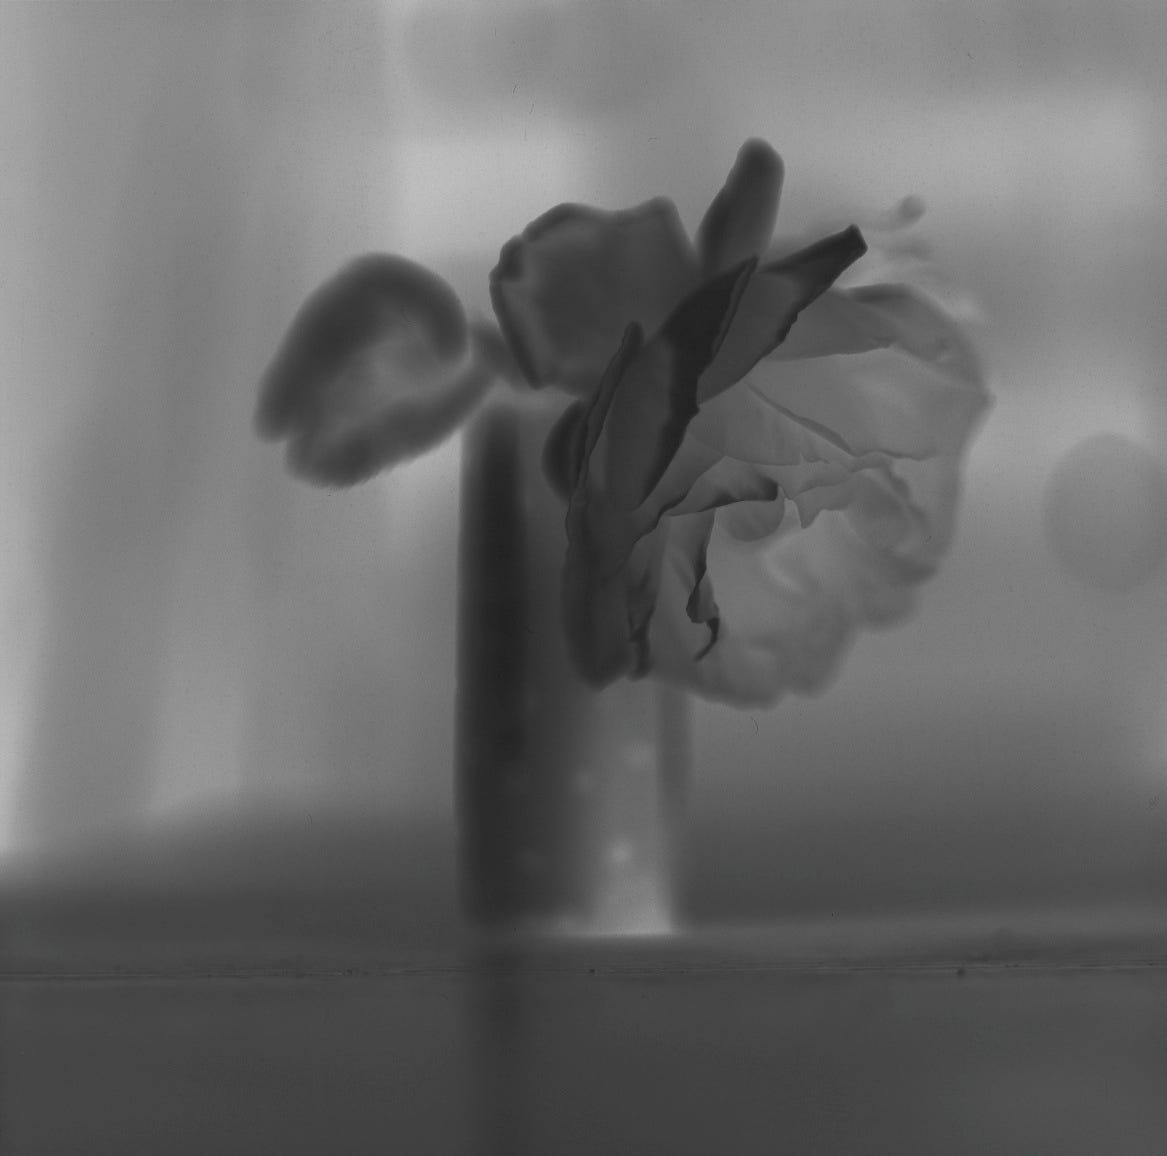
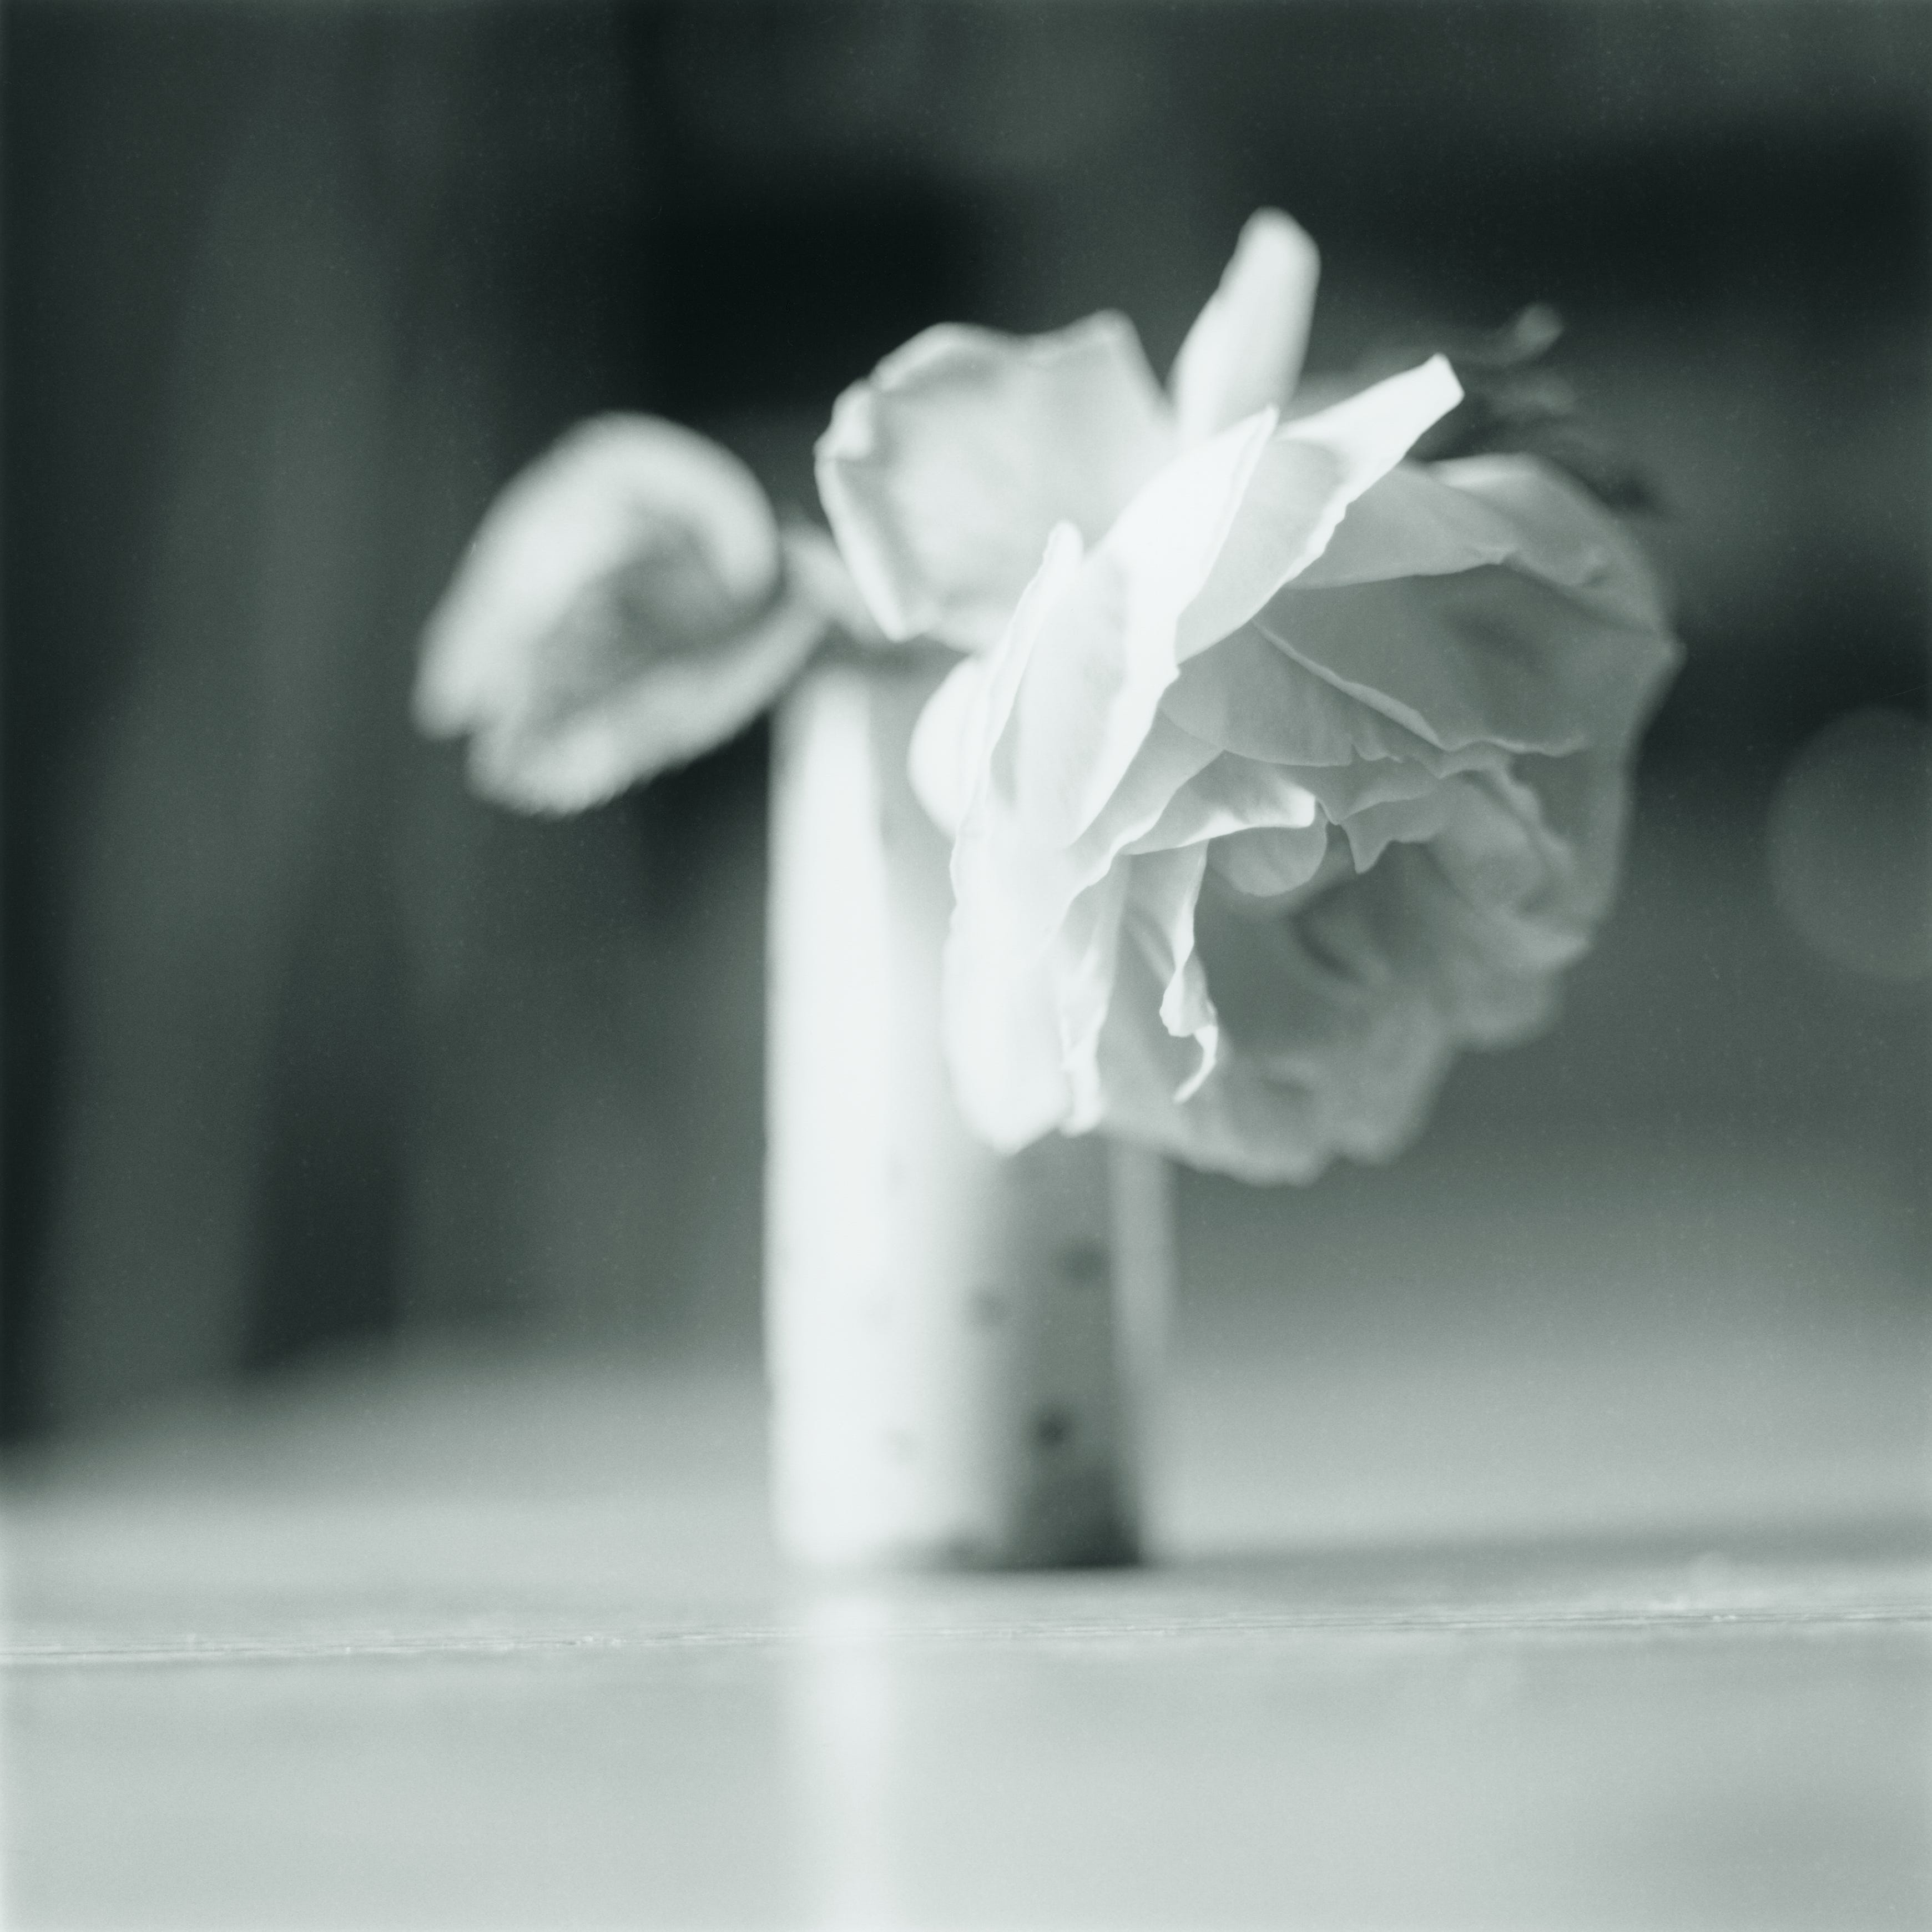
In the example above, most of the tones look correct, but as can be seen in the negative, there is more tonal separation in those middle petals.
Now it’s time to make the pre flash test. The best way to do this is to have a second enlarger set up to expose dim white light to your paper, but how many of us have got two enlargers set up? The other method that I have seen suggested is to take the negative out, stop the lens right down to reduce the brightness, and expose some paper in strips. The problem with that is that you have to keep taking the negative in and out every time you want to do a test or a print, and keep changing the aperture. There is quite a bit of room for error there, so I’m not keen on that way of flashing.
Are there any other ways that a diffused, low intensity light can be given to the paper? Well one method that I have used successfully in the past is to hold two layers of tracing paper under the enlarging lens. This reduces the light to the sort of intensity that you would need for a flashing exposure and it completely breaks the image up into a broad diffused light, which is what you need, because the flashing exposure needs to be even over the whole print. It is important to have the tracing paper as close to the lens as possible though, as this gives maximum diffusion. The only time I don’t like this method is when I am printing from a really dense negative, because the flashing exposure times become frustratingly long (as with the infra red image above).
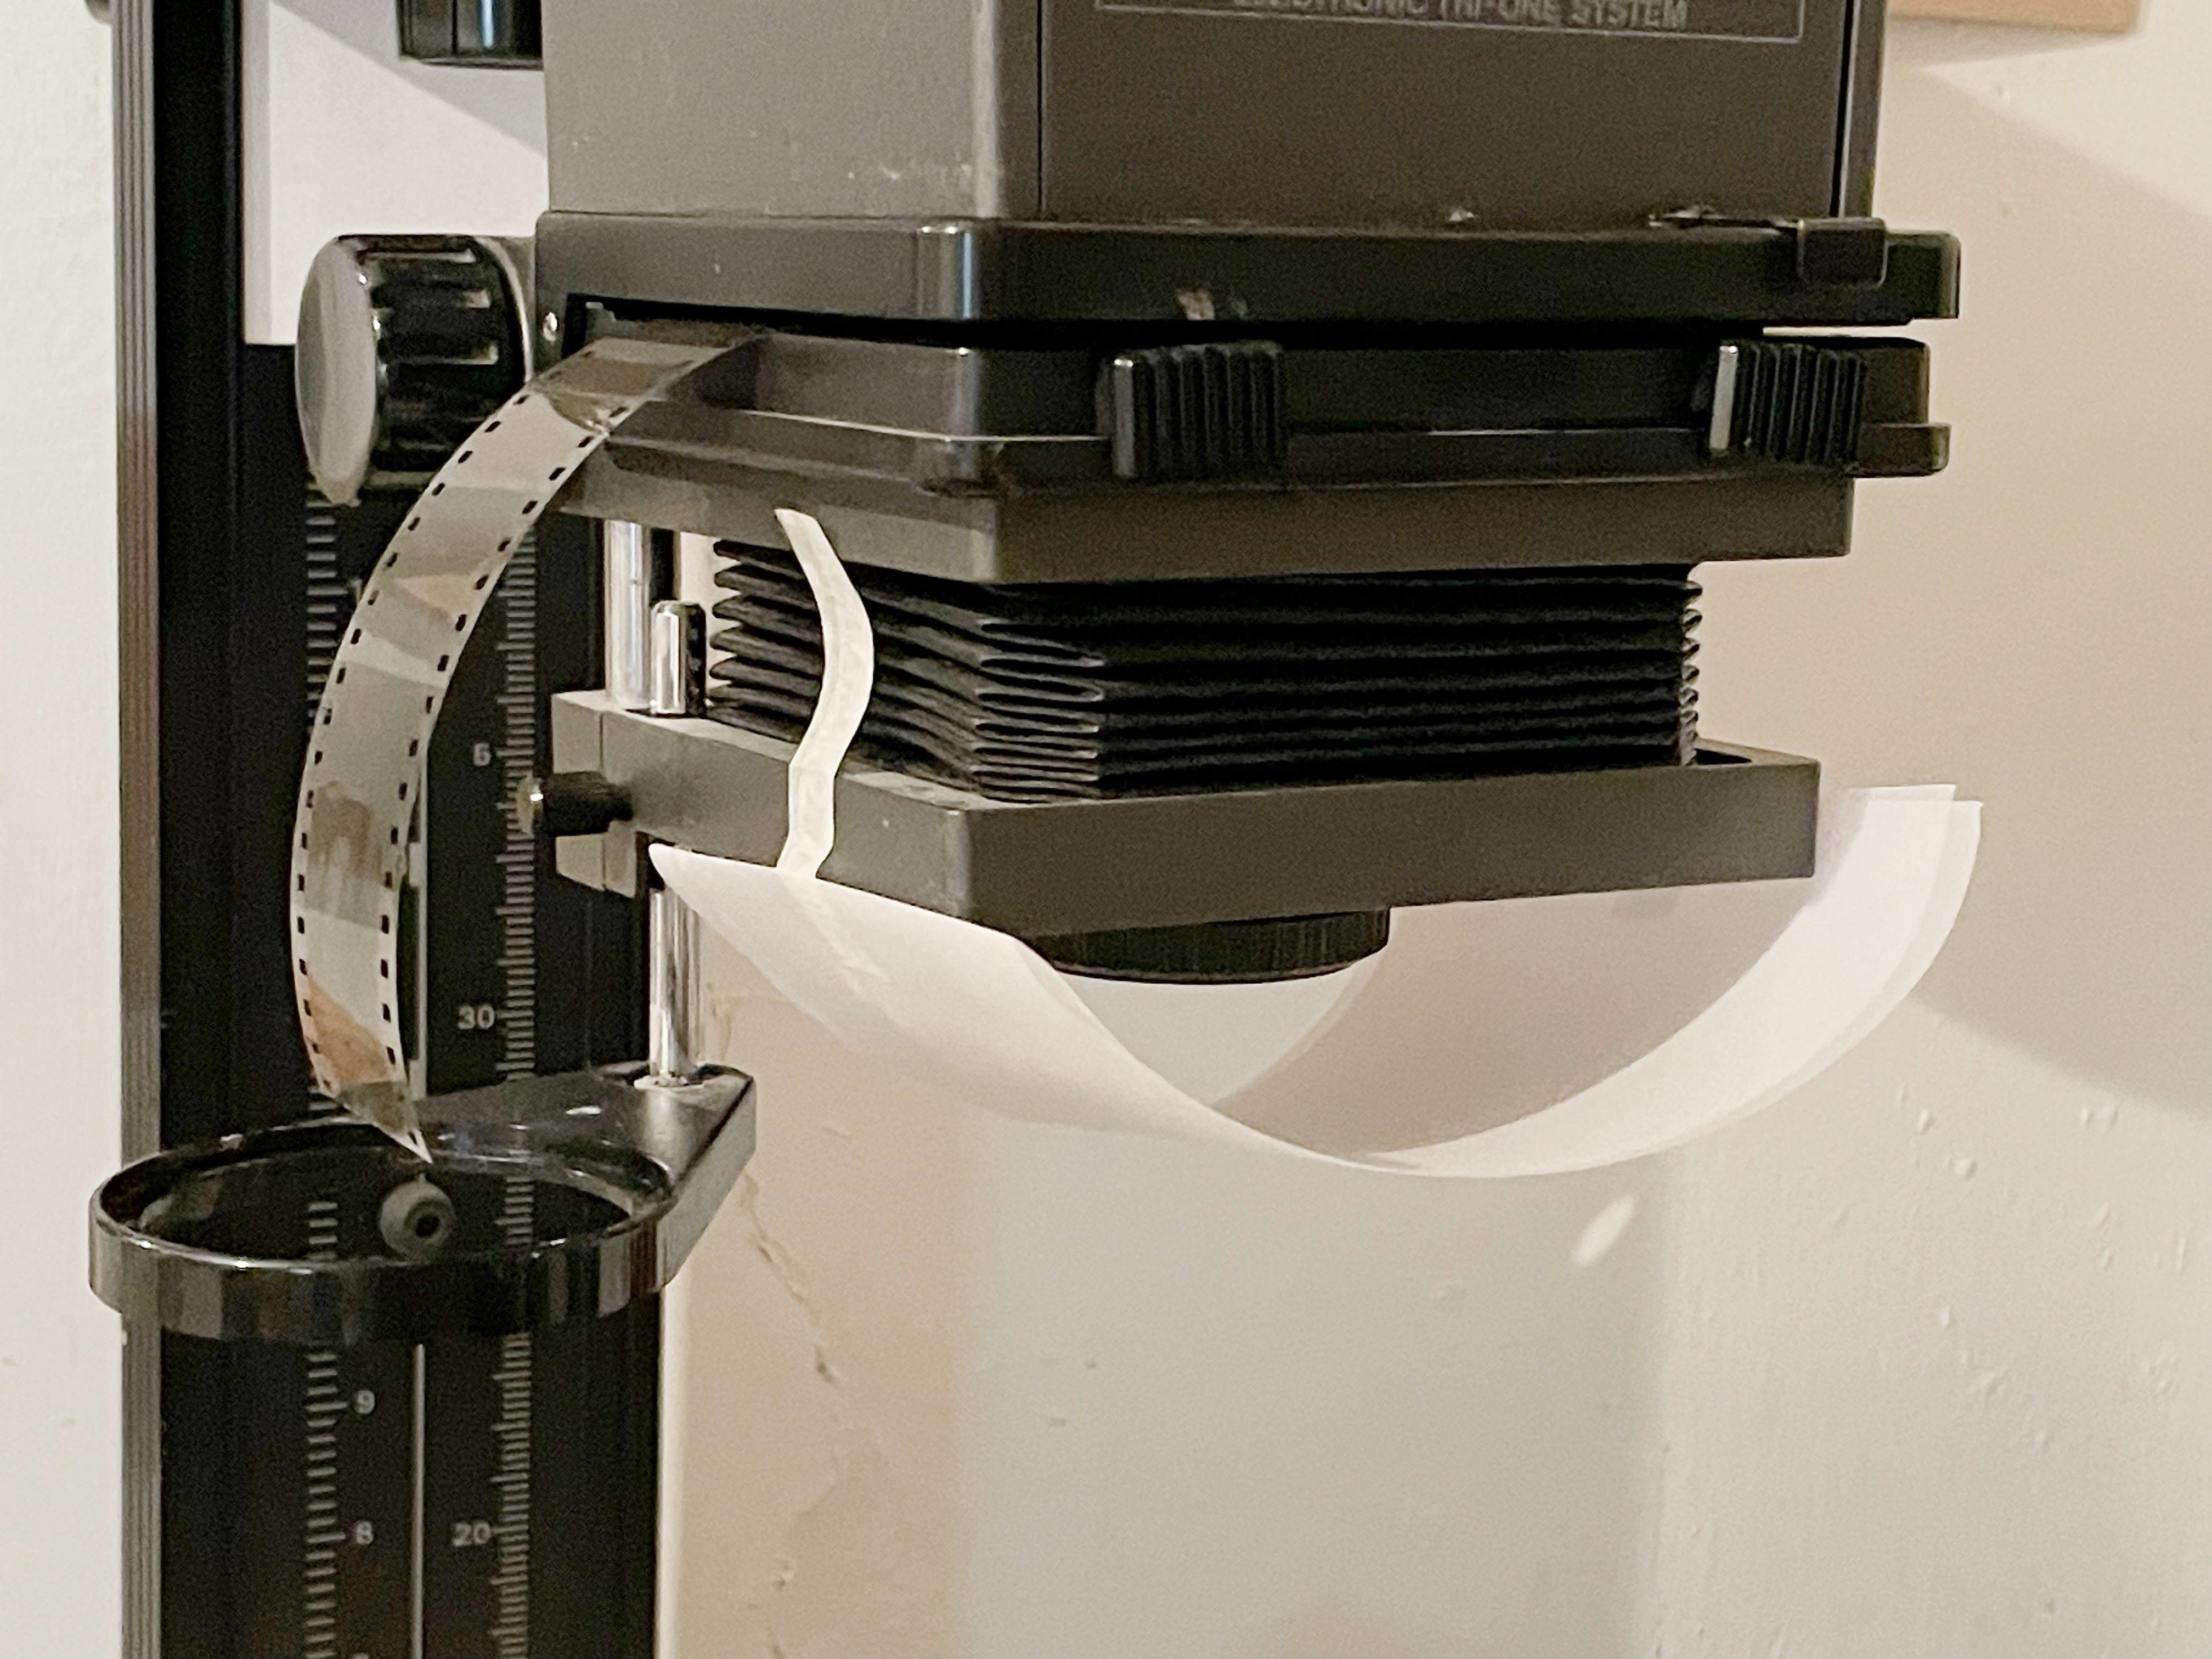
Once you have this set up, a piece of photographic paper is placed on the baseboard and a series of exposures is given. I can’t give you any guidance on how long those exposures should be, it will be totally dependant on how dark your negative is.
What we are looking for is the slightest exposure difference from pure white. This can be quite difficult to spot, so I lay my scissors on the paper, this way I can see where the shadow disappears.
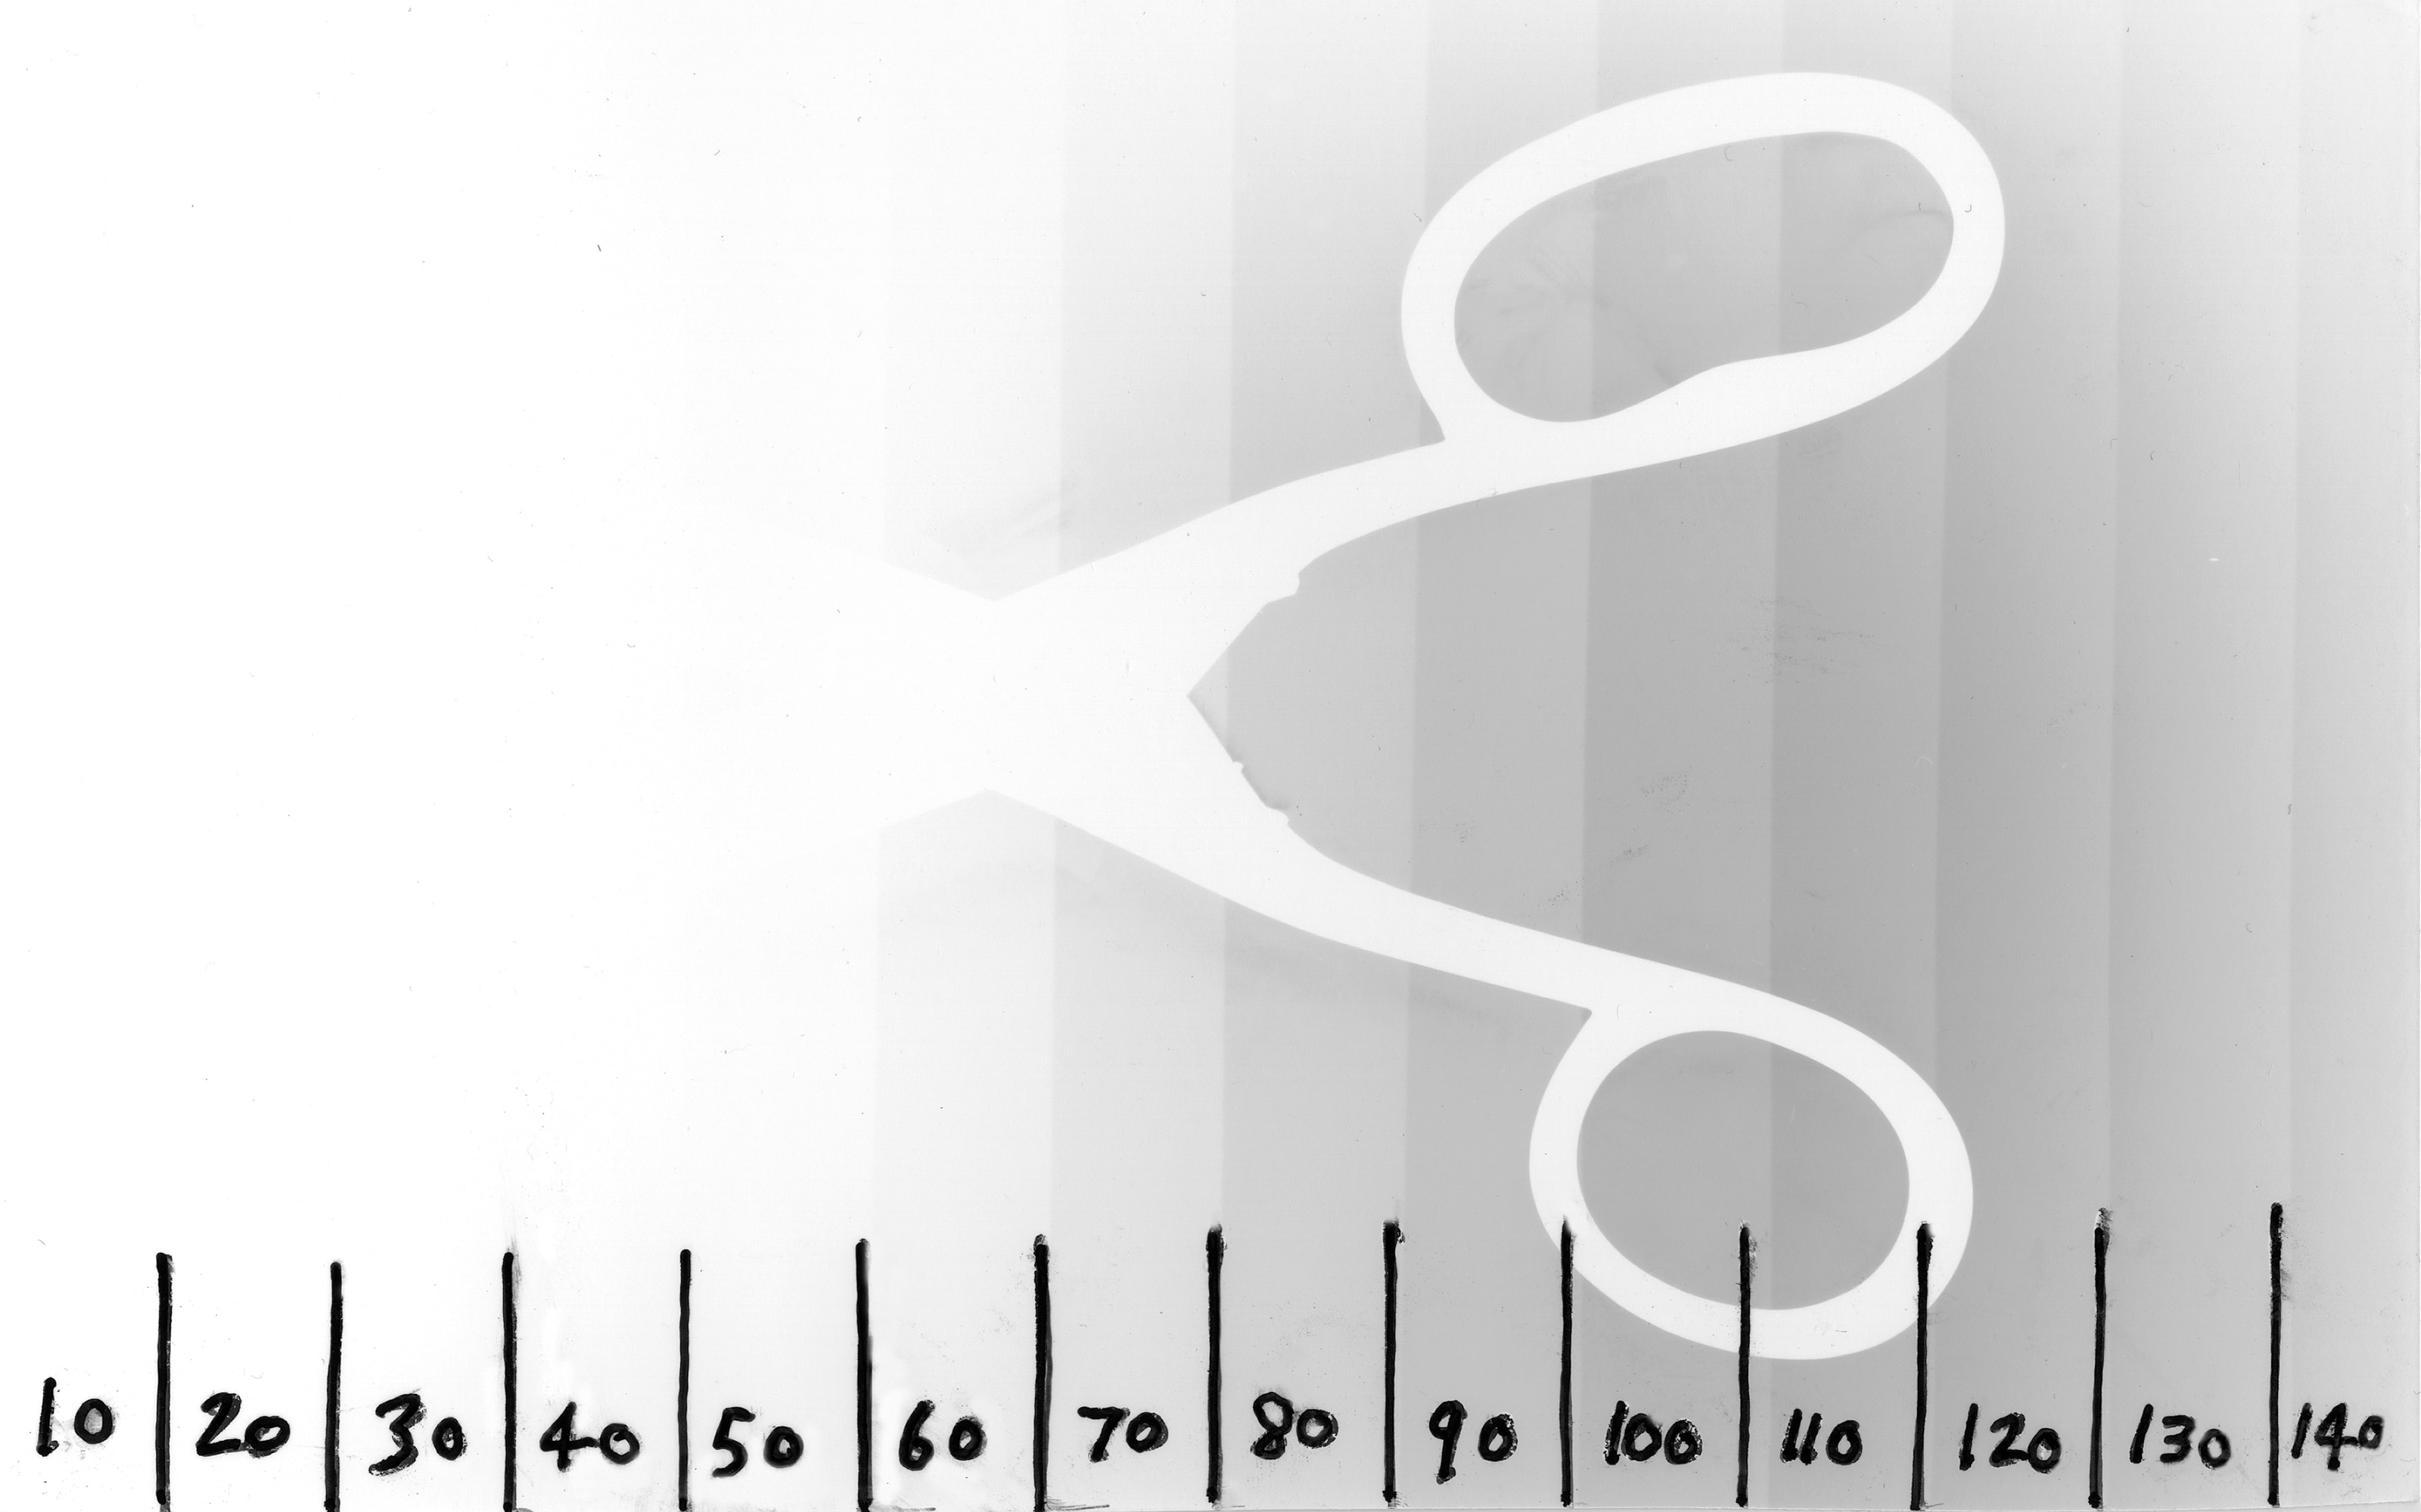
For this test, the tone is quite obvious at 60 seconds. I don’t want tone in the whites of my print, I just want to get to the threshold, so I choose an exposure just before that. In this case 55 seconds.
The next print is given the pre flash of 55 seconds, then the tracing paper is removed and the main exposure is given.
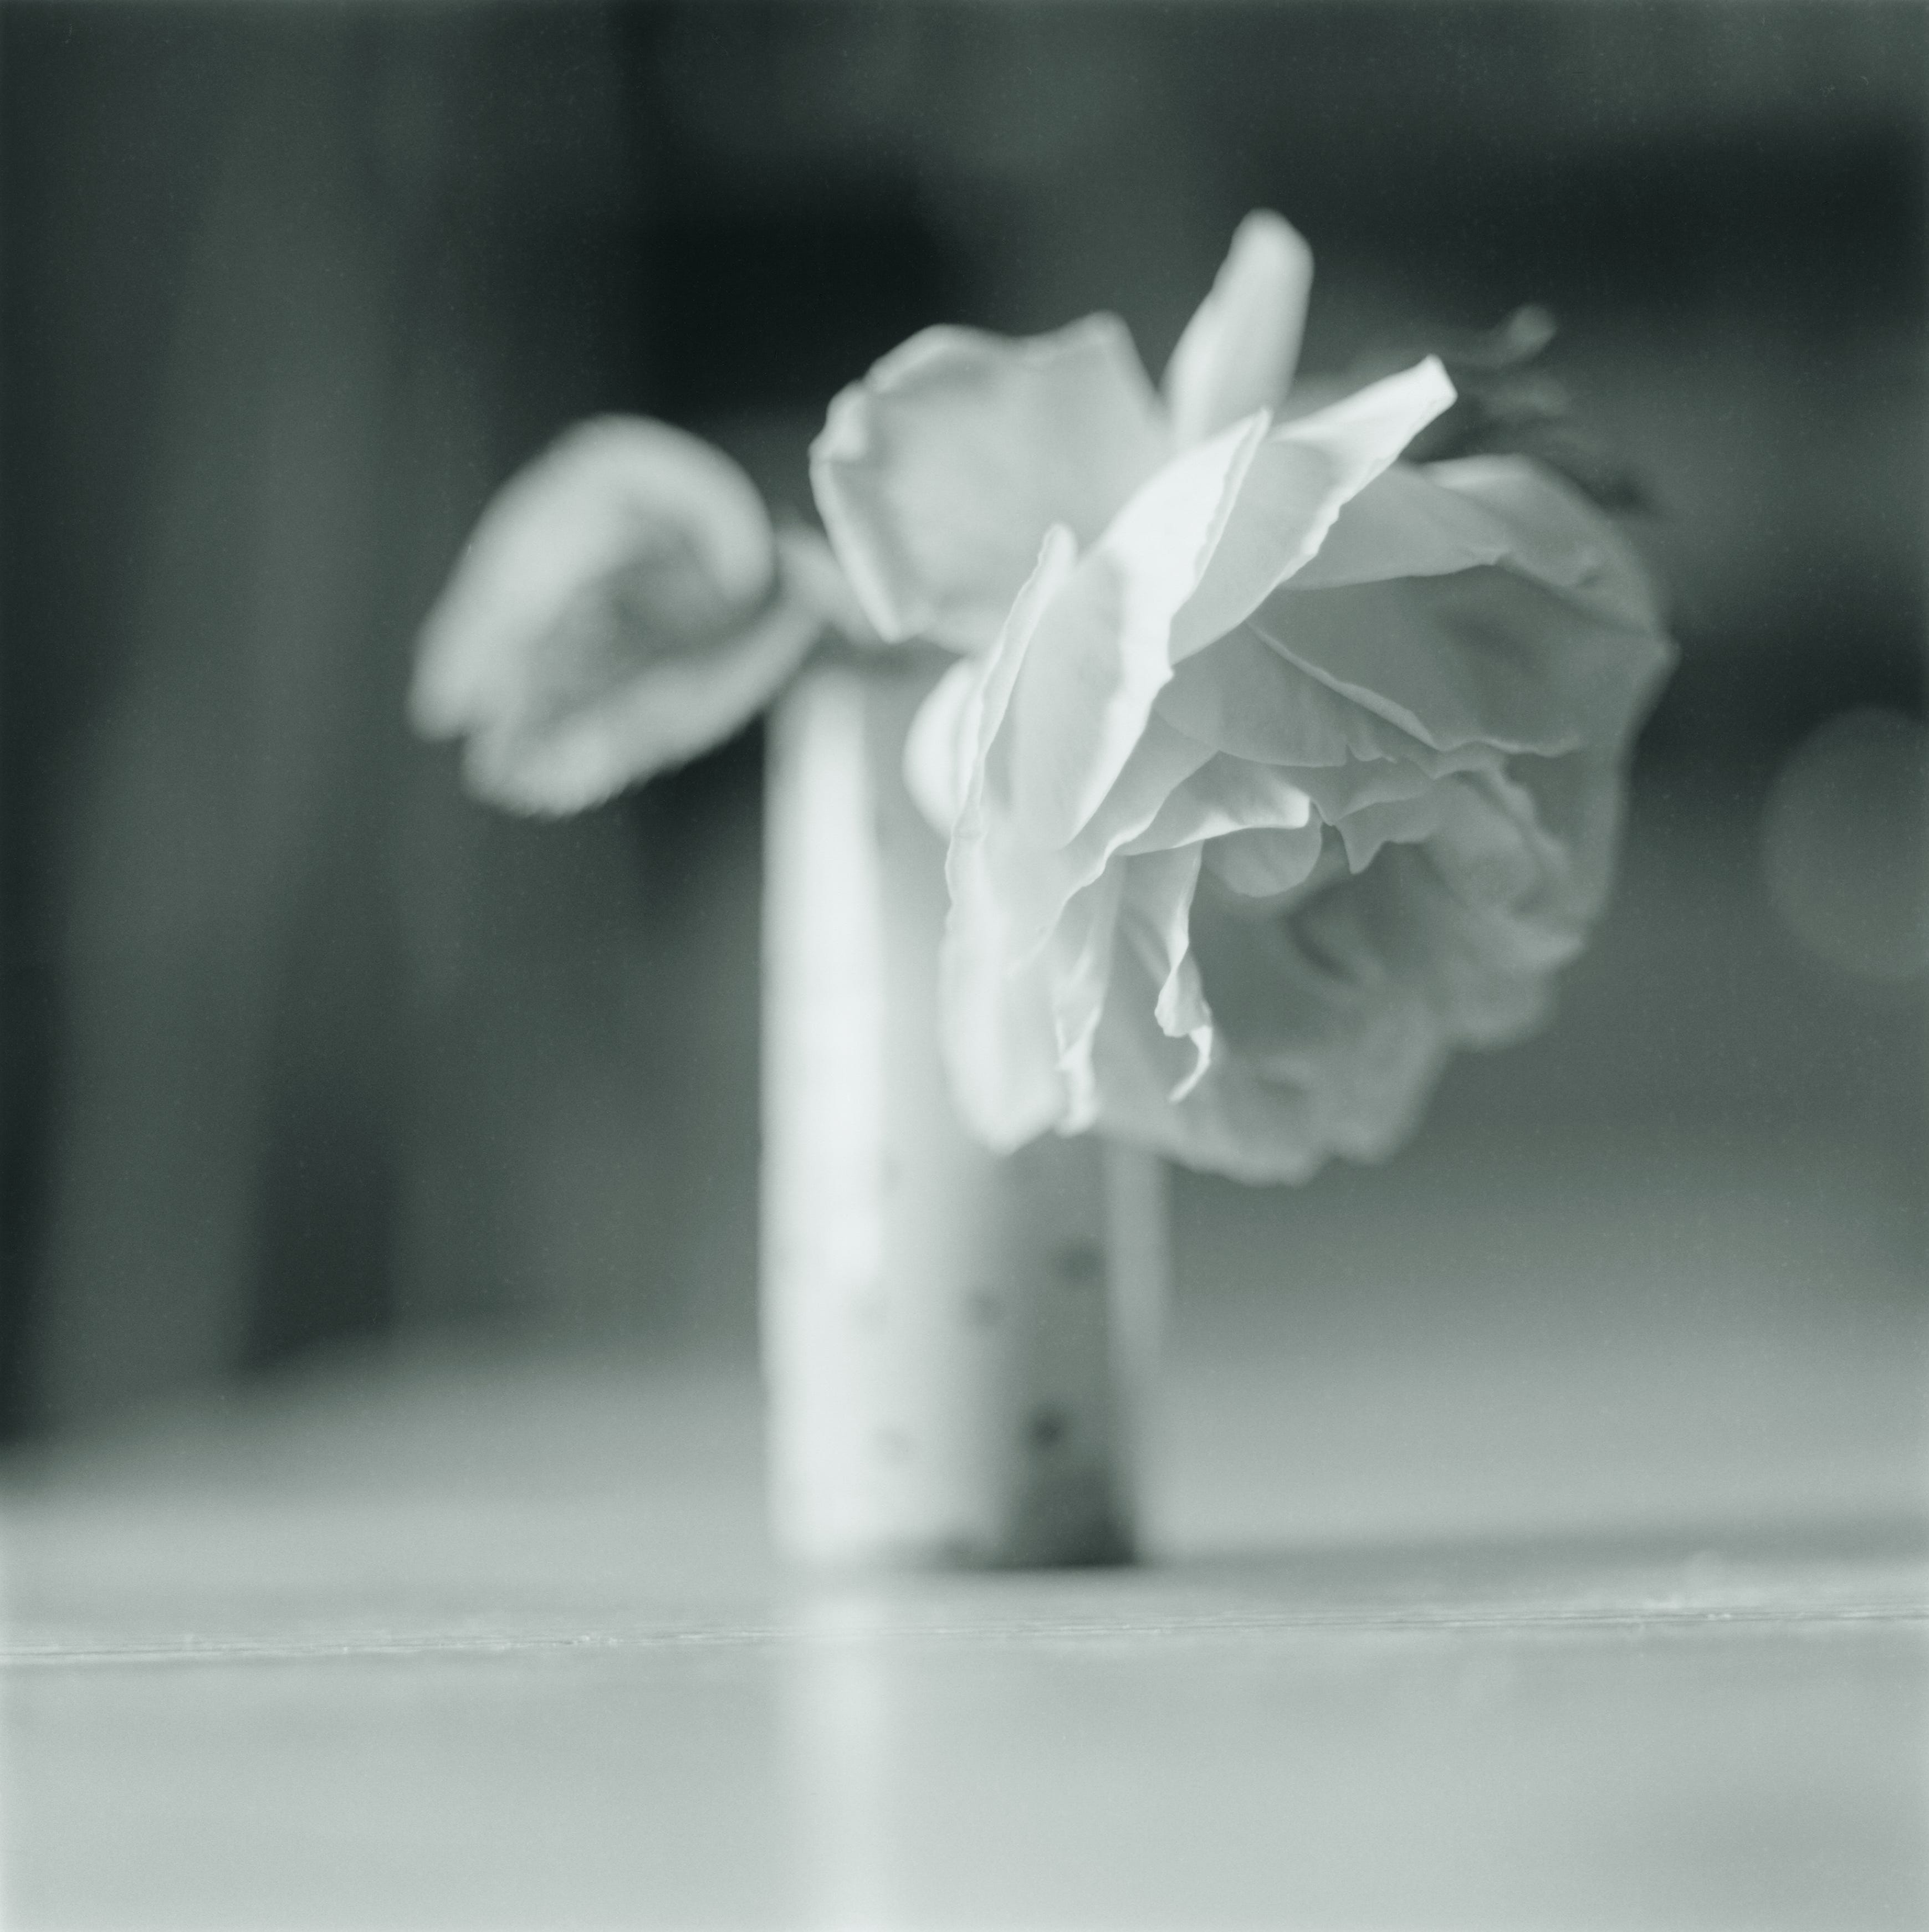
Now the highlight tonality is revealed.
The method is called pre flash, but because exposure is cumulative, the flash can be given after the main exposure, -the effect will be the same.
One other, extra contrast reducing method that makes a difference, is to do the pre flash exposure through a grade 00 filter. This ensures that the low contrast layer of the paper is the only one that gets the boost.
Well that’s it, not complicated, but in practice it can mean making a few test strips before you get to the final print. If you have an important image, then this gives you an extra tool to get the best out of it. Good luck with your printing, let me know how you get on.
All of these words come out of my head. I never use AI in any form and I never will. I hope you appreciate the time and effort that goes into these articles. Let’s keep real photography and real writing alive.
If you find my articles interesting or useful, please spread the word to anyone you can think of who would be interested.
If you have enjoyed this post and the information here and elsewhere on my Substack and you would like to support me, you can subscribe or just buy me a coffee at Ko-fi.com/andrewsandersonphotography You can send as little as £5.00, or more if you are feeling generous. This money goes towards materials used for the tests and printing for these articles. Alternatively you can be a paid subscriber.
Thank you for reading, please let me know your thoughts.
Andrew Sanderson June 2026.
Other places to see my work;
Instagram; http://instagram.com/andrewsandersonphotography
Original hand made darkroom prints are available from my online shop; www.andrewsandersonphotography.bigcartel.com
I also offer one to one workshops at my darkroom/studio in West Yorkshire, UK. If you are interested please email me at sandyjottings@icloud.com
The technique that have used is to establish the pre-flash time ( set aperture, known enlarger head height, no negative , no diffuser, out of focus) and write the time on the box of paper. I’ve tried this with paper negatives to reduce the contrast. Reasonable approach?
I’ll have to check this out. I’ve just started in my own darkroom, and learn as I go.