Film processing at home.
It's easier than you think.

I hope that lots of you are shooting film these days?
If you are, then the next stage is to get the exposed film processed into negatives. A professional lab is of course an option, but today I would like to show you that processing a film at home can be quite a simple operation. Of course there are lots of videos on youtube about it and probably quite a few blog posts, but I wanted to explain more than the basic procedure. I will introduce you to the little things that I do differently, and explain why I have adopted those methods. Whether you think they might be of use to you is entirely your decision, but I will lay out these things and you can take whatever suits you.
Firstly though, a simple explanation of what is happening:
After it has been exposed, the film needs to go through developer which will make the exposed areas of the film turn black, then the (alkaline) developer is replaced with stop bath, which is a mild acid, this kills the action of the developer so that the film doesn't go any darker. The stop bath is then replaced with the fixer, this removes the light sensitive layer of the film, leaving the developed black areas. These are your negative images. The next stage is to wash off the chemicals and hang the film up to dry.
The whole process isn't a difficult thing to do, it just takes a bit of planning and care. It really is great fun and everyone who tries it, loves seeing their images come out of the tank at the end.
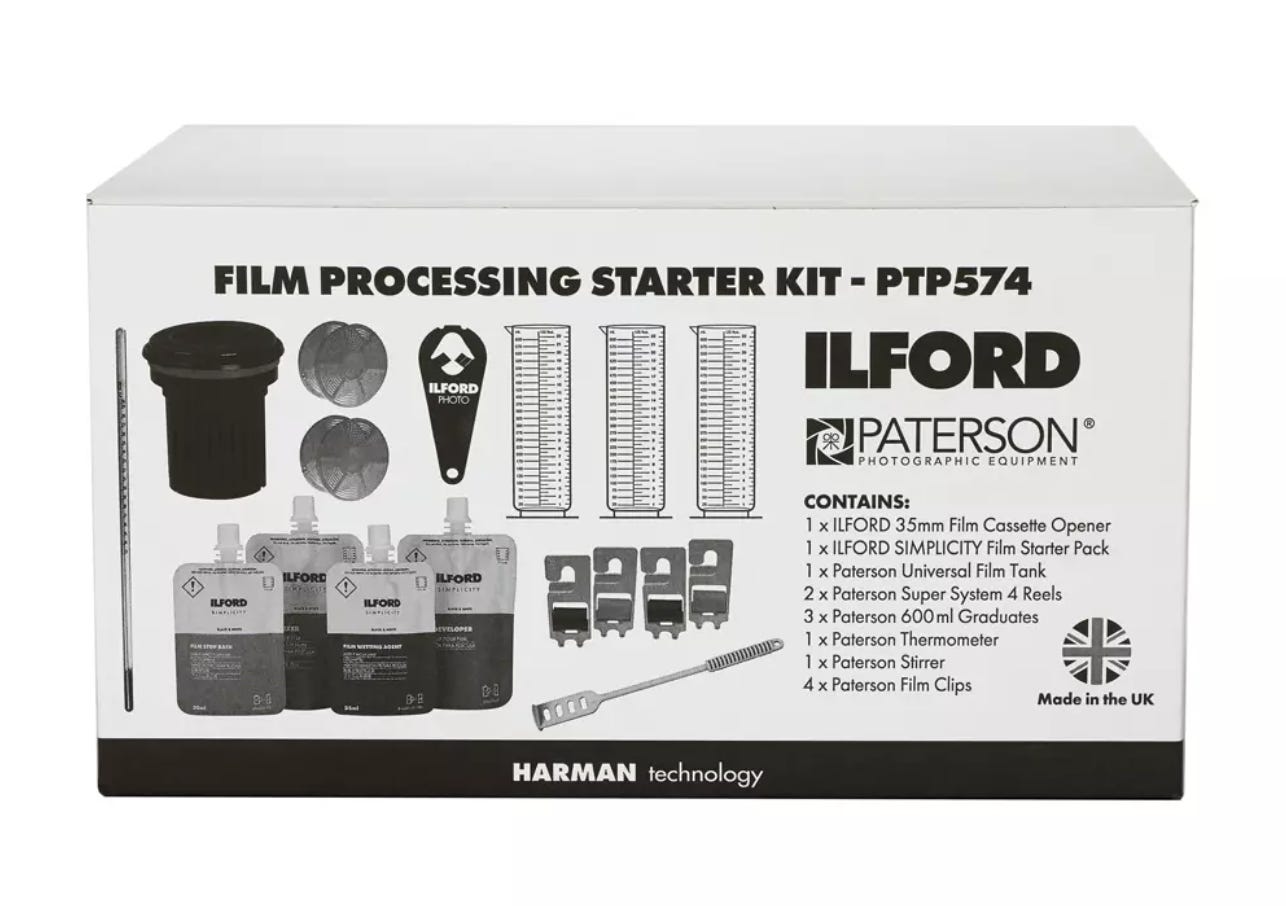
Once you have made the decision to process your film at home, you will need to acquire the necessary developing tank and chemicals. Here is a list of the hardware you need to buy:
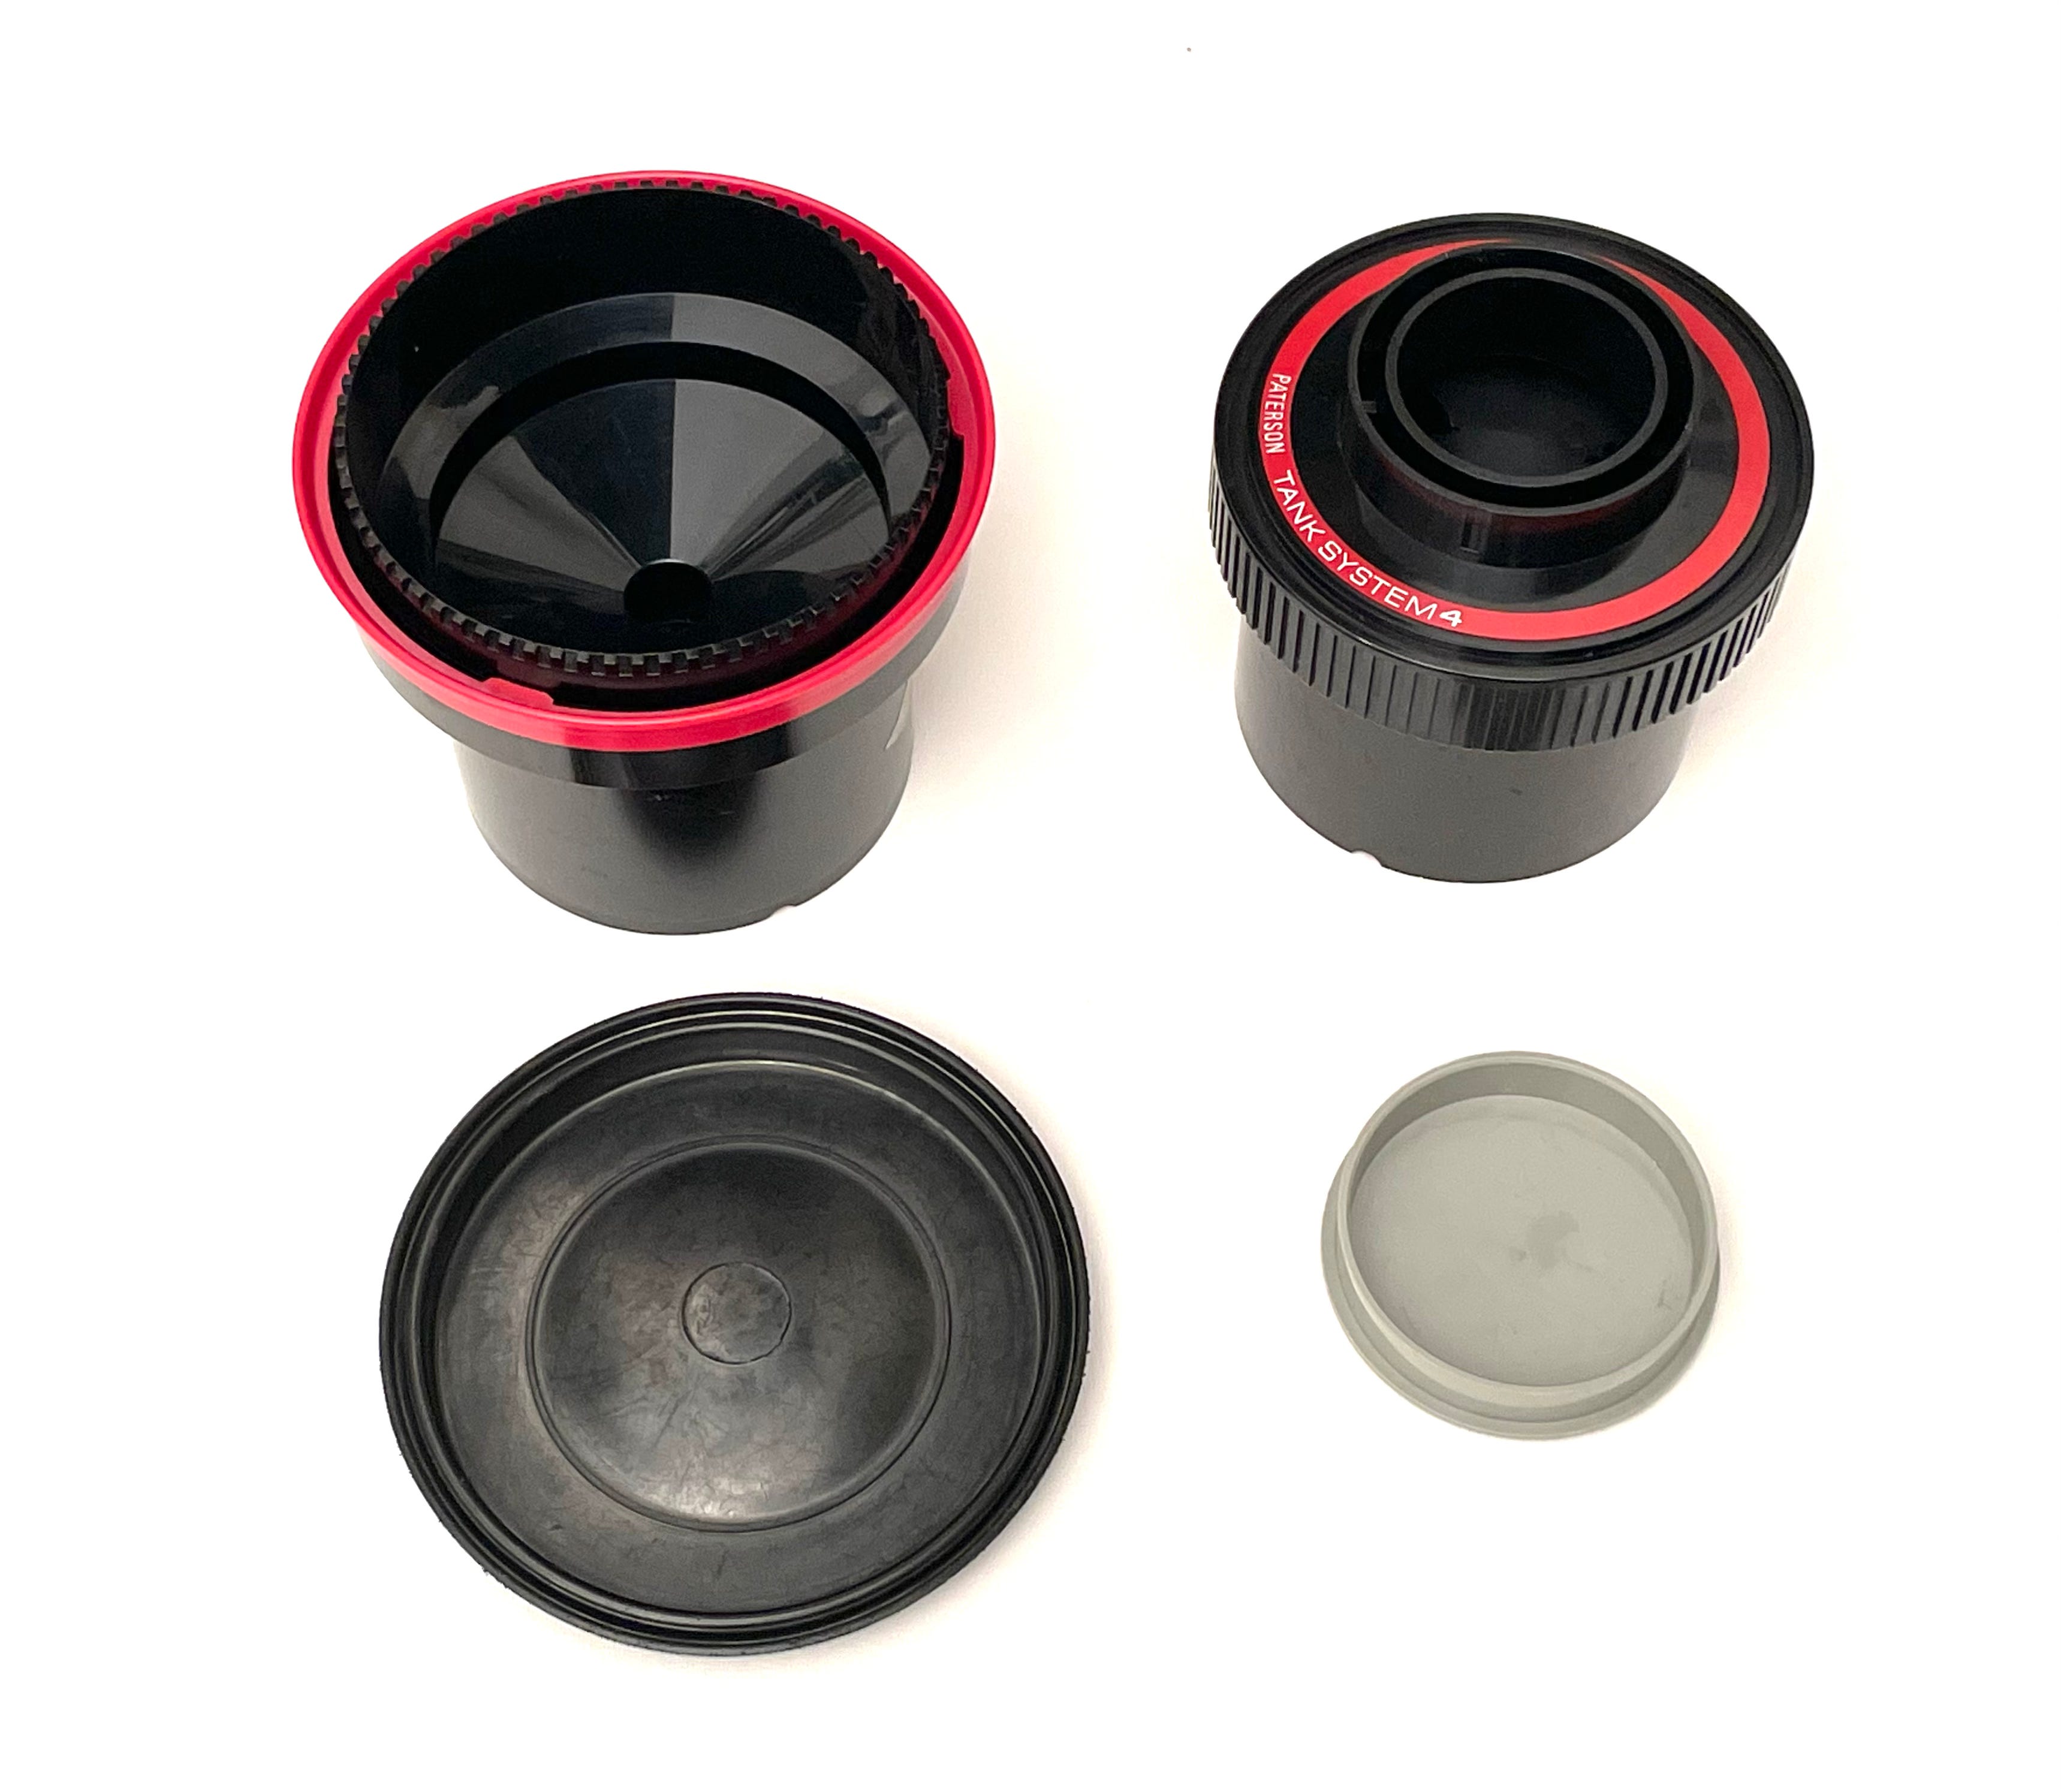
Paterson Super System 4 developing tank, universal size.
Don't bother with any other make of tank, this is a classic design that makes life much simpler, the wide funnel shaped neck makes pouring chemicals in and out a quick operation. I would avoid the older type of Paterson tank, they have a smaller, narrow neck which slows down pouring and they tend to dribble chemicals when you use them.
Measuring flasks.
Assuming you have the ‘Universal’ size Paterson tank, three 600ml graduated flasks will be needed. One each for Developer, Stop bath and Fix. Mark each one with a permanent marker pen so that they don't get mixed up, you will be washing them out after use, but traces of fix may still be there and this can contaminate the developer. If you are planning on using a concentrated liquid developer (explained further on), then you will also need a small measure such as the Paterson 45ml measuring cylinder.
Thermometer.
I prefer a digital one because I struggle to see the thin line of the old type. If you get the latter, mercury is more accurate than spirit. When you are preparing your chemicals, you need to have your developer at 20*C. The developing action will happen faster if the temperature is higher and will take longer if it is cooler. A change of one degree can make quite a big difference to the quality of your negatives, so it is important to get this right.
Timer.
The one on your phone is fine. Each film and developer combination has a specific time of development and If you exceed this your negatives will be dense and contrasty. Some developers are worse than others in this regard, but it is best to stick to the times. Don't be tempted to 'give it a bit more' to make sure you've got something, trust the dilution/time/temperature information and you will be fine.
Chemicals.
I can't start an explanation of darkroom chemicals without mentioning safety. There are certain components in developers that are toxic in various ways. There isn't space here to explain all of them, so please begin and continue with good, safe working practices. Wear rubber gloves, and eye protection is a good idea. Make sure you don't get chemicals on food preparing areas like some Youtube demonstrators. (yes, I’m talking to you Mr 120ist) If you must use the kitchen sink, then avoid splashing chemicals around and wash down thoroughly as soon as chemicals get on anything. Put newspapers down on whatever surface you are preparing your chemicals on.
Choosing your make and type of chemicals.
Here we have a huge selection and to the beginner an overwhelmingly confusing choice. The three things you need are Developer, Stop bath and Fix. Any make of stop and fix will do, but developers vary a lot in the way they influence the final image, and some are simpler to use than others. You can buy powder developers that you mix with water, then store and use a number of times, or liquid concentrates that you use once and discard. Both types have advantages and disadvantages.
Liquid concentrates.
These come in bottles and must be mixed with water before use. Some are quite simple to measure out at 1 to 4 mix (one part dev and four parts water) others are more concentrated and need to be measured with a syringe to get the correct volume. Liquid developers are simpler to use than powdered but the problem is that the concentrate begins to go off air as gets to them. A half used bottle, left unused for more than three months, will oxidise, this will reduce its effectiveness, sometimes totally, leaving you with a blank roll of film. The larger the volume of air in the bottle, the quicker it goes off. In the old days they used to drop glass marbles into the bottle to raise the level of the liquid as high as possible, this expelled most of the air. These days it is wiser to decant the developer into one of those plastic bags with a spout on, like the ones inside a box of wine. The excess air can be squeezed out, making the developer last much, much longer.
If you have some liquid concentrate developer already and you are unsure of its quality, the colour of the liquid can be a very good indicator of the state of it. Often these concentrates are very pale straw when fresh and get progressively more brown as they go off. There is one liquid developer that doesn't go off, though it does darken when opened. This developer is called Rodinal. Anyone who knows anything about film development will have heard about Rodinal, it is legendary. There are a few products that are sold under other names that claim to be the same as Rodinal. Some of the substitutes are; Calbe R09, Fomadon R09, Adox APH 09, Tetenal Paranol. Not all are the same concentration, one that I tried was half the strength and double the price! If you have Rodinal and it is dark brown, do not worry, it will be fine. It is always wise to keep it in total darkness though. I found that daylight severely affected one of the Rodinal substututes that I had, so I don’t take any chances with developers. Ilford Multigrade paper developer goes off in the light too.

Powder developers.
These last for a very long time as packaged powders, but have a shelf life of about six months as a mixed up liquid in a tightly sealed bottle, stored in the dark. A classic powder developer that has been in use for many decades is Ilford ID11. Kodak have a powder developer which is almost identical called D-76.
These are reliable, high quality developers with a proven track record. A mixed up solution is known as a 'stock solution' and the developer can be stored for many months and re used in this form a number of times. The developer is returned to the bottle and re used for other films, though it can't be used forever, Ilford recommend a maximum of ten rolls of film from a 1L stock solution. They also suggest slight increases in development times after five rolls have been processed.
A fresh stock solution (but not a partly used one) can also be used diluted with an equal quantity of water and this is known as a 1+1 solution. This needs longer development times because the developer is weaker. Obviously if you make your developer at half strength it will take twice as long to develop. This method is used to give a negative with a longer tonal range, and an increase in sharpness, but with a bit more emphasis of the film grain. When the developer is used this way it is discarded after one use. This method is used when consistency is important. For a more exaggerated sharpness and a longer tonality, a 1 part developer to three parts water mixture is used. A correspondingly longer development time is then used. The dilute methods are useful in another way too, which I shall mention later.
Stop bath.
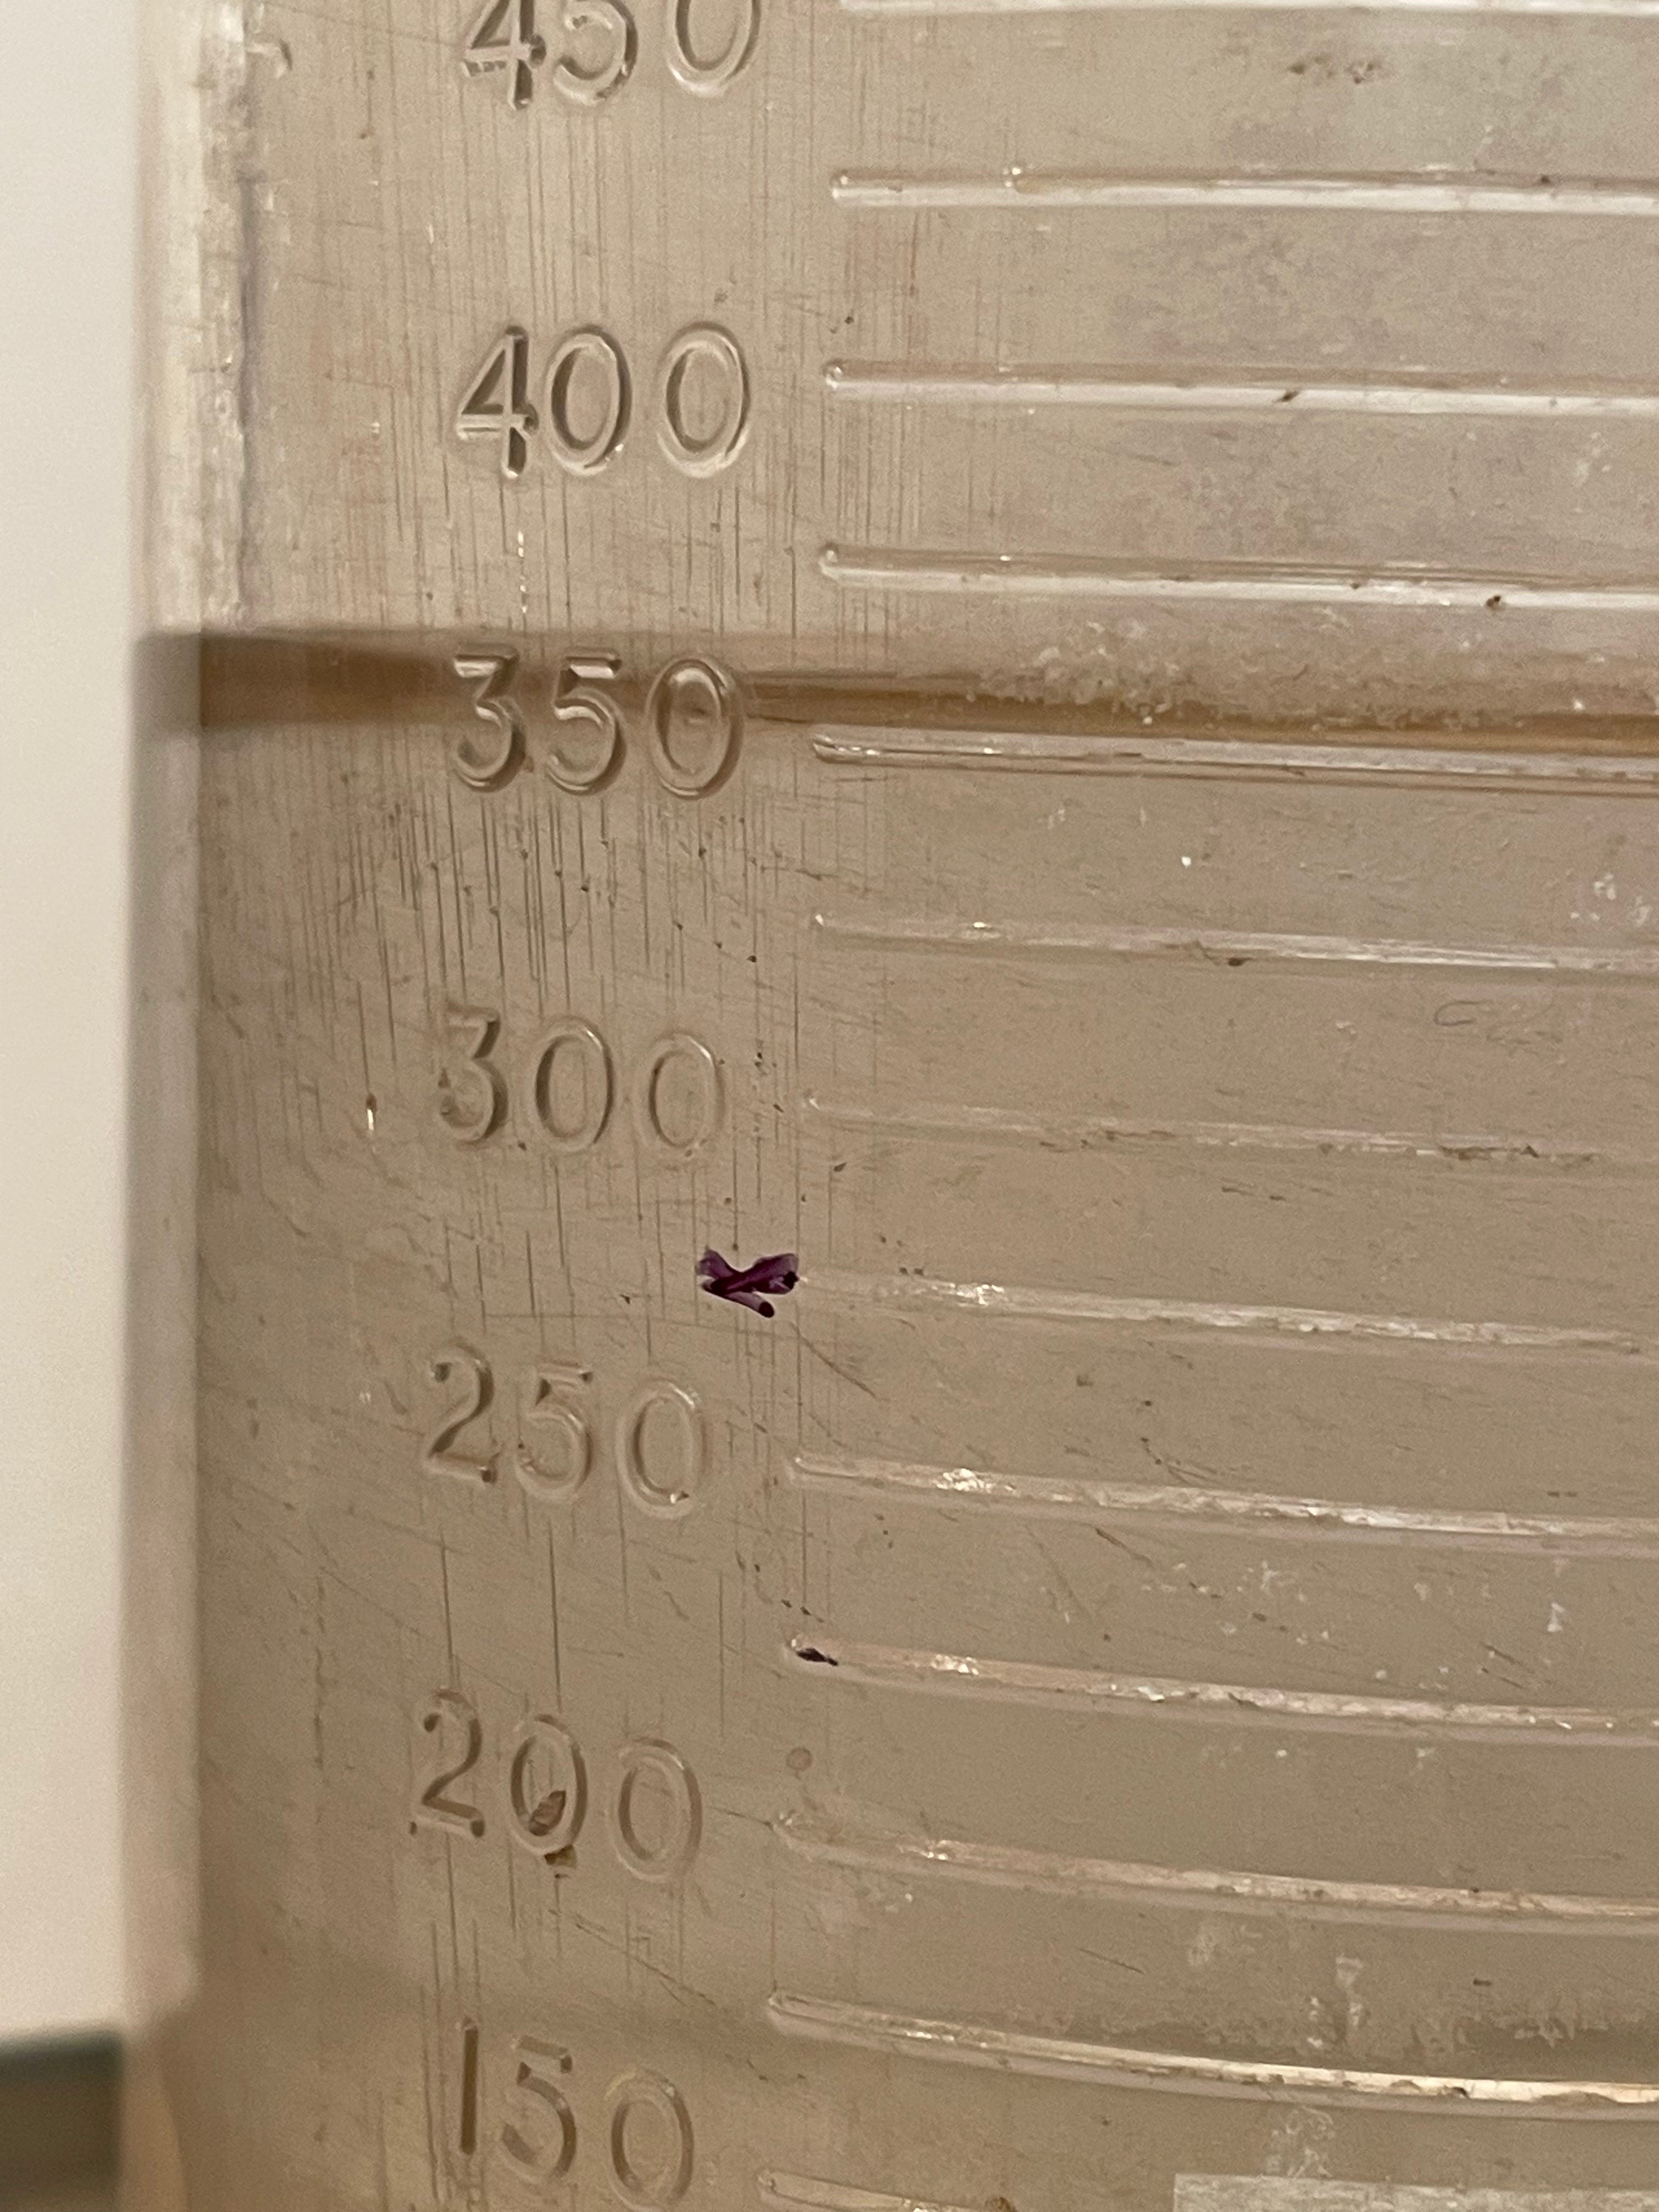
Stop bath is an acid and comes as a concentrated liquid. Mix up a litre of it and store it for multiple use. Ilford Ilfostop is diluted at 1+19 (one part concentrate to nineteen parts of water) and has a colour added to it that shows when it is exhausted. When it is yellow it is an acid and is working, but when the colour darkens to red and eventually purple that indicates that it has become alkaline and useless. Ilford recommend that a litre of working strength stop bath can be used for 15 films. Don’t worry if mixed up stop bath gets on the skin, it will not harm you at the working strength. The concentrate is quite a strong acid, so handle it carefully when measuring out. As I say, rubber gloves are advised.
Fixer.
Fixers mainly come as liquid concentrates. There are slow fixers and there are rapid fixers. I would suggest that there is absolutely no reason for you to use a slow fixer, unless you can’t get the rapid type. My fixer of choice is Ilford Hypam, this is diluted 1+4 for films (one part fix to four parts of water).
Those are the only chemicals you need to concern yourself with as a beginner. There is another that can be used to get rid of most of the fix when washing prints, but you won’t need it for films.
The process.
Now that you are acquainted with the equipment and the chemicals, I will run though how to use them. The trickiest part for a beginner is getting the film into the spiral. If you can get hold of a duff film, or an old strip of negatives you can practice a bit before doing the real thing.
Remember that the film is very sensitive to light. The film must be taken out of its metal jacket and fed into the spiral in total darkness. Put your phone in your back pocket in case it lights up, take off your watch or fitbit if it is likely to light up and put that away too. Lay everything you need out on a table in front of you before you put the light out. You need all of the parts of the developing tank, as well as a bottle opener (to open the film canister), and scissors.
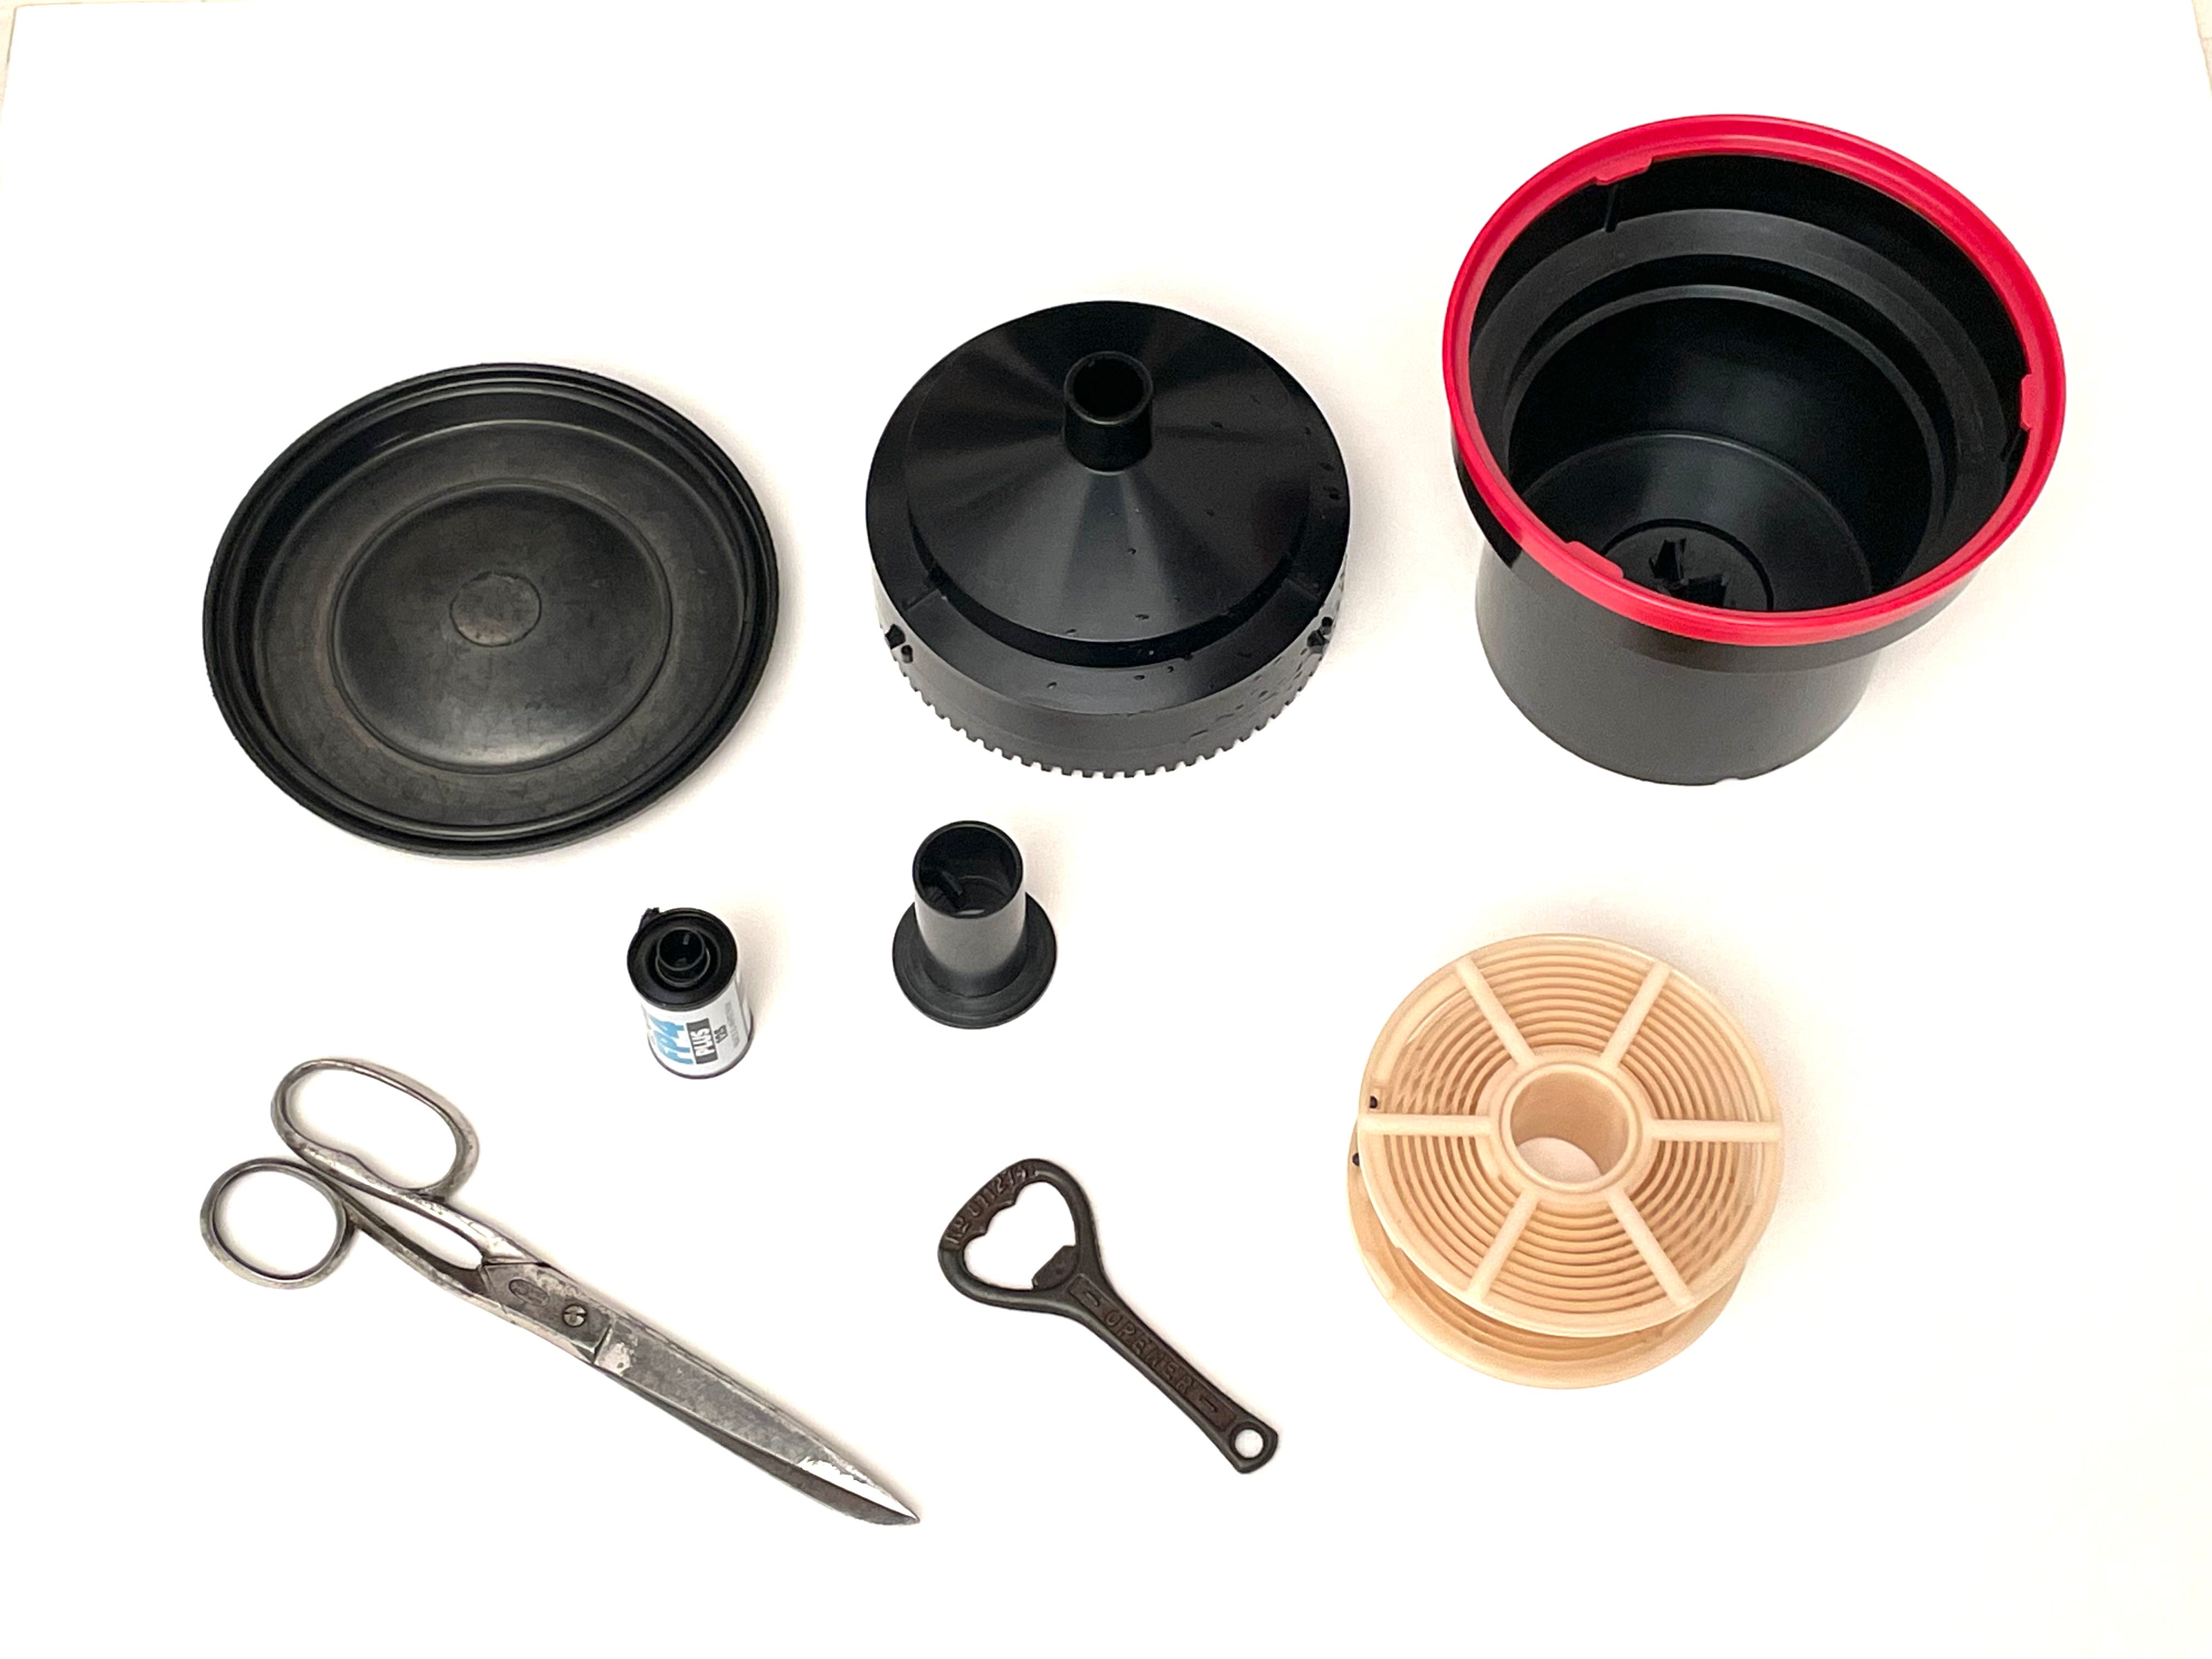
Put the light out and use the bottle opener to lift off one end of the film canister. You will find it easier to do at the bottom, where there isn’t a raised centre column. Pull the spool out of the middle and keep the film tightly wound in your hand, then pull out the first part and snip off the narrow bit at the beginning. Pick up the spiral and begin to feed the film into the gap. It should go in quite easily at first, then get more stuck. At this point you hold the spiral in both hands, twist the circular bits in opposite directions, backwards and forwards and the film will get pulled into the spiral by the little ball bearings in the side. If my description is not clear there will be videos on Youtube that show it more clearly. When the film canister is almost touching the spiral, put your scissors in the gap and cut the film. Wind the last bit of film completely in, put the spiral on the centre column, place the spiral in the tank and push it down to the bottom. Put the funnel part of the tank on and twist it clockwise until you hear a click. You can now put the lights on.
Temperature
As I mentioned earlier, the temperature of a solution affects how rapidly it will work. If you read old literature on the subject it suggests that all three chemicals must be at 20 degrees C before you begin. In practice this becomes a bit of a headache. The one solution that needs to be at the right temperature is the developer, the other two will work fine at room temperature.
Whenever I state this, I get comments from people who believe that any temperature difference will cause a problem with the structure of the emulsion. This problem is known as reticulation. If the emulsion shrinks too quickly, the structure can show a cracking pattern similar to the way mud on a dried up riverbed does. A kind of random crazy paving structure which ruins any chance of enlarging the image.
Many years ago, the celebrated photo-chemist Mike King put forward the theory that reticulation can be caused this way, but with modern emulsions the temperature would have to be extreme. He proposed that the likely cause of most people’s problems was having the stop bath mixed too strong.
When a film emulsion goes from an alkaline bath (developer) to an acid bath, it shrinks rapidly and this can and probably does in most cases, cause reticulation. I can vouch for this, as many years ago in my youth, I put neat stop bath in the tank once and totally ruined a film, but I regularly have my developer and other chemicals at different temperatures and have never had reticulation.
I mix my stop bath to a pale yellow and use a water rinse between dev and stop. The development of the film is slowed right down as soon as the water goes in, especially if it is colder than the dev (most of the year in the UK). I slosh it around a few times to make sure it gets all over the film, then discard it. The weak stop bath then goes in and is agitated half a dozen times. The stop bath does its job, isn’t contaminated or weakened as fast, because there is hardly any developer to battle with, so my stop bath lasts longer and I avoid reticulation.
There is no set number for the amount of agitations when the stop bath is in, you are just making sure that the stop bath is getting to every part of the film. After 30 seconds of inverting you can be pretty sure that it has done its job, so you can pour it back into the storage bottle.
Once the stop bath has done its job and neutralised the developer, no more development will take place, but the film is still light sensitive. Now it is time to pour in the fixer. As soon as the fixer is in, put the rubber lid back on, start your timer again and invert the tank every now and then (the rate is not critical, though I do it continuously for the first minute). After a minute has passed, you can remove the rubber lid, turn the funnel anti clockwise till it clicks and remove it. Your film is still in the fix, and not quite done yet, but you can safely look at it (you can actually look at it after about ten seconds in the fix). Lift it out and look at the film, it should show images, but also be a bit milky. Put the reel back in the fix and rotate the column so that the spiral turns in the liquid. Every 30 seconds pull it out and check if the milkiness has gone yet, when it has, look at the timer and make a note of how long that took, then leave it in the fix for double that time. (As you process more and more films this time will get longer and longer. When it is taking 3 minutes to clear (6 mins full fix) it is time to discard it and mix up fresh). After use, return the fix to a storage bottle.
Washing.
The film must be washed to clear off the chemicals or they will begin to eat away at the images. The old method was to put the tank under a tap and leave the water running for an hour, but these days we have to be more aware of water usage. This method is quicker and uses less water. Put the funnel back in, fill the tank with tap water and put the rubber lid on. Give it a good slosh about to get the water into every part of the tank and discard, this gets the excess off. Fill the tank with water, put the lid on and invert it five times then discard. Fill the tank with water, put the lid on and invert it ten times then discard. Fill the tank with water, put the lid on and invert it 20 times and discard. The film is pretty much washed now, but you can change the water and let it sit for five to ten minutes to let the small quantity of fix leech out into the water if you would like to make sure. When this method was first proposed, it was recommended that the tank be left to rest for five minutes between each new batch of water, but this was omitted from the information given to the public because they though people would be too impatient. If you have the time and are concerned about the longevity of your negatives you may wish to use this method.
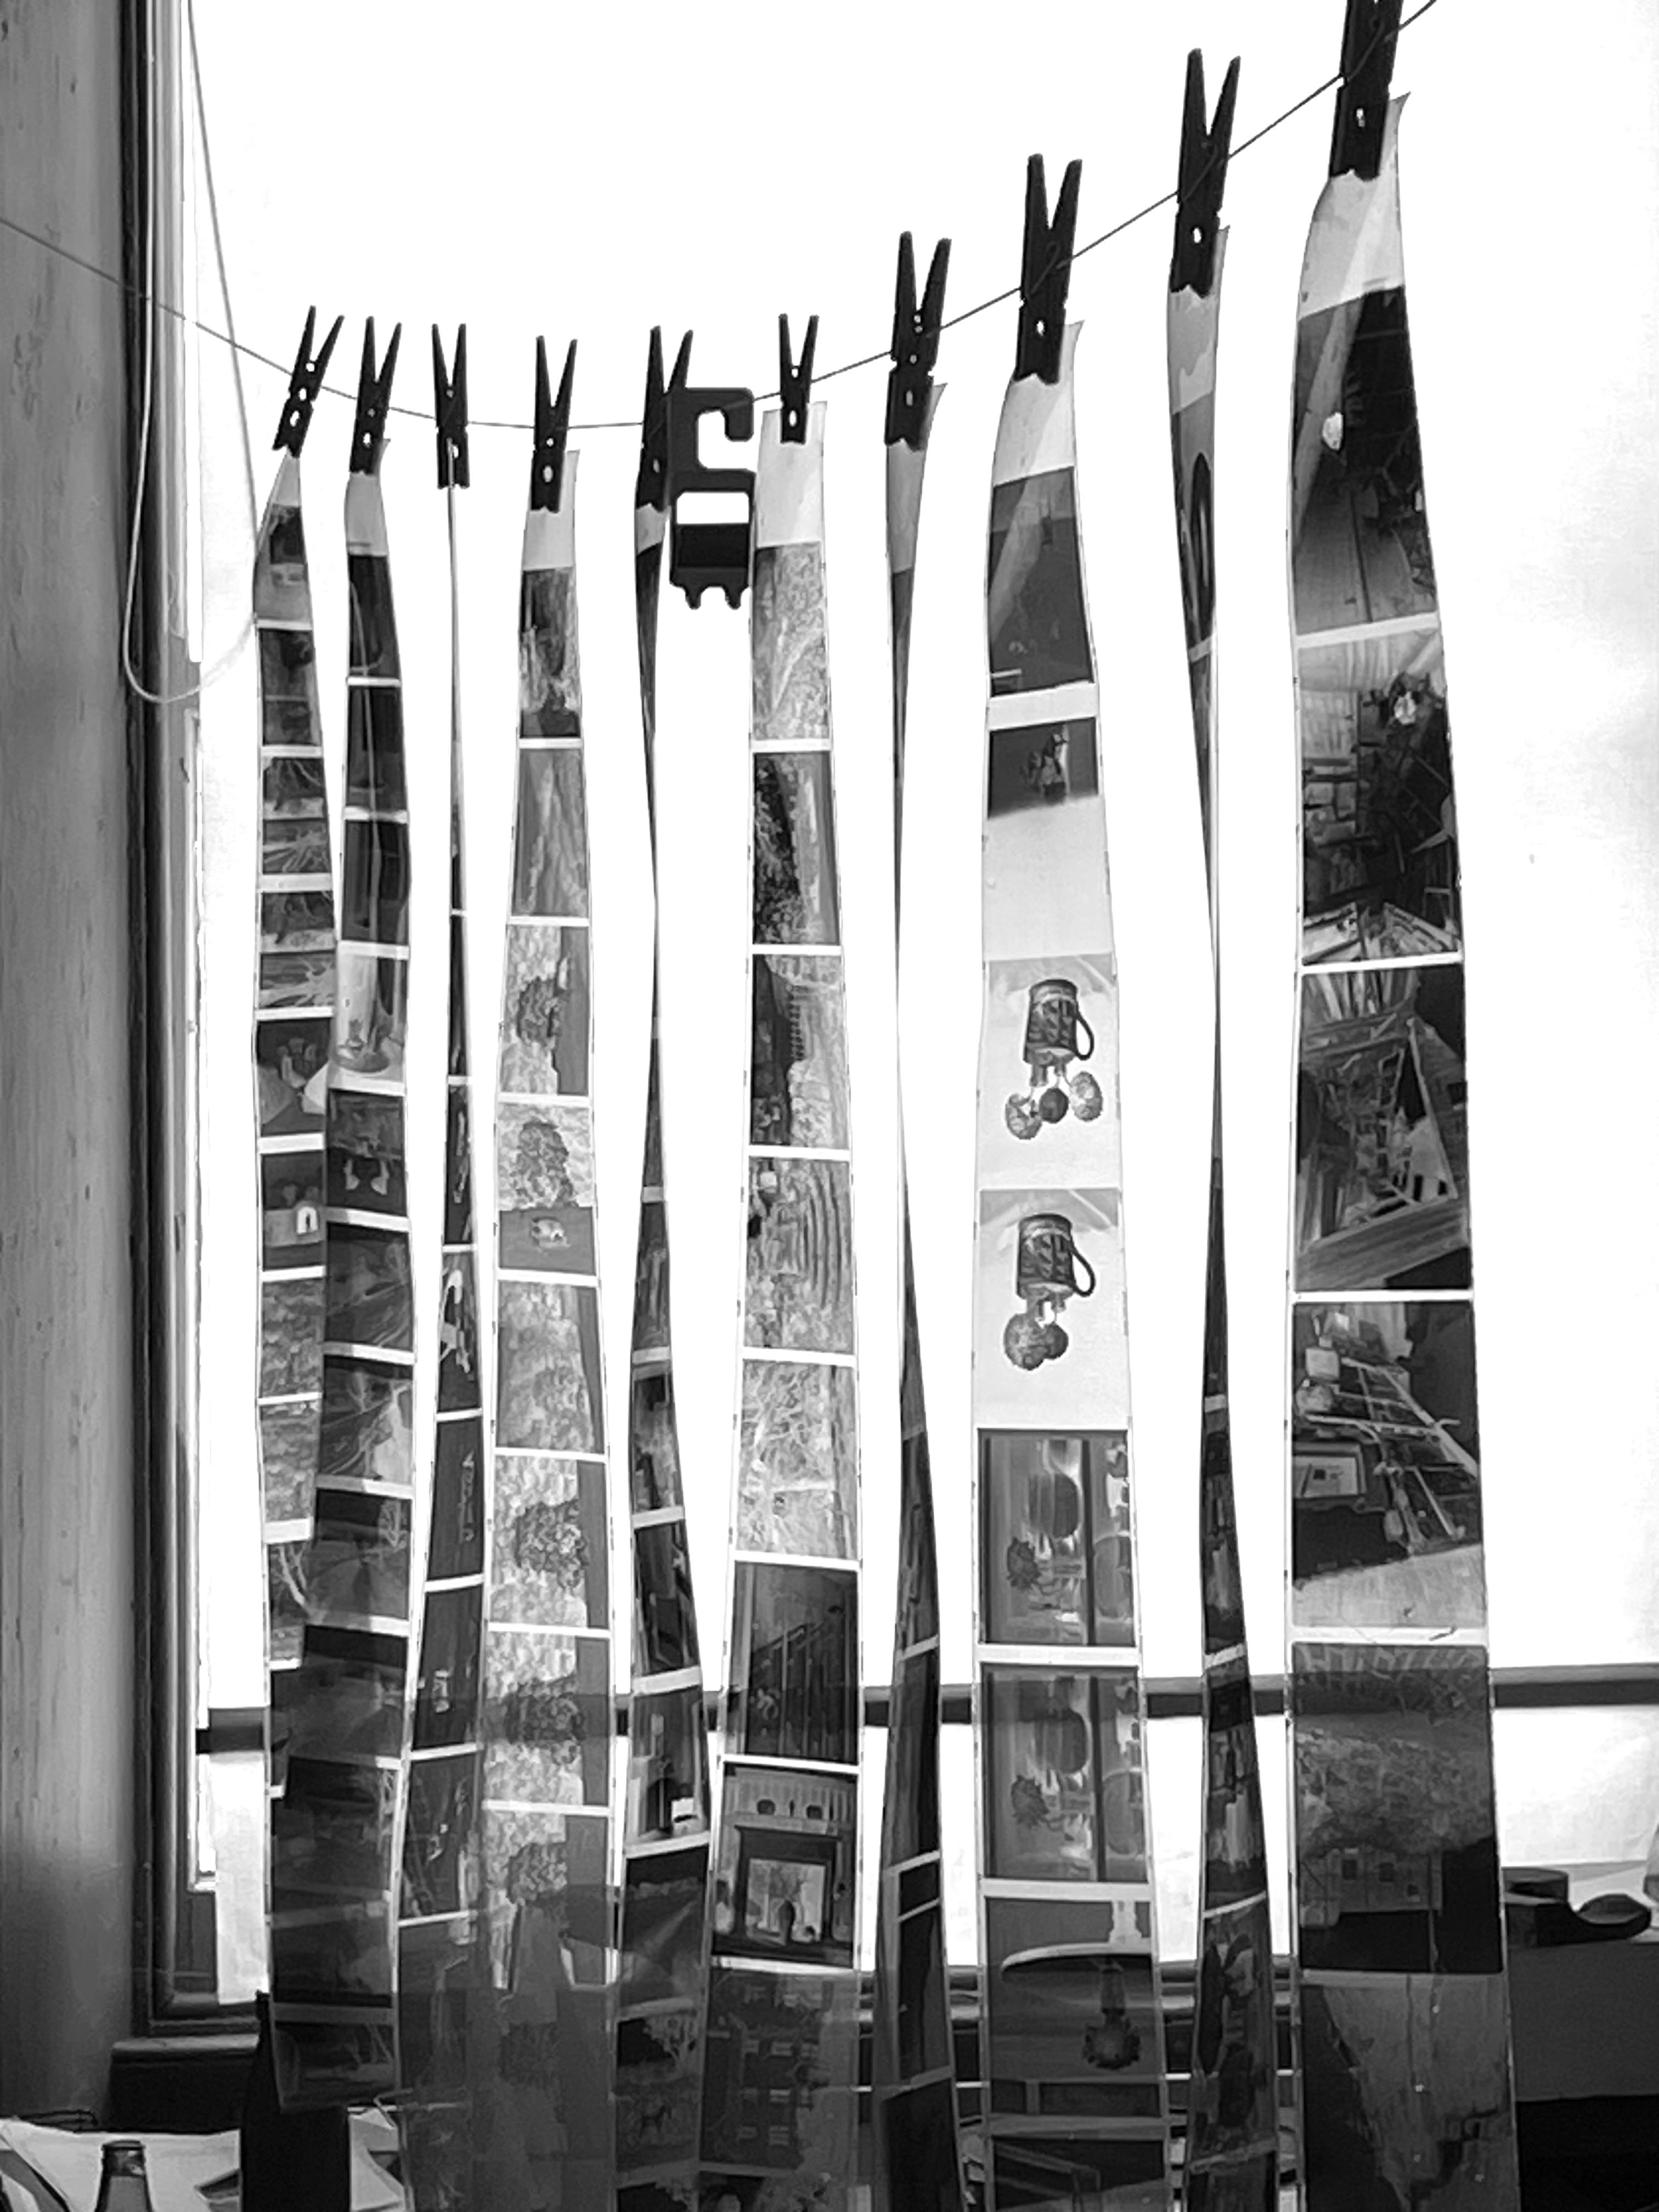
Once the film is washed, many people put a drop of wetting agent into the water to help the film dry quicker. This is basically washing up liquid, and it allows the water to run off, rather than leave droplets. Personally, I find it leaves marks on the film, so the choice is up to you. It probably depends on how alkaline your water supply is. Some people recommend doing the final rinse with distilled or de-oinised water to prevent white deposits on the dry negatives.
The film is pulled from the reel and hung up to dry with a peg at each end. The bottom peg is there to stop the film from curling up. Leave the film to dry somewhere overnight if possible, somewhere that is away from dust and the possibility of being touched. Many people use the shower. If this is impossible in your situation, you can dry the film on the spiral, but it will take much longer to dry and you may have a droplet hiding in the ball bearing area. I once met a student who used a salad spinner to remove excess water from his spiral before hanging the film up. An excellent idea, but it must stay with your processing kit after and not go back into use for food preparation.
Tips and advice.
If you are using a liquid concentrate developer and need to get a large quantity of water to 20C it is pretty much impossible to get your temperature right, pouring cold in, pouring warm in and so on until the temp is correct whilst worrying about the quantity. Mix up the water to the right temperature in a big jug and then pour out the correct quantity into your measuring flask.
Measure water by weight. Many measuring flasks are inaccurate, so I measure out my water by putting a flask on the scales, turning them on (this sets it to zero), then pouring in the 20*C water until the display shows the quantity. (200g equals 200mil if your water is 20*C). This does not apply to chemical solutions, but is very handy for water. If I accidentally pour in too much, I remove some with a big syringe until the display shows what I need.
Agitation. The normal agitation technique for film processing is not vigorous, too much sloshing around will cause the developer to froth and areas of the film covered in bubbles won’t develop properly.
Agitation is necessary to allow fresh developer to the surface of the film, and it is usually done every minute. Three inversions each minute is ideal, though it is wise to learn to twist the tank as you invert, as this gives a more even flow and dislodges bubbles. Turning the spiral as you invert causes the liquid to flow the full length of the film, but this is only efficient if the flow is directed into the open end of the spiral. It is therefore important to place the spiral in the tank the same way each time and turn the tank in a specific direction.
Agitation is more likely to create froth when you use larger tanks to process a number of films at once. Froth trapped in the spiral will cause uneven development and no amount of banging the tank on the table will move it, so the twist is really important. This video explains in more detail;
I mentioned that a more diluted developer such as a 1+3 mixture of ID11 had other advantages; If you have froth trapped in the spiral, the uneven development will be more obvious with a strong developer solution. If the developer is quarter strength, then the rest periods between agitations can do less damage if froth is created .
Processing time.
The processing time given with your developer is specific to your film and is designed to make the exposed parts of the film turn to a very dark grey, not a black. If your exposed areas have gone fully black, no light will pass through and you will have terrible contrast problems. If this happens, a reduced development time will improve the next film. A reduction of 15-20% is the usual adjustment percentage.
If your negatives are wishy washy and feint, an increase in development time of about 15-20% should improve the next one.
When the development is complete, don’t leave it too long before you get the water/stop bath in, the developer that is soaked into the film will carry on developing, making the images darker. If the developer has been poured out and you leave the film a while before using the water/stop bath, you can create marks on the film where droplets of developer are increasing density in small areas.
The stop bath and fix can be reused a number of times, so keep the mixed up solutions in a storage bottle. I use old plastic milk containers. Mark them up with; Stop bath, working strength, and Film fix, working strength. Write the date they were mixed on and each time you do a film, make a little mark on the bottle so you can keep a tally.
When washing your film, fast water won’t speed things up, the chemicals will be released at a certain rate and a full on tap won’t change that. See the method explained above. Whilst wet, the emulsion is soft and is easily damaged, so treat it very carefully. Don’t be tempted to hold it up to the light and try to see the images.
Dry the film away from dust and don’t let anyone near it for a few hours.
Colour negative film.
Processing colour negative film is not something to be feared. Although the temperature control is more strict, the process itself is simpler than black and white, in the sense that there is only one developer type and only one processing time for all films.
These days, accurate temperature control is not difficult or expensive. A Sous Vide device, the size of a hand blender is used in a large container of water (a large plastic storage box will do). This is set to keep the temperature of the water a few degrees above the 38*C that the chemicals need to be. The chemicals are put into thin plastic water bottles (thinner plastic means quicker heat transfer) and floated in the tank until they are up to temperature and the process can begin.
The temperature of the water bath and the temperature of the chemical solutions will be slightly different as heat is lost through the plastic, so some experimentation with bottles of water is advised until you have arrived at the correct temperature for your water bath.
The fix for the C41 colour process works differently to the type used with black and white films, so the method of inspection and doubling of time is not necessary and inspection won’t tell you anything as colour film remains milky until dry.
products
Paterson tanks;
https://patersonphotographic.com/product/super-system-4-developing-tanks/
Paterson measuring graduates;
https://patersonphotographic.com/product/measuring-graduates/
Ilford ID11 powder developer;
https://www.ilfordphoto.com/id-11-product
Ilford stop bath;
https://www.ilfordphoto.com/1893870
Ilford rapid fix;
https://www.ilfordphoto.com/rapid-fixer-product
Rodinal liquid concentrate developer is available from a number of online retailers.
Conclusion.
I hope all of this has been useful to you, I’m not saying that you absolutely have to do things my way, I just wanted to explain the reasons why I work this way. Perhaps these methods might clarify why some things have gone wrong in the past. I have processed thousands of films and I have made all sorts of mistakes in my early years, but this is how I learned what was going on and how to avoid problems in the future. If you find my articles interesting or useful, please spread the word to anyone you can think of who would be interested.
If you have enjoyed this post and the information here and elsewhere on my Substack and you would like to support me, you can subscribe or just buy me a coffee at Ko-fi.com/andrewsandersonphotography You can send as little as £3.00, or more if you are feeling generous. This money goes towards materials used for the tests and printing for these articles. Alternatively you can be a paid subscriber.
Thank you for reading, please let me know your thoughts.
Andrew Sanderson July 2025.
I don’t think I have ever read a better “how to” for film developing. It’s so clear and grounded. I think every beginner should read this. Congratulations on a really great article.
An interesting article about home processing.
I too use the latest Paterson film tanks although I tend to use the twiddling stick rather than inversion.
I agitate continuously for the first minute and then for ten seconds at the start of each of the remaining minutes. So far no problems. It also prevents the dreaded leaky lid syndrome and I don't get told off by my wife for making a mess.