Darkroom tips.
A few ideas to help you work better.

I have been working in a darkroom since I was 18 (and I’m pretty old now). During that time I have found ways to improve my processing and printing experience, small things that in themselves are not too important, but generally help. There are a lot of things to think about when setting up a darkroom and you don’t always find out if a thing is right for you until you have got it set up and used it, by that time it might be too late. Here are a some of the things that I employ to simplify the task and reduce disasters.
Wet and dry.
The usual practice is to have a dry side and a wet side. You need a space to set out your negatives and open the box of paper without getting wet patches on either.

This, I hope is common sense. Even if you are working in a very small space, this is essential, the wet area is somewhere where accidents can easily happen, so be prepared. My workspace tray area is a formica covered chipboard top, just like you would get in a kitchen, this will not soak up chemicals and is easy to wipe down, but I still cover it with two or three layers of old newspaper to absorb splashes. Old fix leaves a calcified deposit which is really difficult to remove (I haven’t found anything that will shift it yet, if there are any chemists reading this, I would be open to suggestions). The newspapers are always laid down so that the writing is upside down, this is to stop me being distracted by the articles when I should be concentrating on developing. This is also the area where I process my films, so I don’t want to go over my process time because I’m reading.
I have a roll of thick, absorbent kitchen roll close at hand in case I splash or spill some liquid, easily done with small darkrooms. Another precaution you could take if you have the space, is to stand all of your measures in a 20x16in tray, then any spillages are more likely to be contained.
Storage.
If you are fitting cupboards for chemicals, have them under the bench, not above you. If you have high cupboards already, use them for tanks, tongs, flasks etc, but not chemicals. If your chemical spills, you don’t want it just above you or near your eyes.
Measuring.
As I have got older I have had the usual deterioration in my ability to see small detail, especially in low light. This means that I have quite a bit of difficulty when measuring out liquids. Measuring flasks are white plastic, or clear, with numbers marked on in relief, difficult to see properly if the flask has water droplets on it. I have a few ways round this; My first method was to lightly rub a permanent marker over the raised numbers for the ones I needed to see. My paper developer is Ilford Multigrade, which mixes at 1+9, therefore I highlight 100ml and 1000ml. I pour the concentrate in up to 100 and top up with water to 1000.
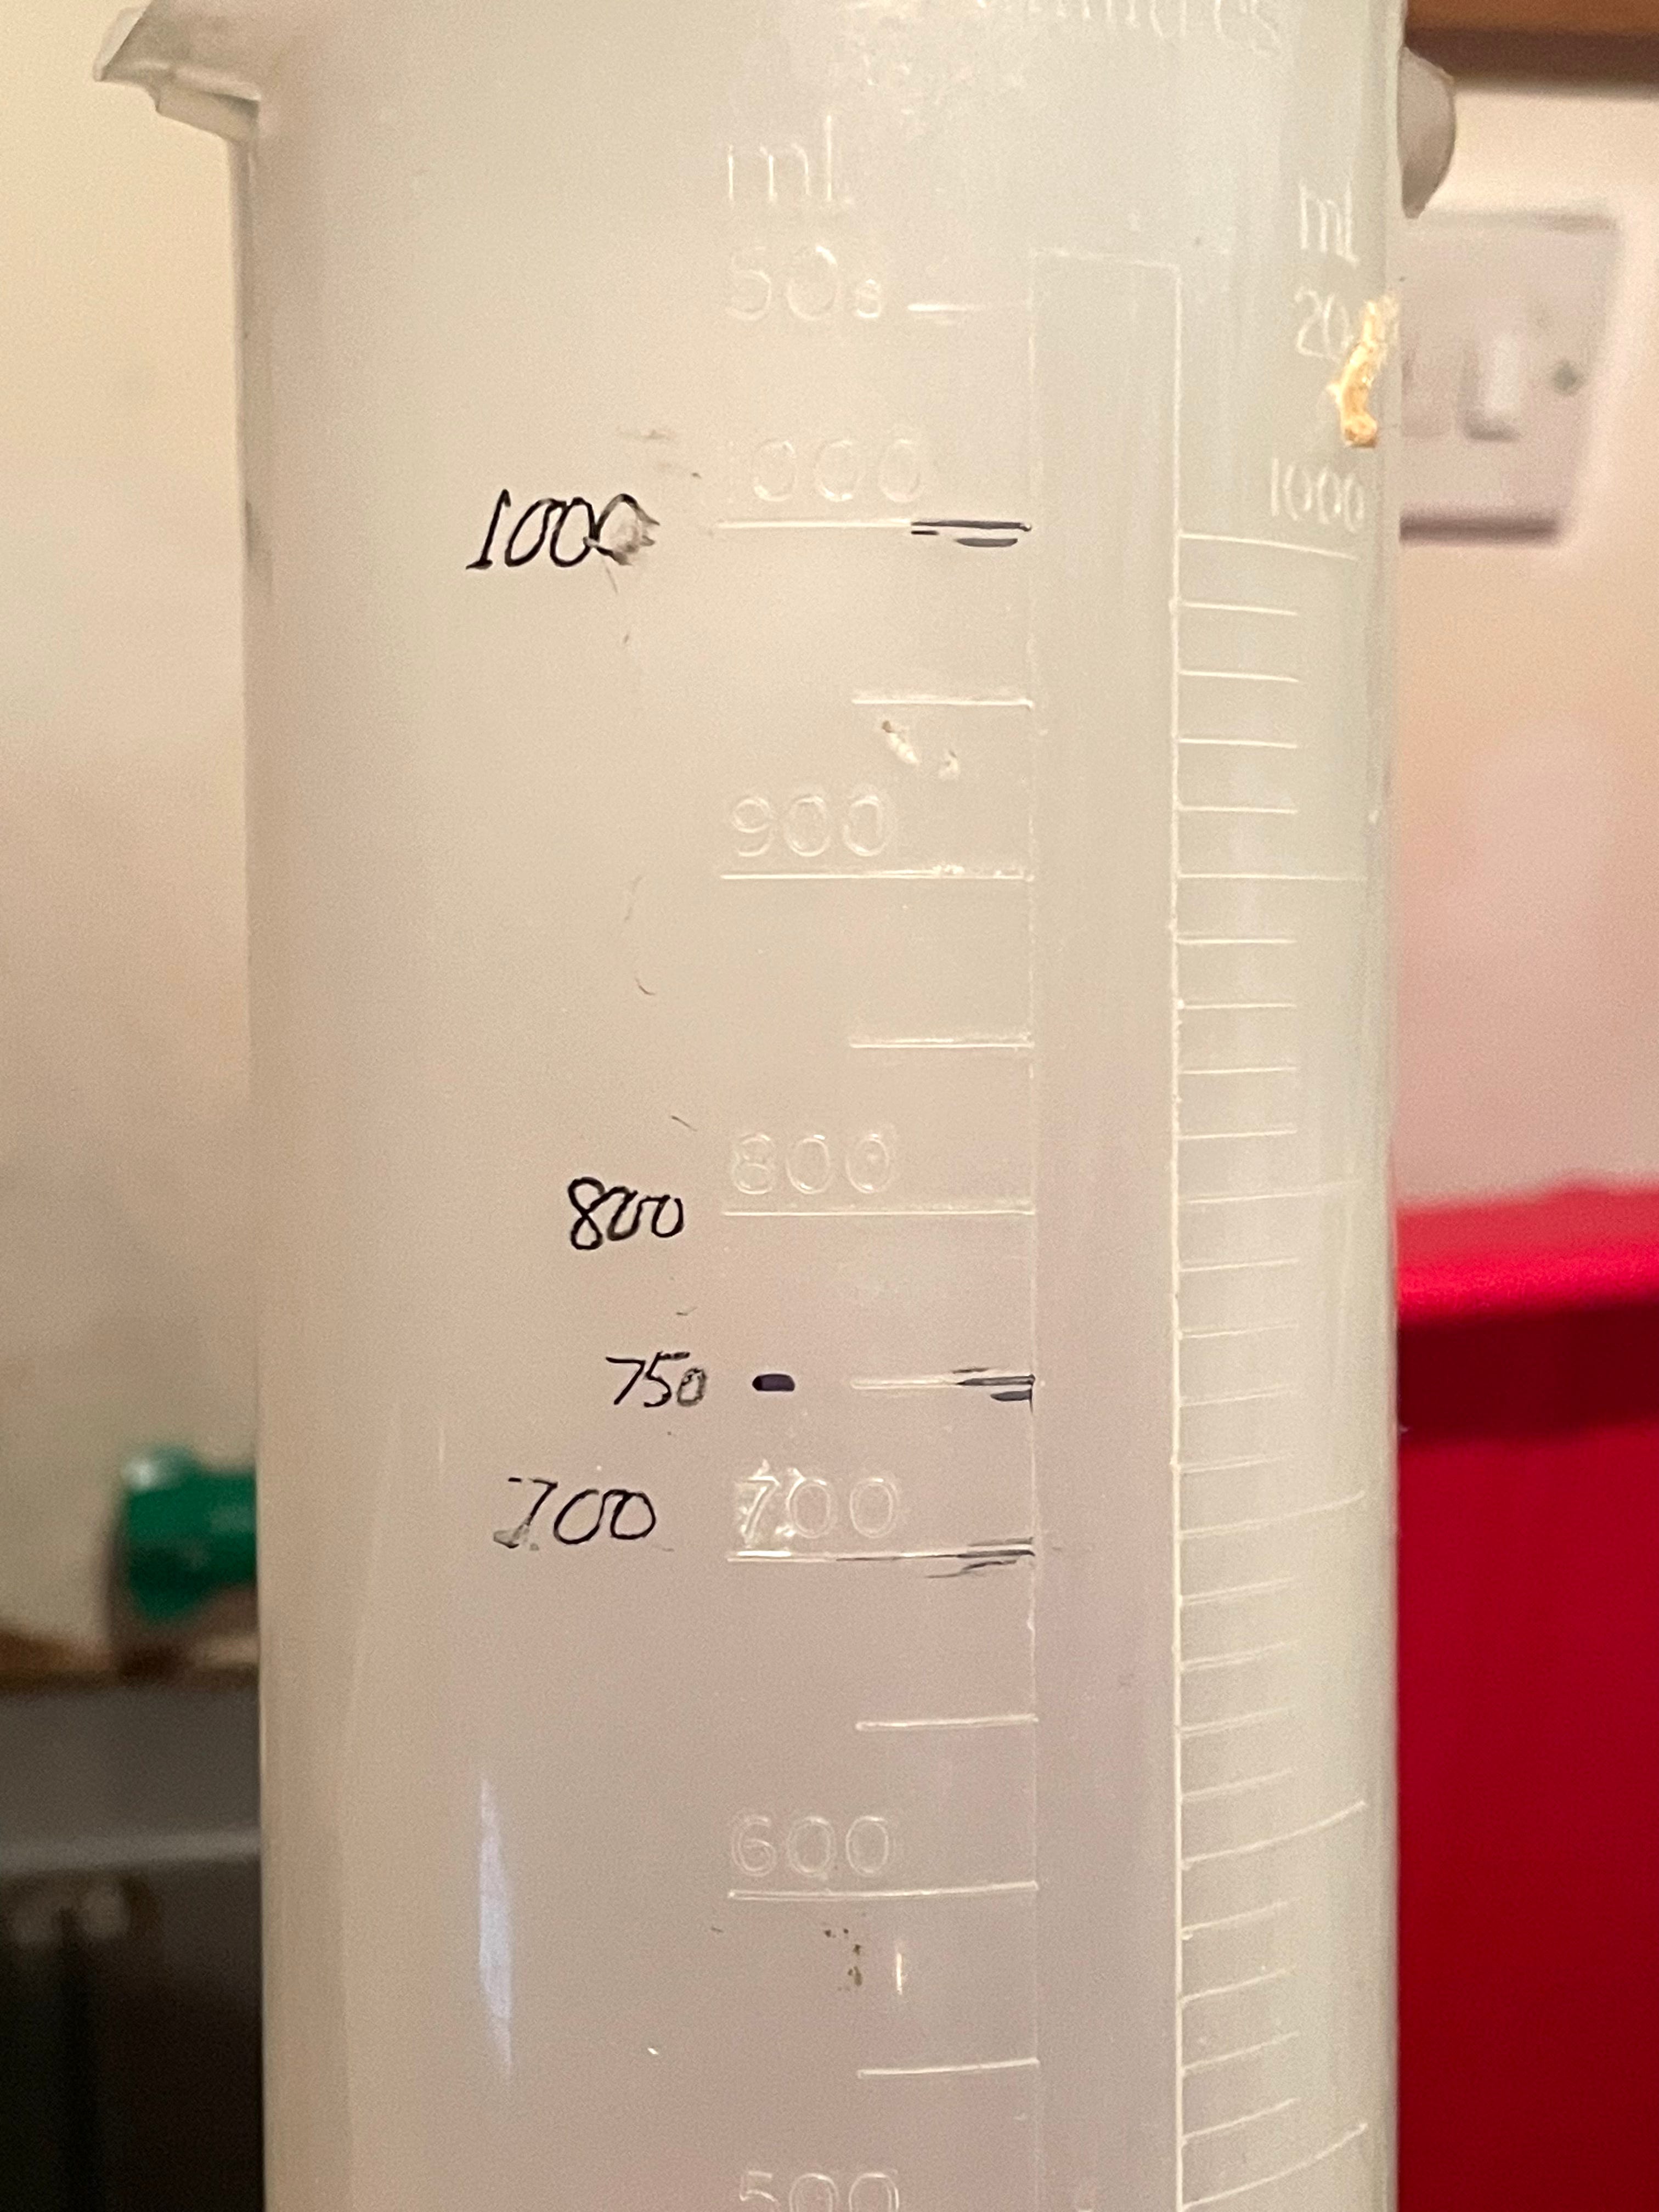
The black marker ink wears off a bit after a time, so needs to be redone.
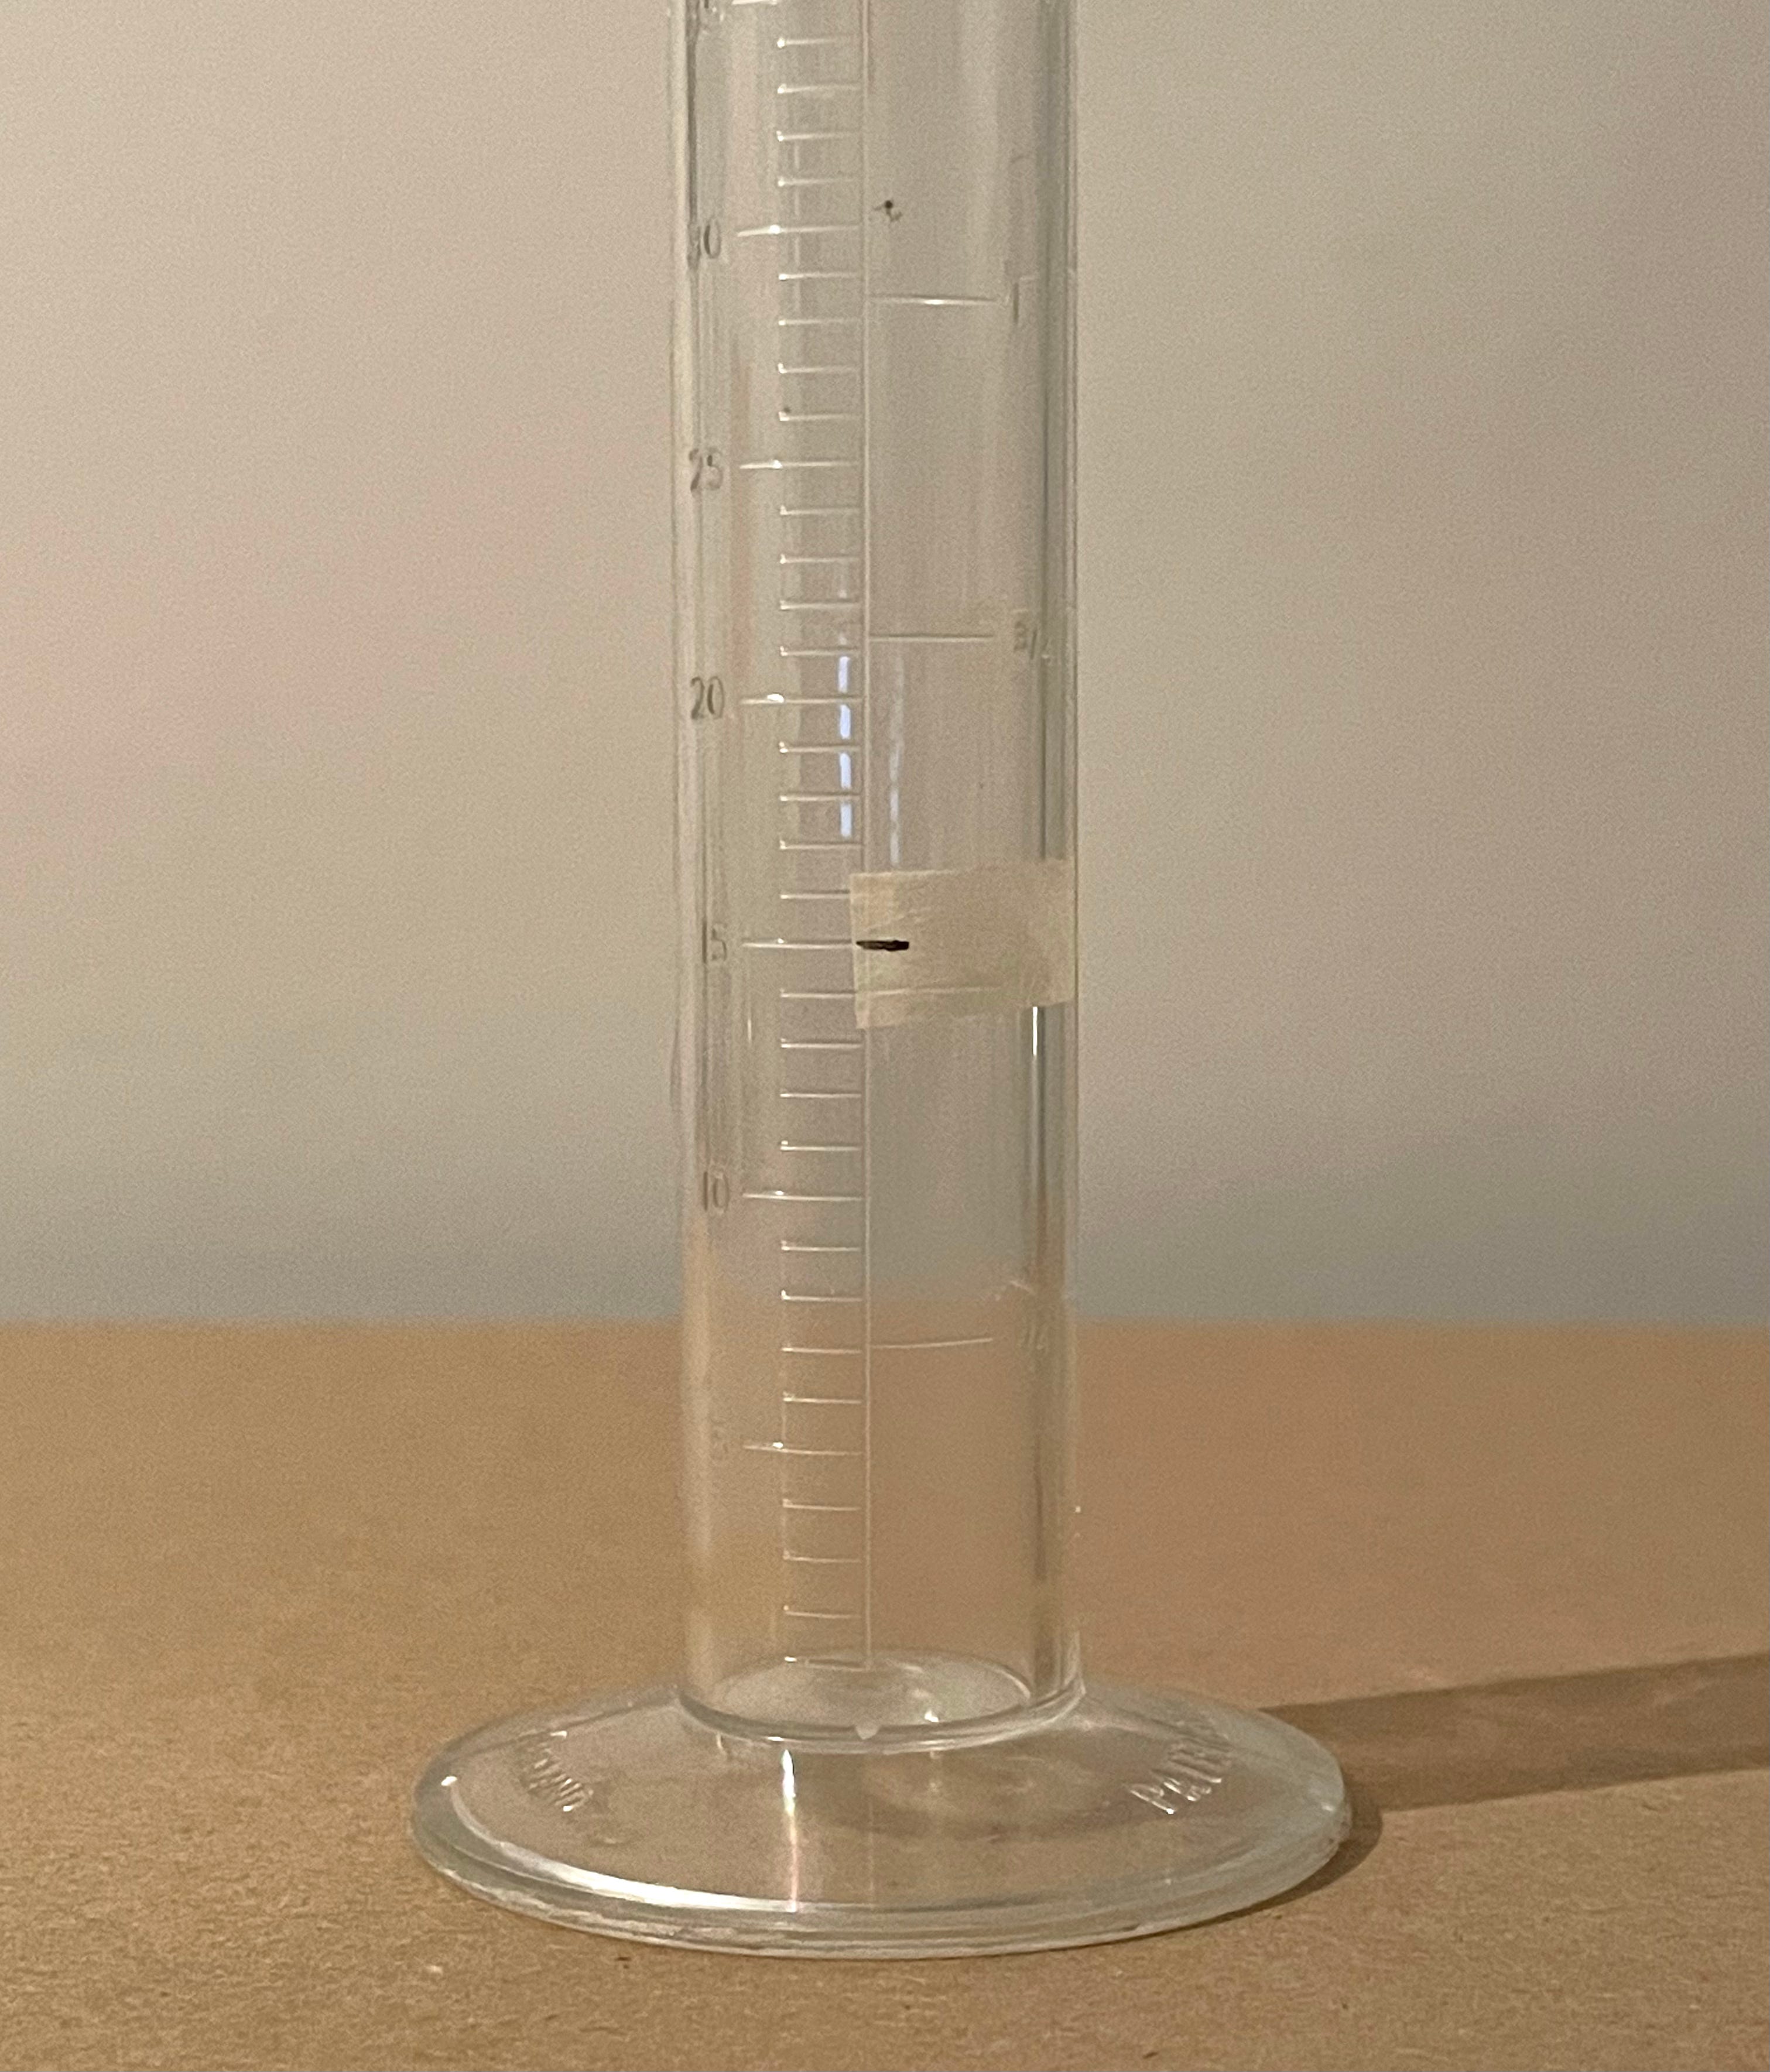
The second method I used was to put a strip of masking tape up the flask next to the numbers and make a black line where I was measuring to. I use a similar technique when measuring out Rodinal concentrate at the small amounts I need for processing one or two rolls of film. With my small measure I aid my vision by putting a small section of tape on it, marking the level I need.
Weighing.
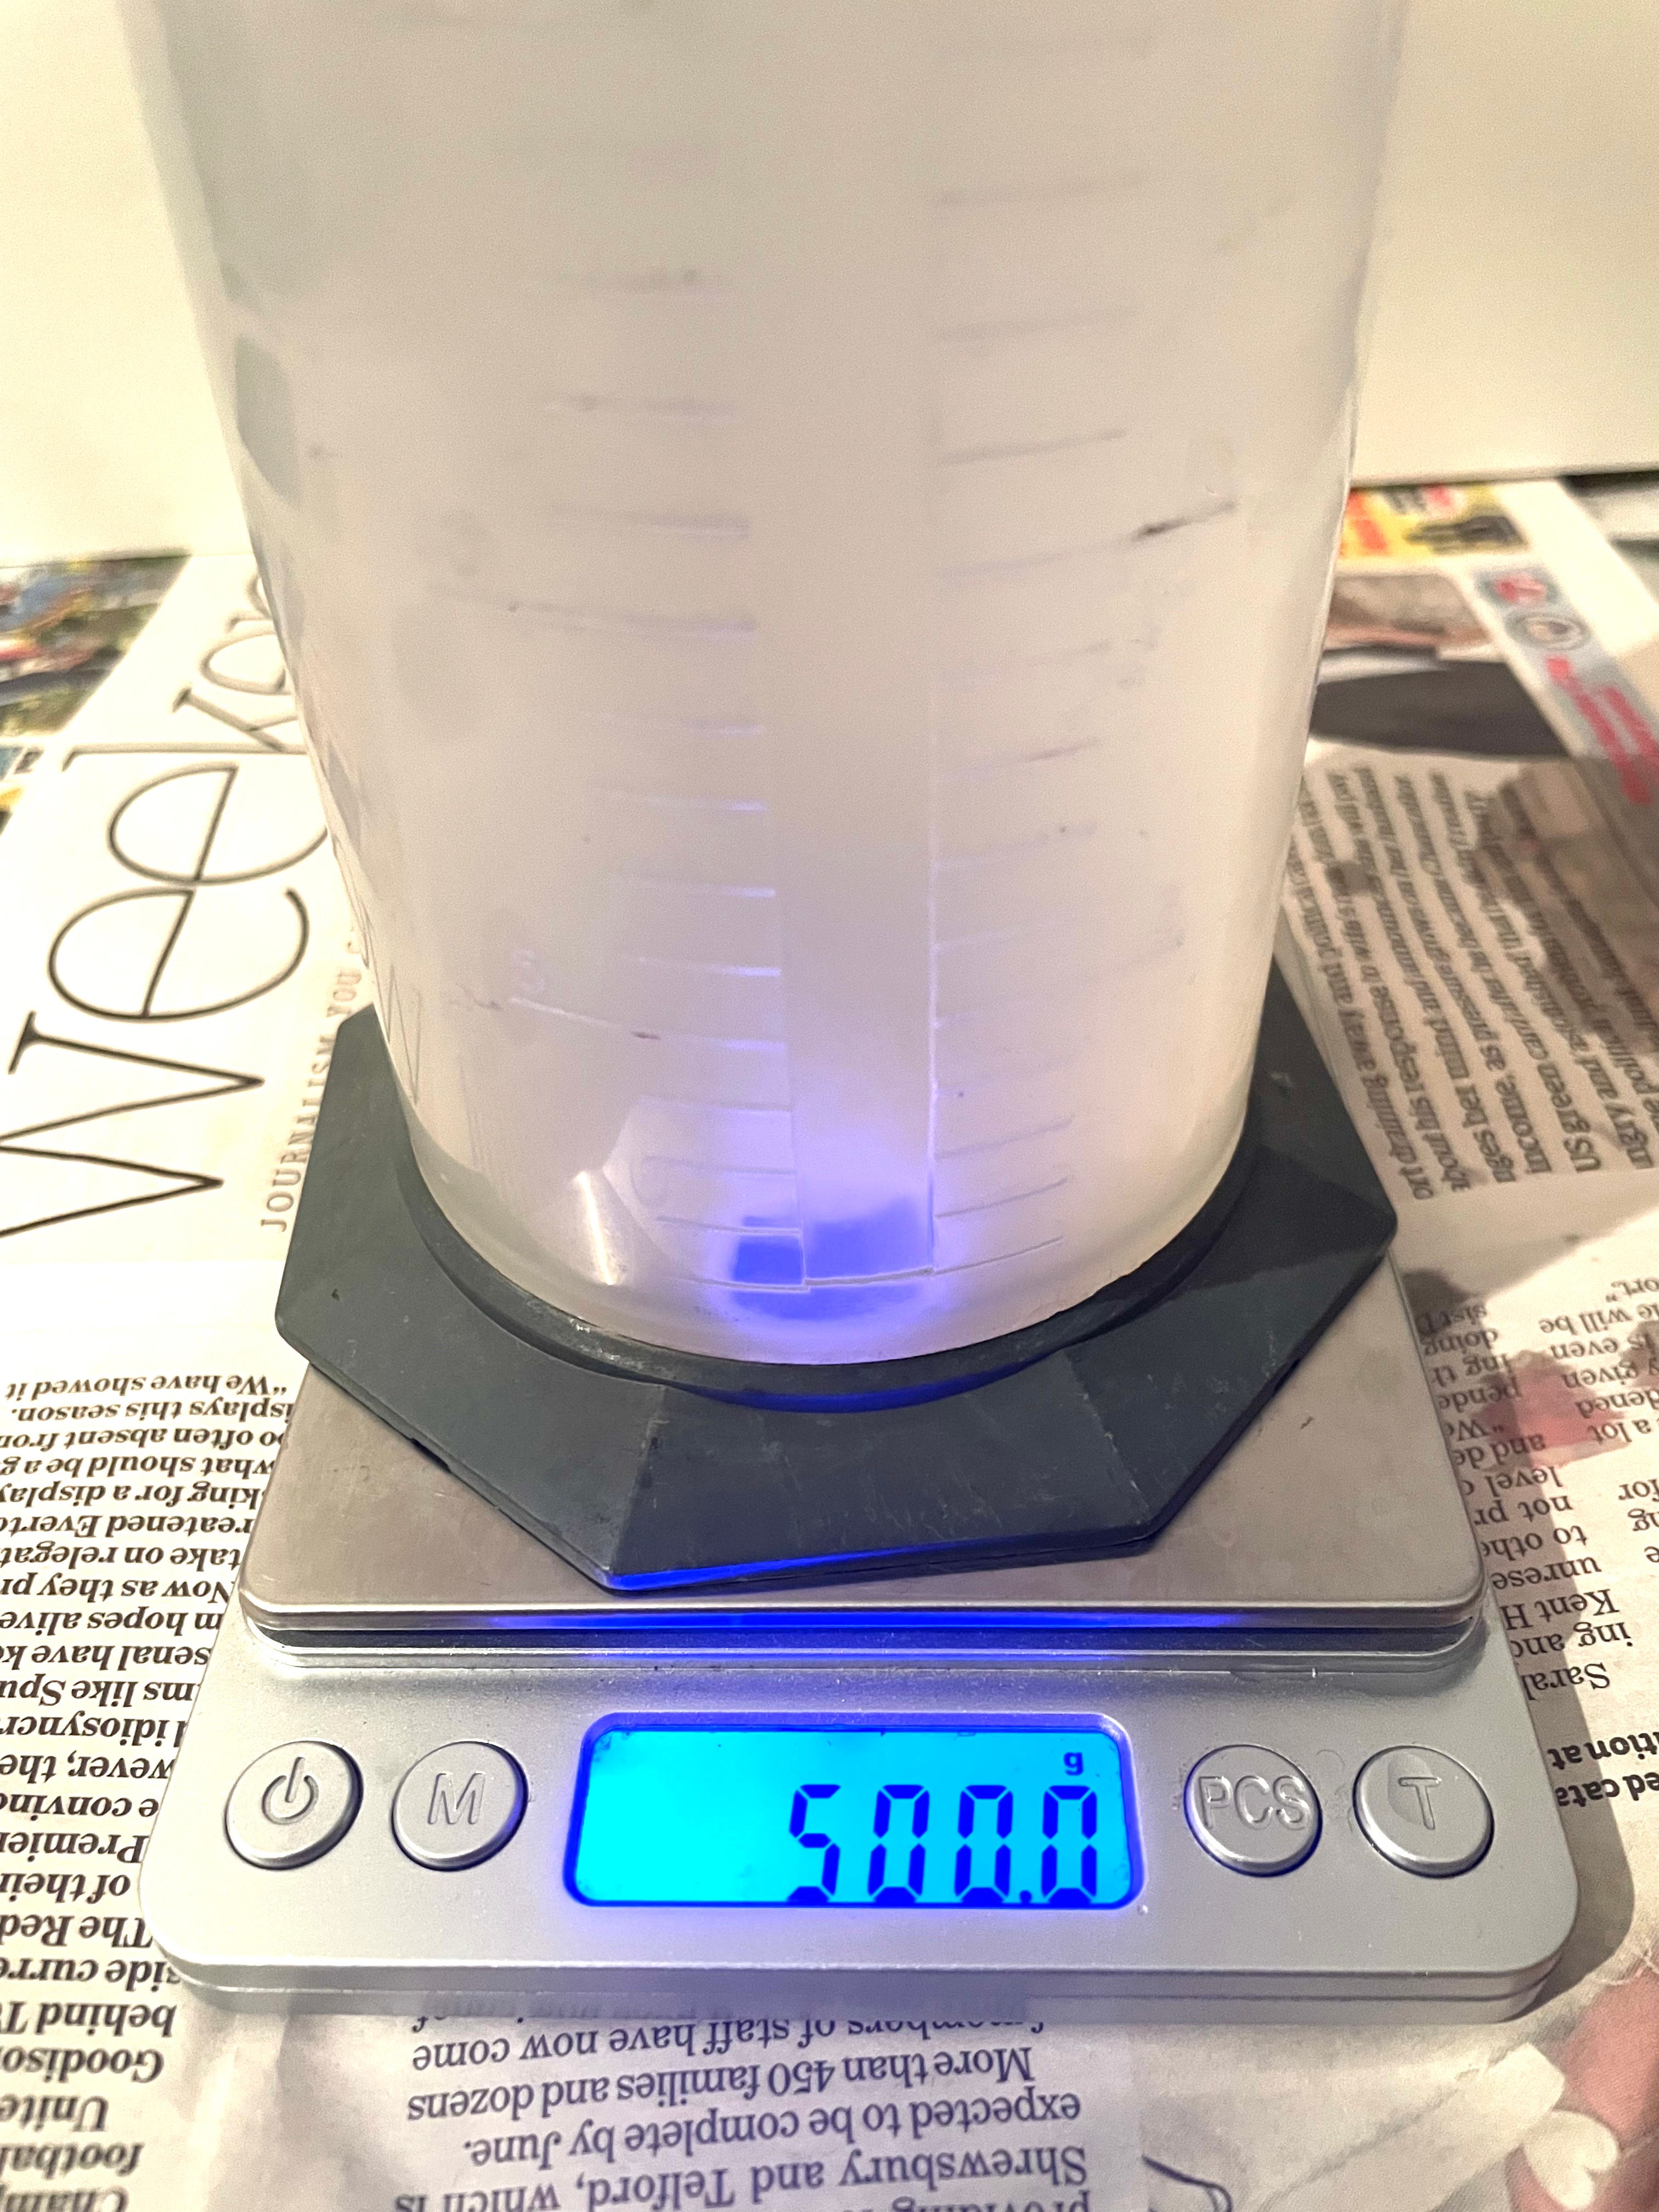
I don’t think it is widely known that when measuring out water (at 20C) the amount in ml is the same as the weight in grams. If you need 350ml of water and you suspect that your measuring flask might not have an accurate scale on the side, you can measure 350 grams instead. Most plastic measures are a bit inaccurate, so I use this method every time. (keep reading, there is a divergence from this rule). I put a clean flask on the scales. I turn the scales on and they set themselves to zero, disregarding the weight of the flask (This can also be done with the ‘tare’ button), then I add the water from a larger jug that I have already got up to temperature.
When accuracy is really important, such as processing with film developers that are concentrated and viscous, a small difference in the quantity of the concentrate can have a marked difference in your results. For instance the new 510 Pyro developer has the consistency of honey and in winter it is even thicker. To ensure that your measurement of the concentrate is accurate, I think it is important to use digital scales to measure by weight.
This is where the 100g = 100ml rule changes. With chemical mixtures, the specific gravity changes that relationship. The 510 Pyro dev needs a small calculation as 1g does not equate to 1ml. The specific gravity of 510 Pyro is 1.16, so for a correct measurement of any amount by weight, the quantity required (in ml) should be multiplied by that number.
A 500 ml solution to process a 120 film would be 500 ml of water mixed with 5 ml of 510 Pyro (a 1+100 mix). So the final amount after allowing for the specific gravity would be 5.8 grams. For my own way of working I prefer to make a bit more; I always mix 50ml more than the recommended amount to cover a spiral, to avoid uneven processing from the developer frothing. The quantity then would be 6.38g of concentrate and 550g of water (5.5x1.16). My proportions for a 35mm film would be 350 g water with 4.06 g of concentrate (3.5x1.16). To measure, I draw up a quantity of the viscous developer in a syringe and drip it into the flask until I get to the correct quantity.
Other developers will need a calculation too. For instance, Kodak HC110 concentrate has a specific gravity of 1.26. If you need 10 mil of HC110, that equates to 10 grams. You multiply 10 by 1.26 (the specific gravity of that developer) and get 12.6 grams. That is how much you weigh out.
Mixing up viscous concentrates.
It is important to make sure that thick syrupy film developers are completely mixed in and dissolved before use. If some of it is still sitting at the bottom of your jug, the developer will not have the correct strength and your negatives will be under developed. I measure out the concentrate by dripping it into a large flask on the scales (flask A), then measure the water in another flask (flask B). I then pour about an egg cup of water from B into A and stir it until I can see it has completely dissolved, then the rest of the water is added and stirred.
Getting chemicals up to temperature
This applies to working strength developers such as ID11, Microphen, D76 etc. In the UK, the temperature of my chemicals is often quite a bit lower than the 20C I need for processing, so I need to sit the bottle in a bucket of hot water to raise it.
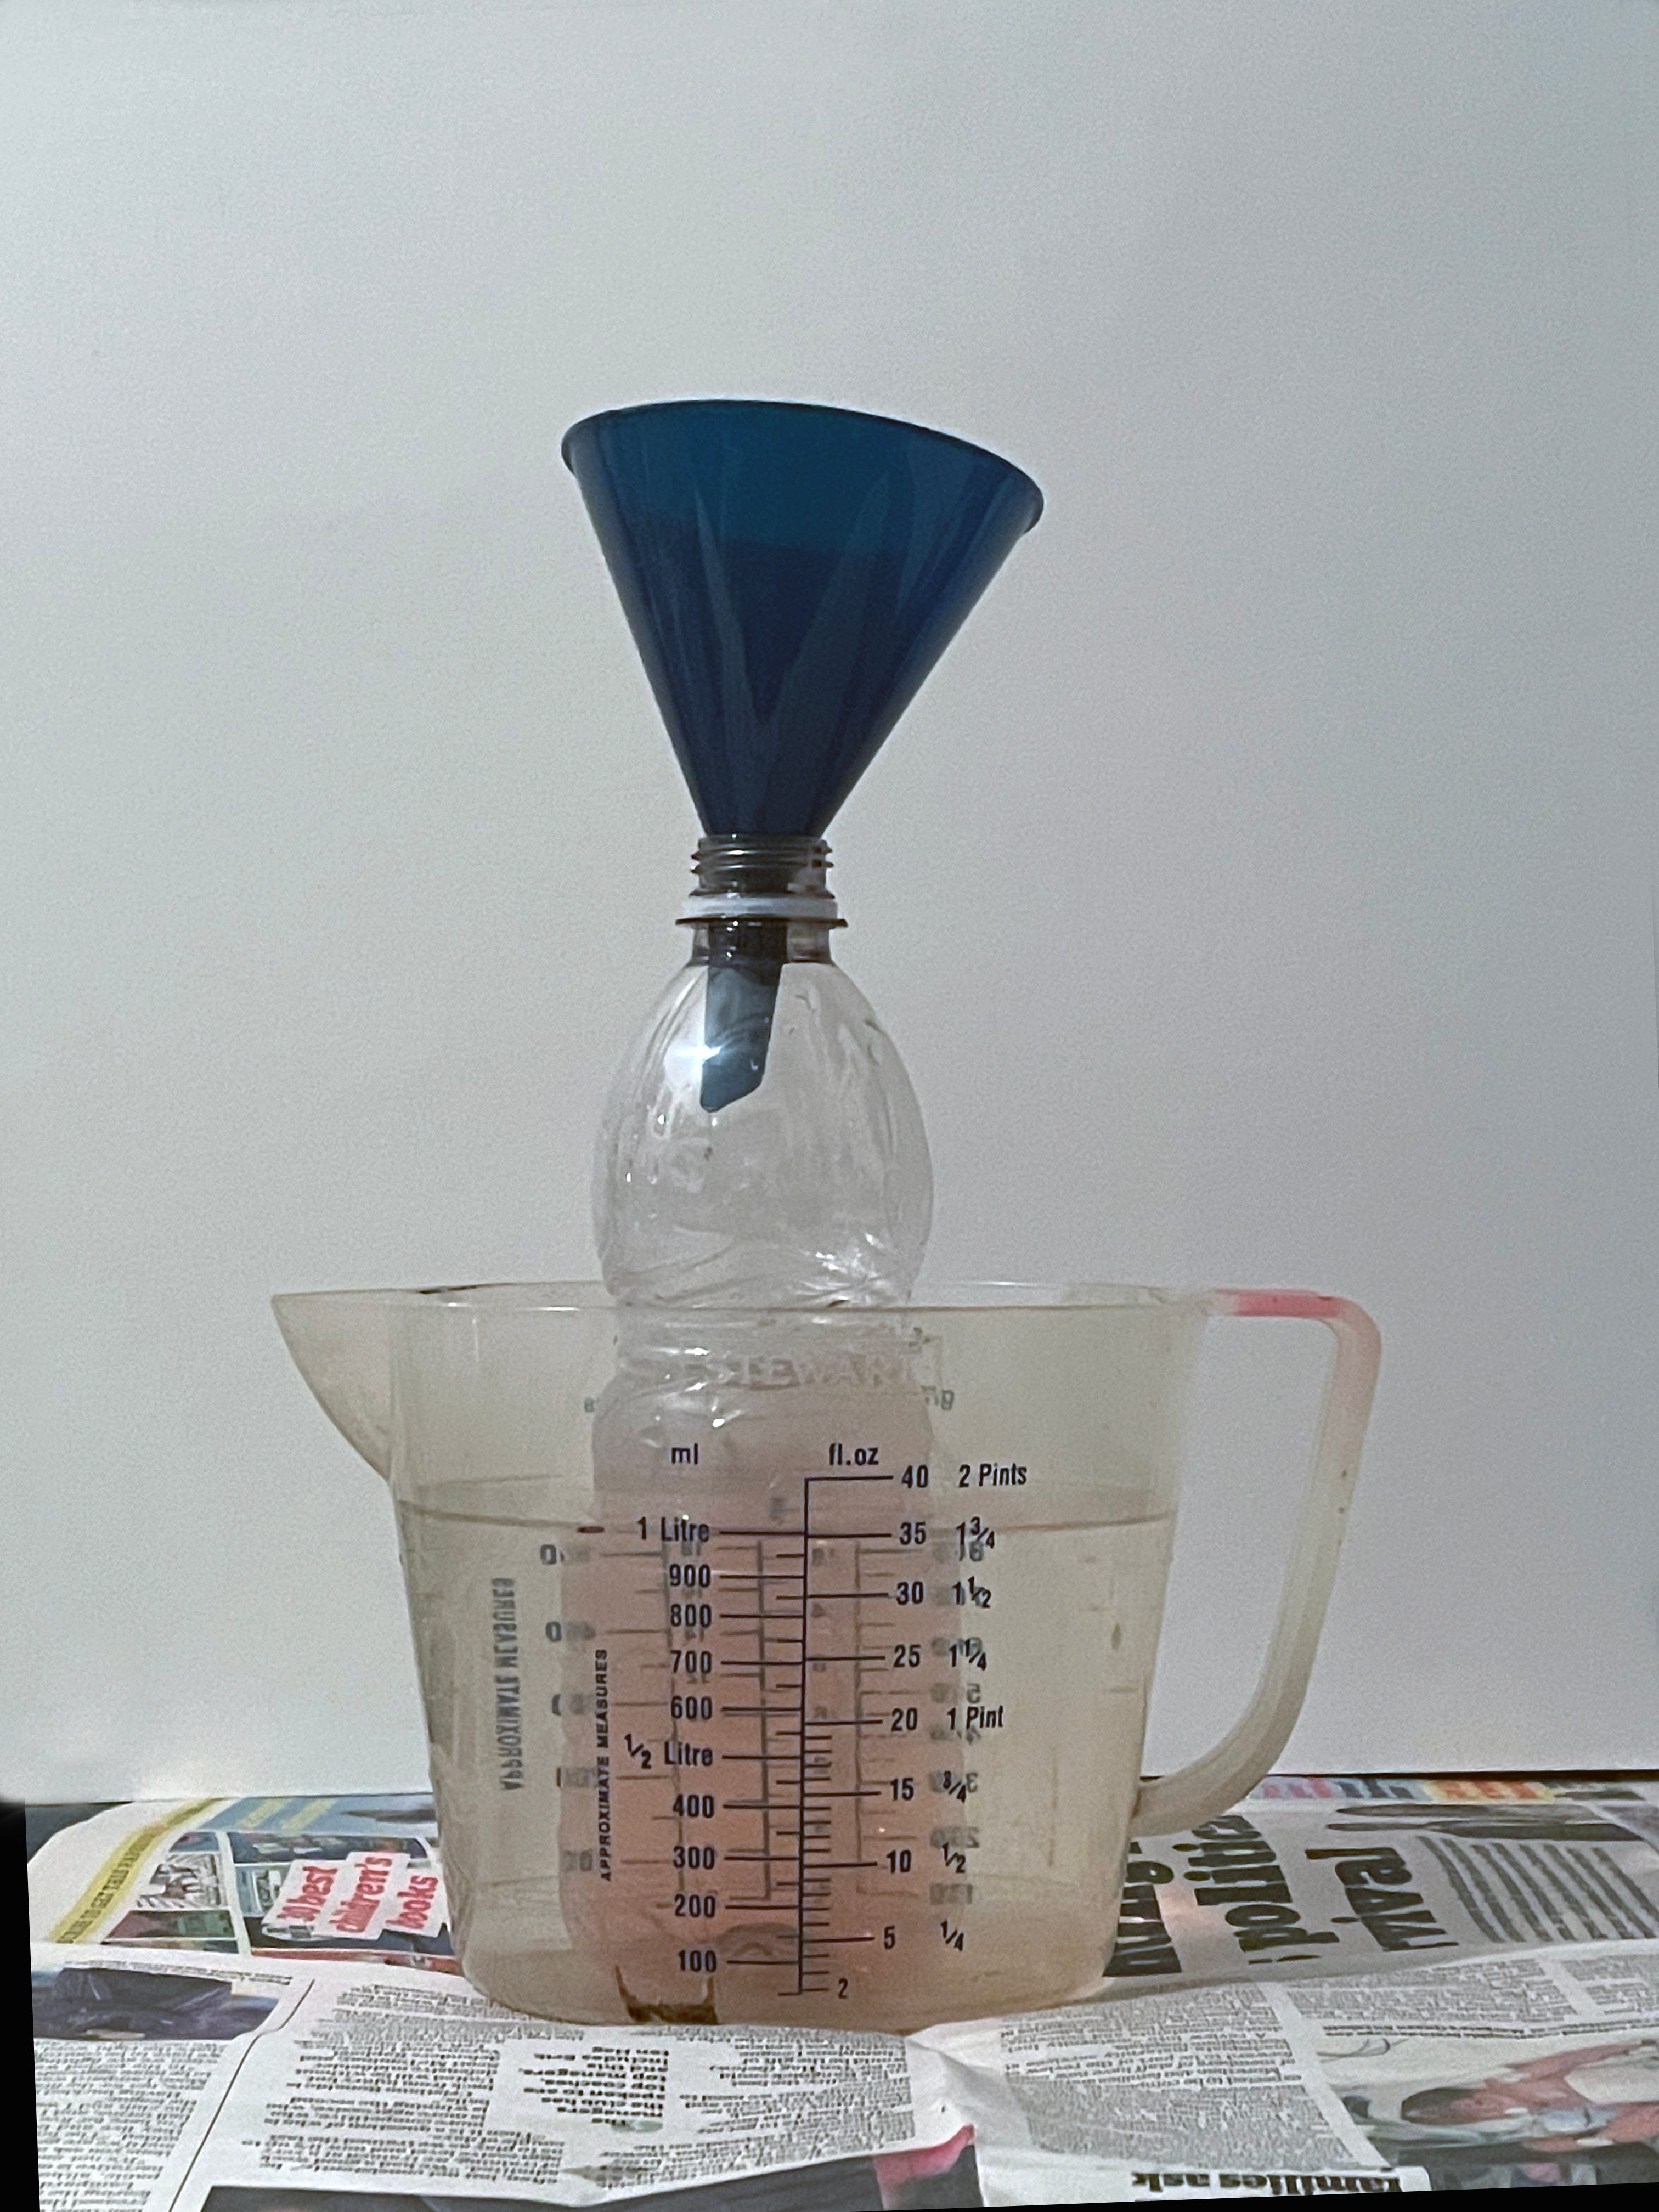
If you use a perspex measuring flask sat in a bath of warmer water you could be waiting a long time as they don’t transmit heat very well. A thinner plastic will transmit heat more rapidly. The thin plastic bottles that you get cheap water in work really well, but don’t cut them down for ease of pouring, because they are too thin to hold their shape when cut in half and your developer will easily spill. Measure out the quantity you will need and pour it into the bottle. Use a small funnel to get into the narrow spout. Because the thin plastic transmits heat quickly, the surrounding water only needs to be about 5 or 10 degrees hotter.
Trays and tongs.
Always use a developing tray that is one size up from the paper size you are using. If you use a 10x8 tray for a 10x8 print, when it is time to get the print out, it is tricky to get your tongs or fingers around the edge of the paper.
Some fibre based papers, like the old Kentmere range, expand quite a lot when wet, making it too long for the tray. If you try to get round the edge you end up creasing the paper badly.
Use tongs, not your fingers whenever possible, chemicals are absorbed into the skin, even if you wash immediately. Use one set of tongs for dev only and don’t get stop or fix on them. Use another set of tongs for stop and fix.
When you are not using tongs, they leave wet patches on the work surface, or they sometimes fall into the tray, which is a pain in the arse.
My solution for this is to have the 1 litre flask that I measured the developer out in, at the back of the table behind the tray. I put a big funnel in it and every time I’m done with a pair of tongs I drop them in the funnel. All drips go down into the flask and the tongs stay dry.
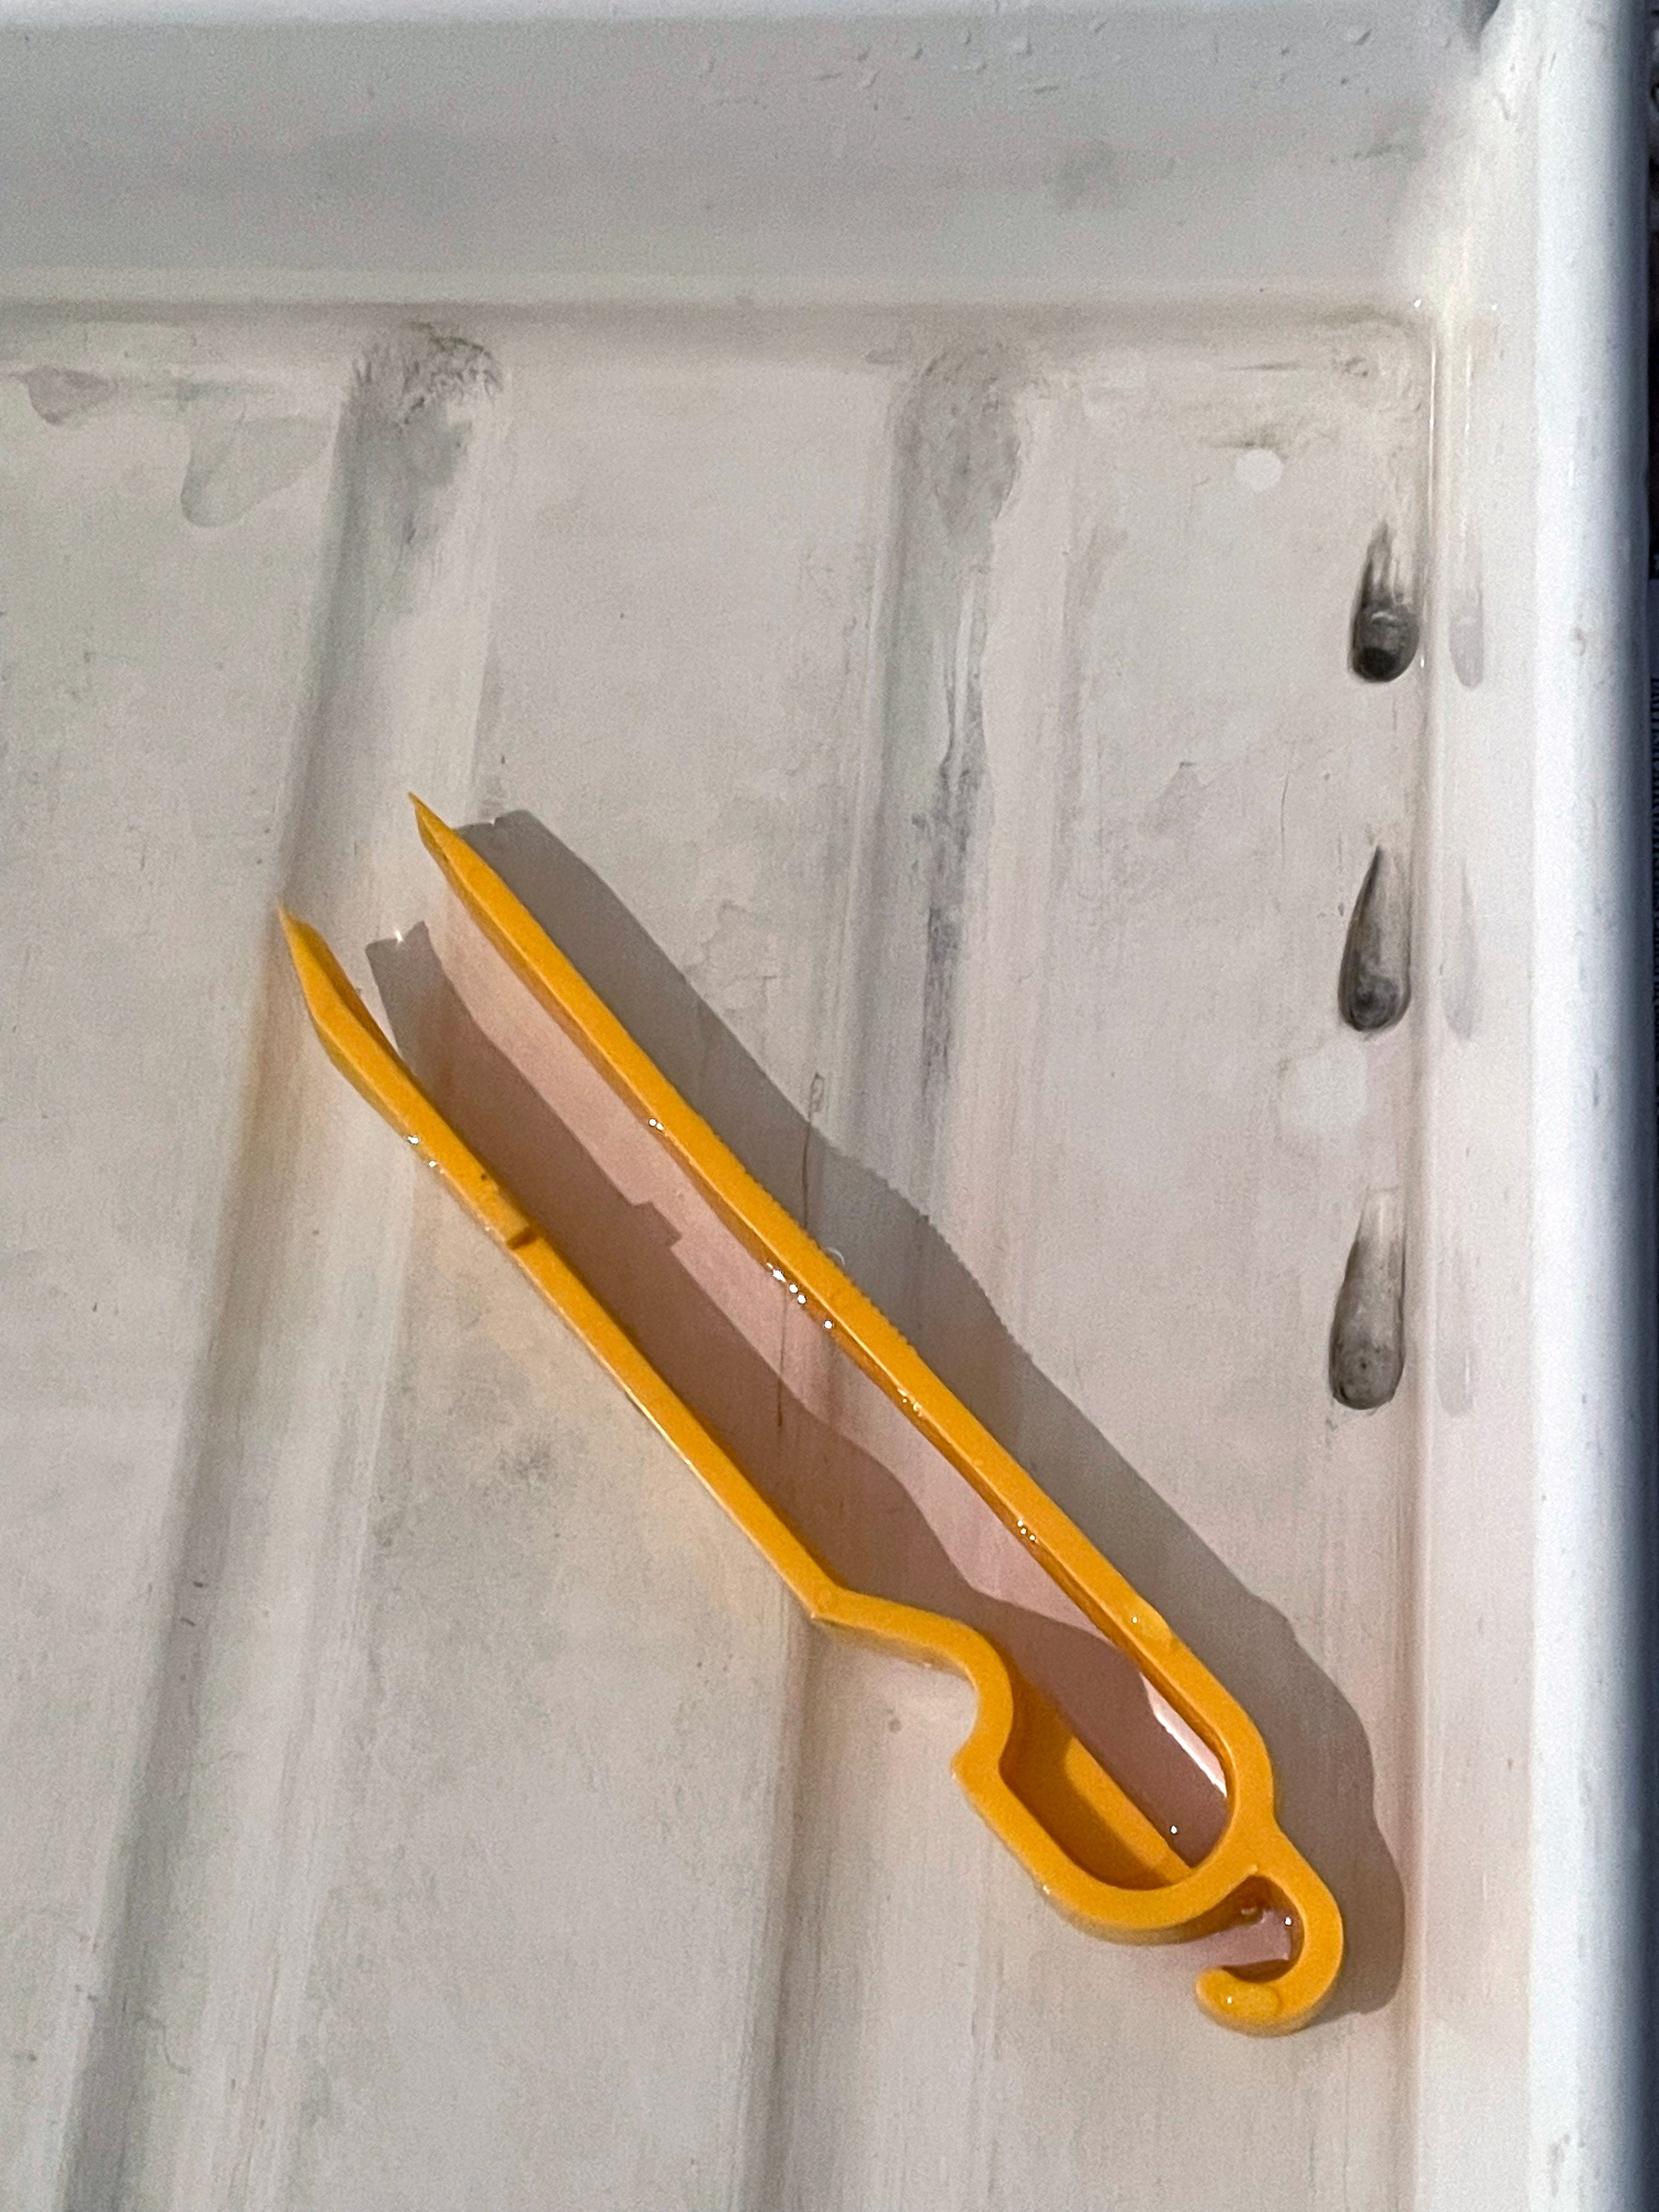
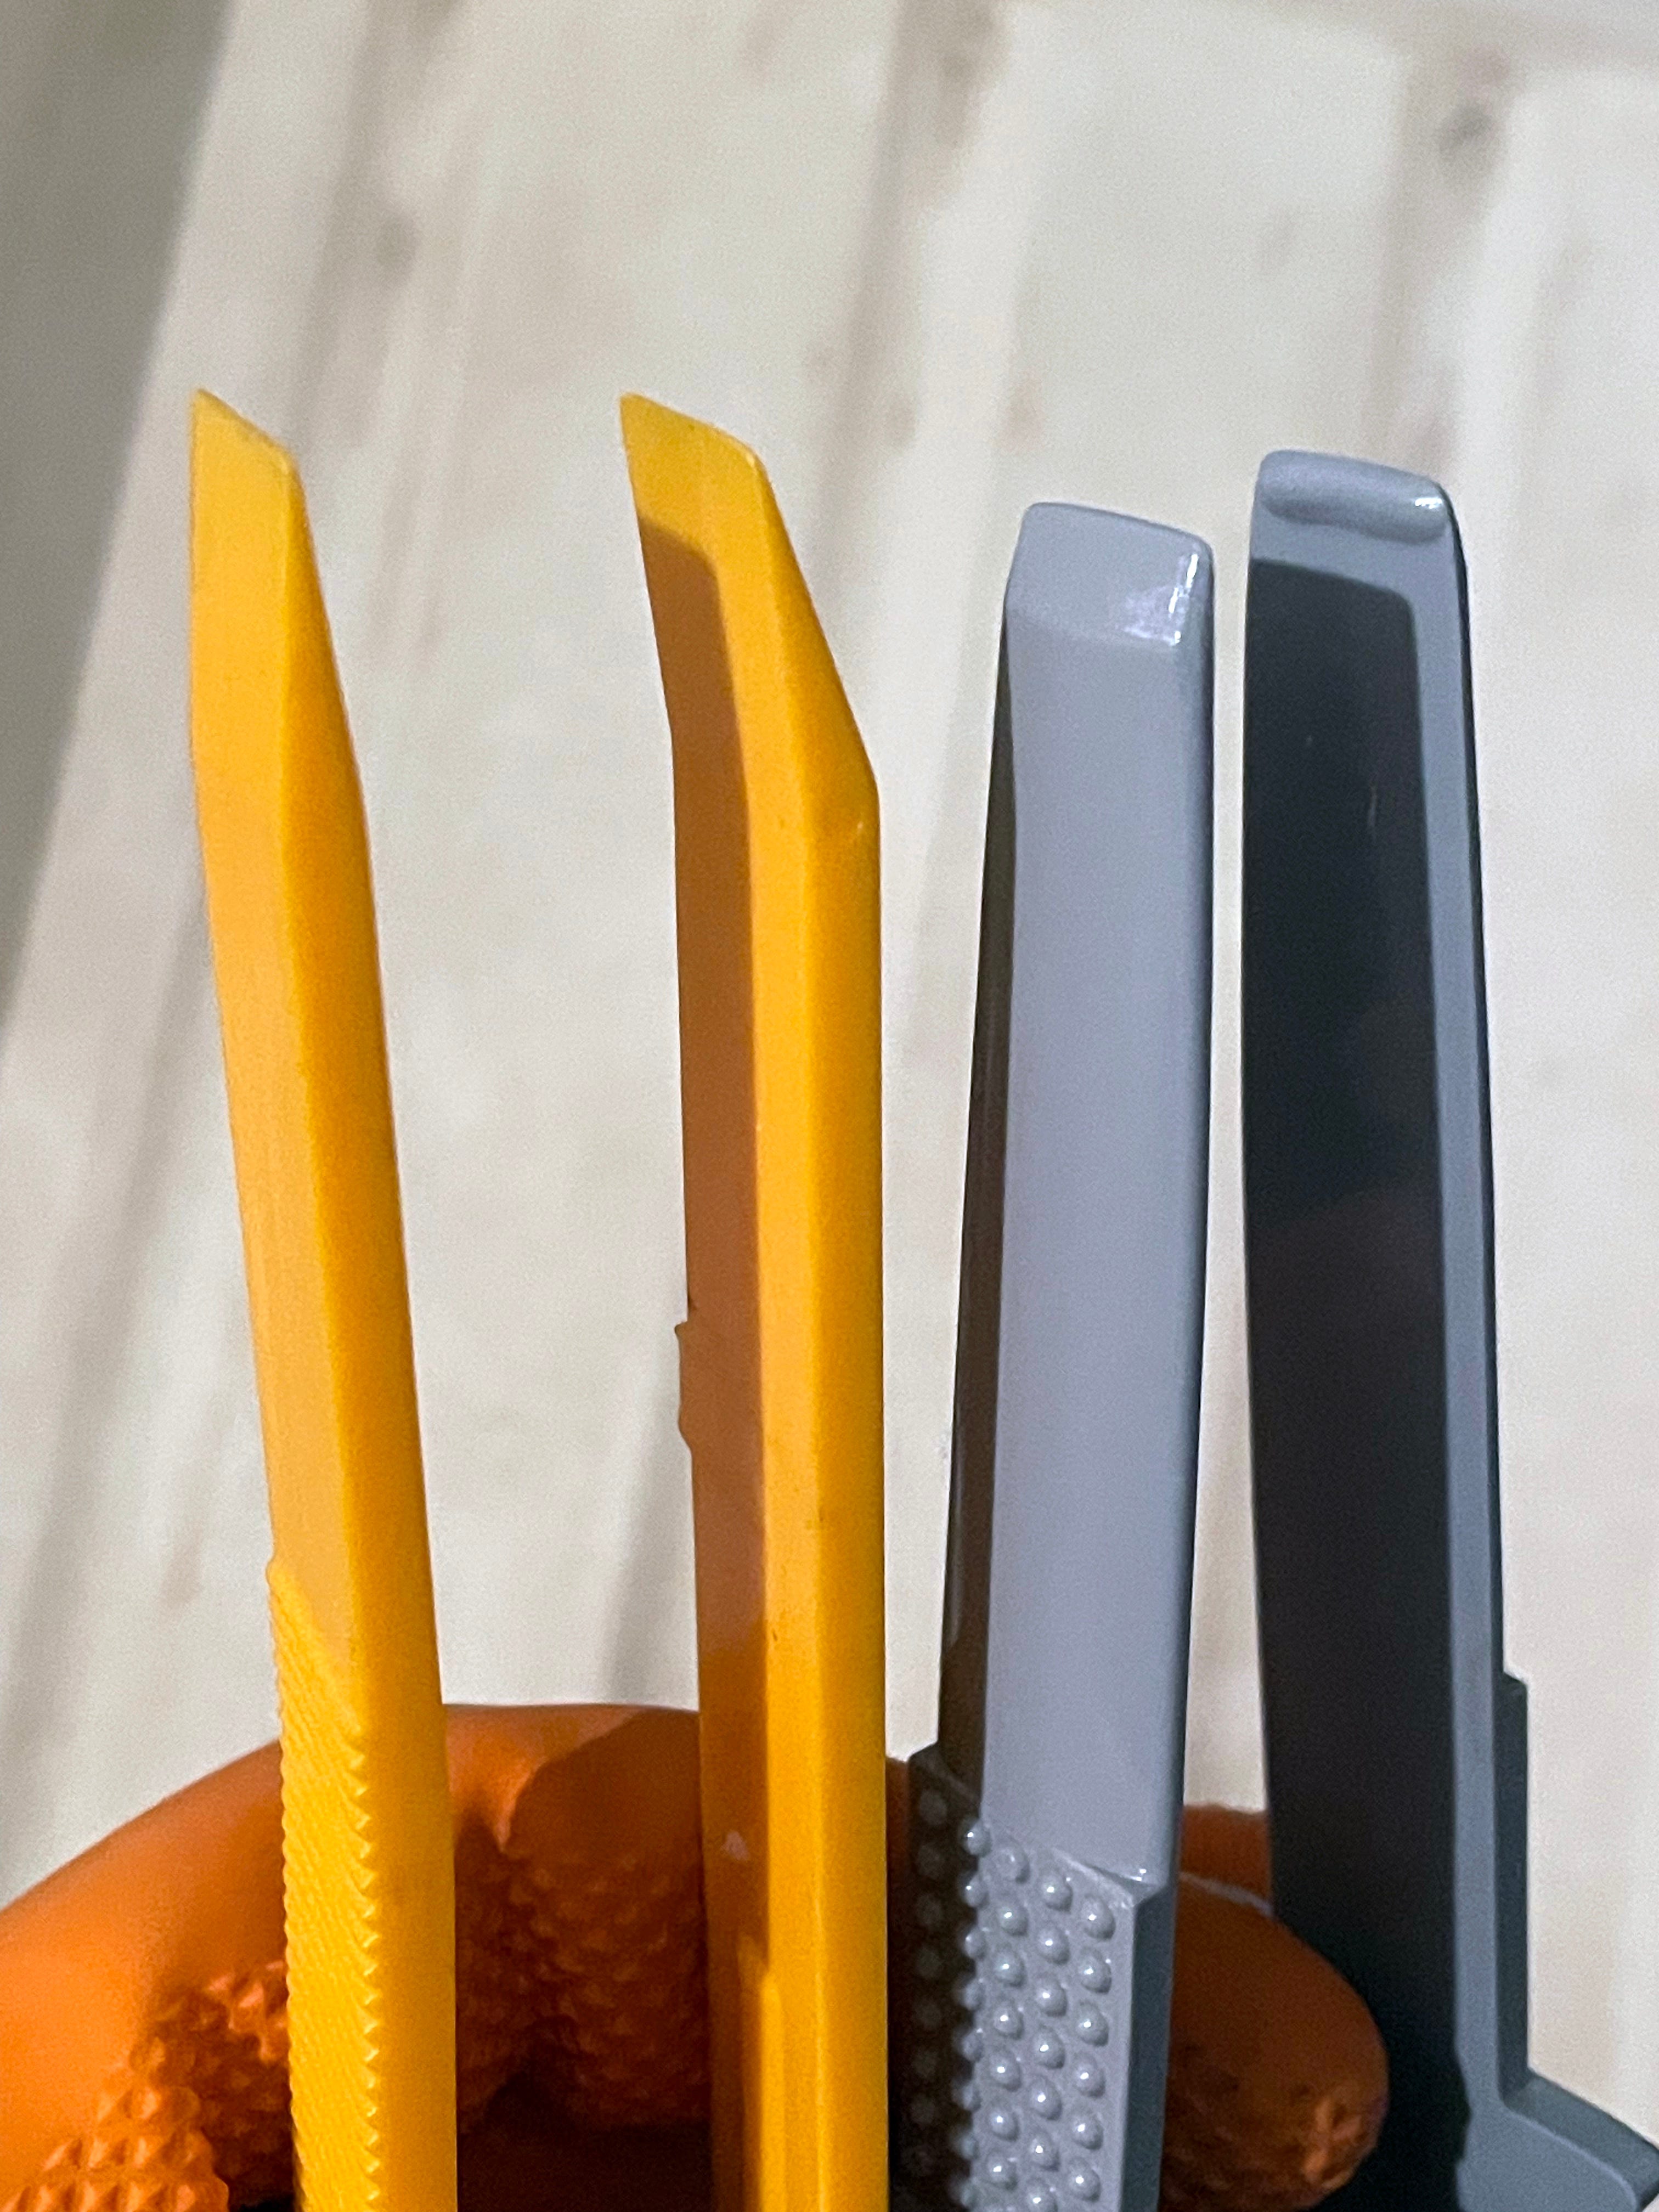
There are many designs for print tongs and personally I don’t like most of them. I prefer tongs that grip at the very end, but are not sharp. The old type that Paterson made were perfect, but the current type grip about a quarter of an inch further back. There is another type that might be Paterson, but I can’t remember, they have a clip near the end that locks the ends together when you use them. If I have a pair (the yellow ones in the pictures) I snap this bit off. This type also have sharp corners which can easily damage the print surface.
When development is done, lift the print out by one corner, and drain off the excess developer for ten seconds before putting the print in the stop bath, this will make the stop bath last longer.
Making test strips.
For consistency always test with the paper you are printing on. You can’t make test from one box, then a final print from another.
If you are doing test strips, a quick slosh about in the stop and ten seconds in the fix will be enough, but full prints need to be stopped and fixed properly. Cutting the stop and fix time for tests speeds up a darkroom session, so it’s worth thinking about (nobody keeps test strips do they?). Resin coated prints only need about ten seconds in the stop, but the more absorbent Fibre Based papers need longer. The developer is deep in the paper fibres and you must allow enough time for the stop bath to penetrate and do its work. I would suggest 30 seconds minimum (with agitation), possibly one full minute for really thick papers like Ilford Art 300. This minimises the possibility of staining with dev carry over into the fix which can happen with some papers. If you have used this paper and experienced orange/brown staining, then this is the reason.
Lift the print from the corner and allow it to drain before placing in the fix, then give it one minute for resin coated and two minutes for Fibre based, with gentle agitation. Remove it and place it in a tray of water as soon as the time is up.
Light.
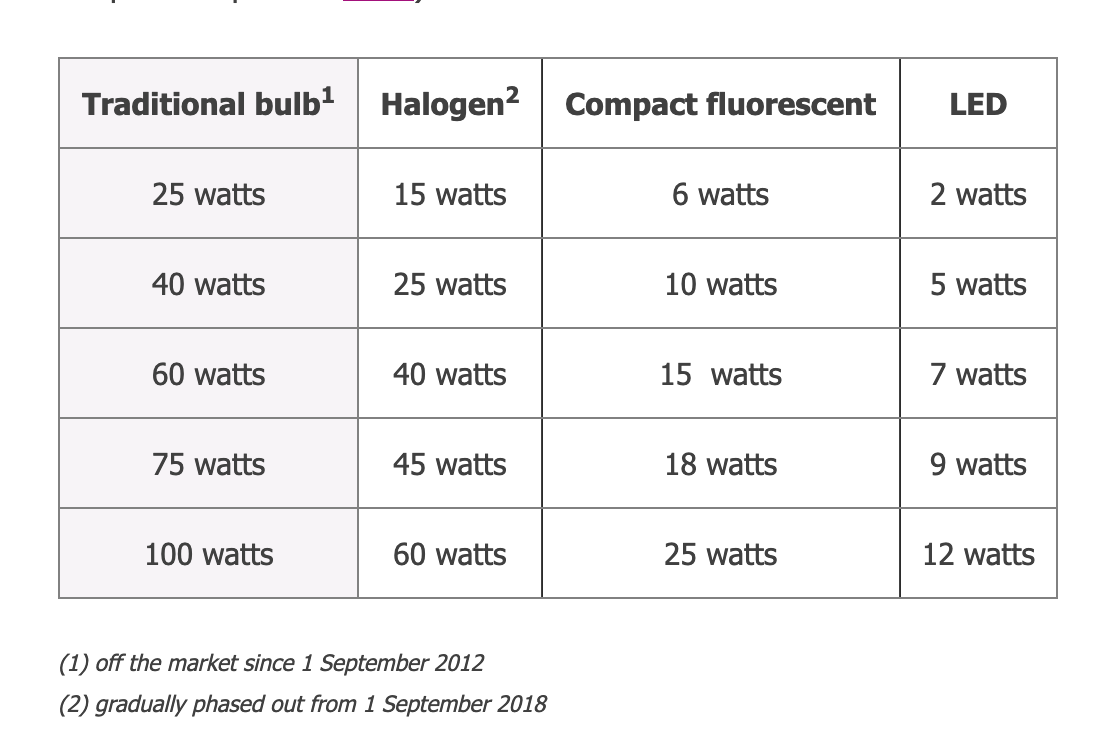
You need a safelight and you need white light for inspection, measuring out and selecting negatives. Where you position these lights will either help your work, or drive you mad. Your print inspection white light should be a 60 - 100 watt bulb near your fix tray, but not directly over it. When you are looking at your test strip or final print you don’t want a bright light reflecting off the liquid. When I say 100 watts, I am referring to the old measurement. here is a conversion chart;
Safelights.
If you only intend to print on normal photographic paper, then an amber coloured light will be fine as long as it is not too close to your paper, but if you plan on using Ilford Direct Positive, or Ortho film, then you will need a red light. In my room I have a fairly bright amber light, which is positioned in the central part of the ceiling to give even light around the whole room. When I stand at my enlarger, my body casts a shadow over the baseboard, allowing me to see my projected image better. I also have a small portable red light that can be plugged in at one of the three power outlets around the room. This has been very useful at times.
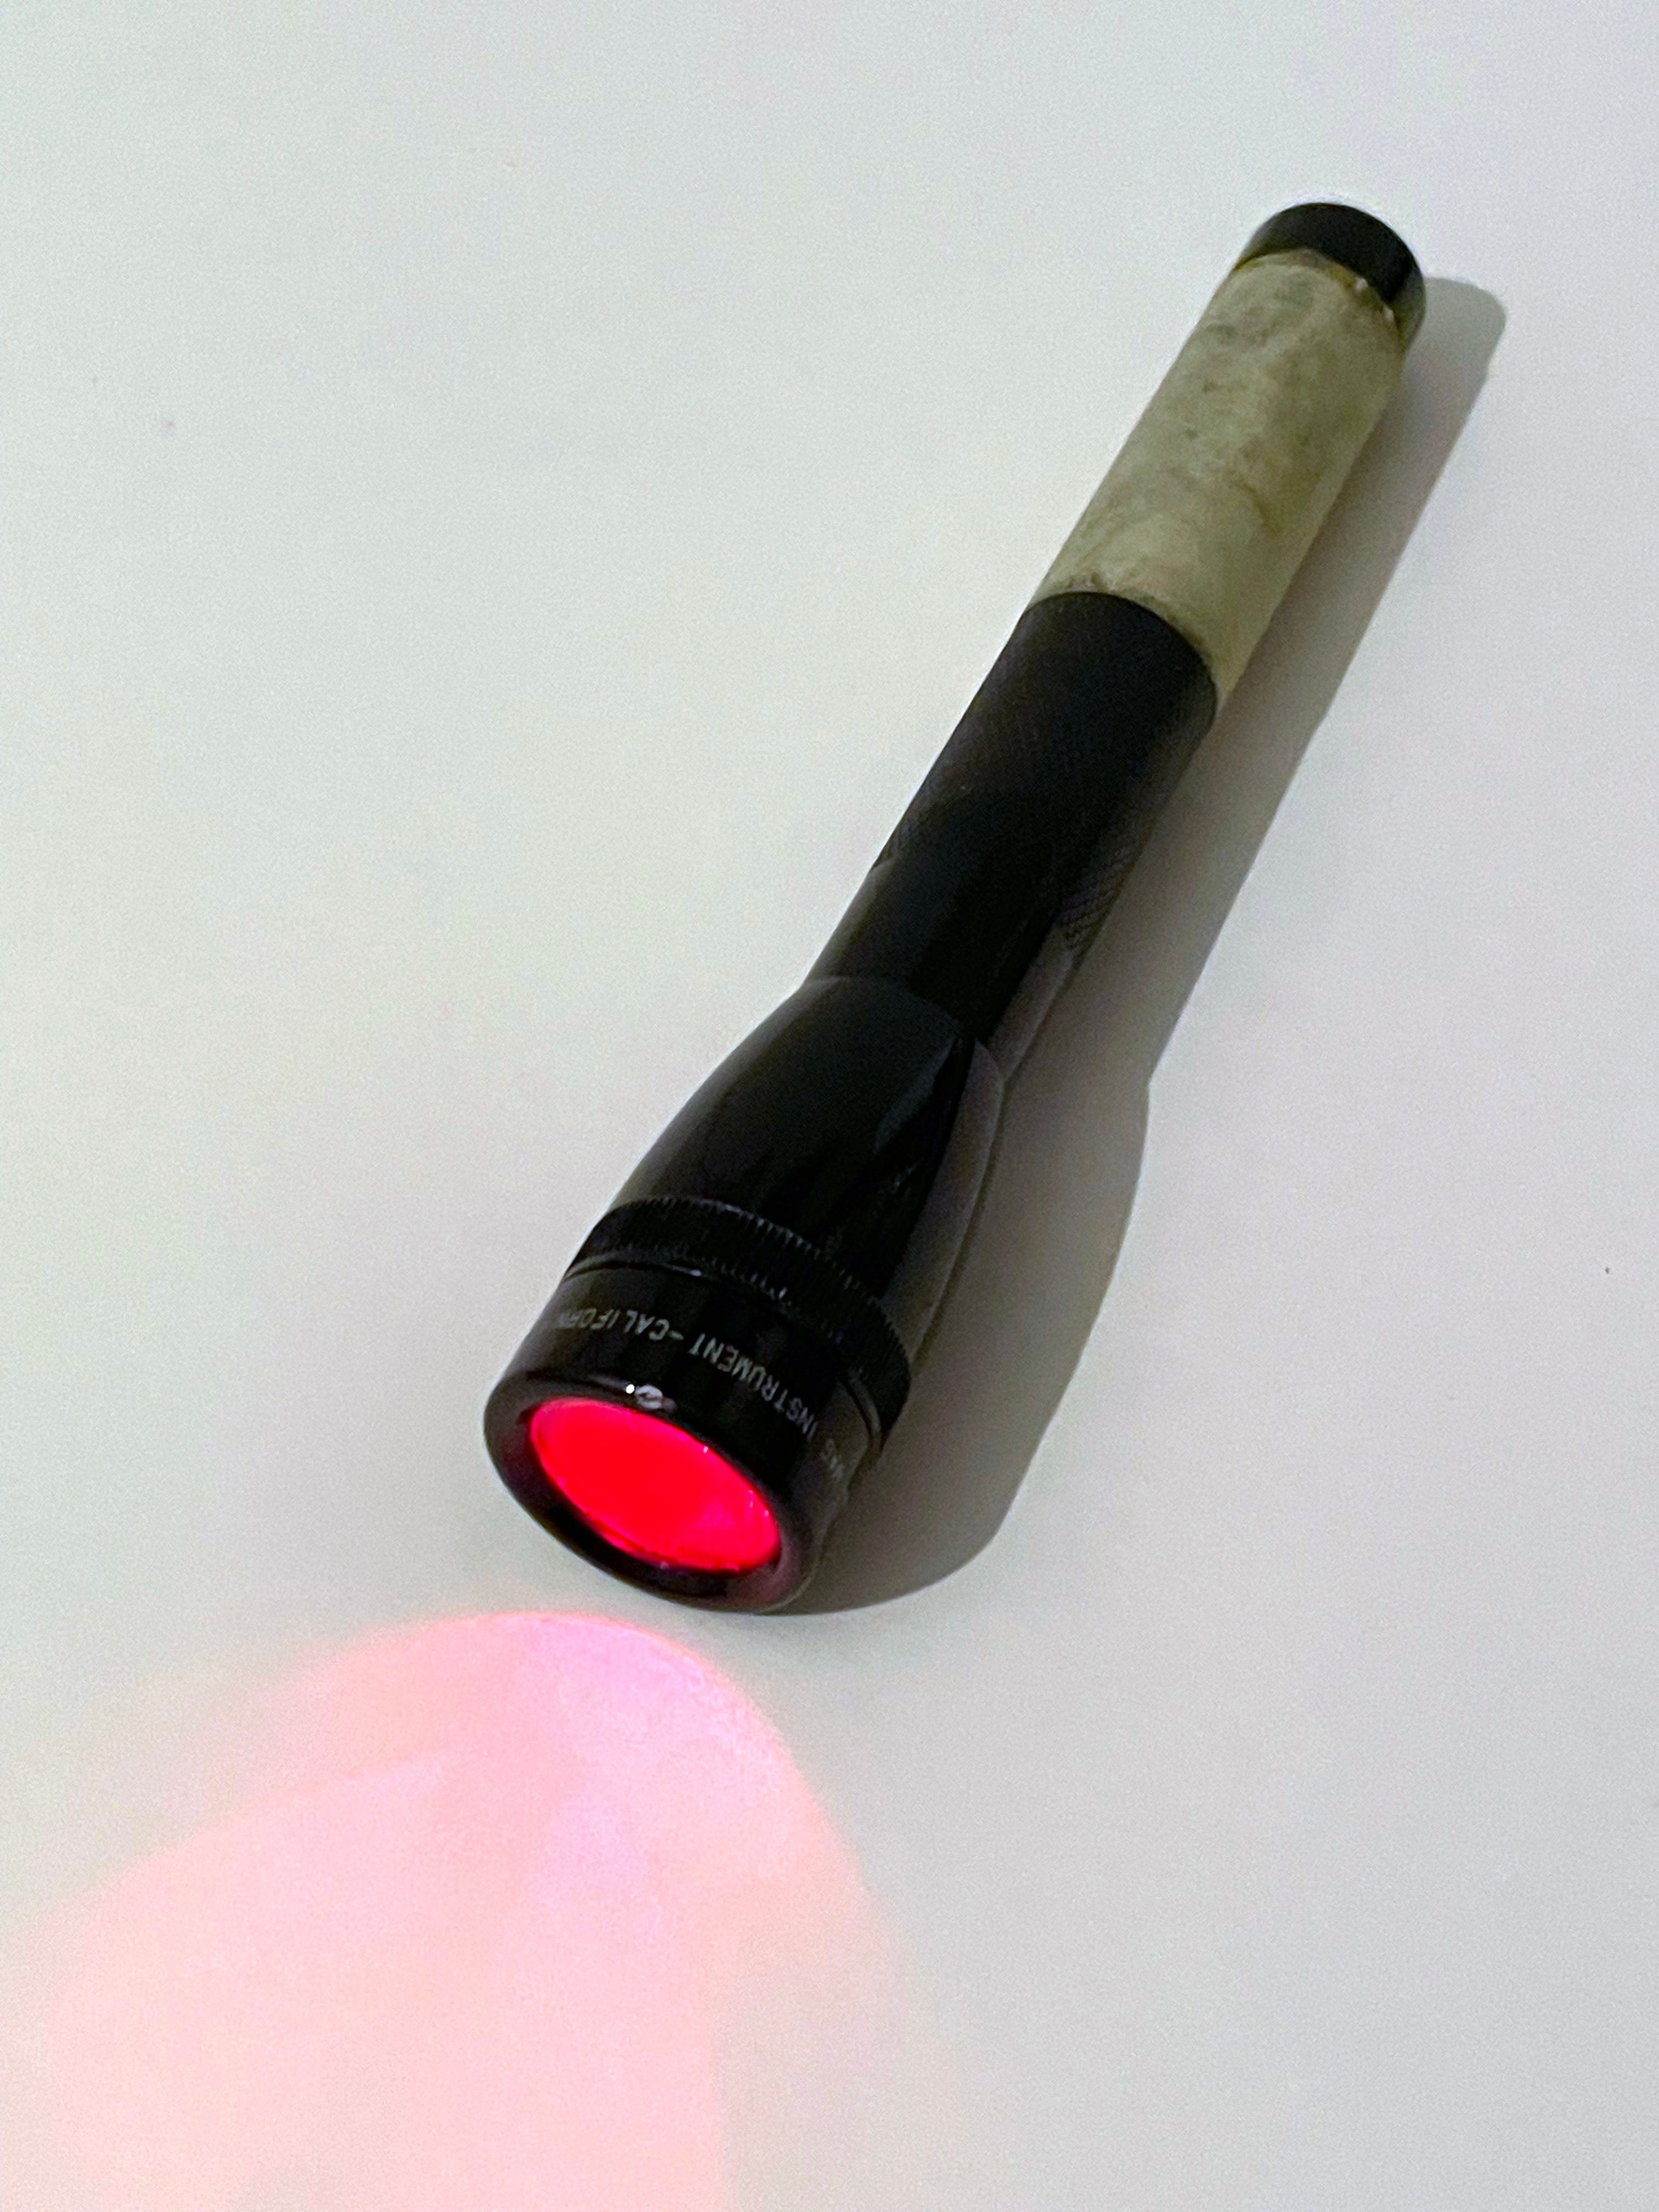
I have a small torch near my baseboard with a red filter over the light. This is really handy for finding things when you have paper out and can’t put the lights on, because dropped items fall into dark spaces and roll under cupboards where you can’t find them with annoying regularity. You can make a red safe torch light by getting a second hand red filter that is the diameter of your torch and taping it on with black gaffa tape.
Selecting negatives.
Finding the negative that you need to print needs good, even light. If you have an inspection light near your fix tray, it won’t be in the right place for your dry area, so you will need another light with a switch that is easy to reach when you are putting the negative in the enlarger. I have an LED strip light positioned under a shelf that is positioned below eye level. This gives good light for seeing contact sheets, but when I need to look at an individual negative I find it too intense and in an awkward position. For negative inspection, a light box is preferable, but an iPad can be used instead. You can open a blank page of Notes, or take a picture of a white wall and use that. It is important to put the iPad away when your white light is out, you don’t want an alert lighting up the screen when you have paper out. Either put it in a drawer, or an old 10x8 paper box.
Masking frames (easels).
Over the years I have owned a lot of masking frames in sizes from vintage 5x4 to modern 20x24inch. Every single one of them has had alignment problems. The more expensive ones are great in their ability to hold the paper still and to offer accurate adjustable borders, but the movable blades are vulnerable to stress and can often be out of line. To counter this I have a sheet of graph paper to hand that I can place on the baseboard and this gives me lines to angle the blades to, then a strip of masking tape holds them together. Most of the time I don’t use them, the big ones are heavy and are difficult to store if you have a few. Instead I have a home made wooden base and laser cut sheet steel ‘frames’ for 10x8 paper, (the extra weight is really handy for curly old papers). For my 16x12 and 20x16 prints I have a bigger base and laser cut sheets of MDF.
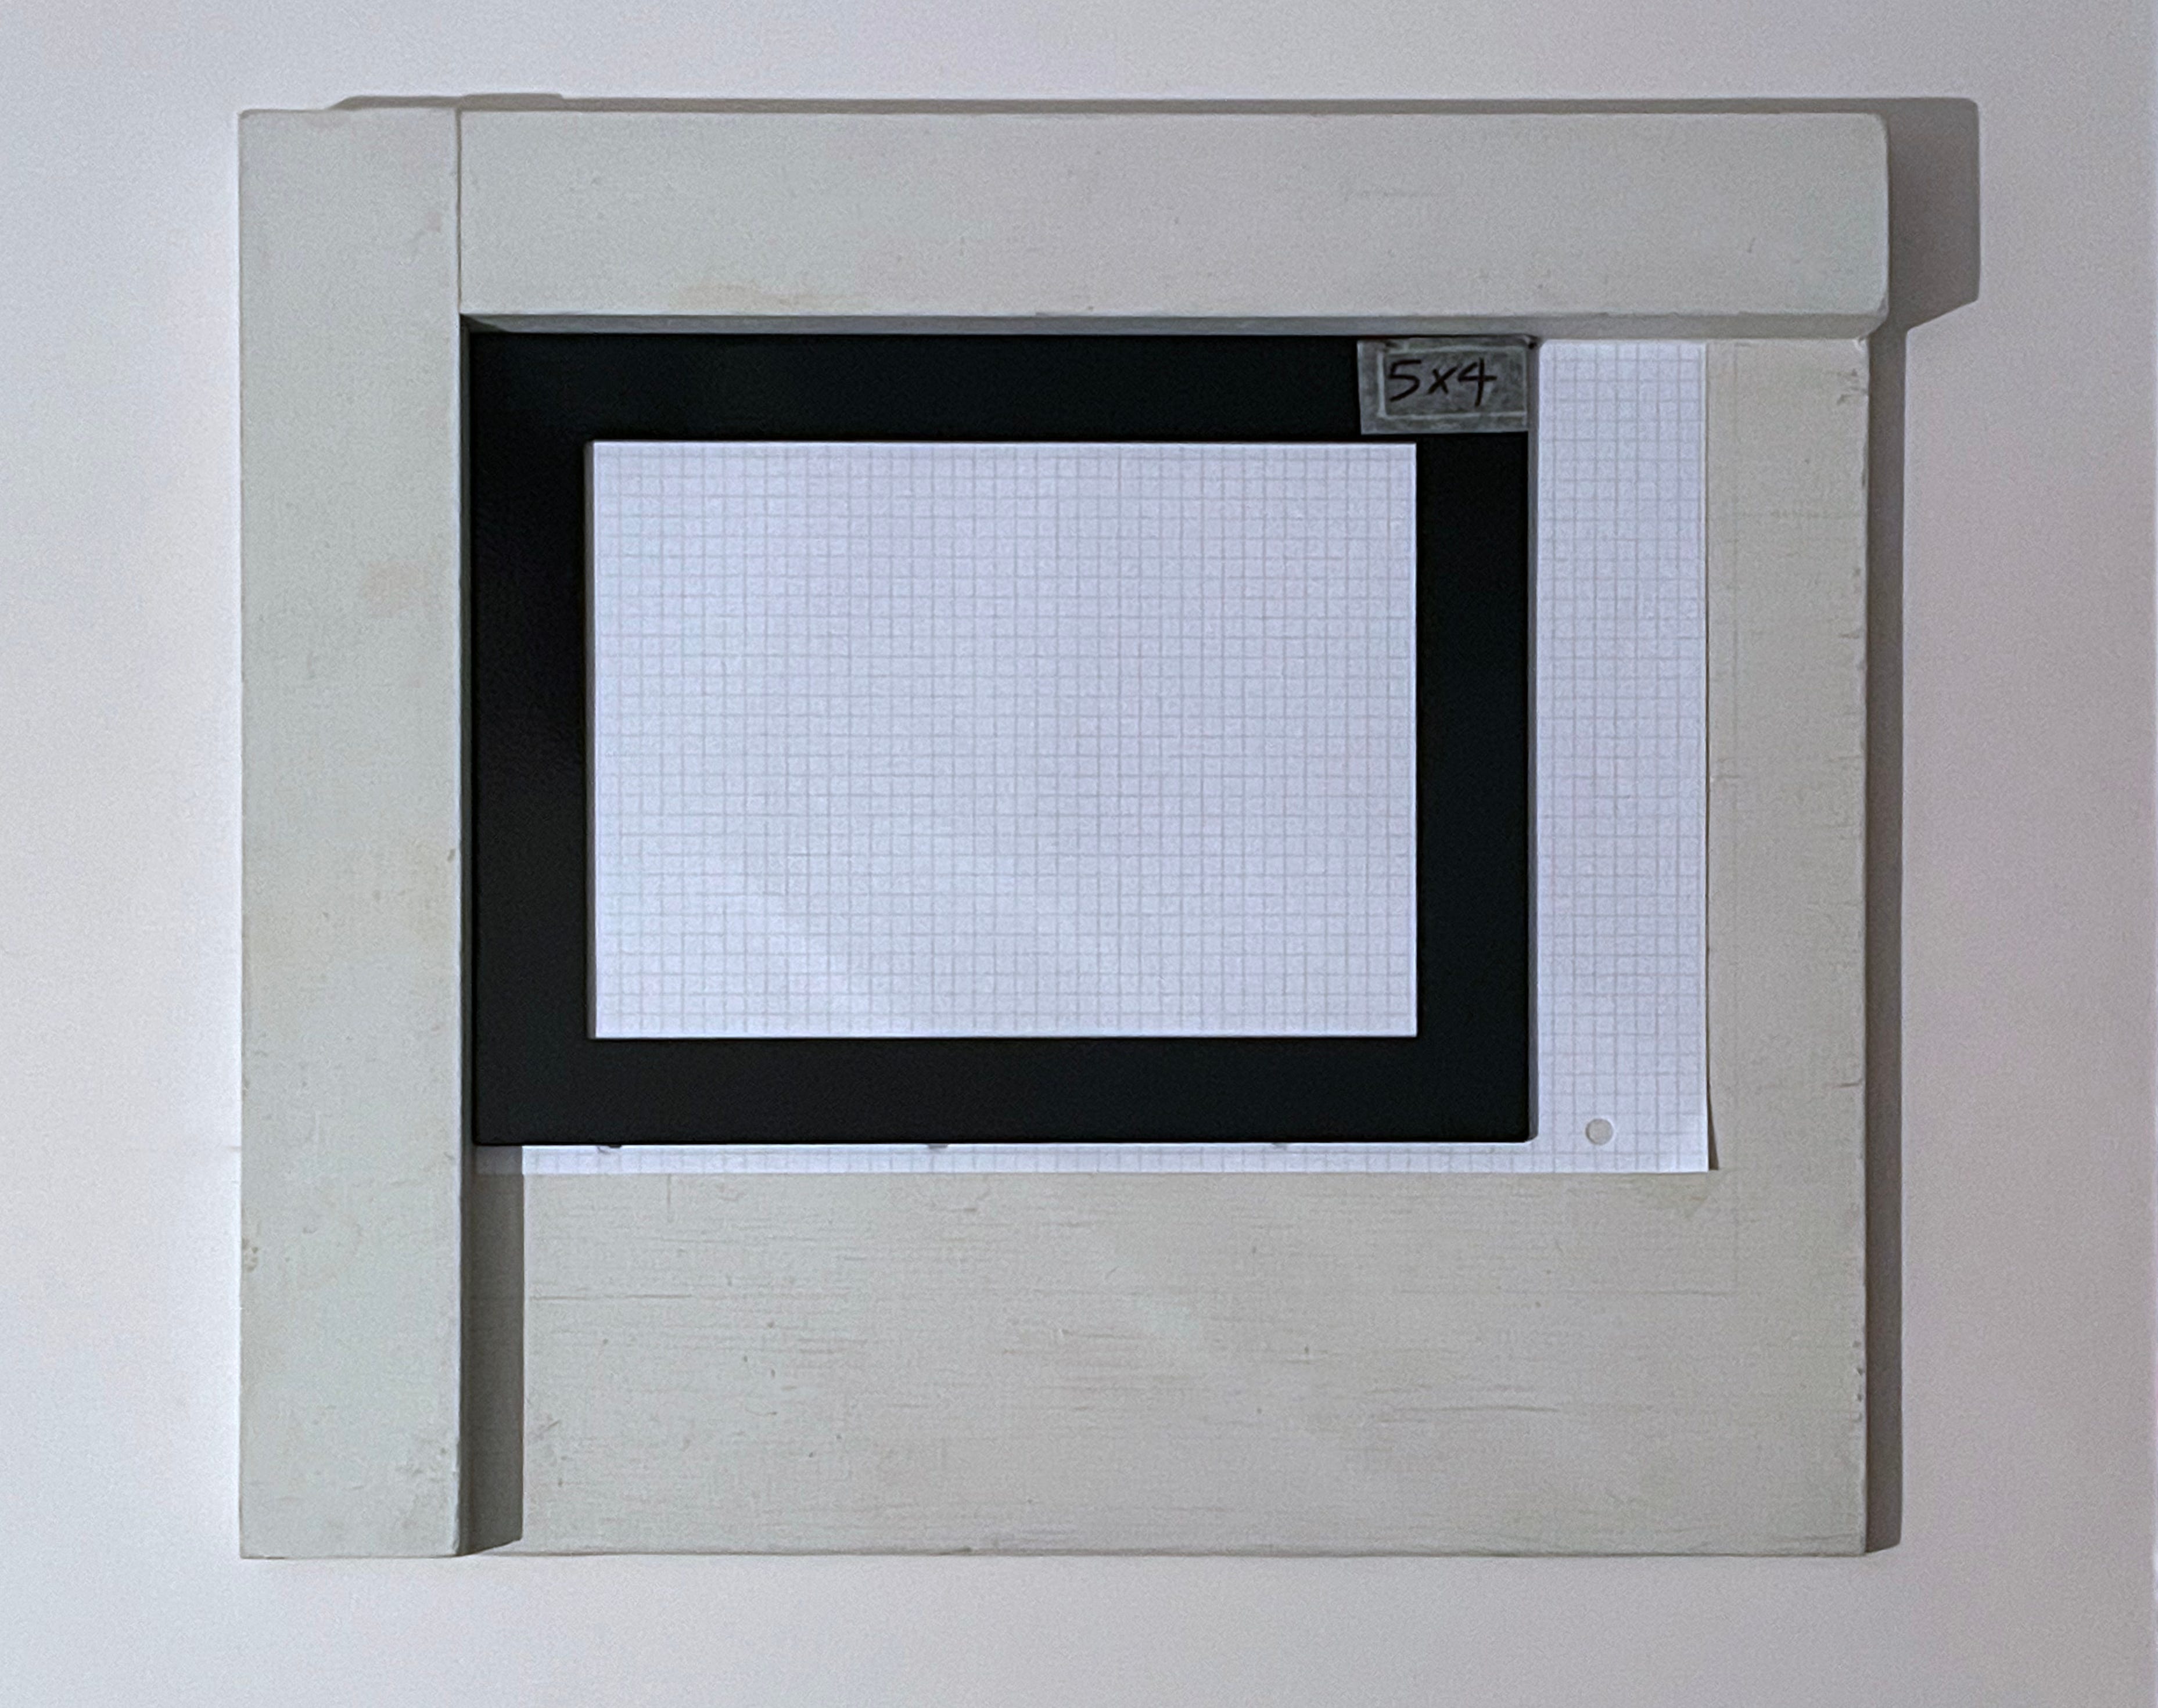
I have the steel sheets cut for 35mm format, 6x6 square, 6x7 format and 5x4 format. I can hang these on a nail on the wall, saving space and the prints made with them are perfectly proportioned every time. I also have a consistency throughout my portfolio and if I need to get some framed up, the framer only needs to measure one of them, then cut the same size mount for all.
Timers and timing.
Many people use darkroom timers and set them to give a measured amount of light. This is very handy for final print exposures, especially if you are easily distracted by talking to other people or you have music playing. When it comes to making test strips however, I don’t think they are a good thing. The light source in your enlarger might be an old incandescent tungsten bulb, a cold cathode flourescent tube, or an LED. All of these have different warm up times and doing short exposures with your timer can give inconsistent final print exposures.
The timer might be set for 2 seconds and give 2 accurate seconds of power to the lamp, but the delay in the lamp reaching its full brightness means less than 2 seconds of light reaches the paper. Making a test strip with many short exposures compounds this problem. If for instance I do ten exposures of 2 seconds each, then choose 18 seconds as my print exposure, the final print has only had one warm up time, but the test had nine! The final print is therefore darker than I intended.
There are two solutions to this; The first is to do your print exposure by firing off the timer nine times, the second method is to make your tests another way (this is my preferred method).
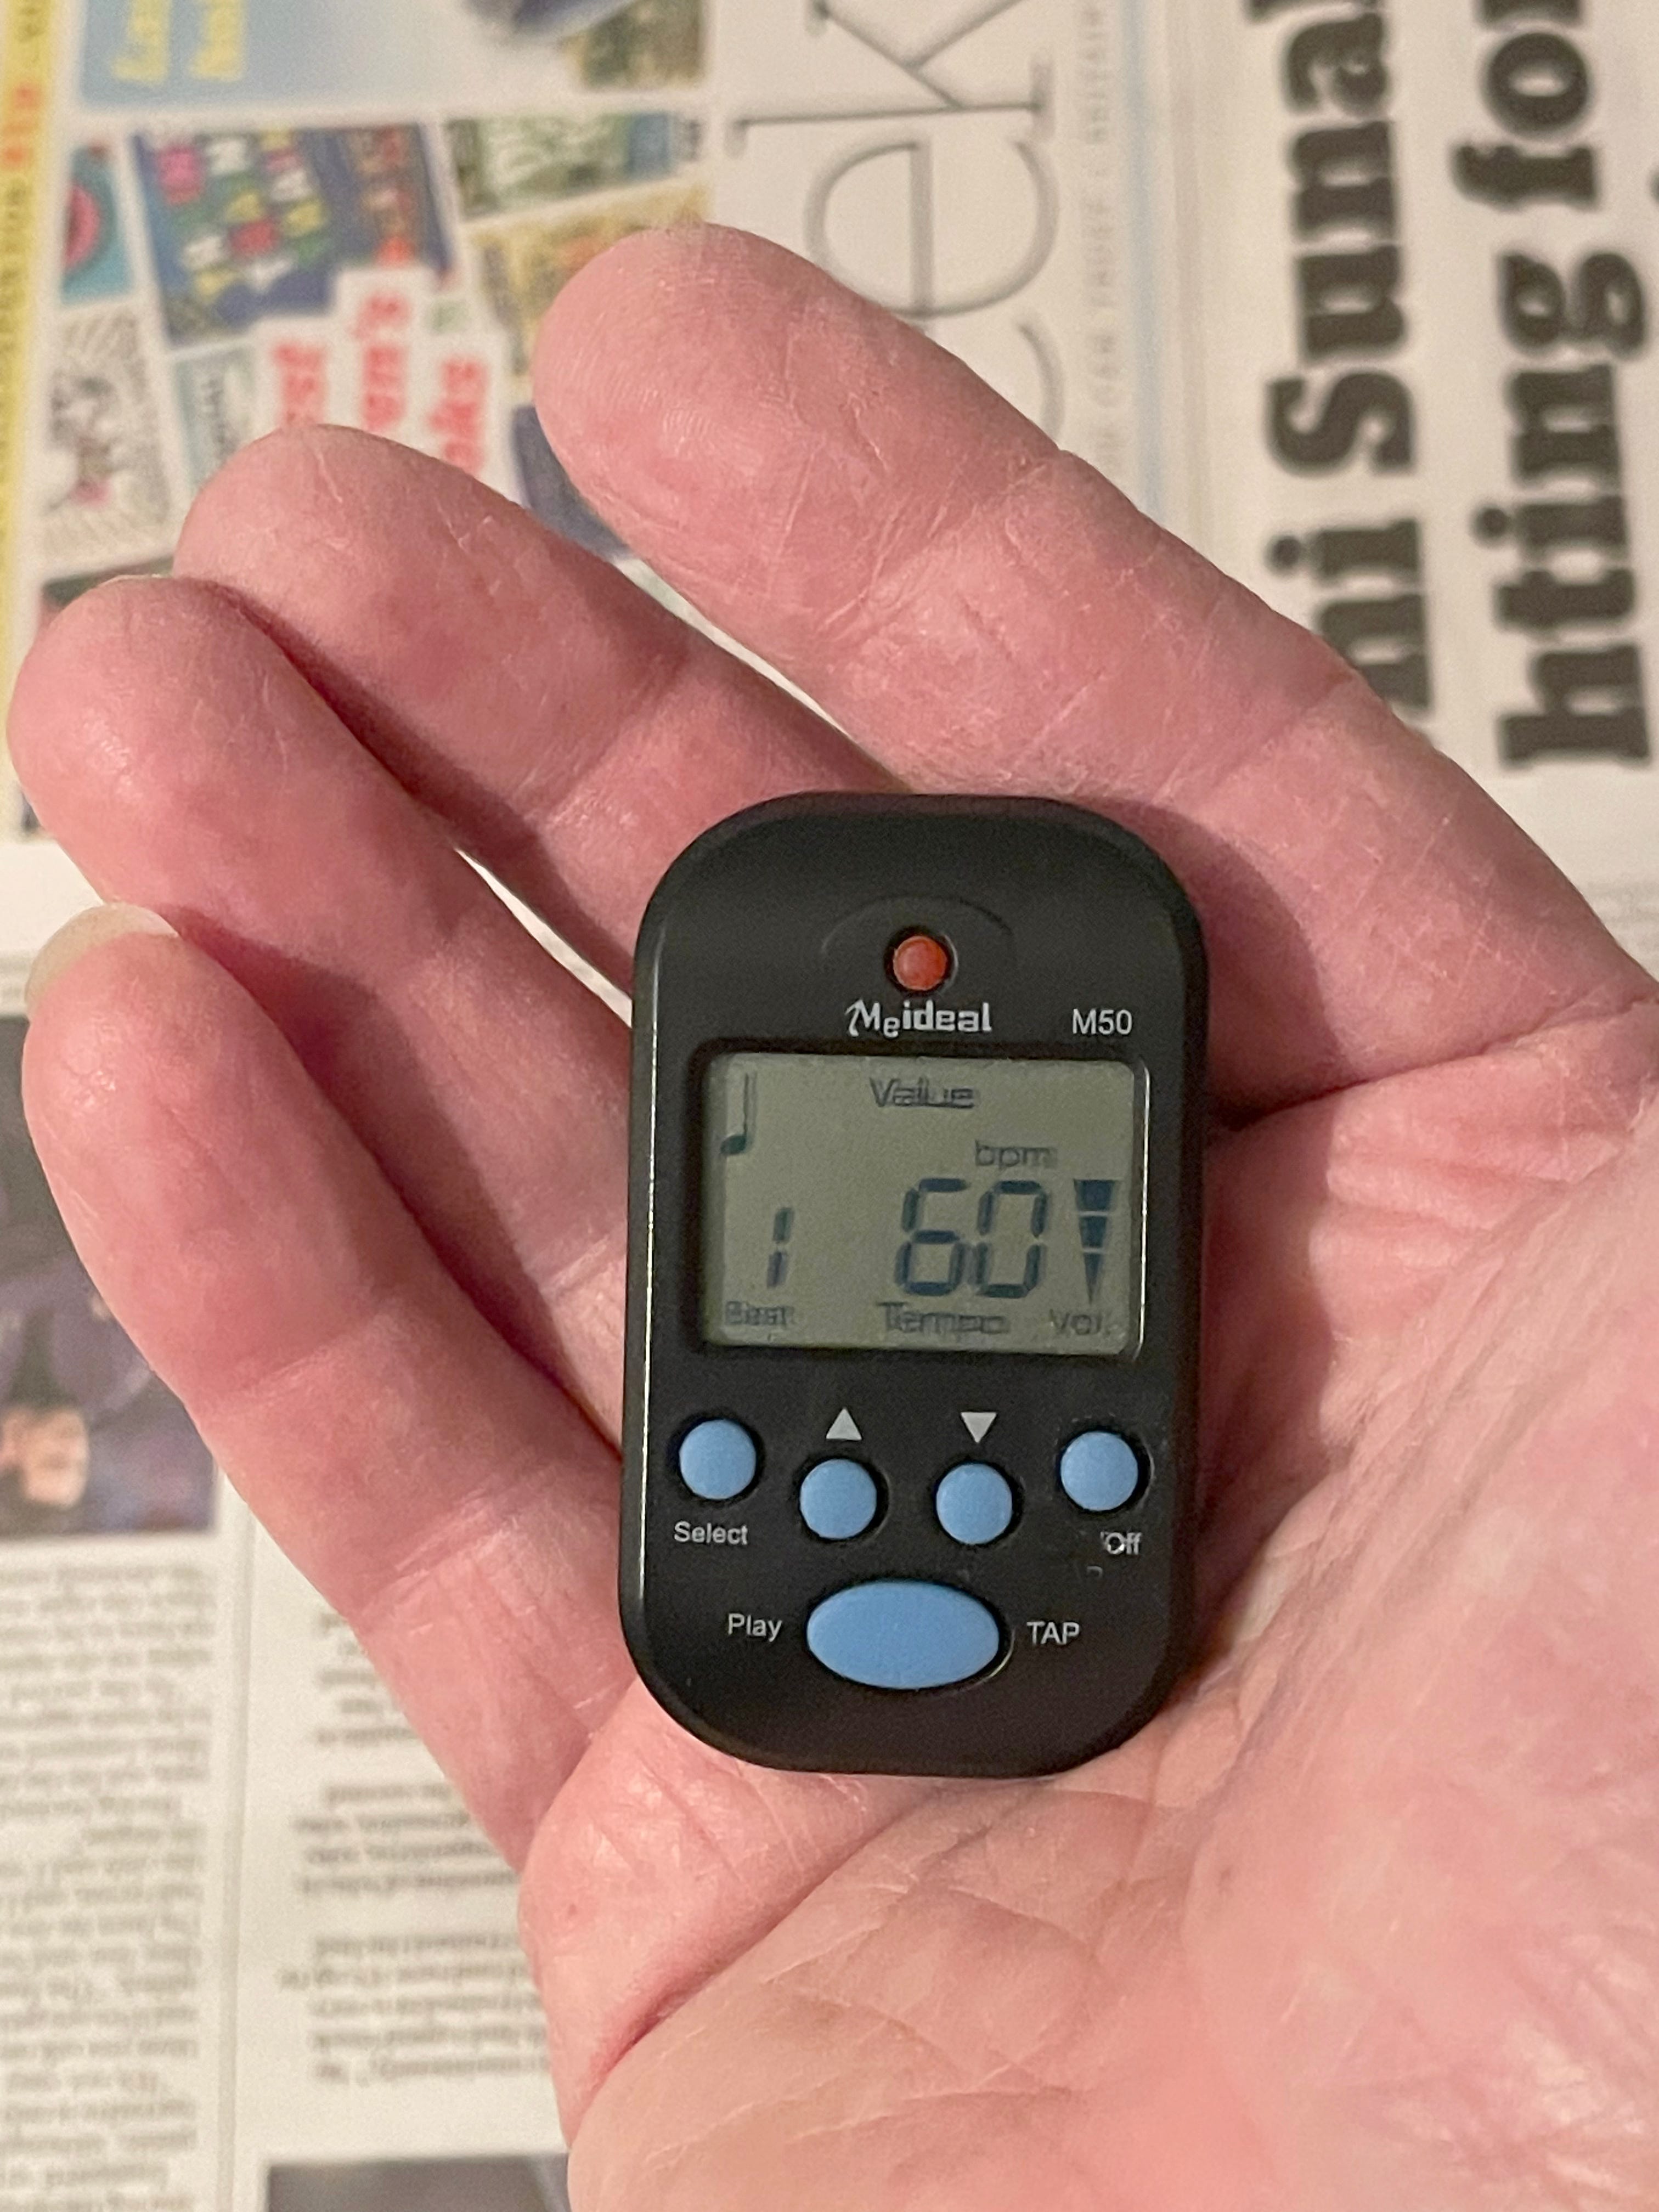
Put the strip of paper on the baseboard and cover it. Put the enlarger on and wait for the lamp to warm up (cold cathode enlargers take ten to fifteen minutes, so are best left on for consistency). Put a metronome on to tick every second, then uncover the test and count as you move the card in stages over the paper. It takes a bit of practice to consistently move the card exactly on the tick, but once you get it, you will always manage it instinctively.
Washing.
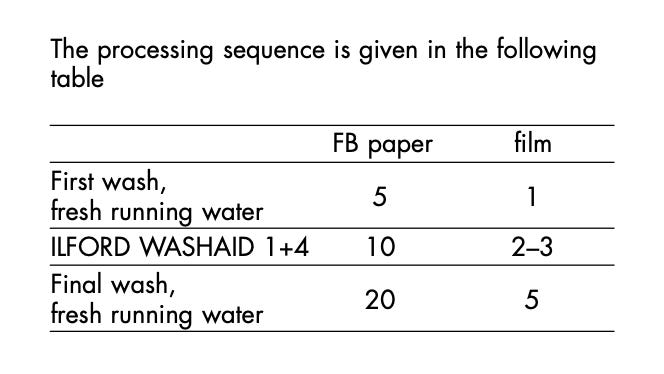
You don’t need any fancy equipment to wash prints, a large tray will do. When your prints are washing it is important to avoid them clinging to each other, as this traps the fix you are trying to wash out. I find that a large tray with a pipe entering from one corner will cause the water to circulate and move the prints round. I also don’t put them all in the same way up, as this encourages them to cling to each other. Alternate them; one face up, the next face down, the next face up and so on. This will cause them to slide over each other better. Change the water a few times too. Resin coated papers wash quickly, but Fibre Based papers need 30 minutes to an hour. Hypo clearing solution can reduce this time, here is the sequence for Ilford’s ‘Washaid’ (in minutes);
Drying.
Resin coated prints are easy, you can hang them up from one corner, or lay them on a sloping mesh screen and they will be dry quite quickly. There are a number of ways to dry Fibre Based prints though, and people have individual preferences. I just hang my 10x8 prints from one corner and leave them overnight. This means they are a bit curly the next day. There are two schools of thought on combatting curl with Fibre Based papers, one is to hang them up in pairs, back to back, pegged at the top and bottom corners. A method I don’t like because it makes the prints cockled rather than gently curled. The second is to lay the print on a sheet of glass when wet, then stick it all the way round with gummed tape. The print is cut from the tape when dry. This will produce flat prints, but you have to leave a bigger border to allow for the waste.
Flattening.
I take my gently curled prints and place them on a flat surface, face to face and back to back. Then I put some big books on top. After a week the prints are fine. If all of the prints face the same way, the combined curl becomes much stronger and is harder to flatten.
Food and drink.
These are a definite NO. Food is not a good idea near negatives and you will most likely have chemicals on your hands. Liquids can easily be confused in the dark and you might take a swig of something very dangerous.
Stray light.
Phones light up at the wrong time and paper can be ruined easily. Put your phone in your bag, or drawer and don’t use it till all light sensitive papers or films are stored away. The same goes for Apple watches, Fitbits etc.
Enlarger.
Your enlarger should be light tight, capable of holding the negative flat, and have even illumination on the baseboard.
If your negative is not held flat, the print will not be sharp over the full area. The frames at the end of a strip of 35mm are the tricky ones, because the neg carrier can’t get a tight grip all the way round.
Check the illumination of your enlarger by putting it on without a negative in and looking at the projected white area. You may see that there is a difference between the light coverage when the lens is stopped down a bit. I can see on mine that the centre and edge are not the same until I have stopped down two clicks.
Notes.
Have a notebook and pen to hand and write down what you have done, especially if your paper type has changed, or you are trying something new. If you are using different films and developers, write the details of your film, developer, temperature and processing time on your negative filing pages as well as your notebook, these are a very quick reference for the next time you use these materials.
Conclusion.
I think I have covered everything here, but please let me know if I have missed anything out, or you have had consistent problems in any particular area.
If you find my articles interesting or useful, please spread the word to anyone you can think of who would be interested.
If you have enjoyed this post and the information here and elsewhere on my Substack and you would like to support me, you can subscribe or just buy me a coffee at Ko-fi.com/andrewsandersonphotography You can send as little as £3.00, or more if you are feeling generous. This money goes towards materials used for the tests and printing for these articles. Alternatively you can be a paid subscriber.
Thank you for reading, please let me know your thoughts.
Andrew Sanderson September 2025
Hail to you and these amazing instructional tips, Andrew! I hope that the younger film community finds you and laps them up. I was taught by a VERY strict teacher and the rules are anchored in me forever. She always said, “make it a habit and never deviate from it”. That has helped me enormously.
“…newspapers are always laid down so that the writing is upside down, this is to stop me being distracted…” So true! I was reading one lining my workbench this morning, even though it was months old!