Liquid Sunshine
Rescuing highlights on a dark print.

As a darkroom printer, I have many bottles of pre mixed chemicals such as developers, stop bath, hypo clearing agent, fix etc, but I also have raw chemicals for mixing up special brews for a particular purpose. One of the chemicals that has a number of useful functions is Potassium Ferricyanide. This chemical is used in the making of Cyanotypes, and for a pre bleach when Sepia toning. Historically It was used in the colour processing industry to remove metallic silver and it is an ingredient in glucose meters used by diabetics.
Do you know it is also used as an anti caking agent in table salt? They call it Potassium Hexacyanoferrate, but it’s the same thing. Despite the alarming ‘cyanide’ in its name, it only releases Hydrogen Cyanide gas when mixed with strong acids.
I mainly use it for sepia toning, as it is the main ingredient in the pre bleach for sepia toning (for those of you not familiar with sepia toning, the sequence is: A print is immersed in a ferricyanide/bromide bleach bath for a minute or two, washed, then immersed in the toning solution. The bleached image then comes back brown. This is followed by another wash and then the print is dried).
What Potassium Ferricyanide is also useful for though, is putting a bit of sparkle into a dark print. If it is used to bleach away the highlights, the effect can make the image look more ’sunny’. It is an old technique, not used much these days, but it can be very useful. A solution of Ferricyanide and fix is known as Farmers Reducer, or as Liquid Sunshine.
Last year I had a student in the darkroom and we were trying to make a print from a slightly under exposed negative. I went for a higher grade of contrast, confident that the image would be rescued and have a more pleasing tonality, but the test strip looked a little flat. At all exposures, the highlights were still grey, there was no proper white in there where there should have been.
I explained to the student that we should choose the exposure where the black parts were correct, a little bit heavier than perhaps the lighter areas on the test strip would suggest. This would give us full blacks on the print, and then we could use sepia bleach to bring the brightness back in the highlights.
We made a full print of the image at the chosen time on the test strip, and when it came up, when we looked at it in the fix, it definitely looked heavy and overprinted and the highlights were grey. There wasn’t really a white in it. If you didn’t have a bit of darkroom experience you might have thought it was a bit of a failure.
I began by fixing the print properly, gave it about 10 minutes in running water, put it in hypo clear for 4 minutes and gave it another 10 minute wash. This ensured that there was no patchy areas of residual fix in the print. This can happen if you have a number of prints in the wash and you don’t move them around. Some areas get washed better than others and residual fix will give patchy results when toning or bleaching.
I then placed it in a weak ferricyanide bleach (that’s Potassium Ferricyanide and Potassium Bromide) and within about 20 seconds the highlights started to bleach away in the image. I took it quickly out of the bleach, put it in a large volume of water and sloshed it around to remove as much of the ferricyanide bleach as possible. I tipped all of the water out of the tray and refilled it with fresh, keeping the print moving. The reason for working quickly is because the bleach soaks into the fibres of the print and can take the bleaching process too far if you don’t wash it quickly enough.
I kept the print in running water for ten minutes, changing the full tray for fresh water a couple of times to ensure that it was clean enough to go onto the next stage.
At this point I have three options;
1. If I put the print in fix, the bleaching effect will go a little bit further, but it will be permanent.
2. If I put the print in sepia toner, the bleached areas will come back as brown.
3. I can put it back in developer and bring it back to where it was. If you choose this option, use stop bath afterwards to neutralise the developer, but there is no need to fix again. Just give it a good wash.
I wanted to go with the second option because that gave me two other options; A fresh mixture of toner (Thiocarbamide and Sodium Hydroxide) would make the highlights go to a chocolate colour, but an older, more exhausted version would bring the highlights back as a sandy colour, which would be brighter and would suit the image better. I usually keep about three bottles of toner available, each with a different age and potency.
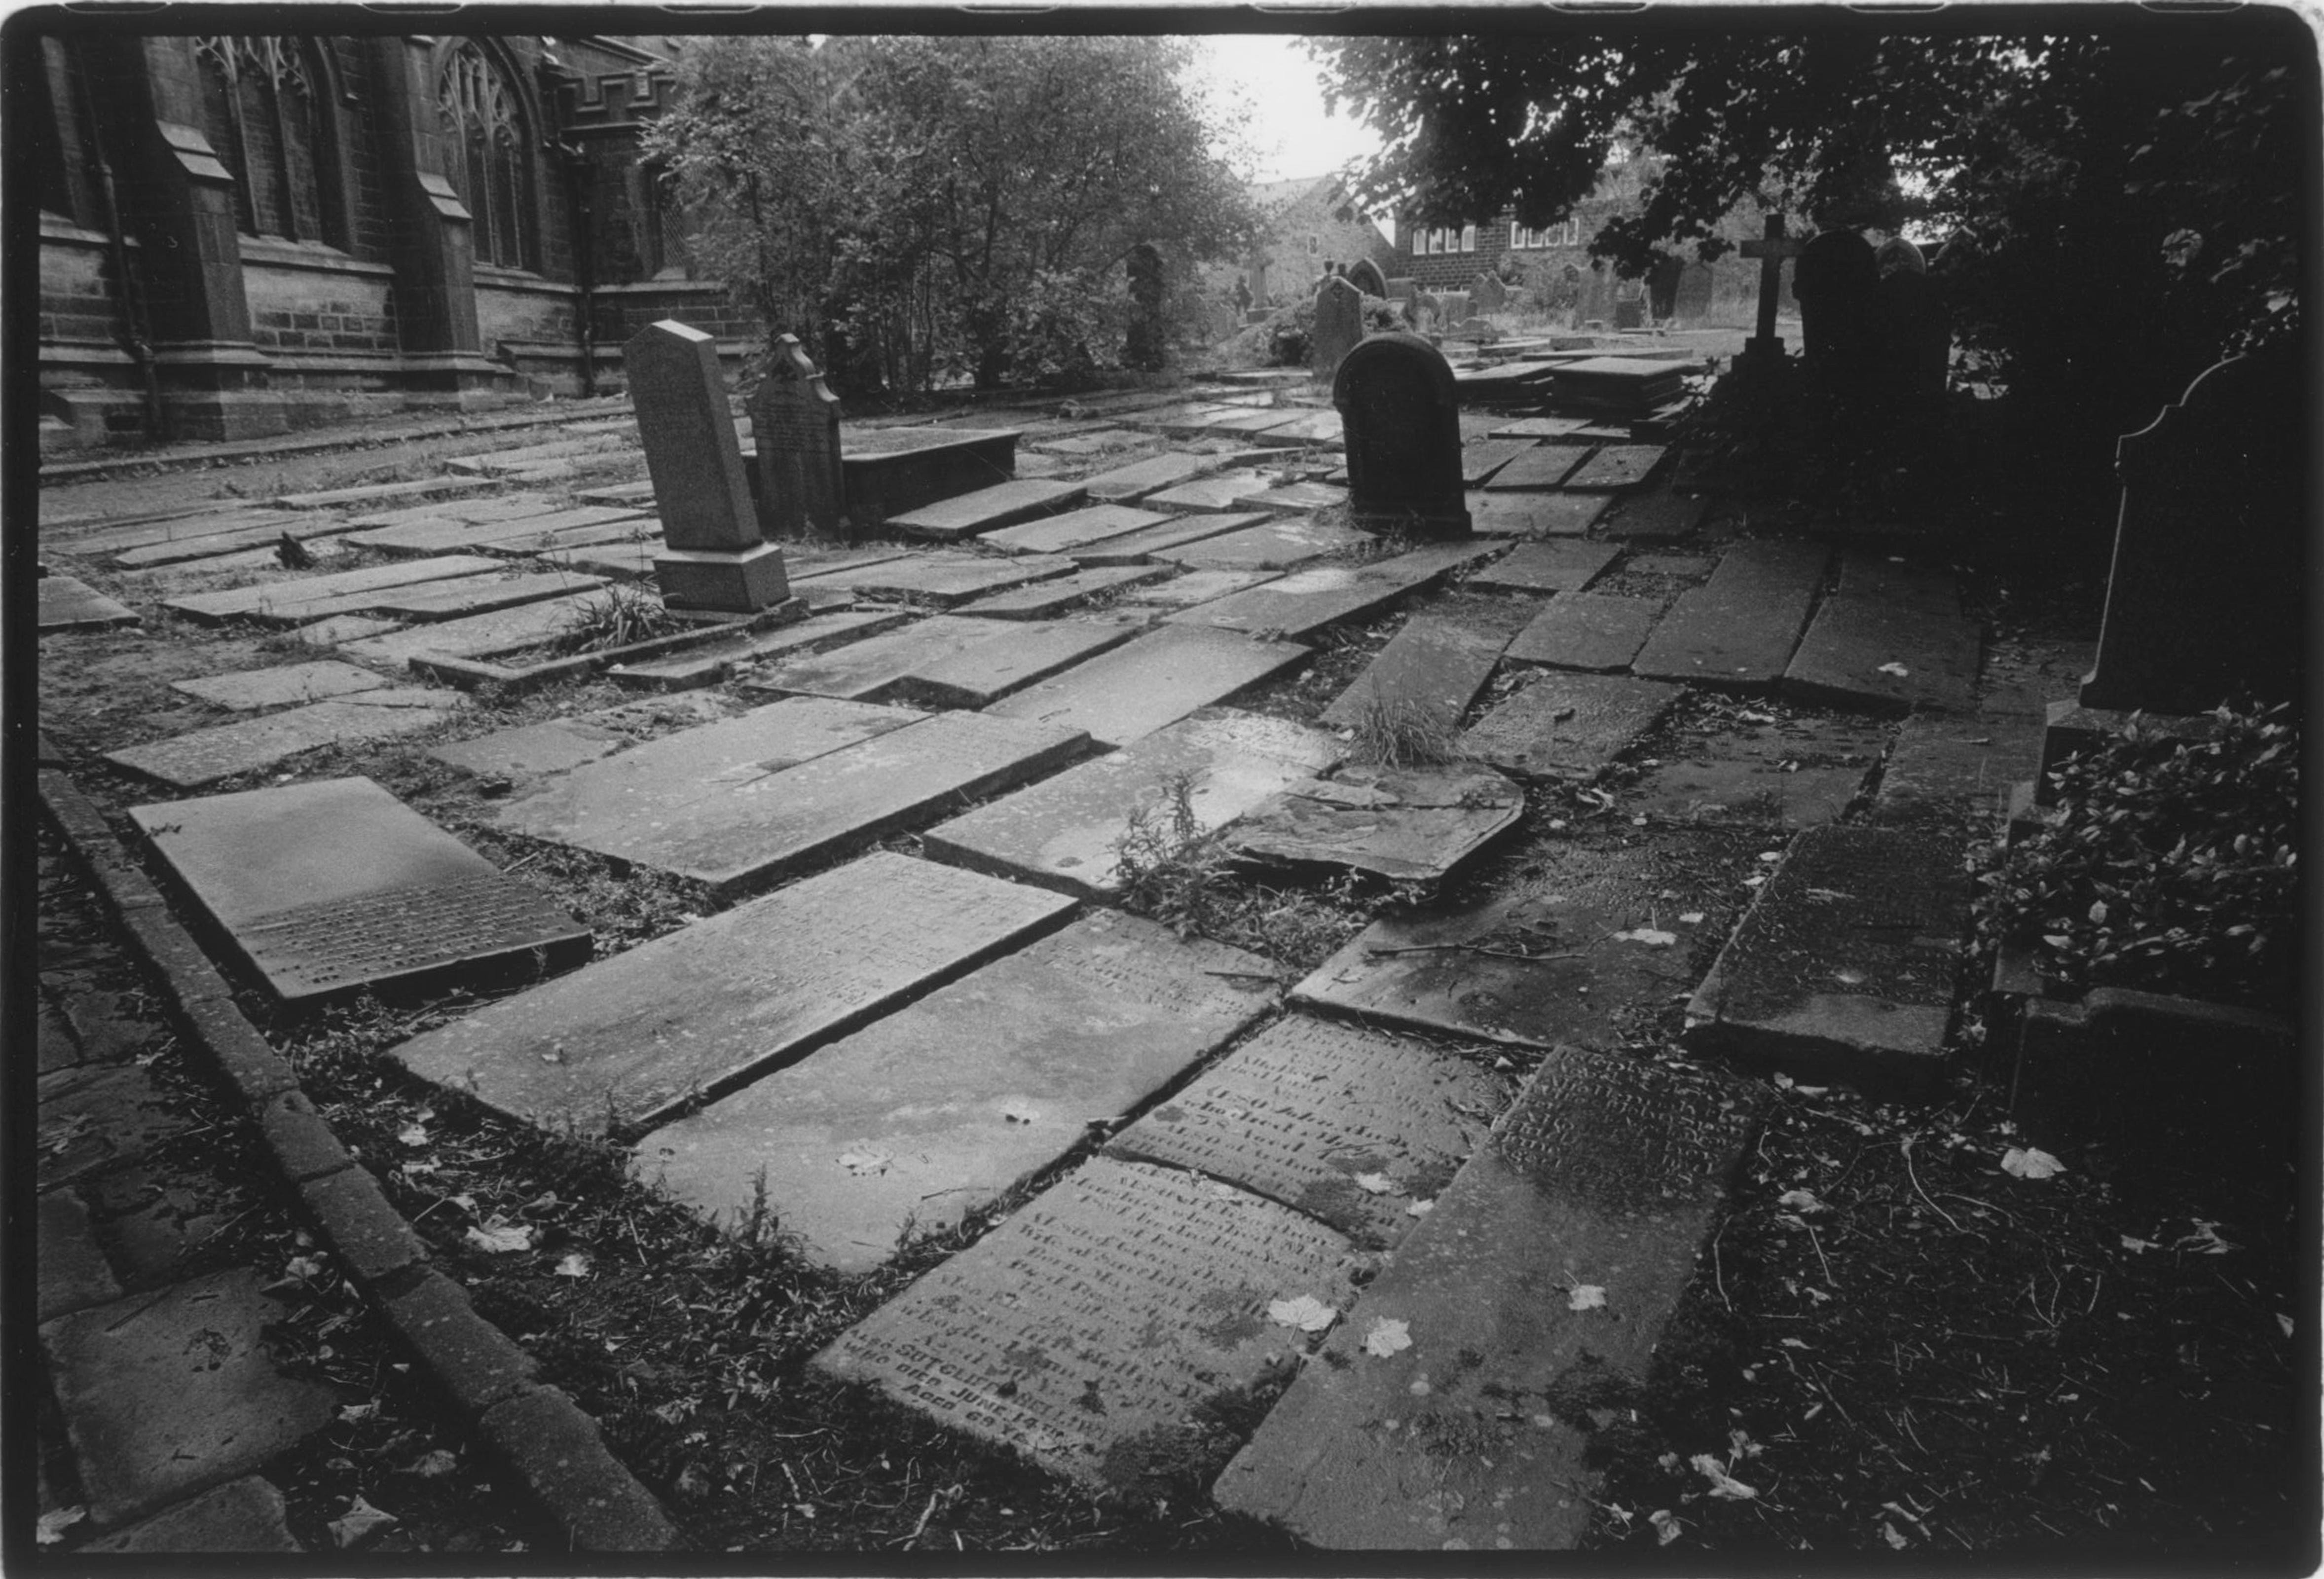
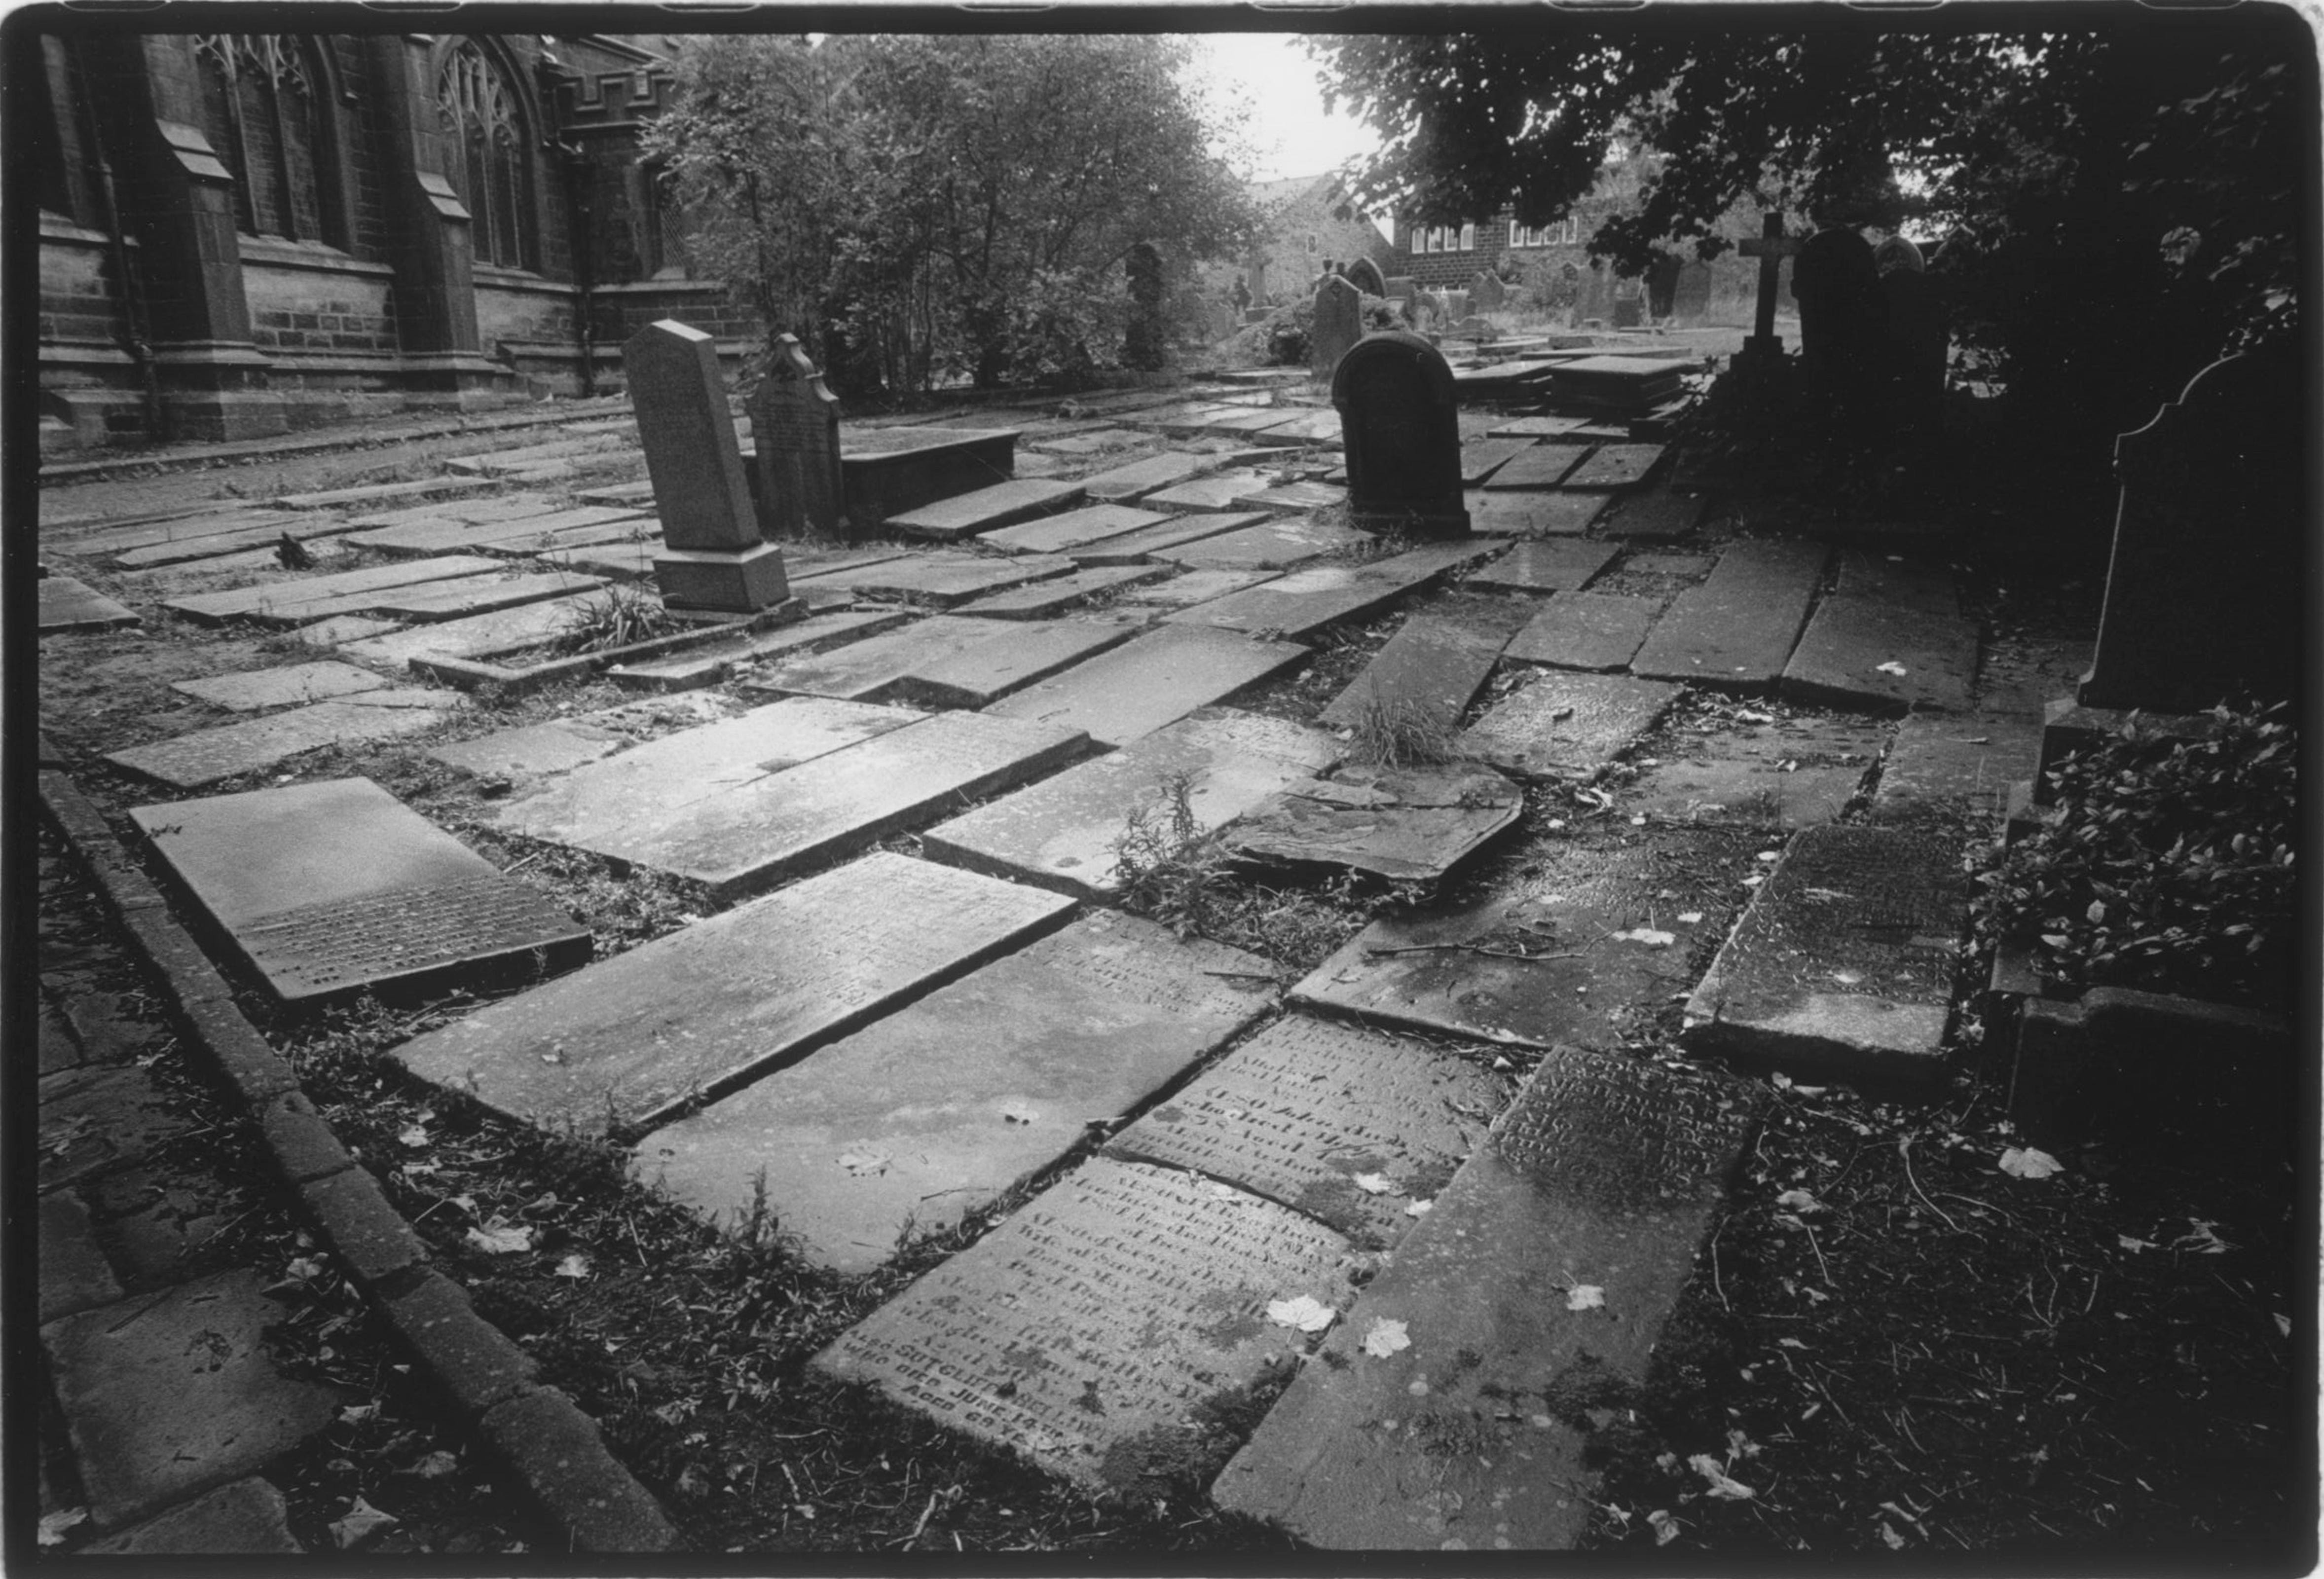
Once I had explained the options the decision was made to go for the semi exhausted toner and the tones came back a light, sandy colour. The print looked wonderful and the student was amazed. I don’t have that image here, but this print of mine was done the same way:
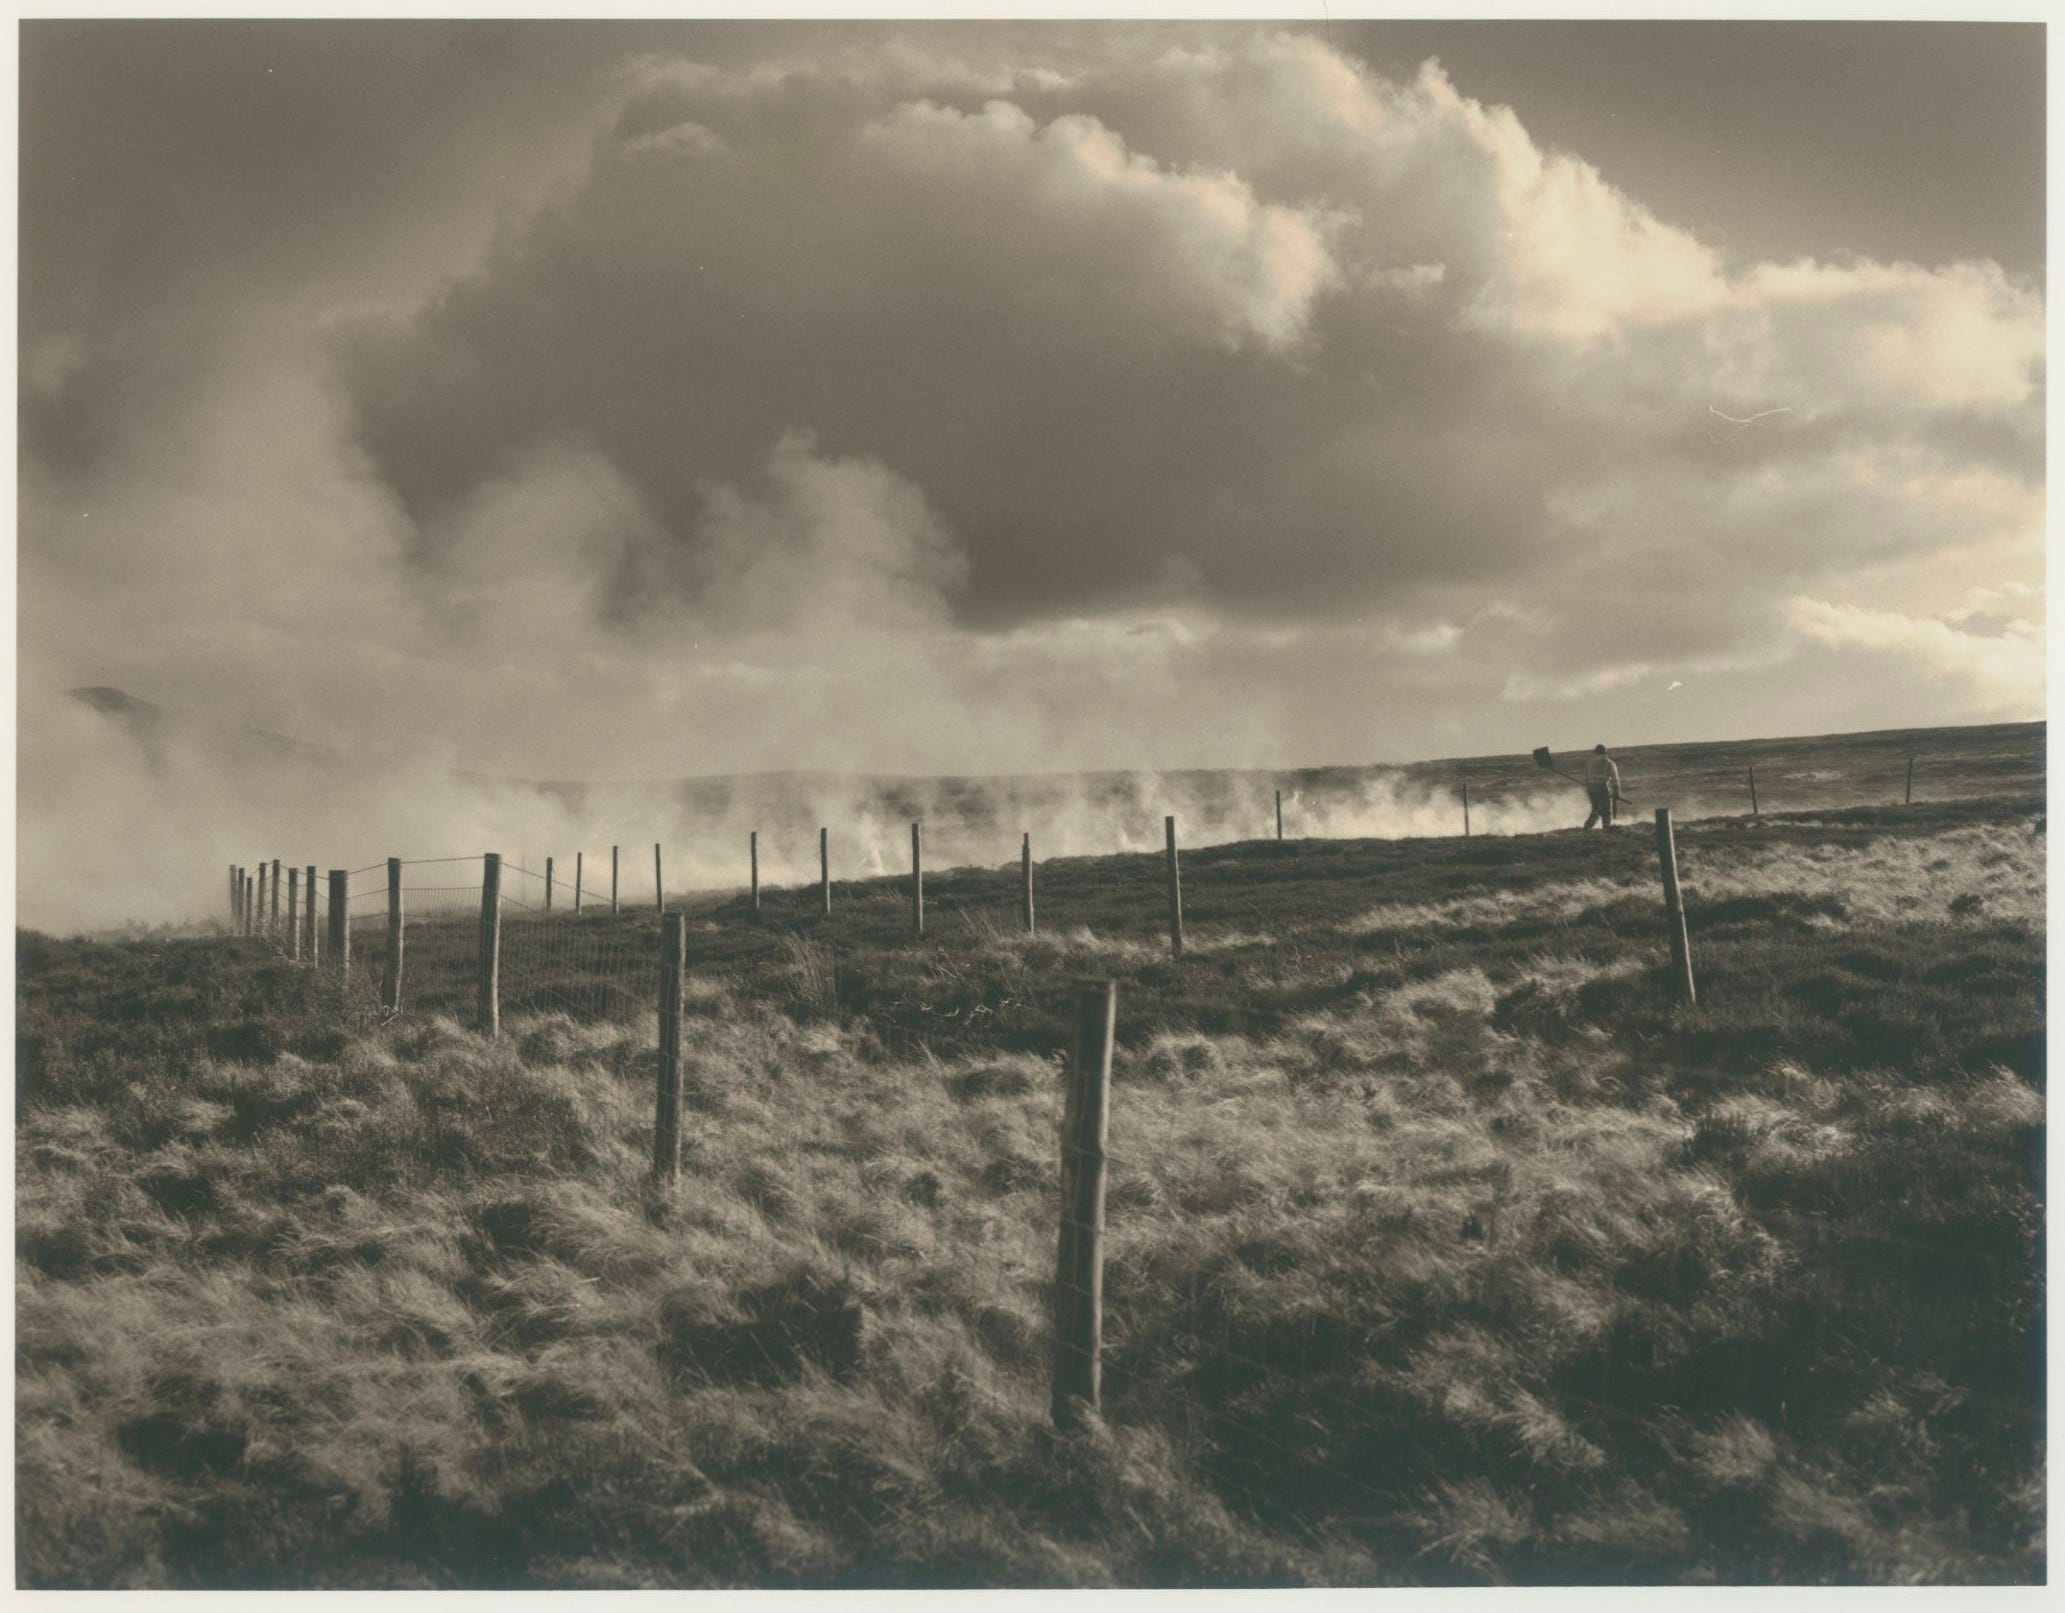
This is just one use of Potassium Ferricyanide as a print toner, but as I mentioned at the beginning it can also be used as a print brightener in conjunction with fix (rapid fix, or normal hypo, as long as there is no hardener added). When these two chemicals are used, the image will gradually bleach away beginning with the lightest tones on the print. Used with care it can make a dull print look bright and lively. It can also be painted on with a brush and used as a local bleach to brighten eyes, clouds or any dulled down highlight. It can be used all over the print to lift all highlights, or applied locally for an effect which has historically been referred to as ‘liquid sunshine”.
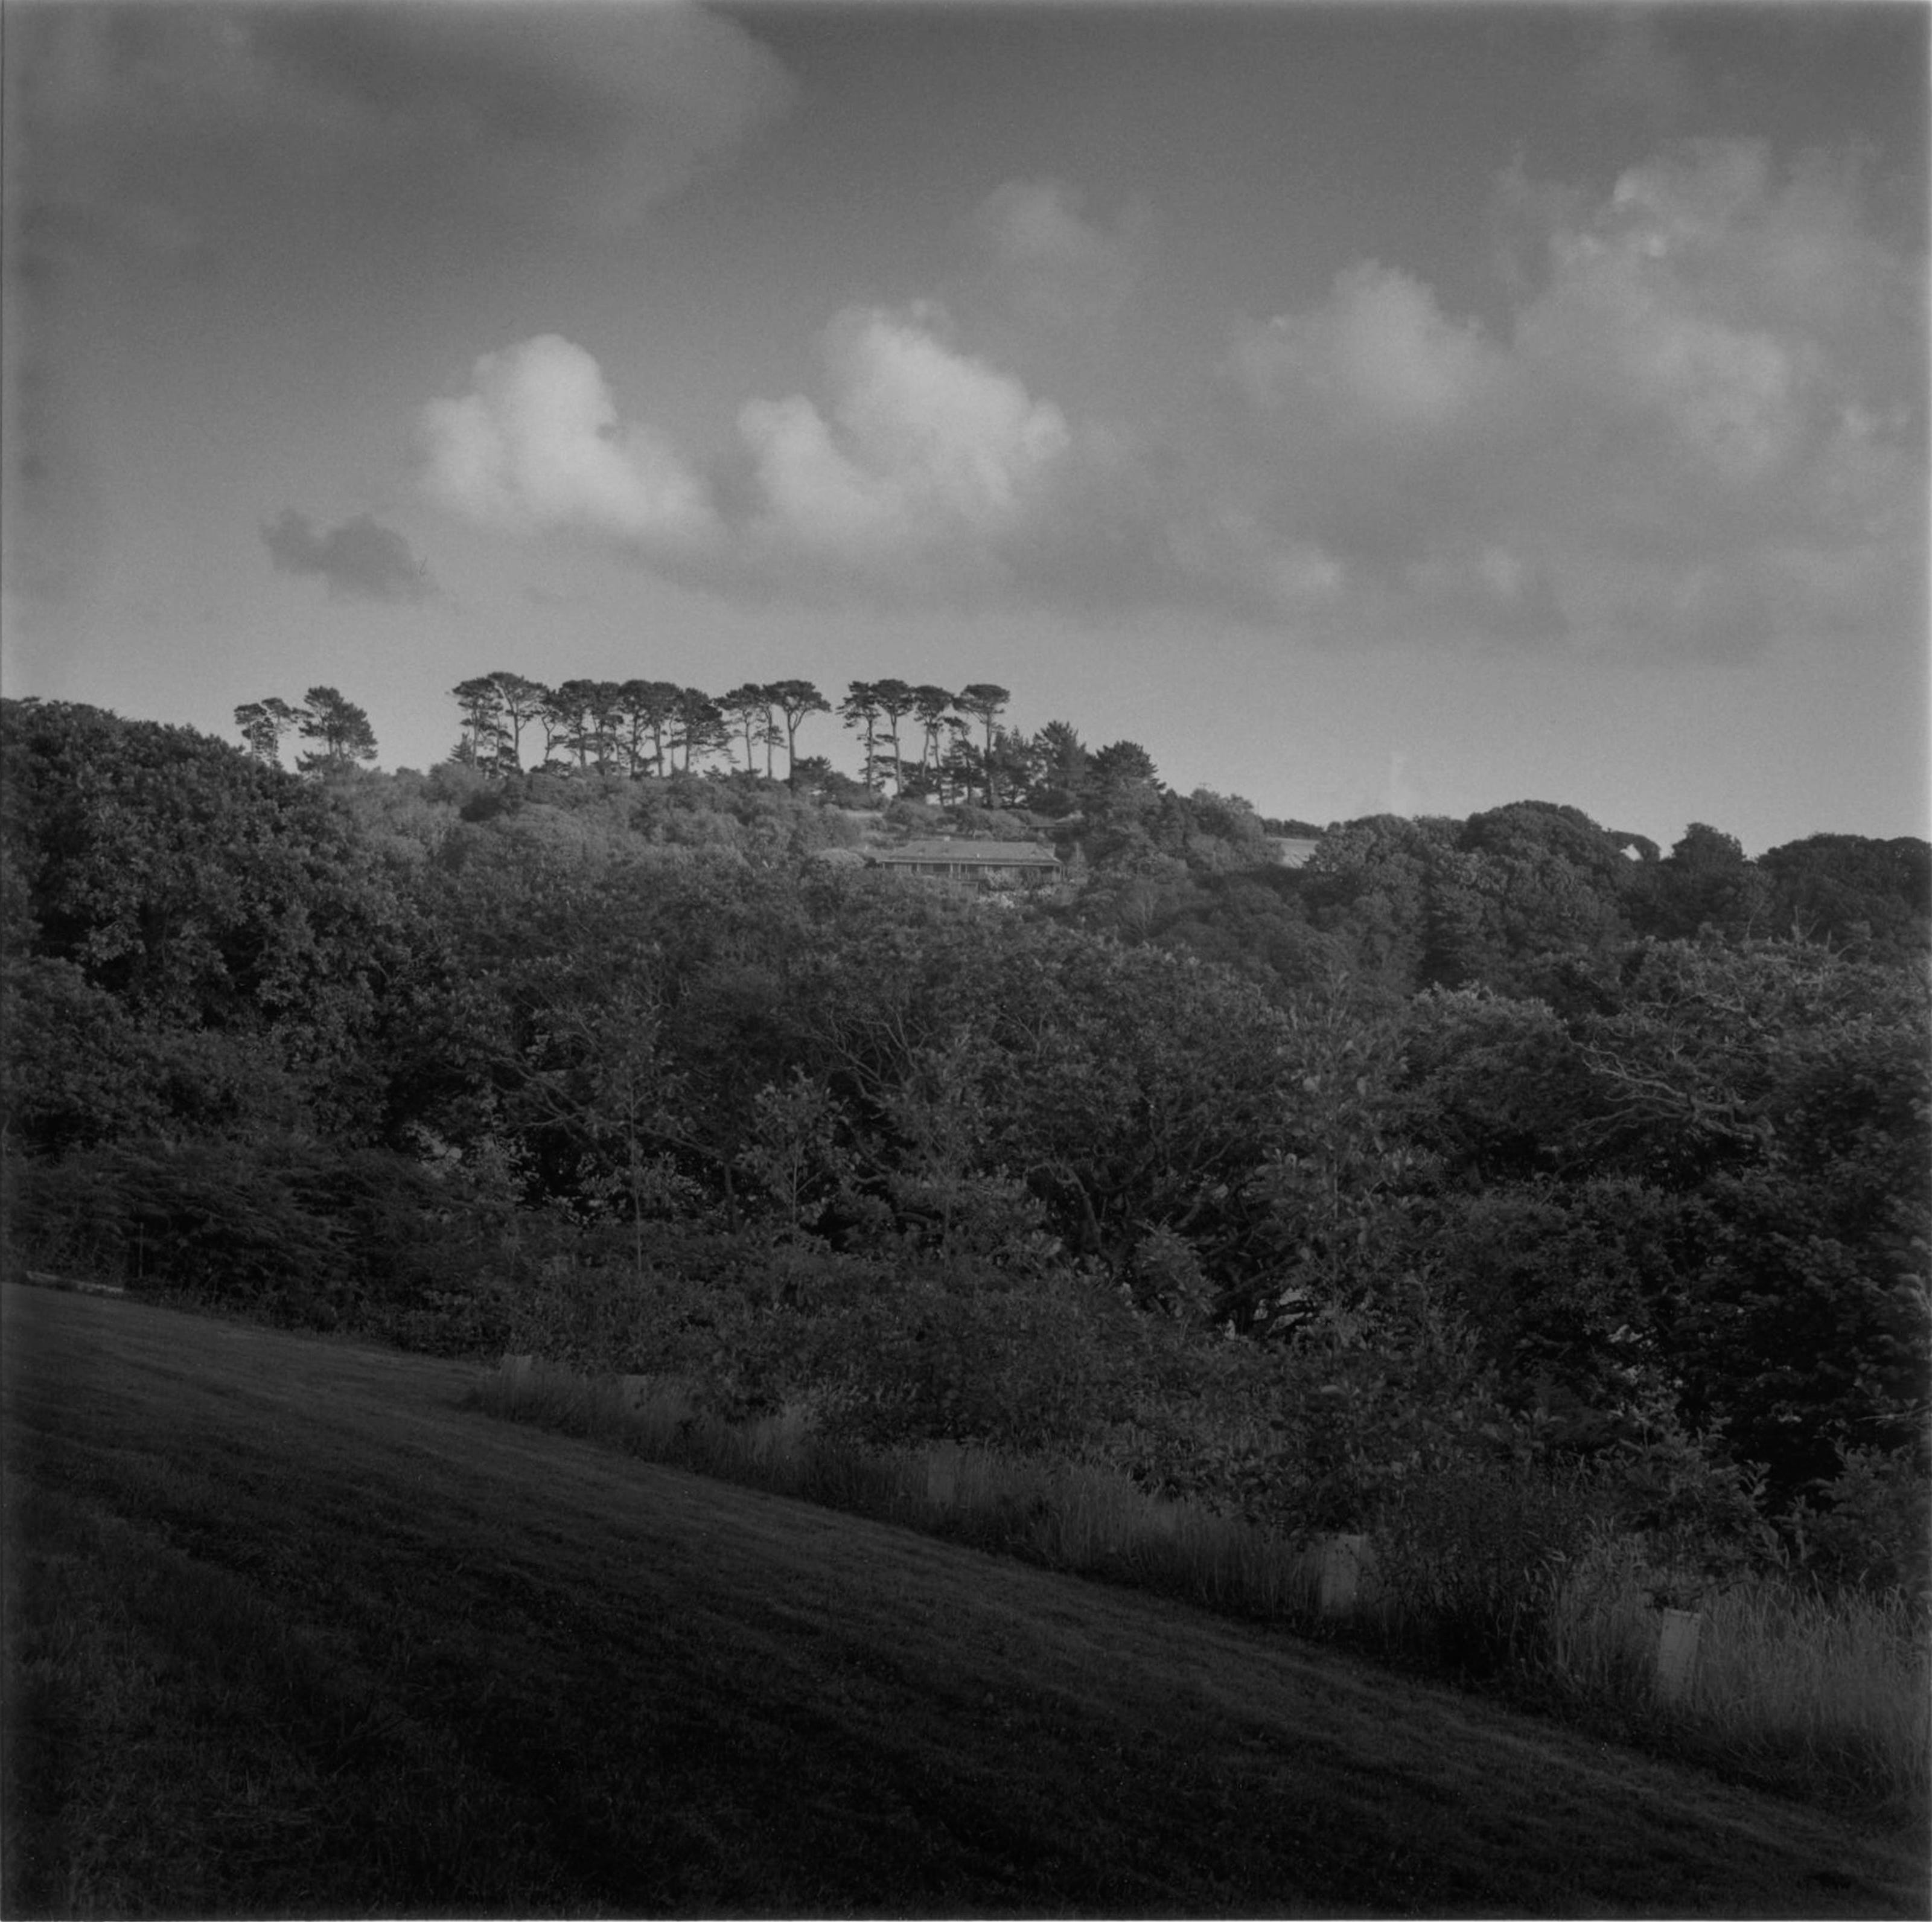
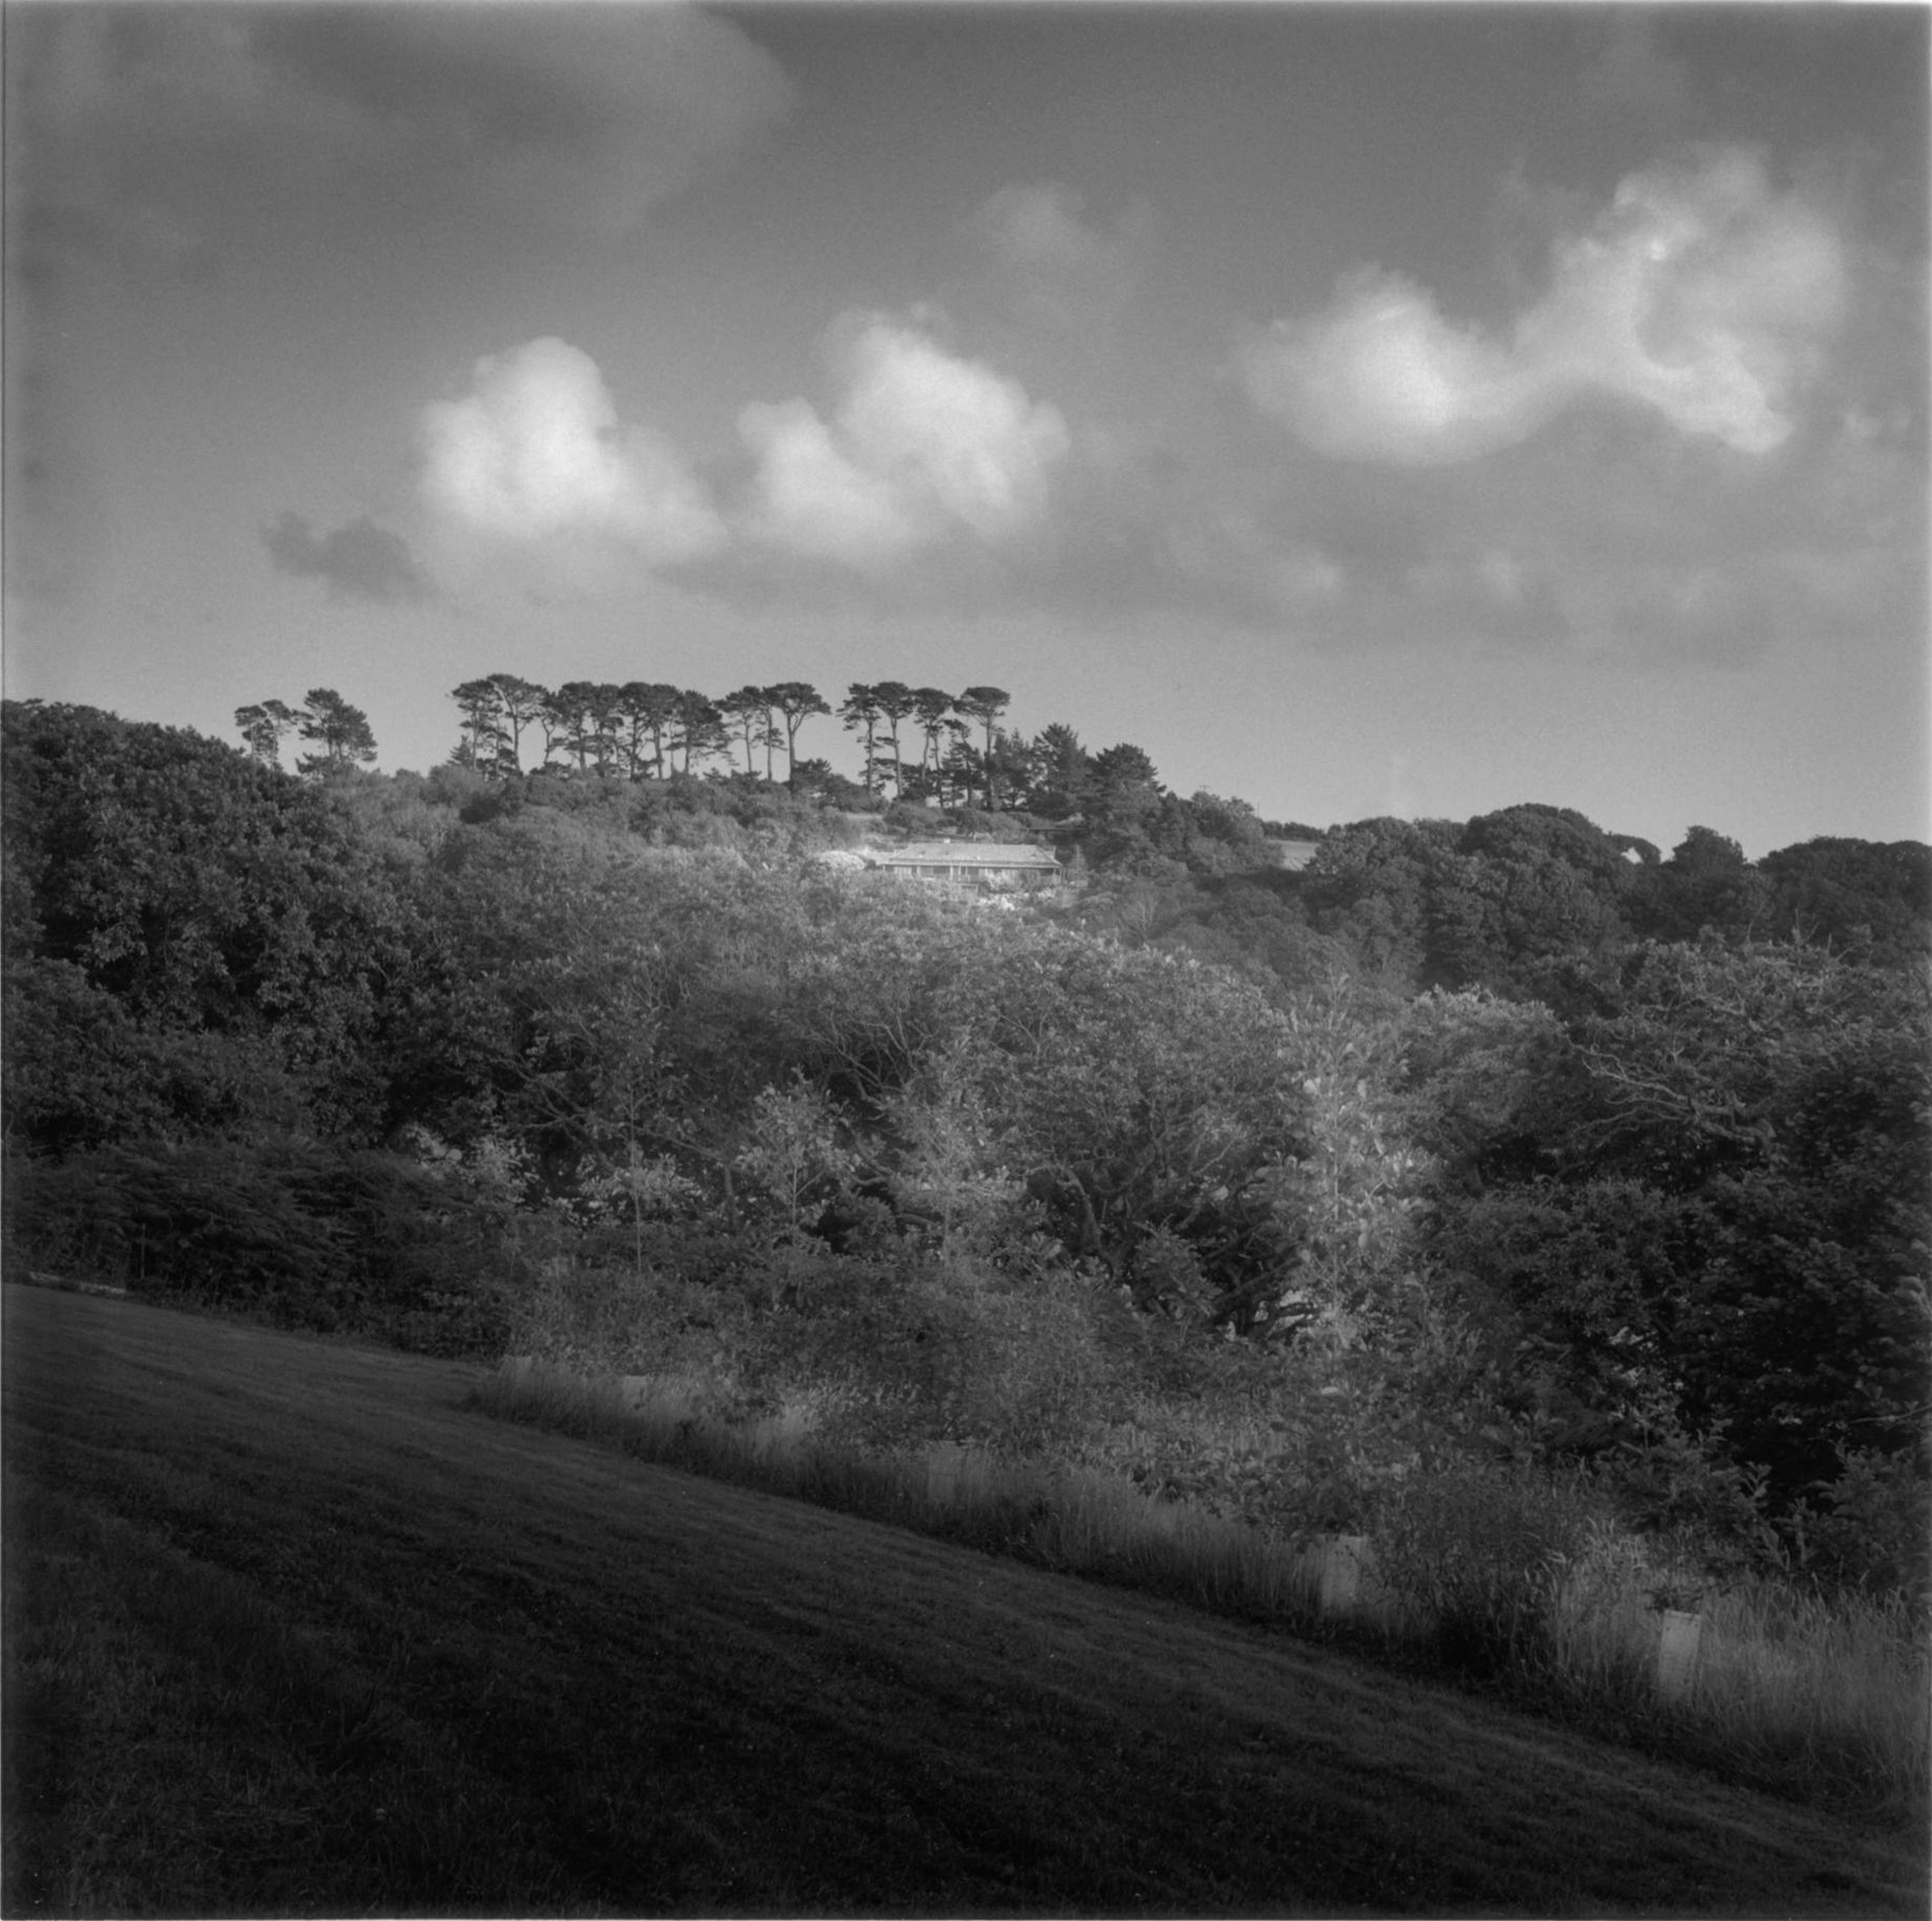
Here are two images that show how locally applied Farmers Reducer can lift highlights and look like sunshine. These are before and after on the same print:
For best effect use fresh developer, stop and fix. The bleaching chemicals can be made up and stored for a long time until needed, but they will exhaust in about fifteen to twenty minutes when mixed together as Farmers Reducer. There are two ways to use it, some printers like to mix the two, then observe the bleaching, removing the print as the correct highlight density is approached. The other method is to put the print in the ferricyanide bleach first and then transfer to the fix. The print can then go back into the ferricyanide if it needs to go further. This has the same effect, and the chemicals last a bit longer, but the bleaching effect is harder to judge.
It is important to note that the bleach is absorbed into the paper and carries on a little bit in the wash, so it is easy to go too far. So some anticipation is needed. Once the print has gone into the fix (after the ferricyanide) it is permanently bleached and it can’t be rescued. It is often recommended that two or three prints are made of the image before you begin, and then it isn’t a disaster if you don’t get it right first time.
It should be noted that a black and white print can take on a creamy mushroom colour in the bleached areas where it has been bleached. The more you bleach, the worse it is. You can see from some of my examples here that it can make quite a change. If you are going for a sunny look, then this can only help, but local bleaching must be done with care, or the colour difference can look out of place. Here you can see quite a colour difference because the print needed a lot of bleaching:
Once the desired effect has been achieved, the print must be given a thorough wash, you don’t want to leave those chemicals in the paper.
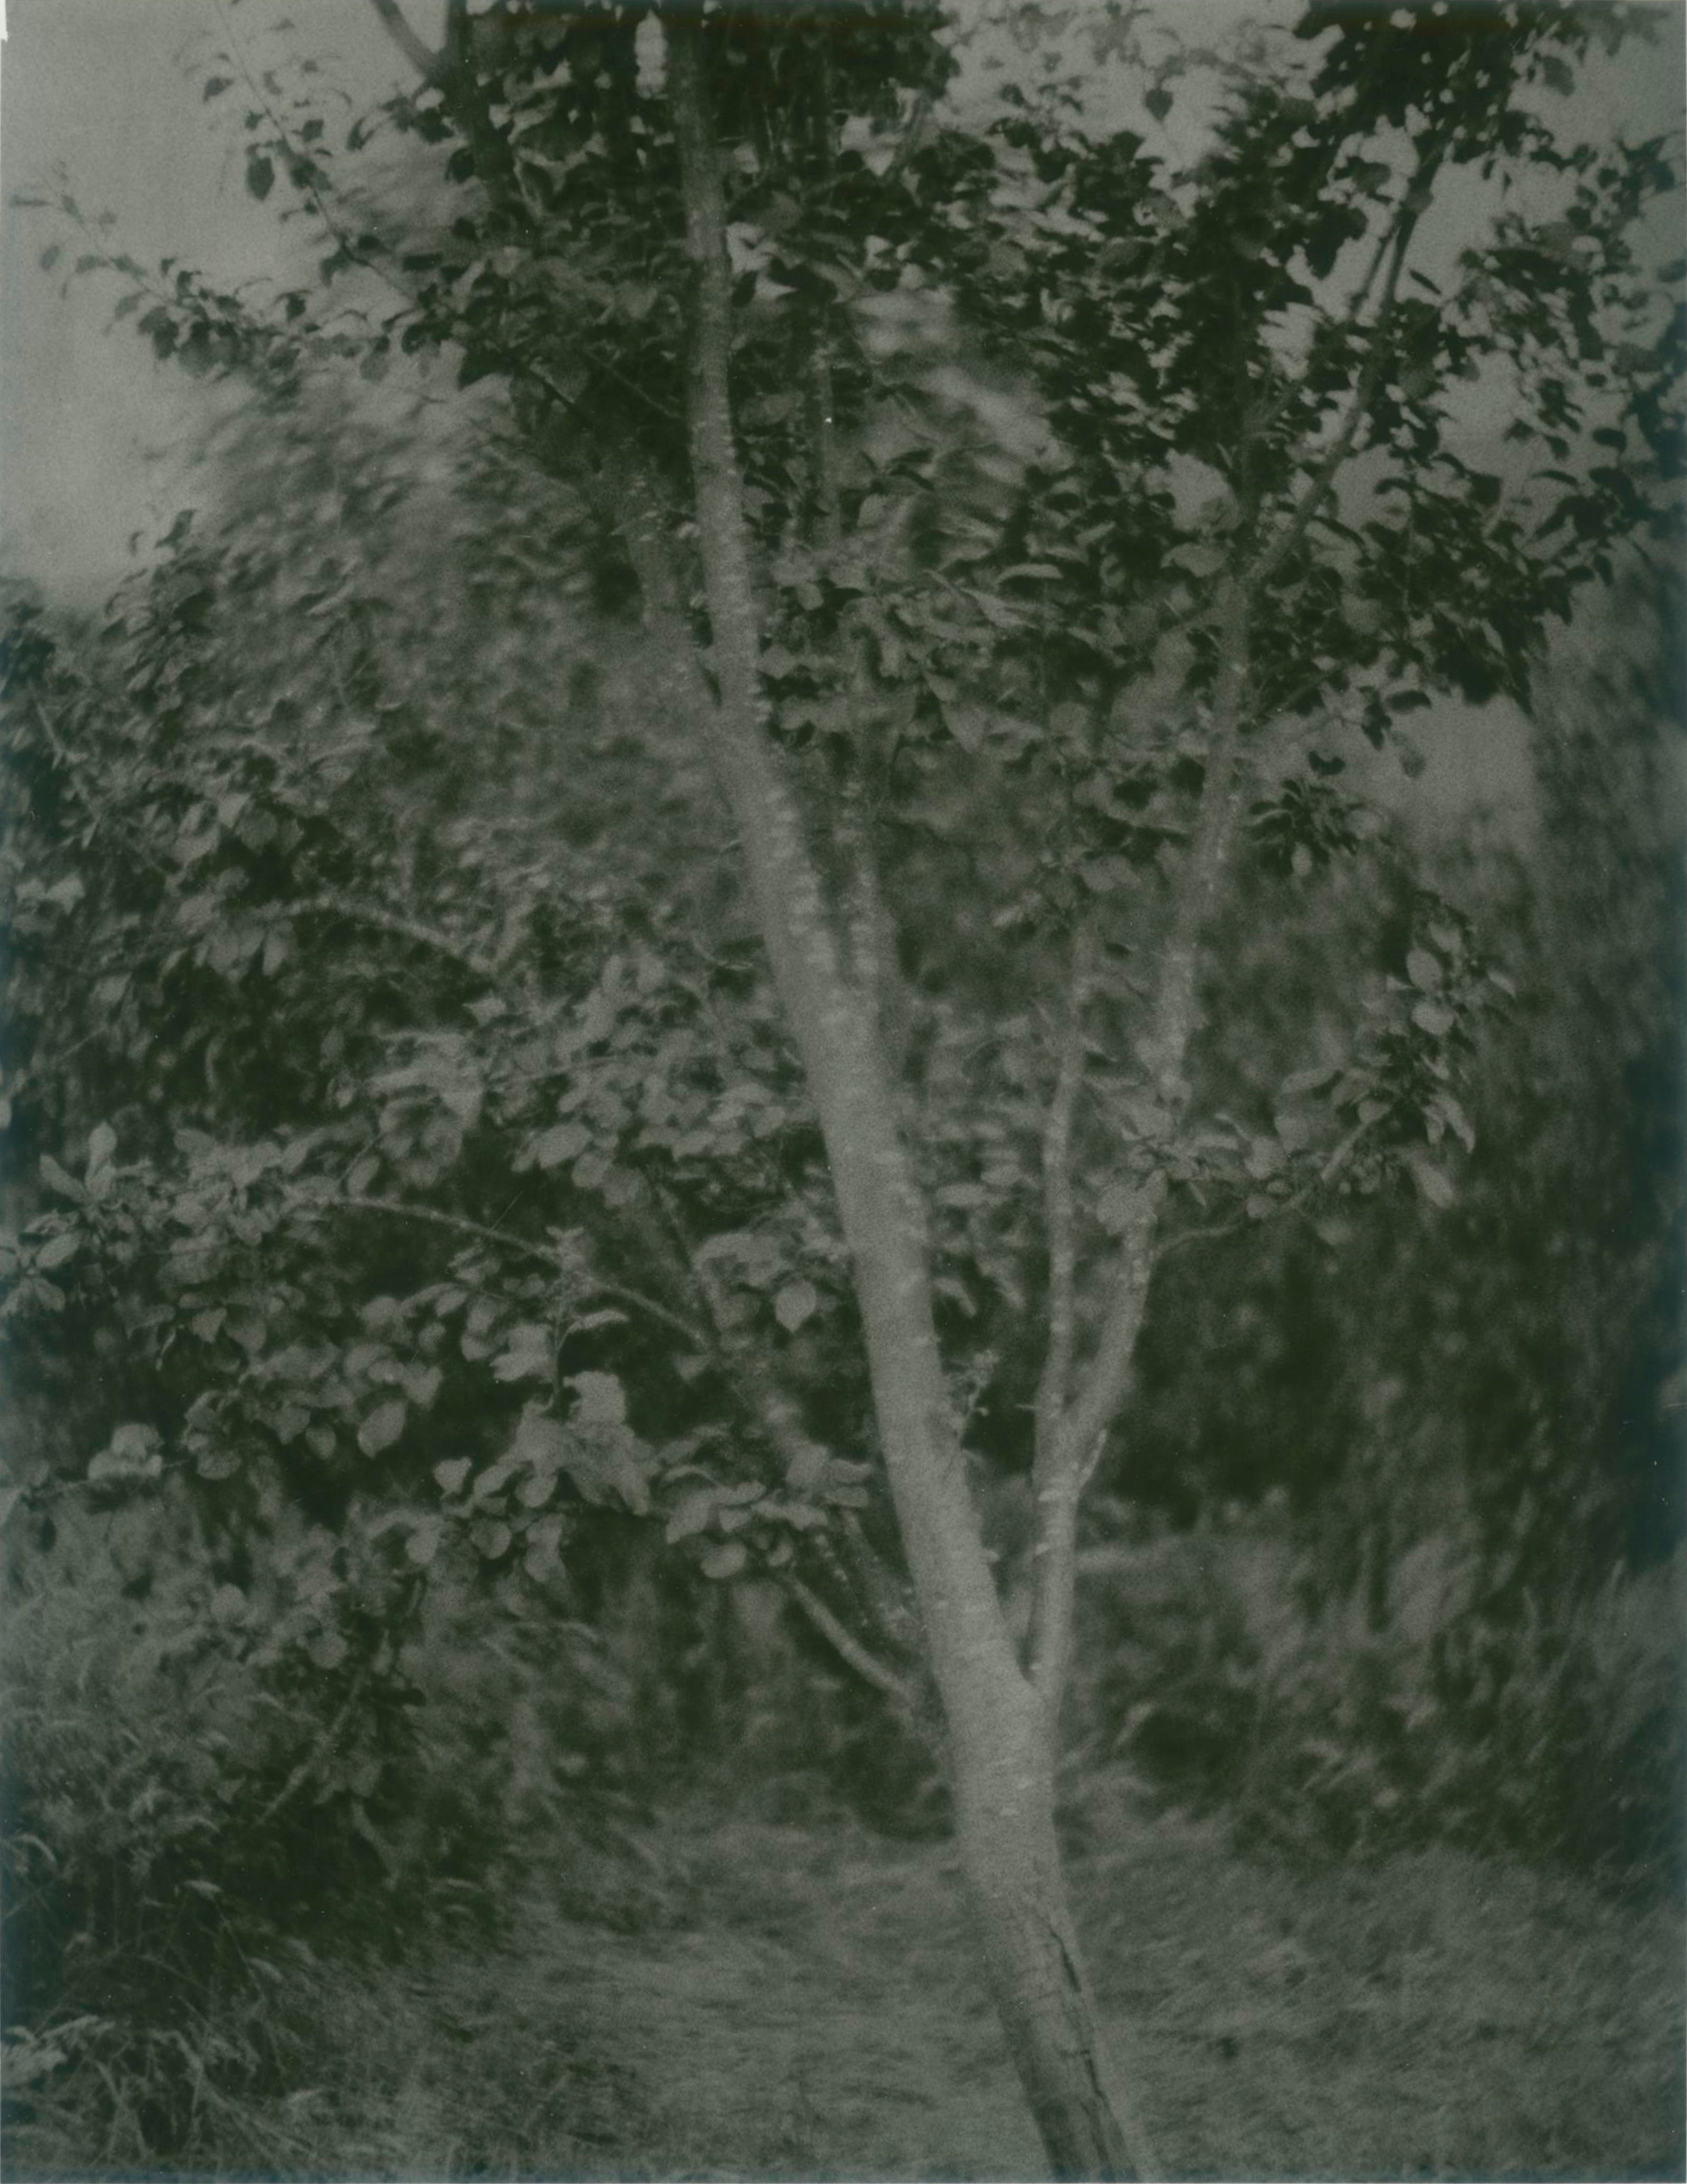
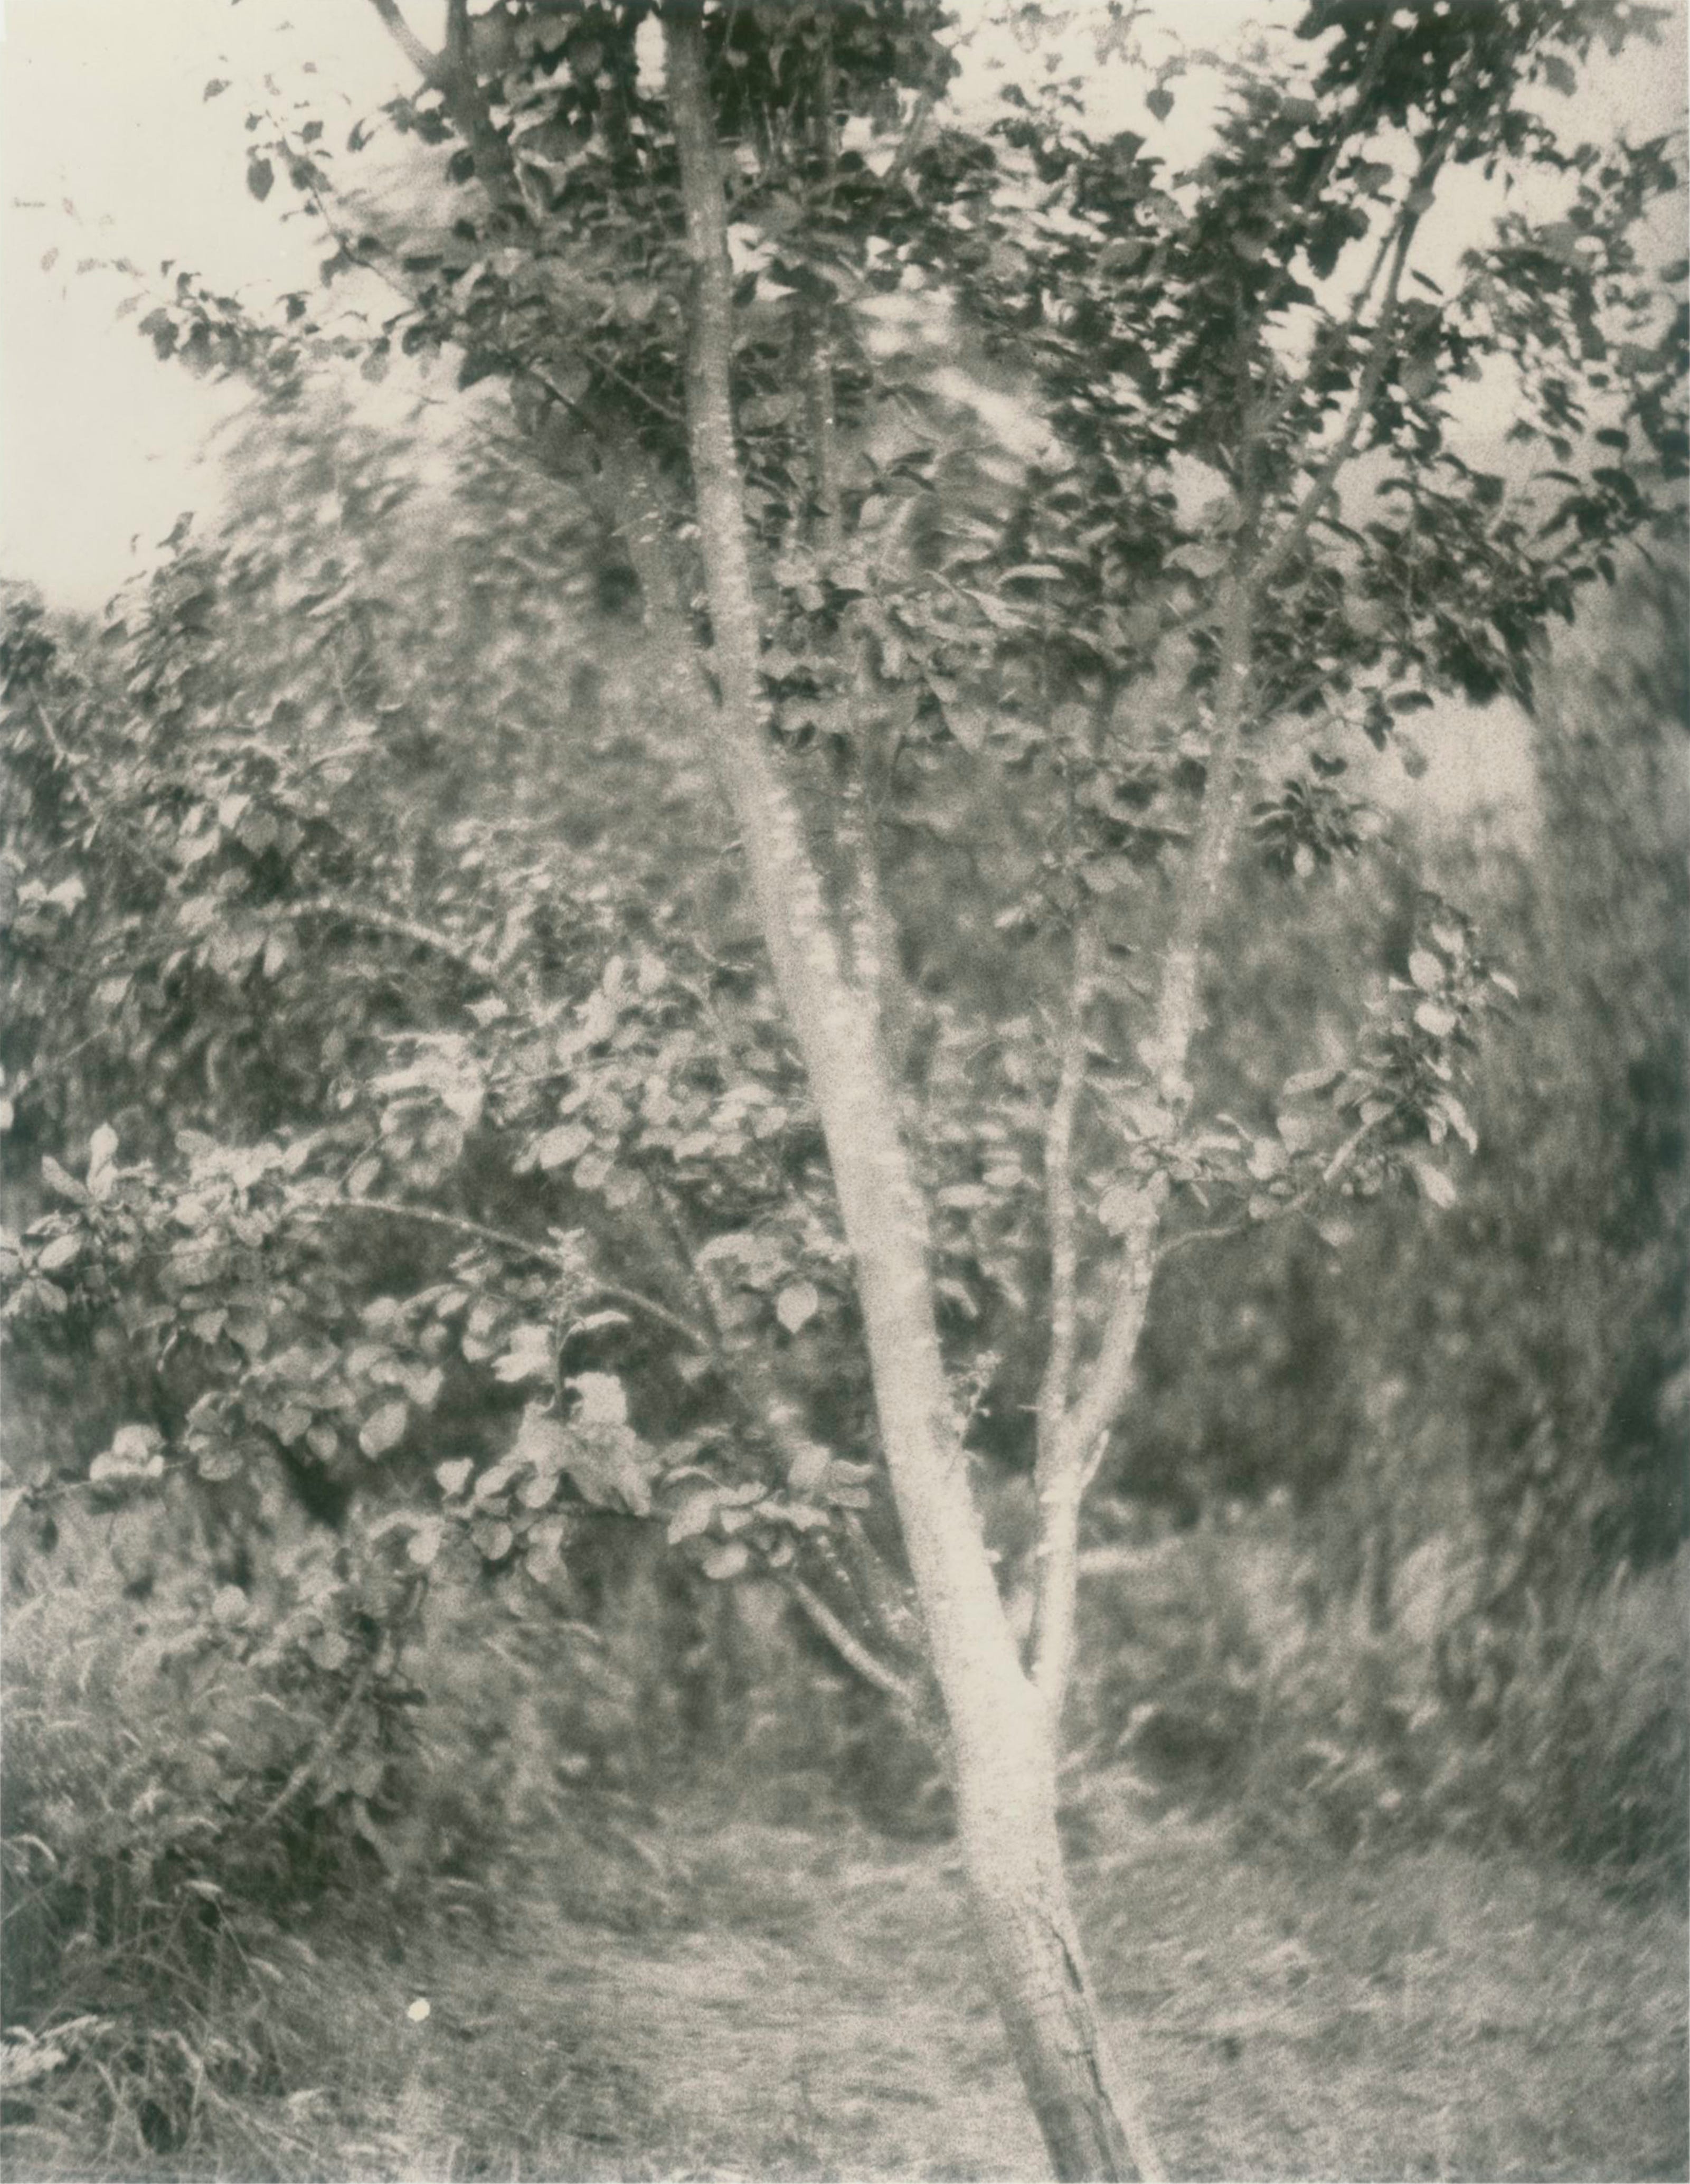
Here are some more examples of locally applied bleach to lift certain areas of the print:

I wanted to get the effect of patchy sunlight when clouds blow over.
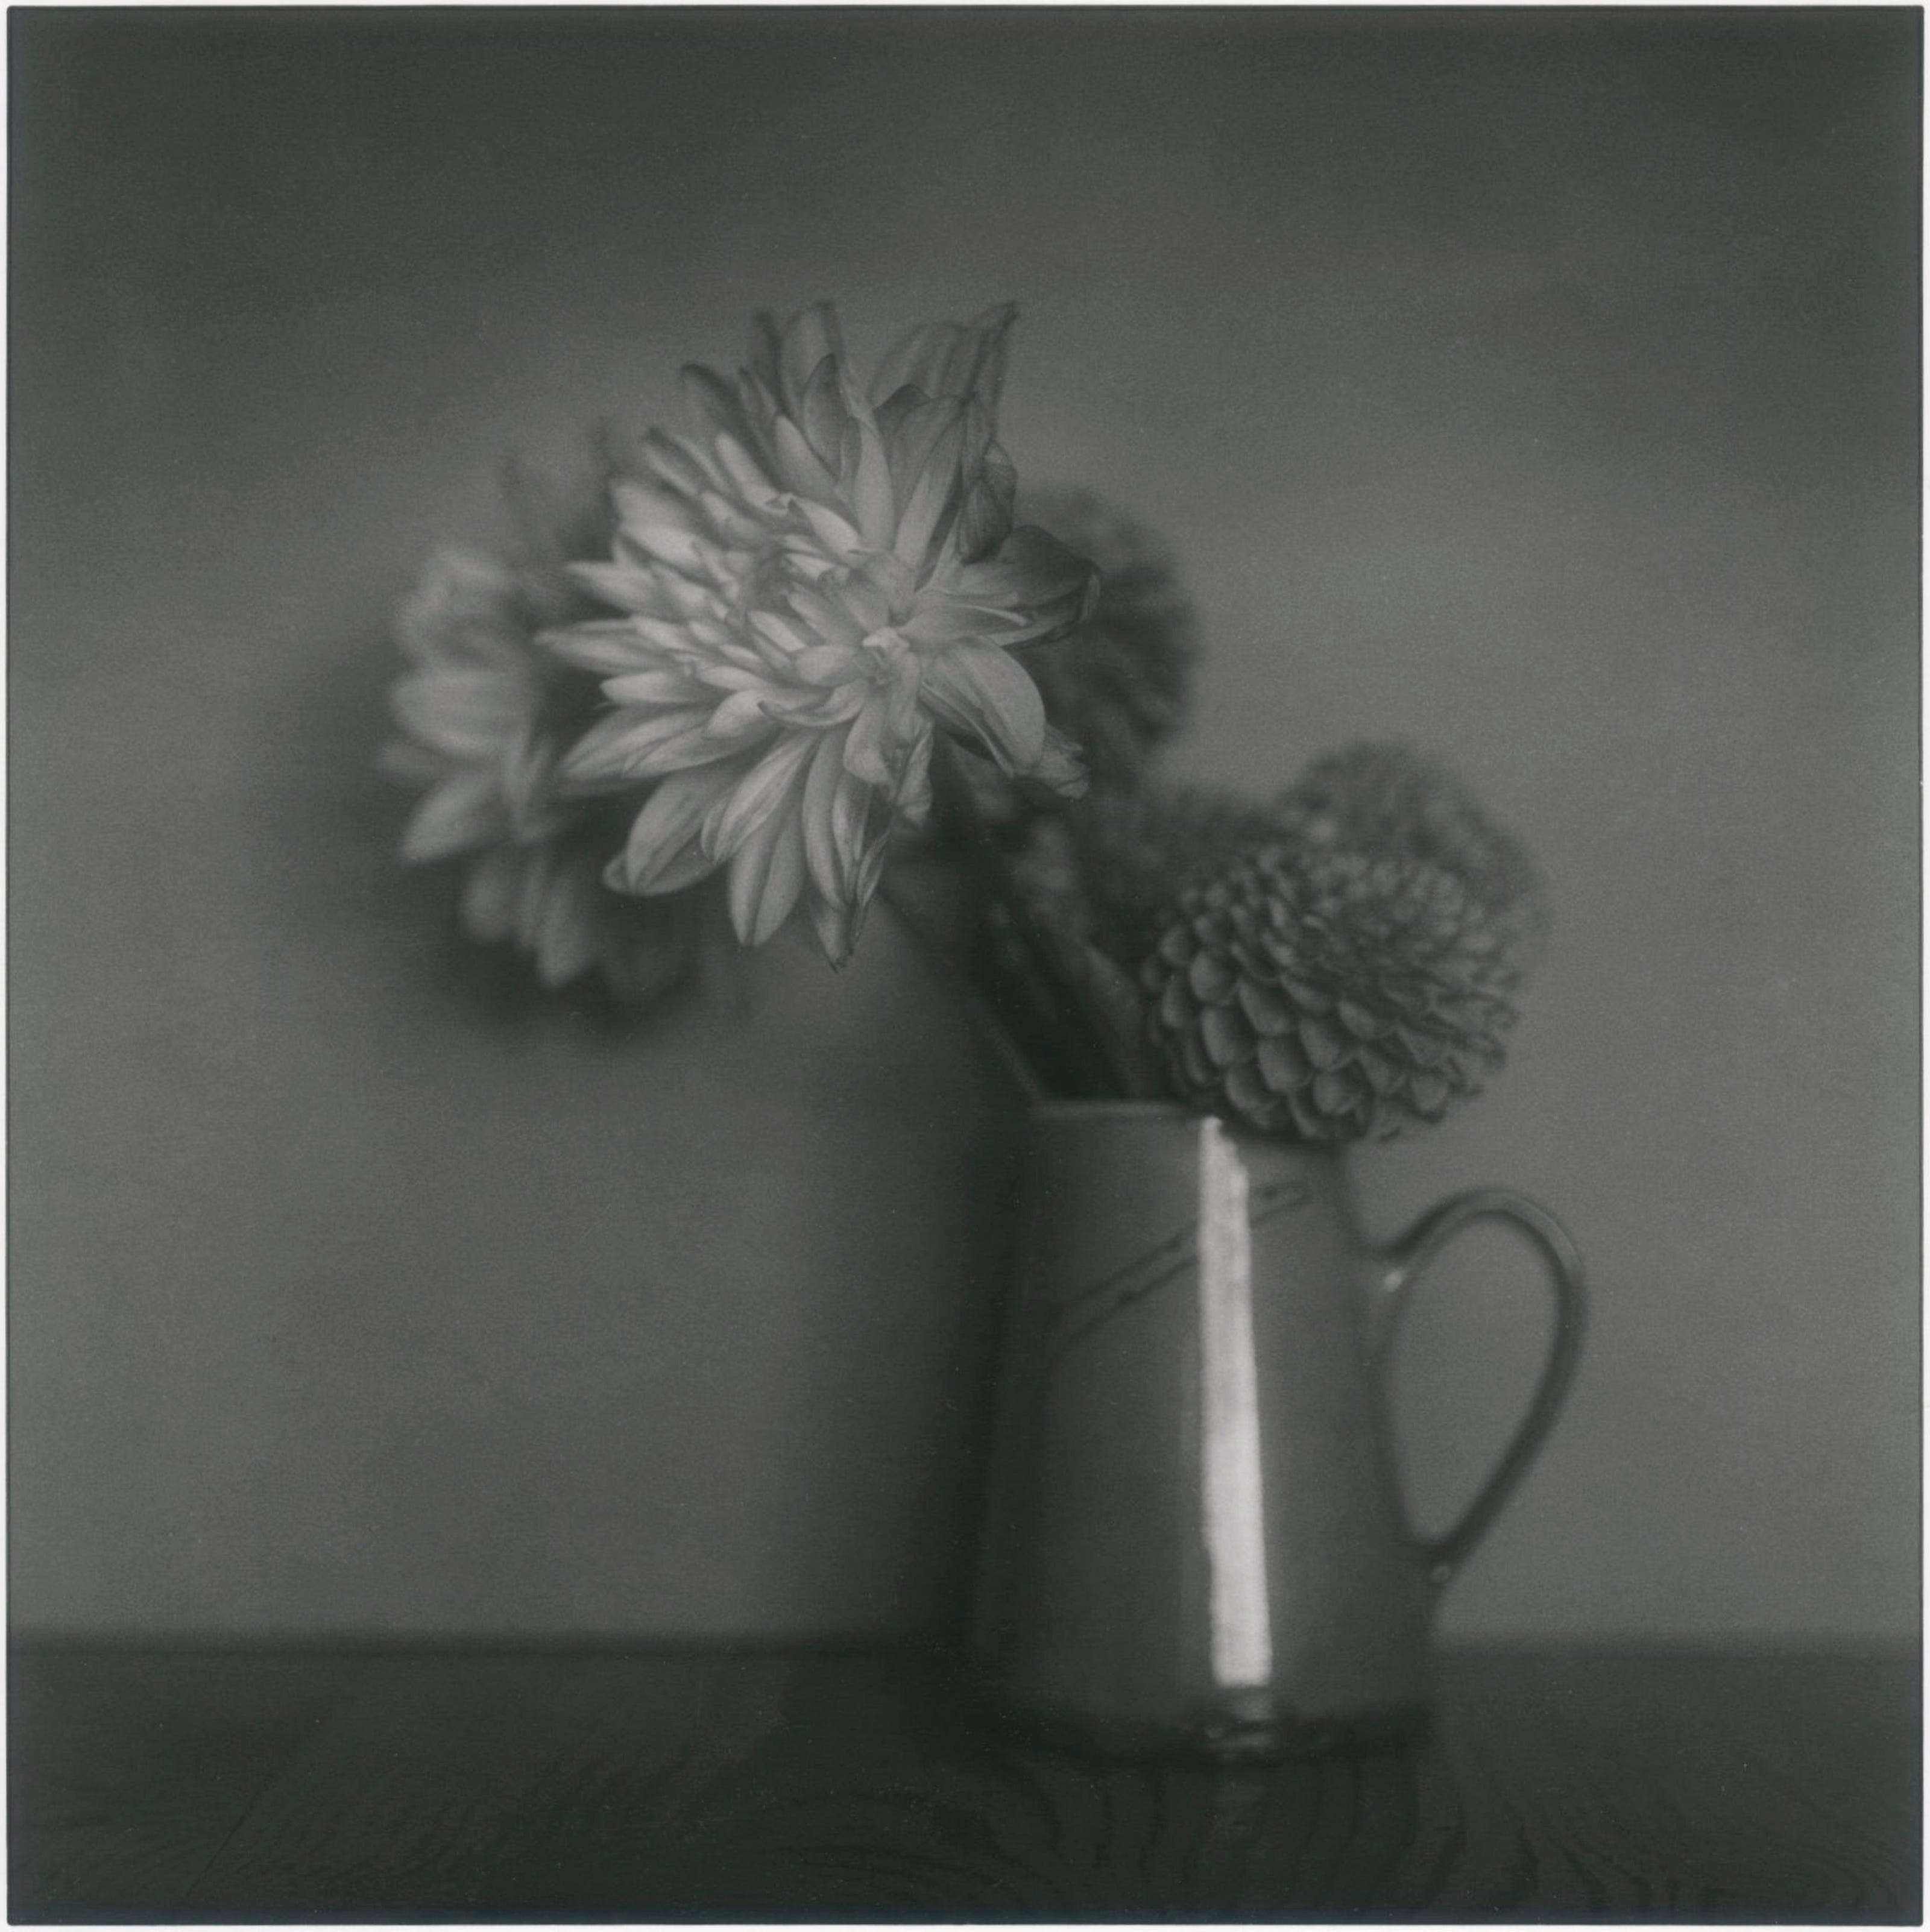
The flower picture here was lightened in the petals and I feel that it made a big difference to the final image.
If you find my articles interesting or useful, please spread the word to anyone you can think of who would be interested.
If you have enjoyed this post and the information here and elsewhere on my Substack and you would like to support me, you can subscribe or just buy me a coffee at Ko-fi.com/andrewsandersonphotography You can send as little as £5.00, or more if you are feeling generous. This money goes towards materials used for the tests and printing for these articles. Alternatively you can be a paid subscriber.
Thank you for reading, please let me know your thoughts.
Andrew Sanderson March 2026.
Other places to see my work;
Instagram; http://instagram.com/andrewsandersonphotography
Facebook; https://www.facebook.com/andrew.sanderson.96155/
Original hand made darkroom prints are available from my online shop; www.andrewsandersonphotography.bigcartel.com
I also offer one to one workshops at my darkroom/studio in West Yorkshire, UK. If you are interested please email me at andrewsandersonphoto@gmail.com
My photography teacher, Diego Ortiz Mugica (who studied with John Sexton), uses ferricyanide to locally accentuate highlights in some prints. He has a variety of brushes and sponges in different sizes and applies it very carefully. In one hand he holds the brush, and in the other a hose with water, with which he rinses the print after applying the ferricyanide.
It’s almost as if he were painting with light in some way. Always very carefully, because of course it’s irreversible and can damage the print. It’s a beautiful process to watch, which he performs in the darkroom under the safelight.
I really enjoy your articles. Thank you very much.
A really nice writeup and some wonderful examples.