iPinhole viewfinder.
A modern solution to an old problem.

Last weeks article was about a home made enlarger. This week we are continuing the idea of making or adapting things to provide a solution to problems that no commercial option exists for.
As someone who has used pinhole and other kinds of home made cameras for at least forty years, the biggest problem I have often found is knowing what you have in the frame and what you don’t. It’s very easy to have intrusive things coming into the frame and a common problem is being too far away from the subject. If the composition of the finished image is important, then a rough ‘point it in the general direction’ approach isn’t always good enough. Home made pinhole cameras often have a very wide angle of view which makes composition difficult. You can mark sight lines on the camera, but the real difficulty is in estimating how near the subject you need to be. You can easily have a shot with far too much foreground and your subject looking far away. After many years you get better at estimating, but occasionally the shot will be ruined by something coming into the frame that you haven’t anticipated, like your tripod legs.
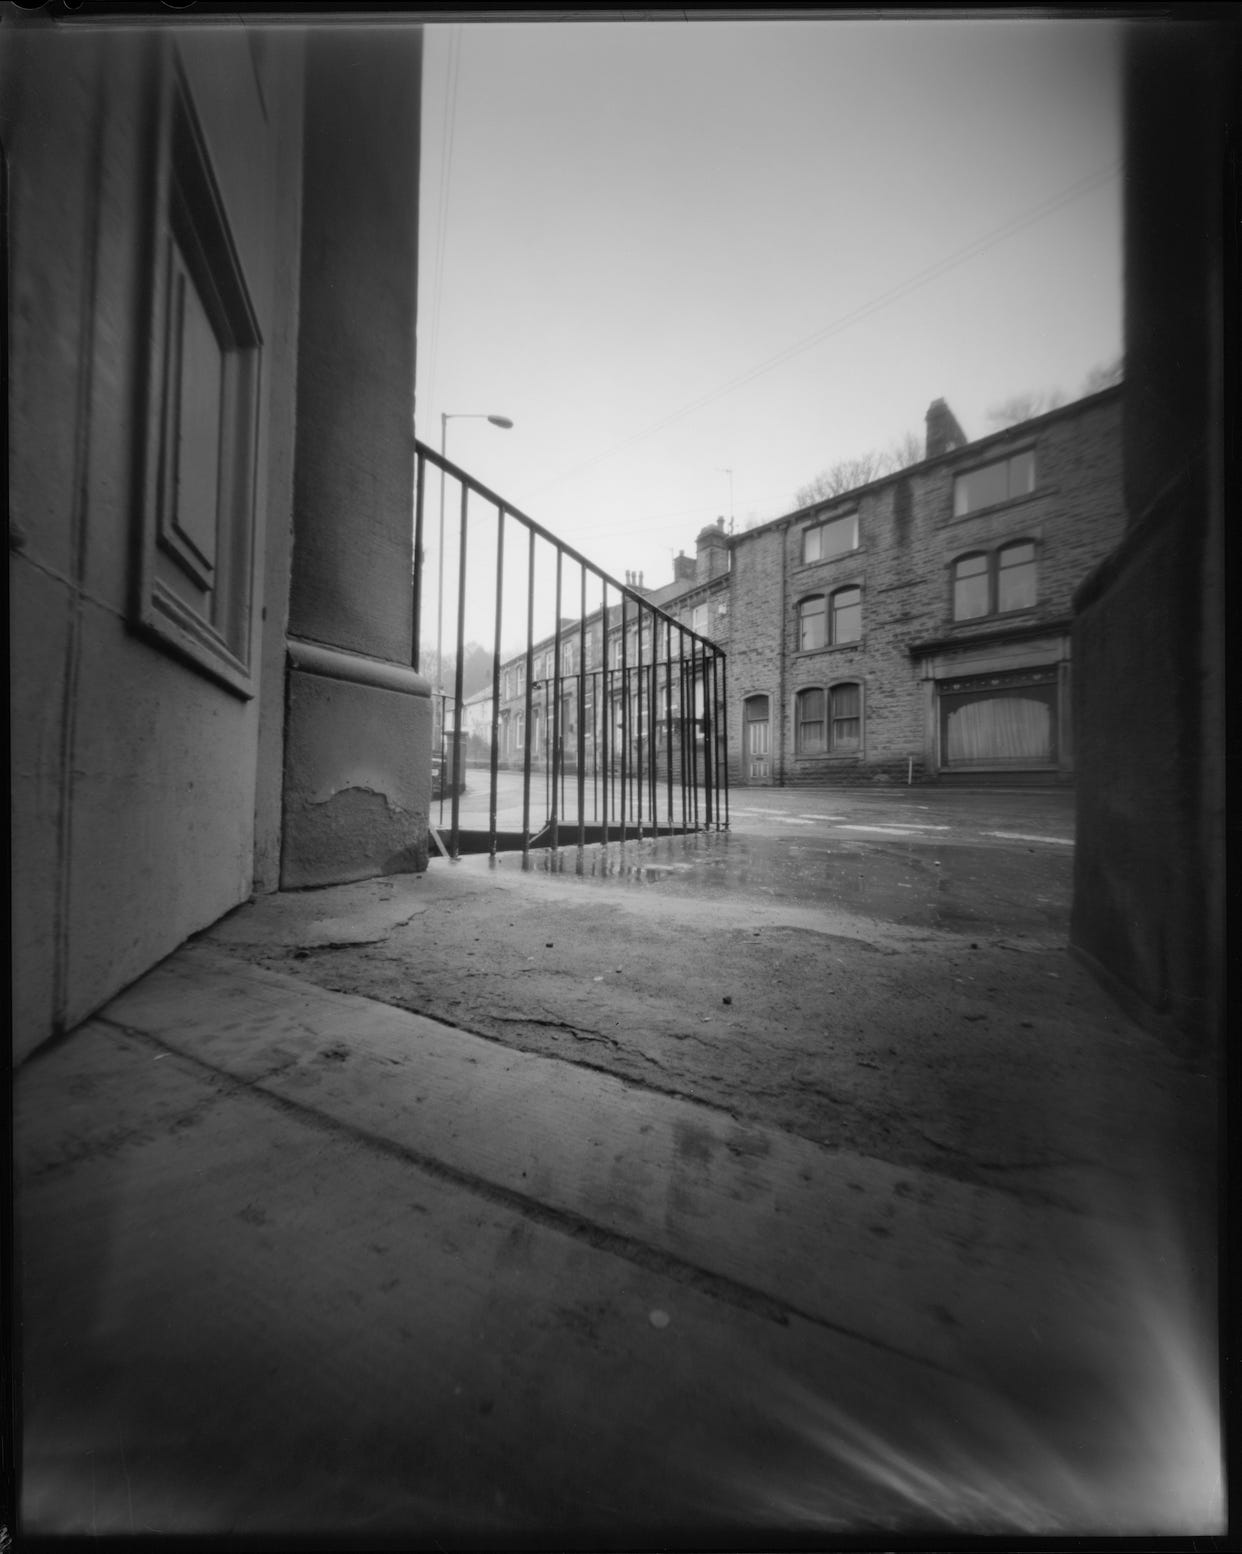
About twenty years ago I made a 10x8 pinhole camera which shot really wide images. The first picture I took with this was at the front door of my studio. I wanted to check that I had worked out the aperture correctly, so I put it on the ground, propped the door open with it, then did the exposure. I then processed it immediately to see if the exposure was correct. It was, but there was a lot of foreground due to the angle of view being so wide.
I loved the extremely wide view that it had and the big negatives gave an extra quality to the images. The problem was, that I often had not got close enough to my subject.
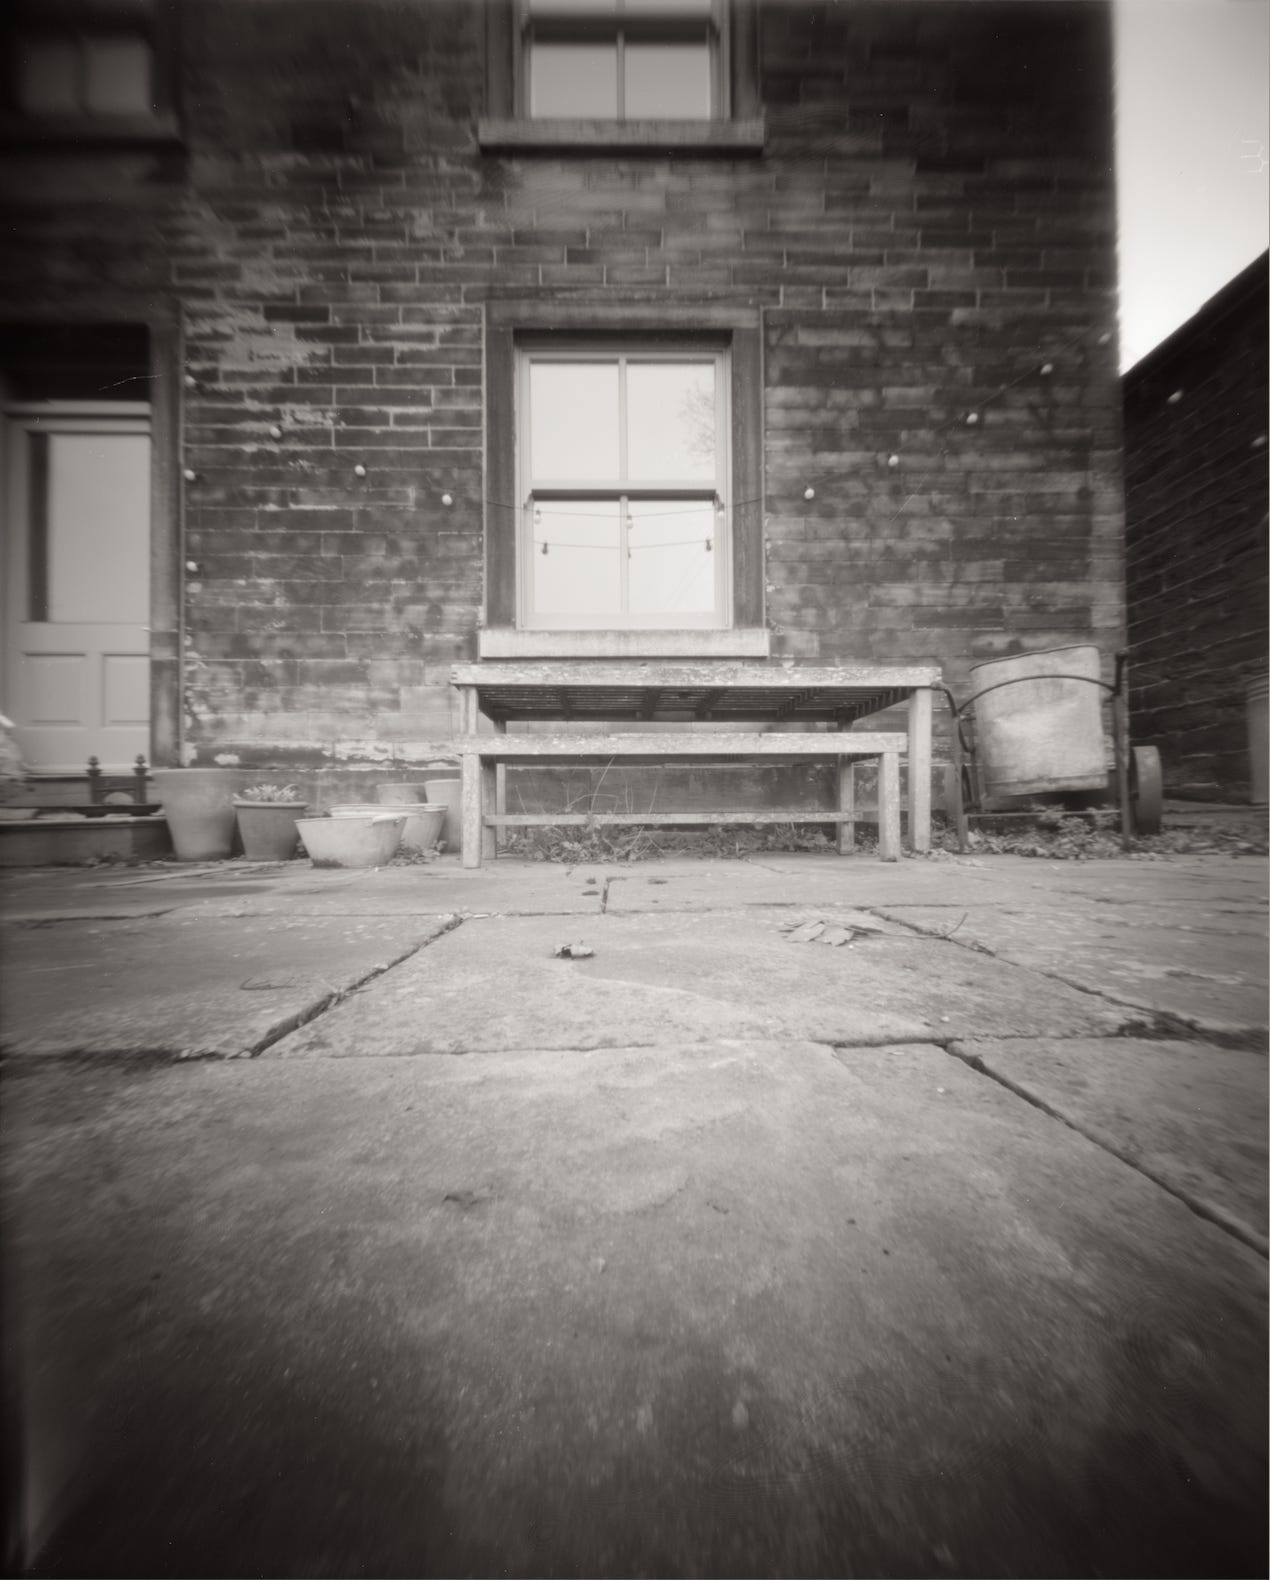
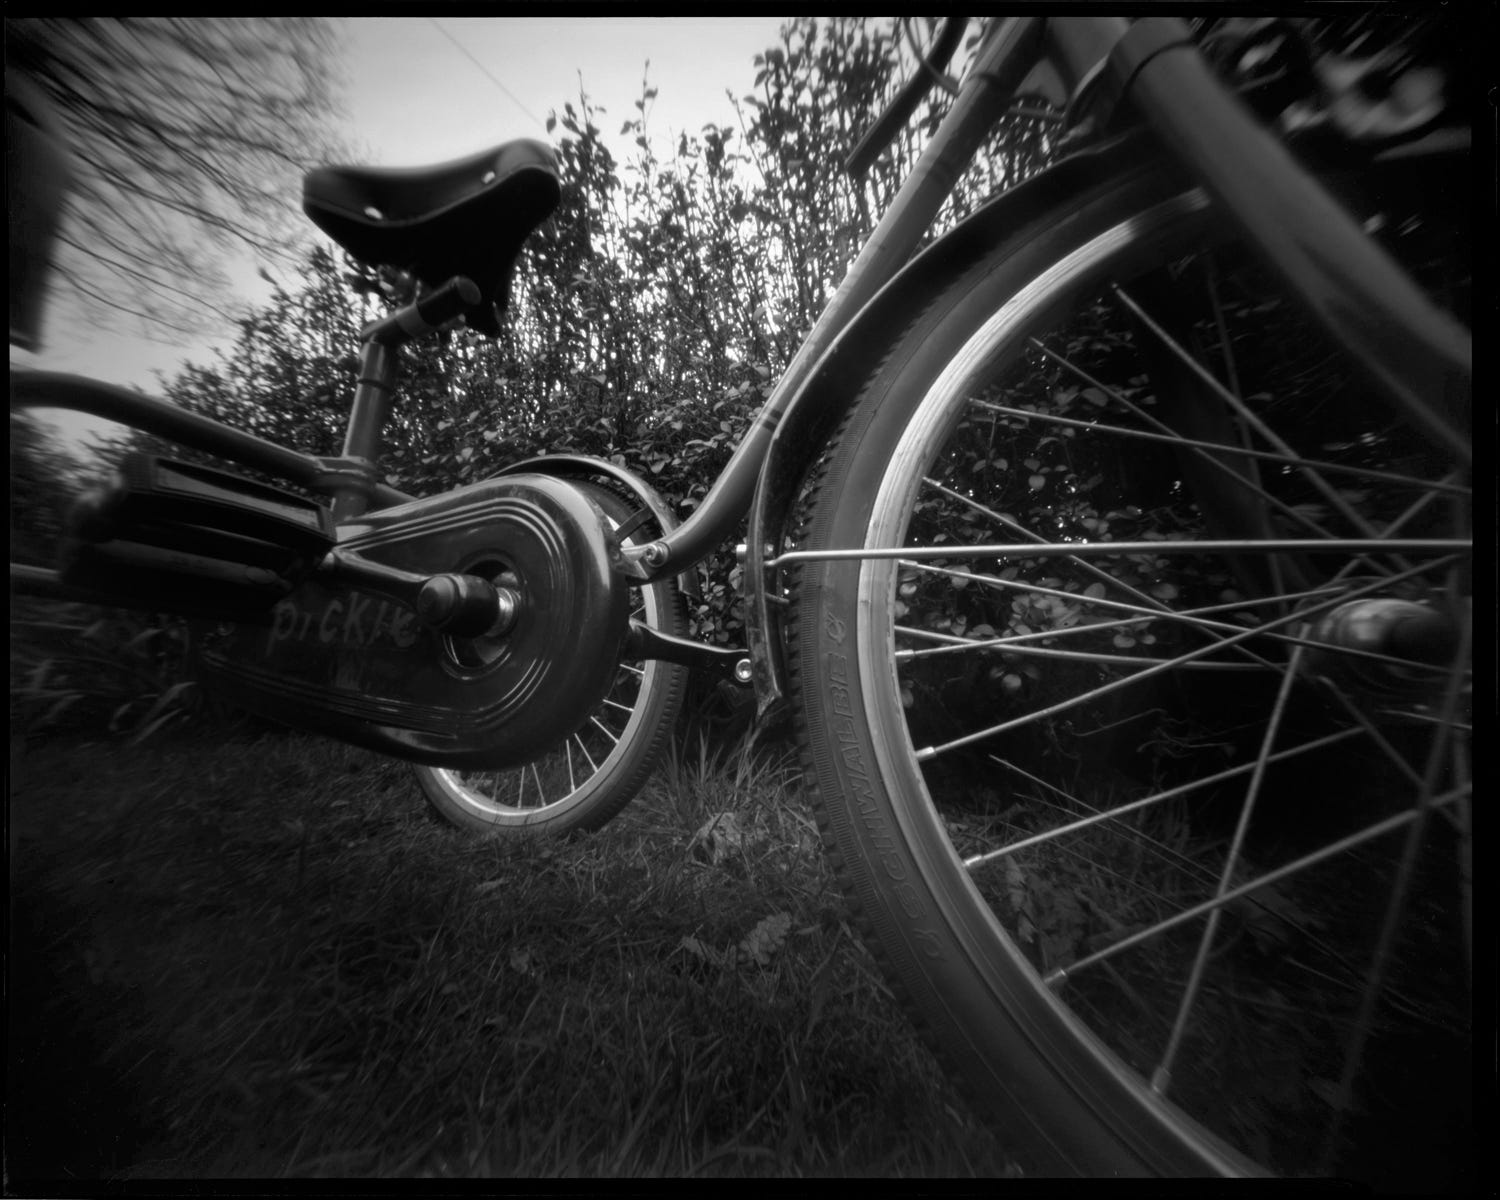
This is another test shot, taken at the back of my house. The camera was only 7 feet away from the table, but in the image it looks much further.
When I got very close though, it gave great angles.
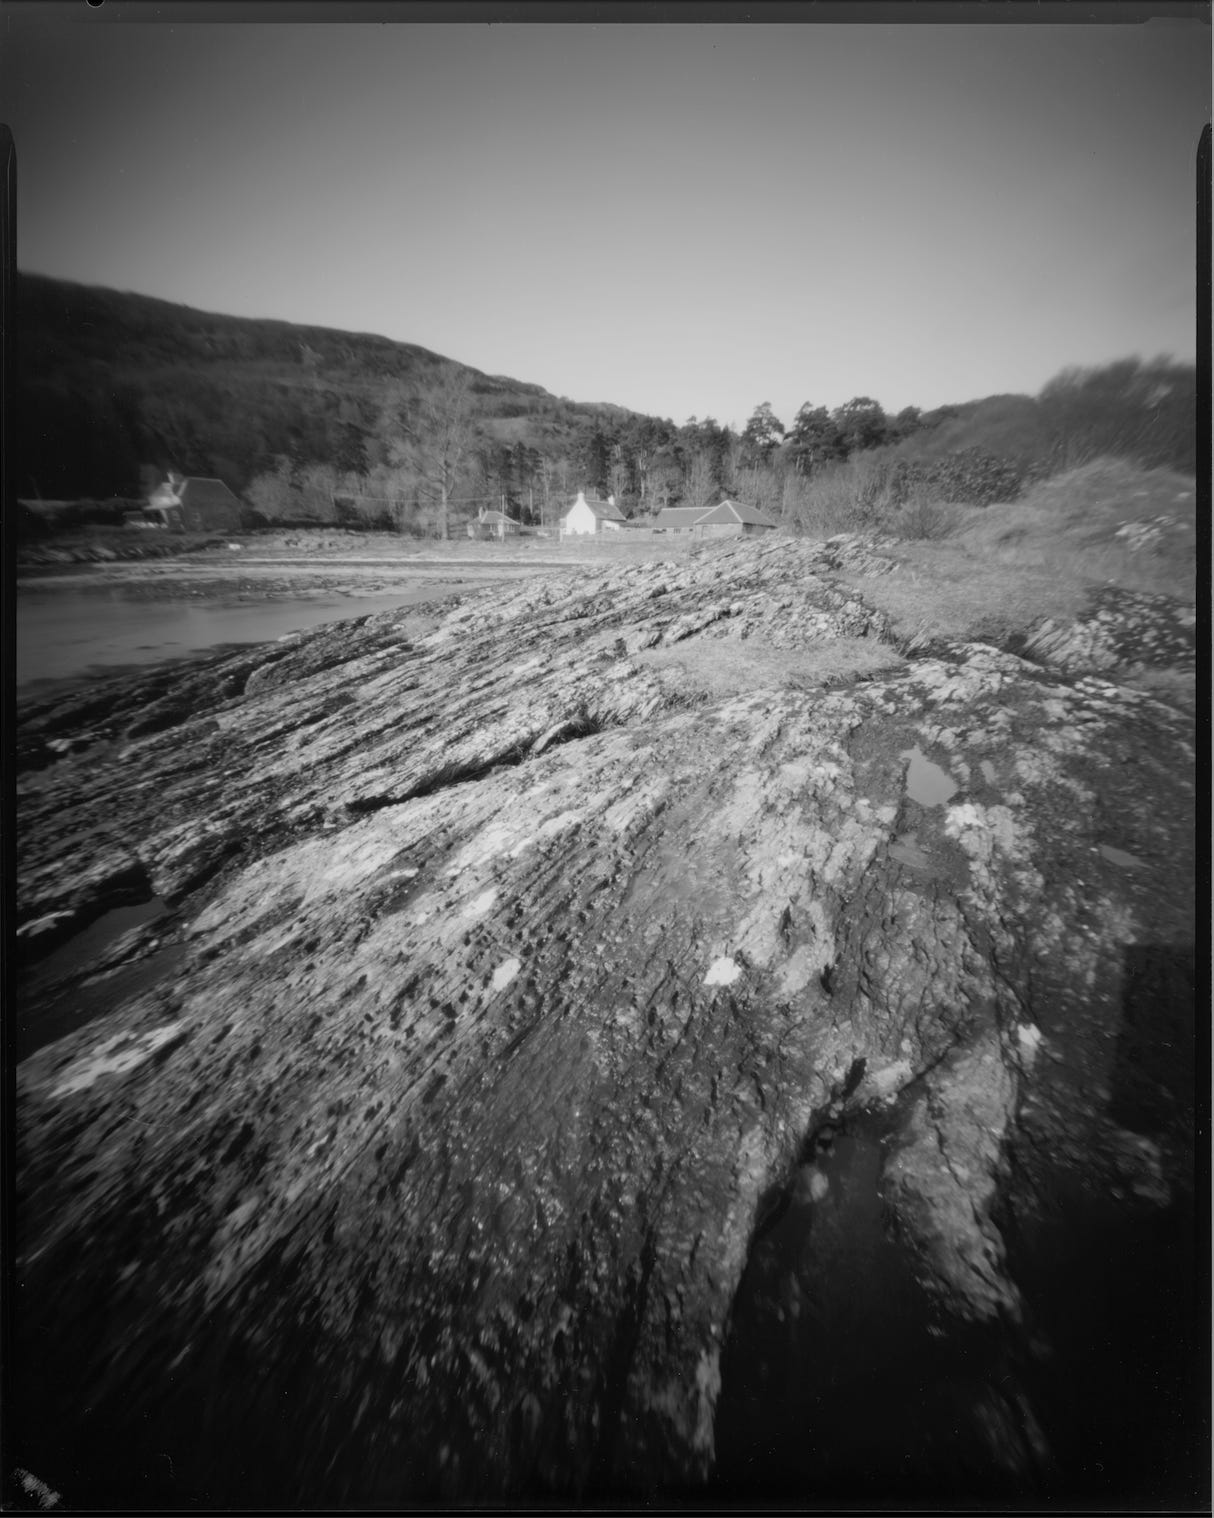
When I estimated the angle of view correctly I was really pleased with the results, but on too many occasions I was disappointed with the image. This shot of a Scottish loch and cottage was again dominated by a huge foreground.
I used it off and on for a number of years, but then put it away. I loved what it did, but mistakes were expensive.
After many years, I got inspired to use it again, but I remembered the frustration and ruined shots, and with film getting ever more expensive, I wanted some way of seeing what was in the frame before I committed any more costly sheets of film to it.
Viewfinder idea.
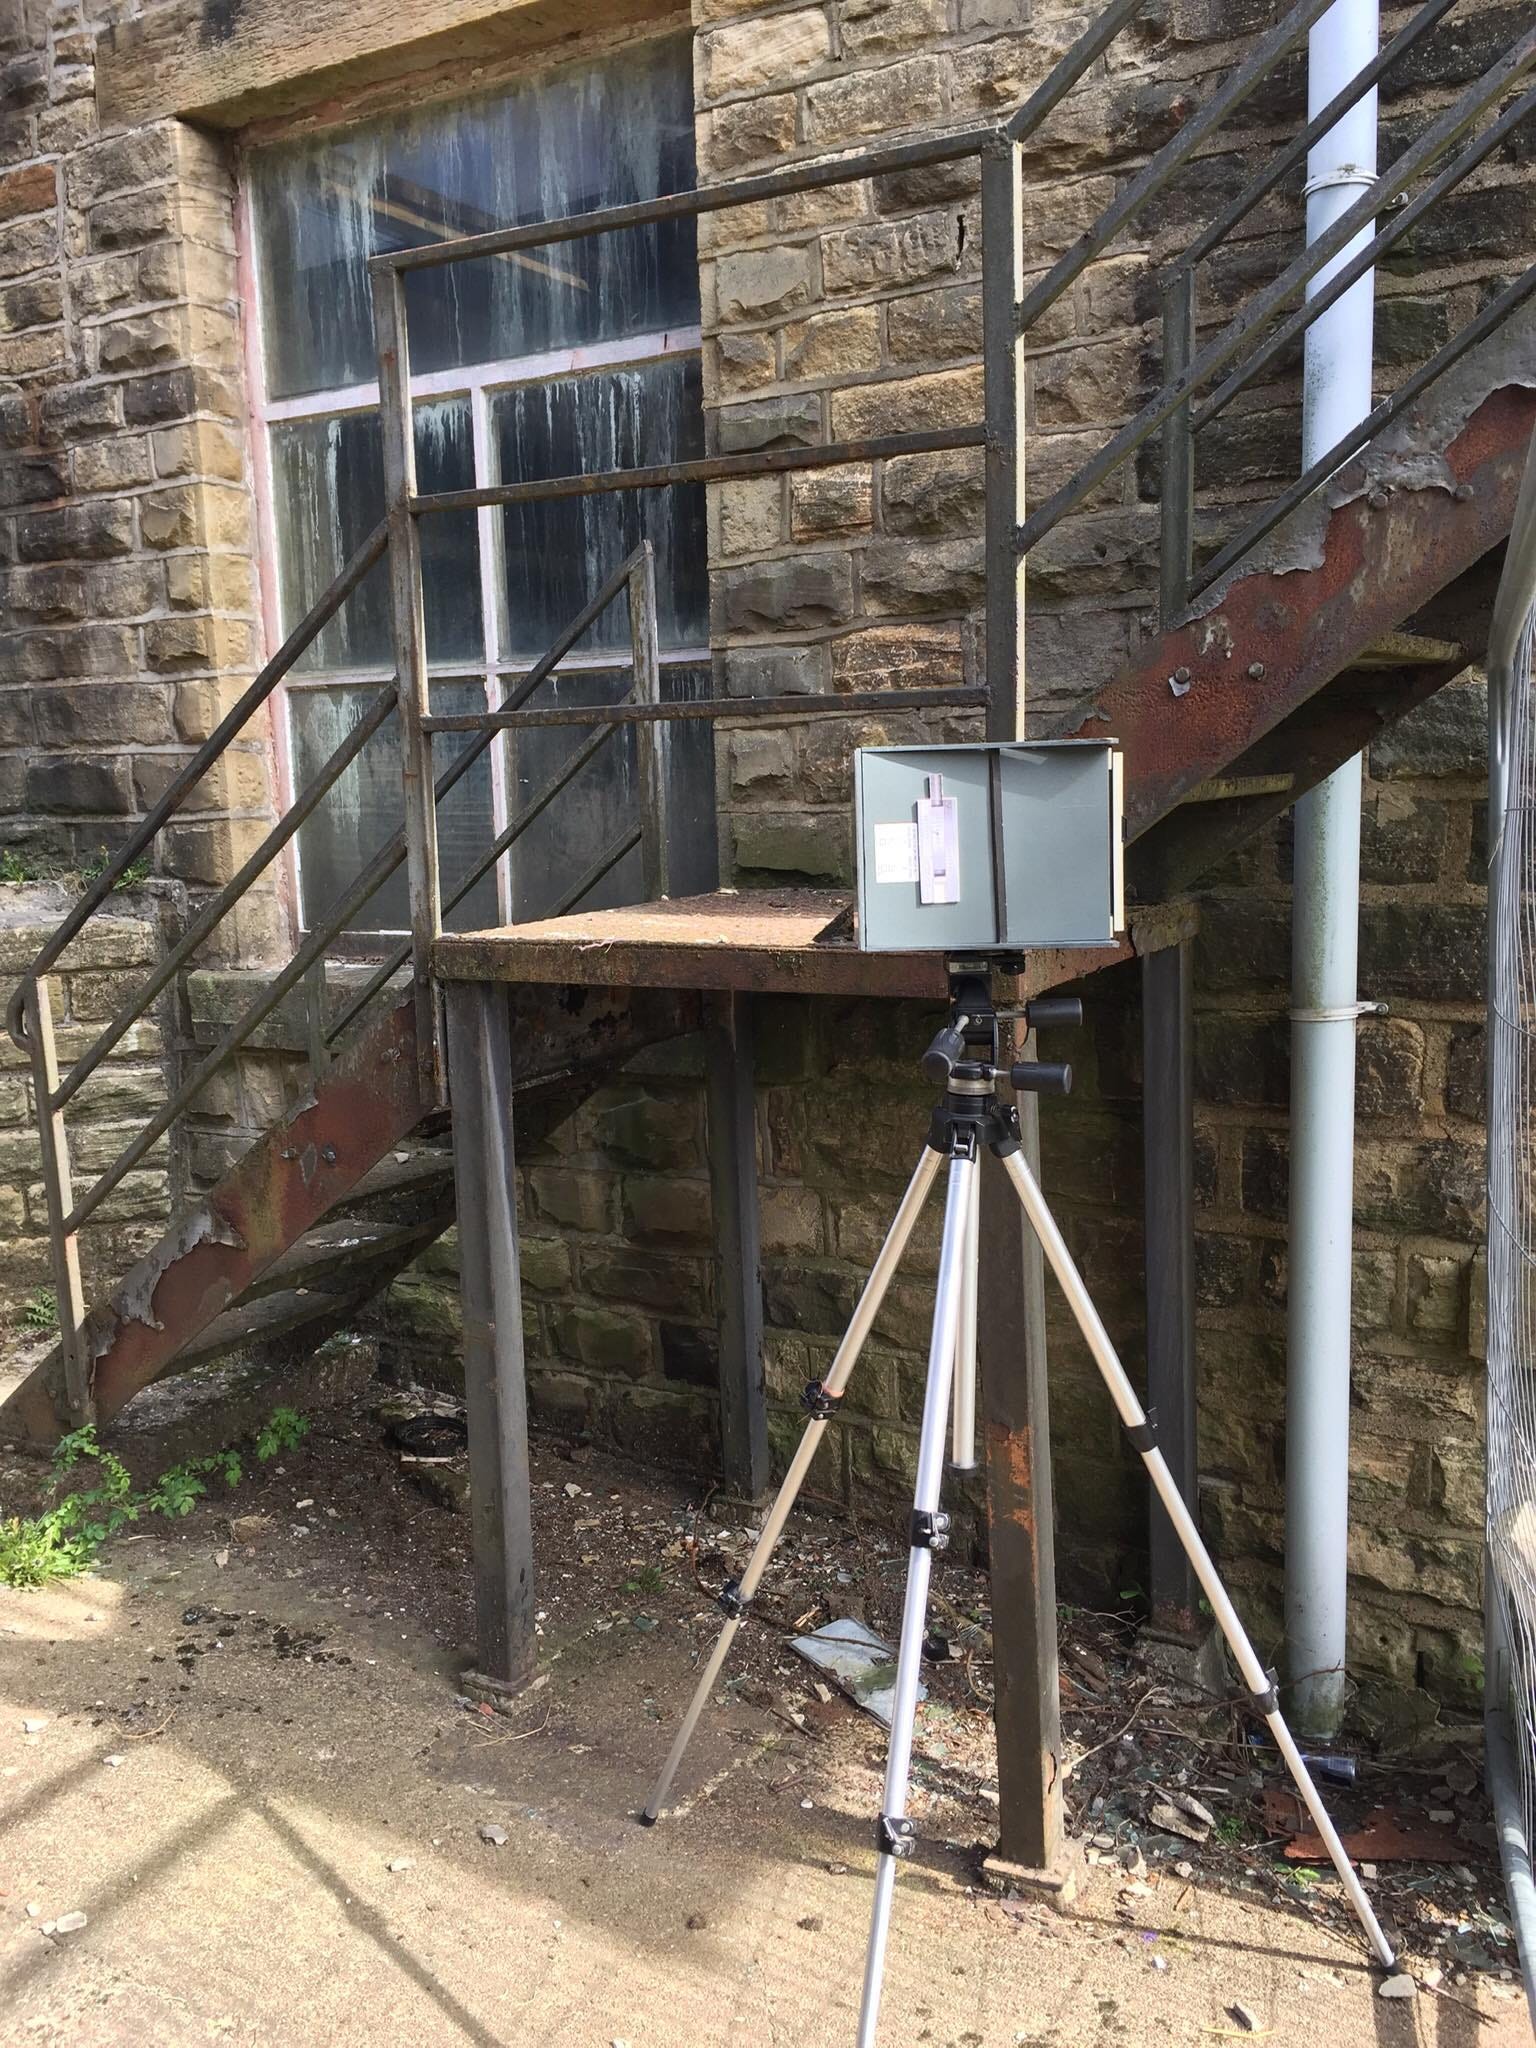
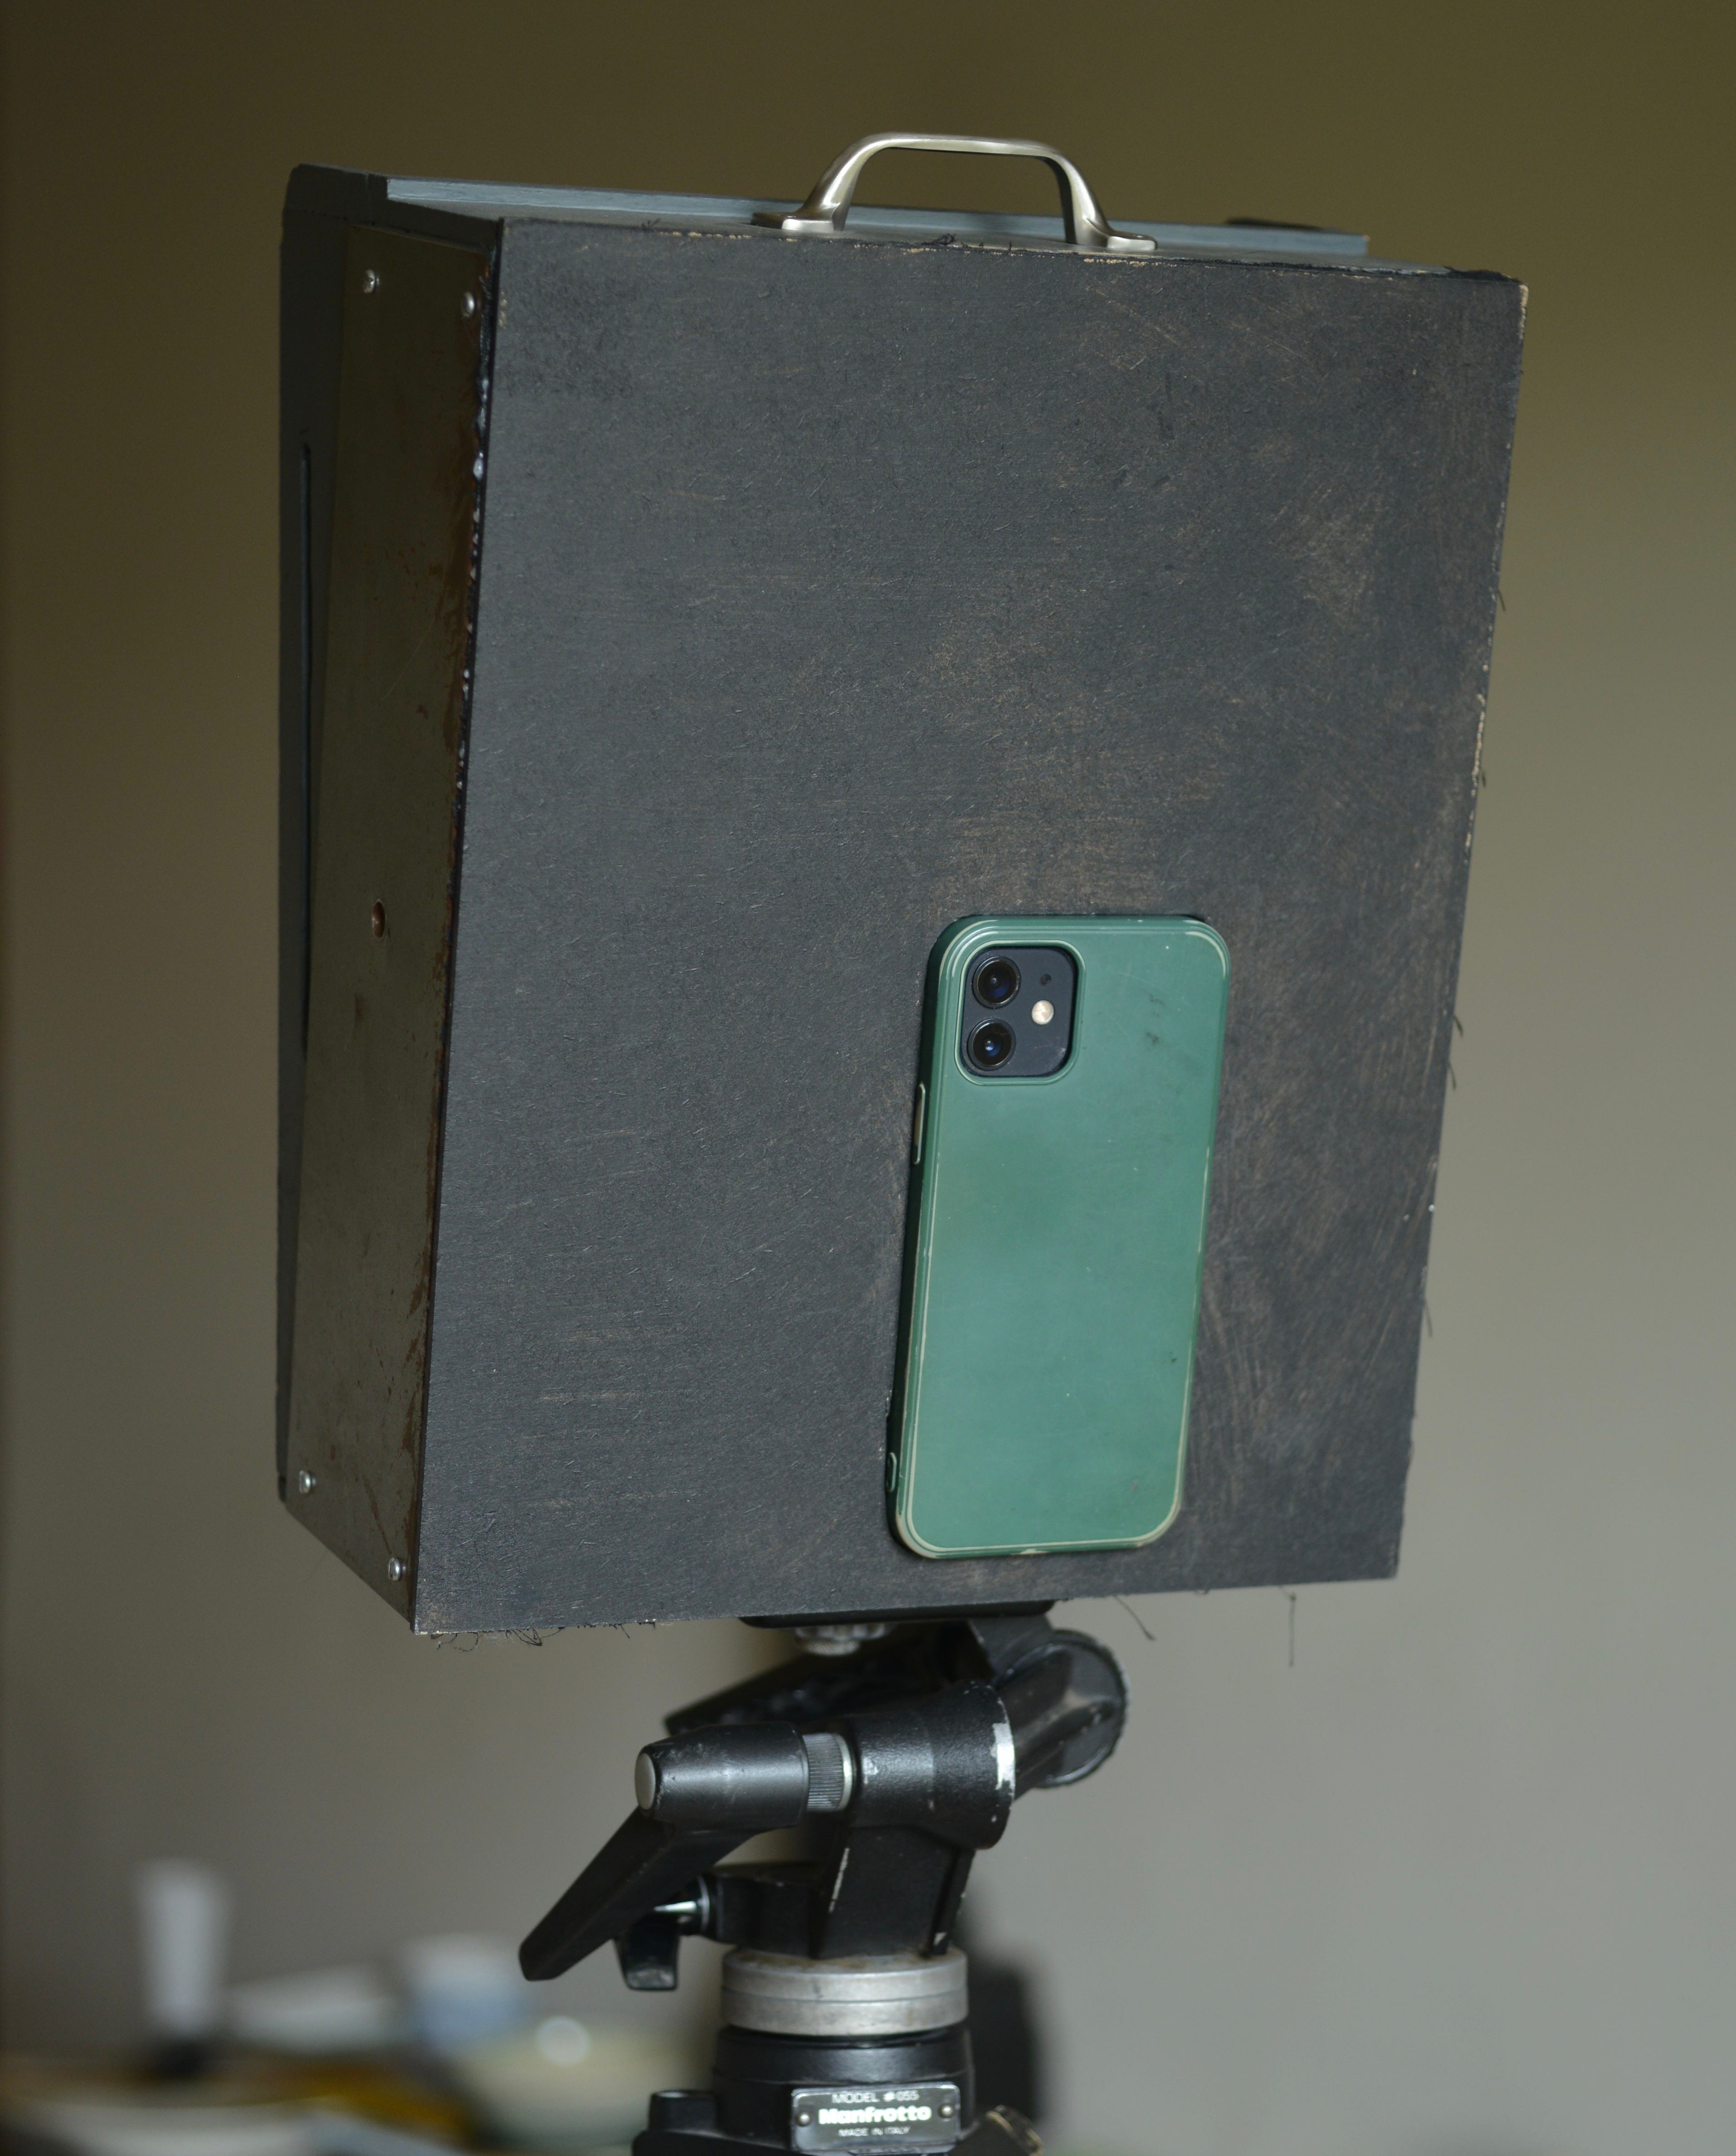
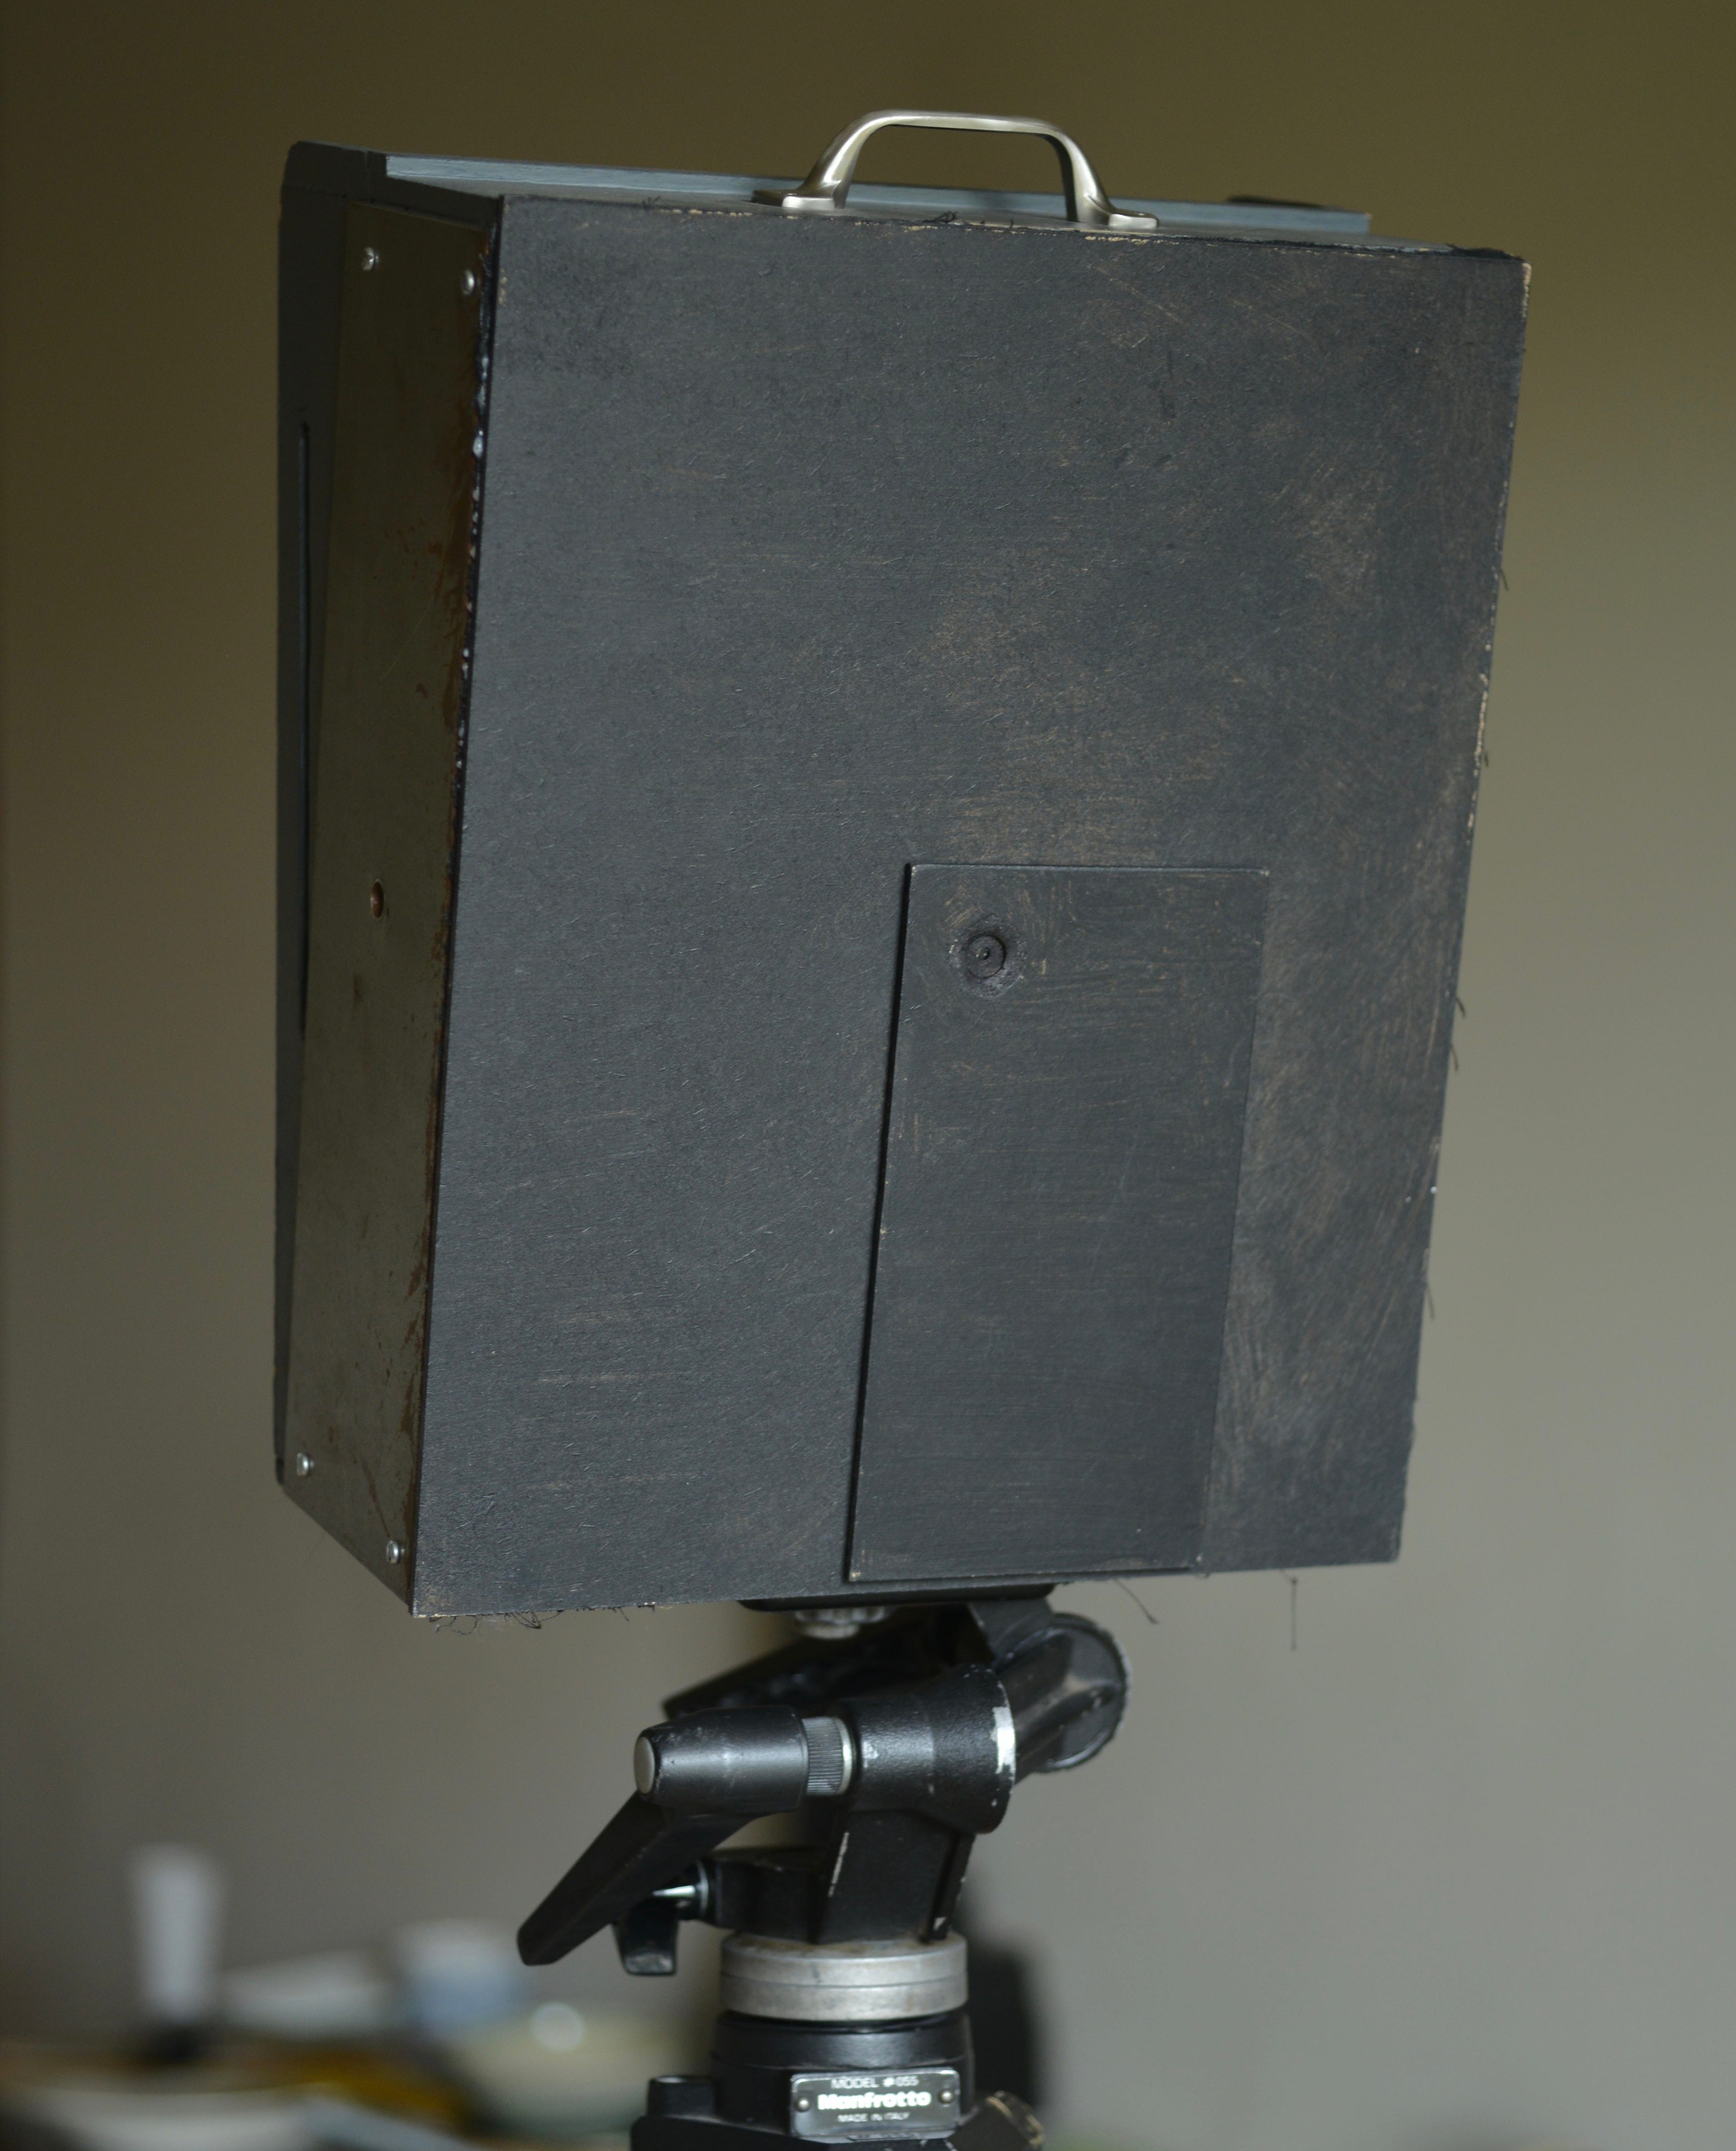
Noticing that my iPhone camera when set on super wide had the same angle of view as the 10x8 pinhole camera, I decided to try to use it as a viewfinder and set about designing a way to mount it on the camera. The important thing in construction was that the phone lens had to be in exactly the same position as the pinhole, I couldn’t mount it on the top or side, as this wouldn’t give me a really accurate idea of the composition for close subjects.
Firstly I had to take off the front section of the camera where I had affixed the pinhole. This was just a bit of tin cut from a coffee container set in a wooden block. I had to set the pinhole in another panel of MDF, as I had damaged the previous bit when I tried to get it off. It had all been glued in place at the time I made it, with no intention of altering it. I could just discard it and make another, but I knew the effective aperture and I knew it was sharp, so I wanted to use the same one.
I cut a larger hole in the front panel of the camera box, one that would take my phone snugly and then I put a light baffle behind. The pinhole was then attached to a similarly sized bit of MDF board so the two were interchangeable.
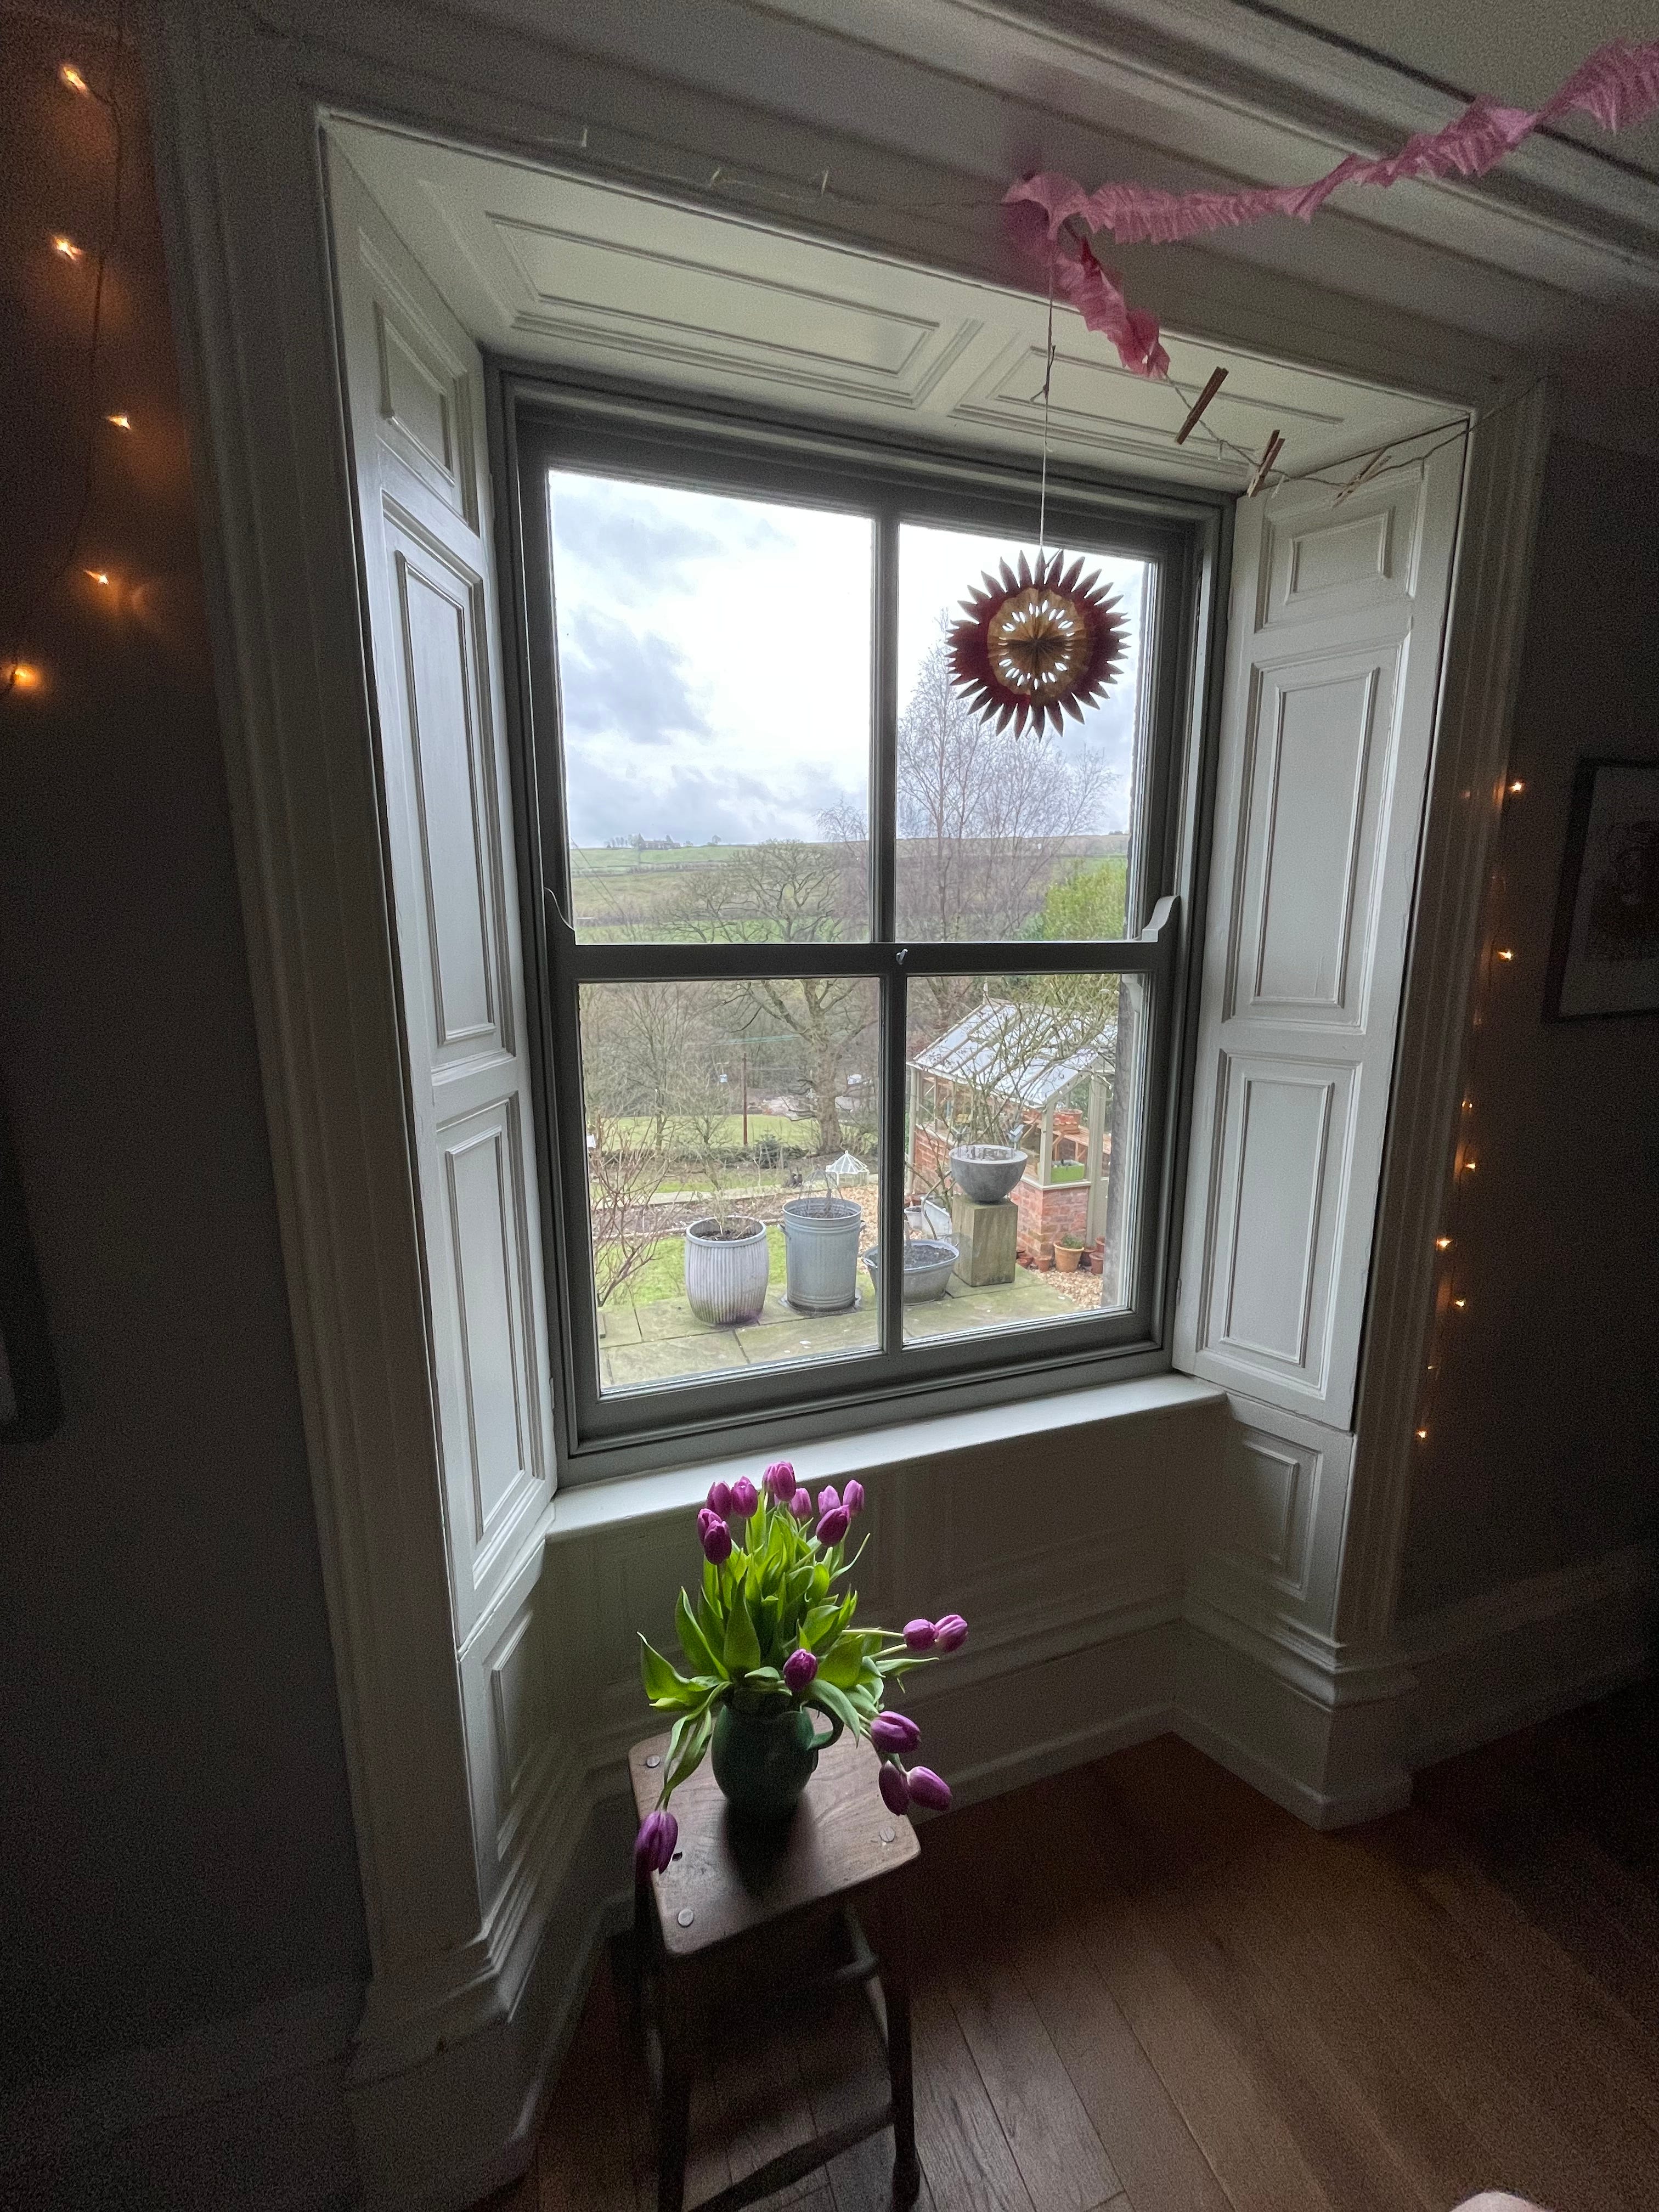
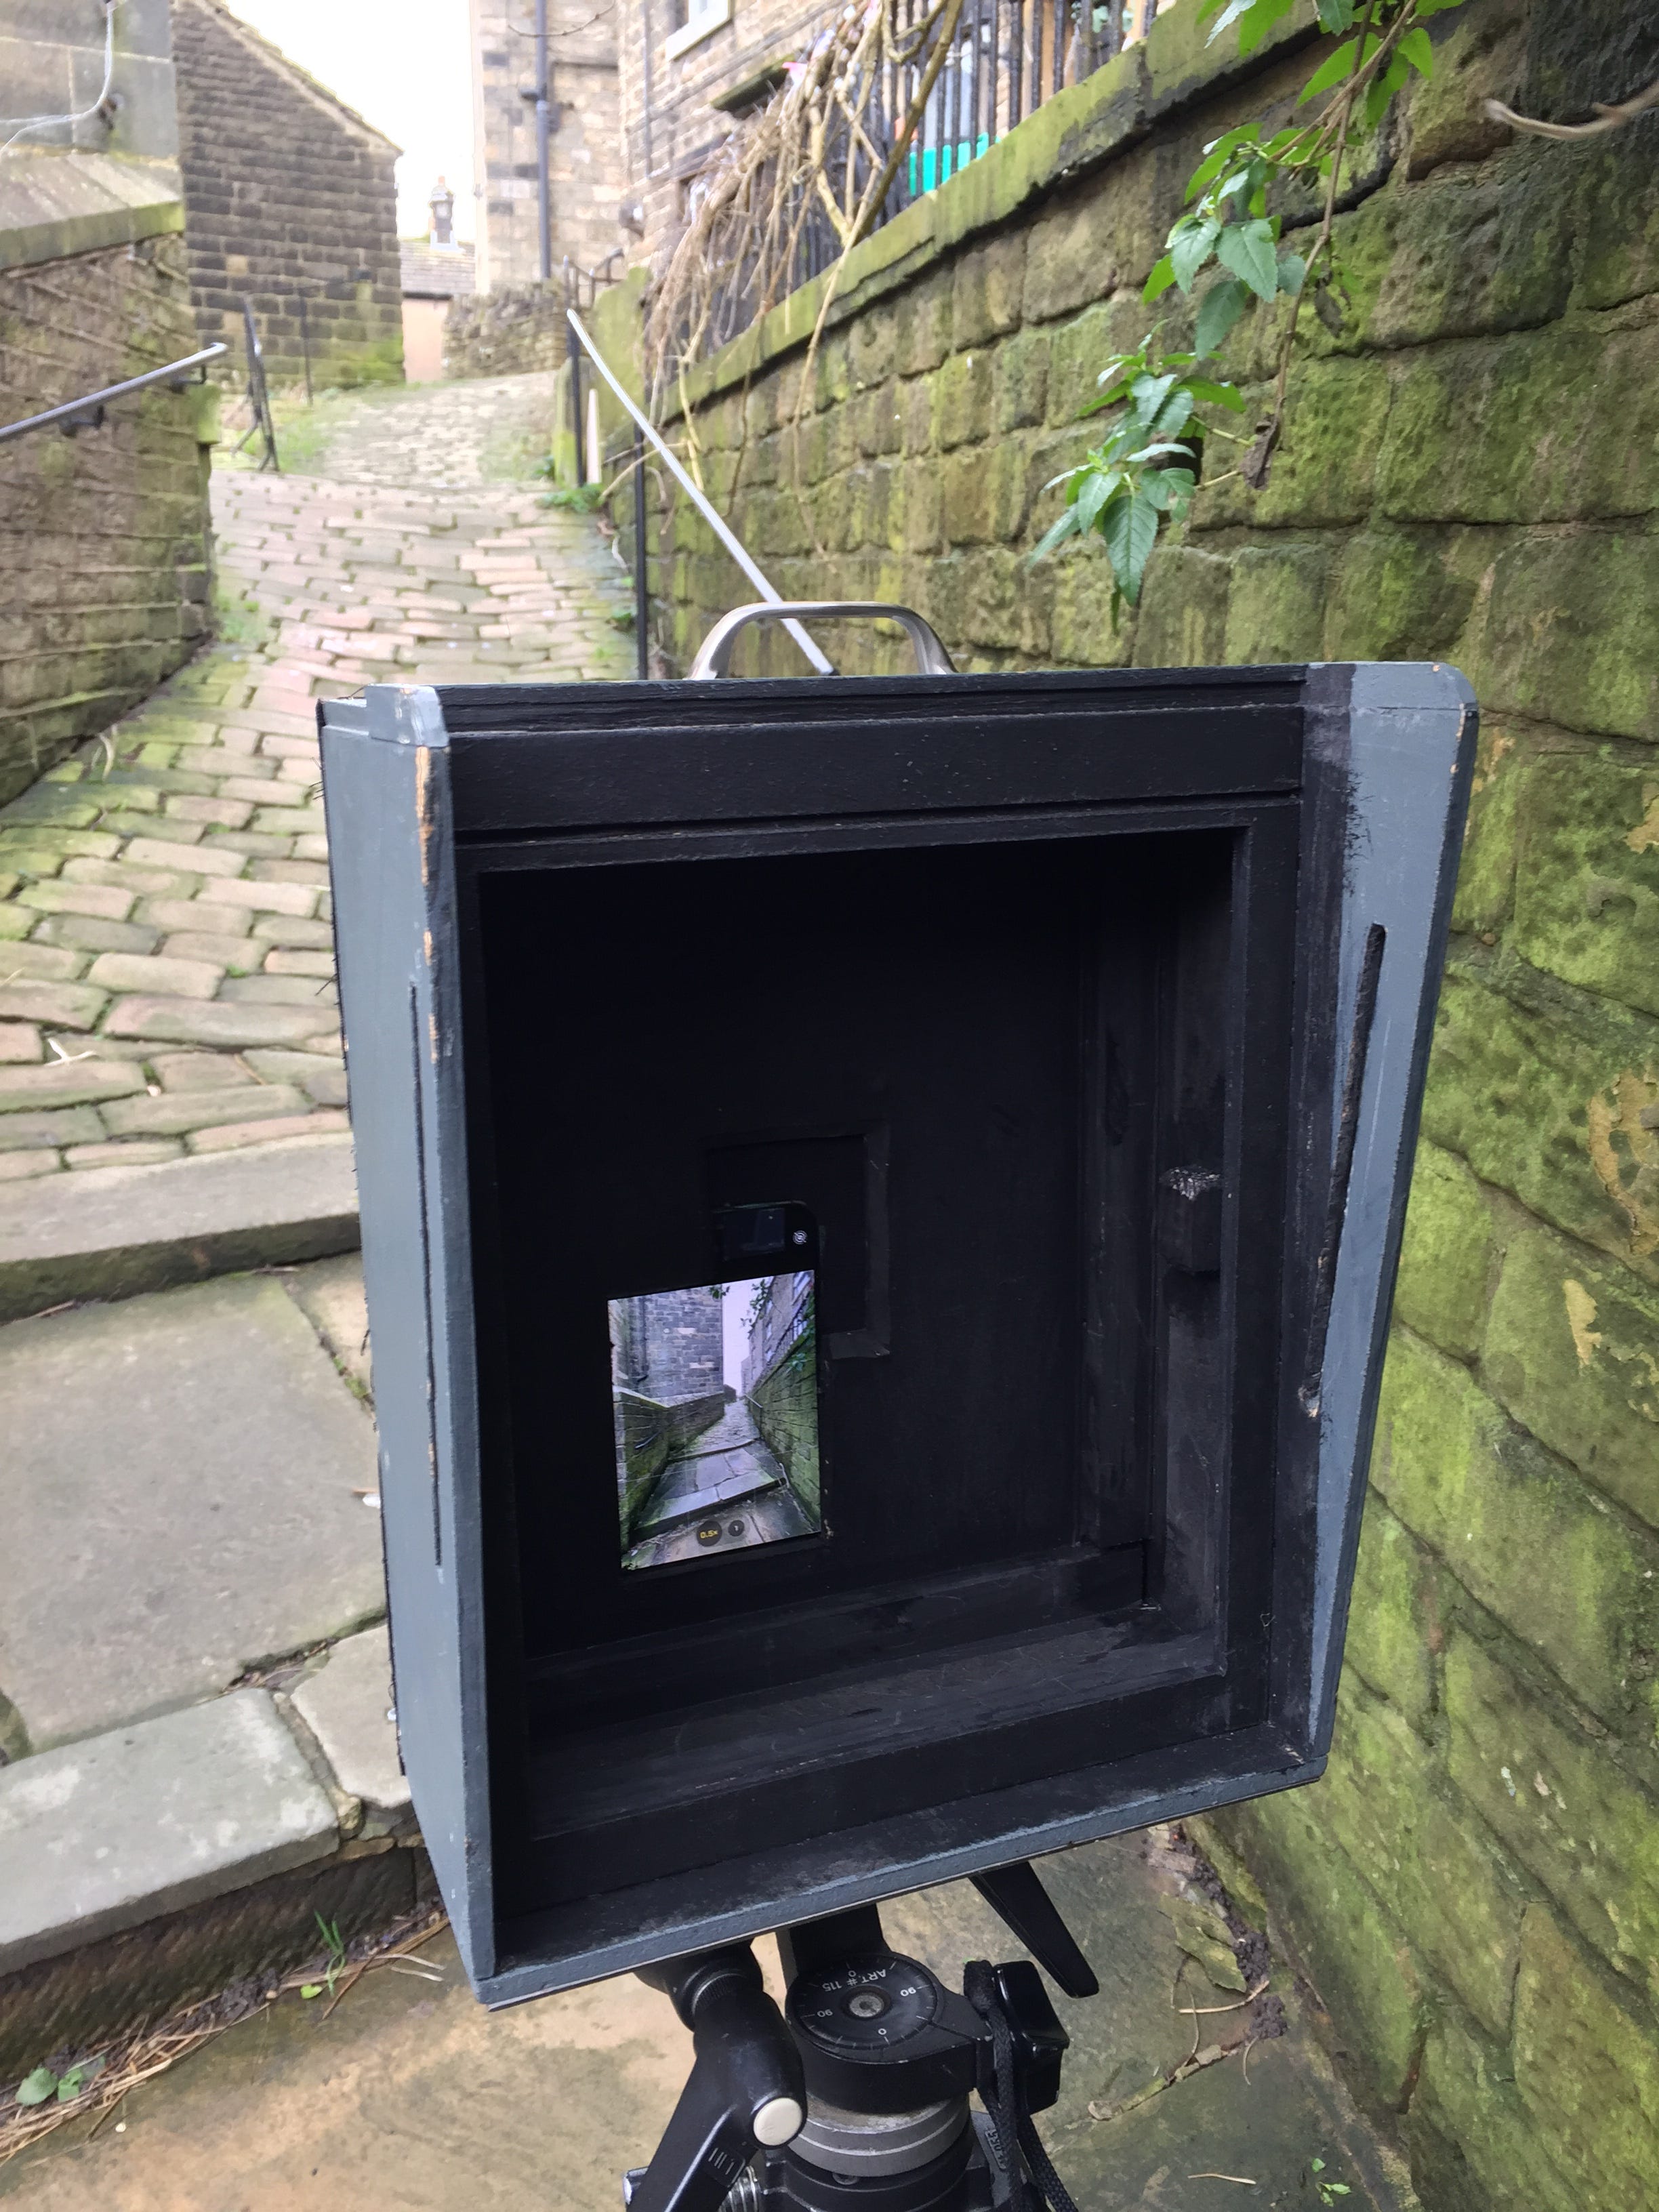
I loaded up a couple of sheets of very old Ilford HP5 to test it and did some supporting digital shots to show how it all worked. This is what you see in the back of the camera with the phone attached:
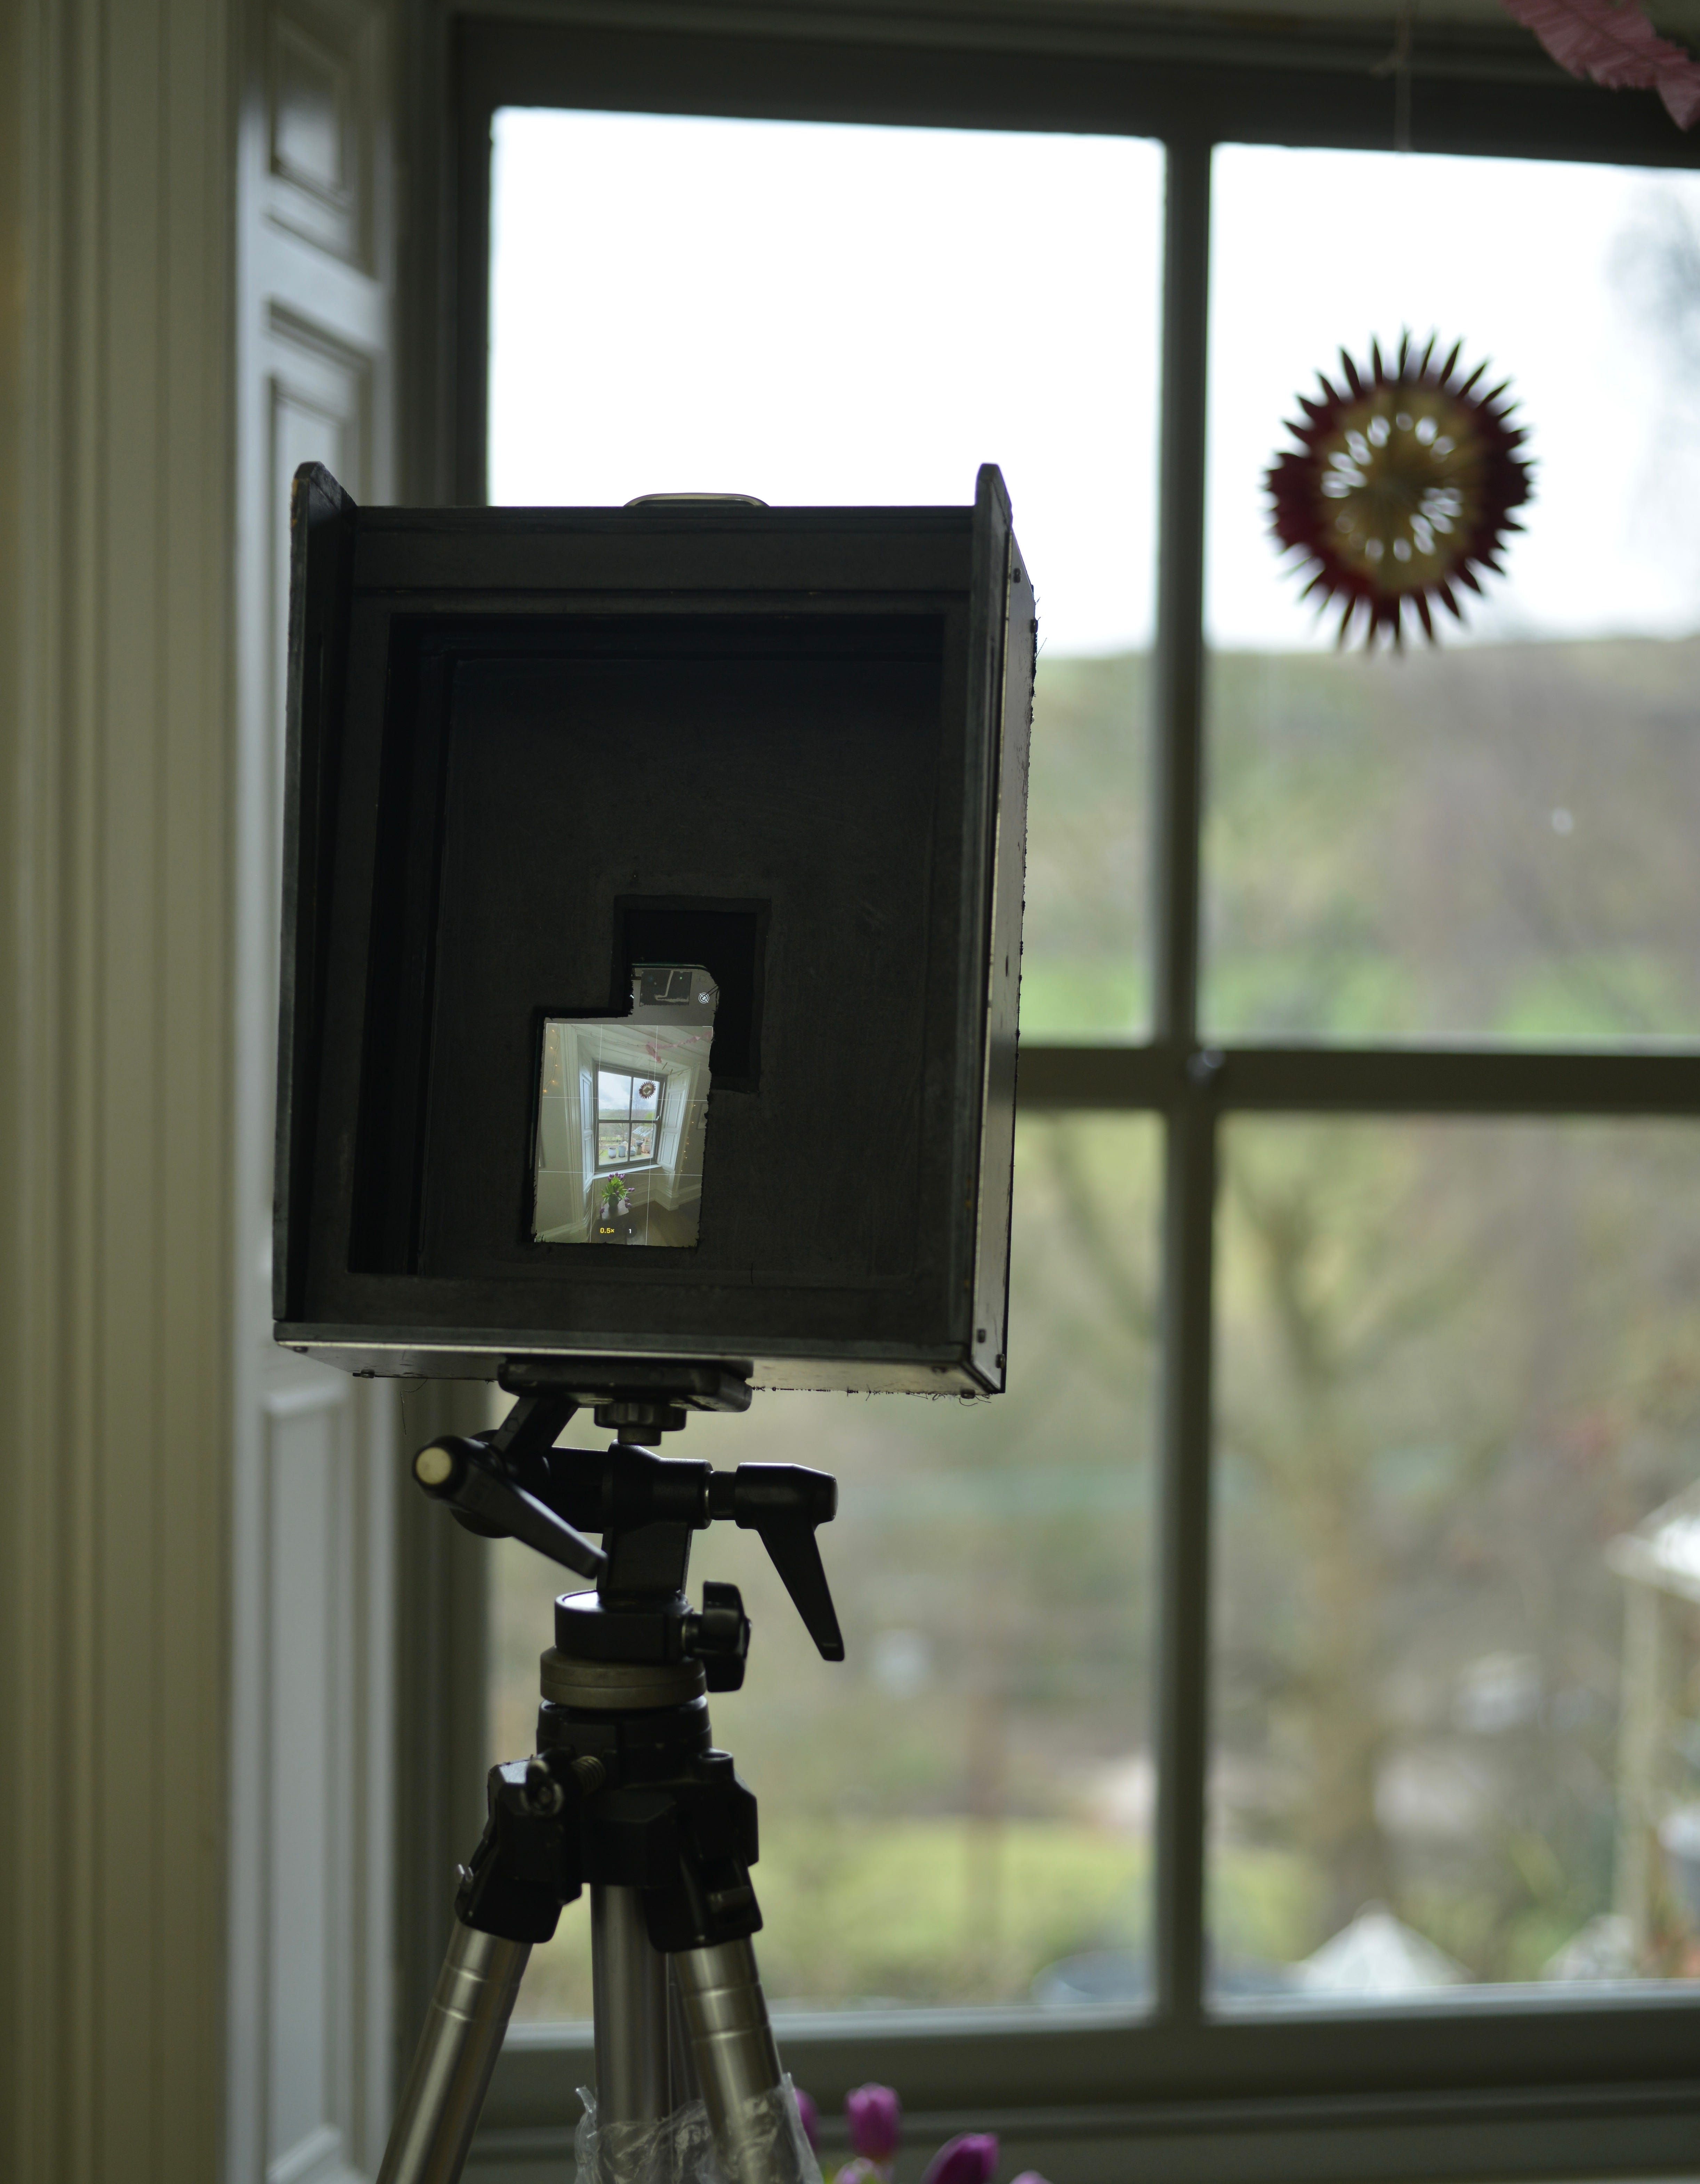
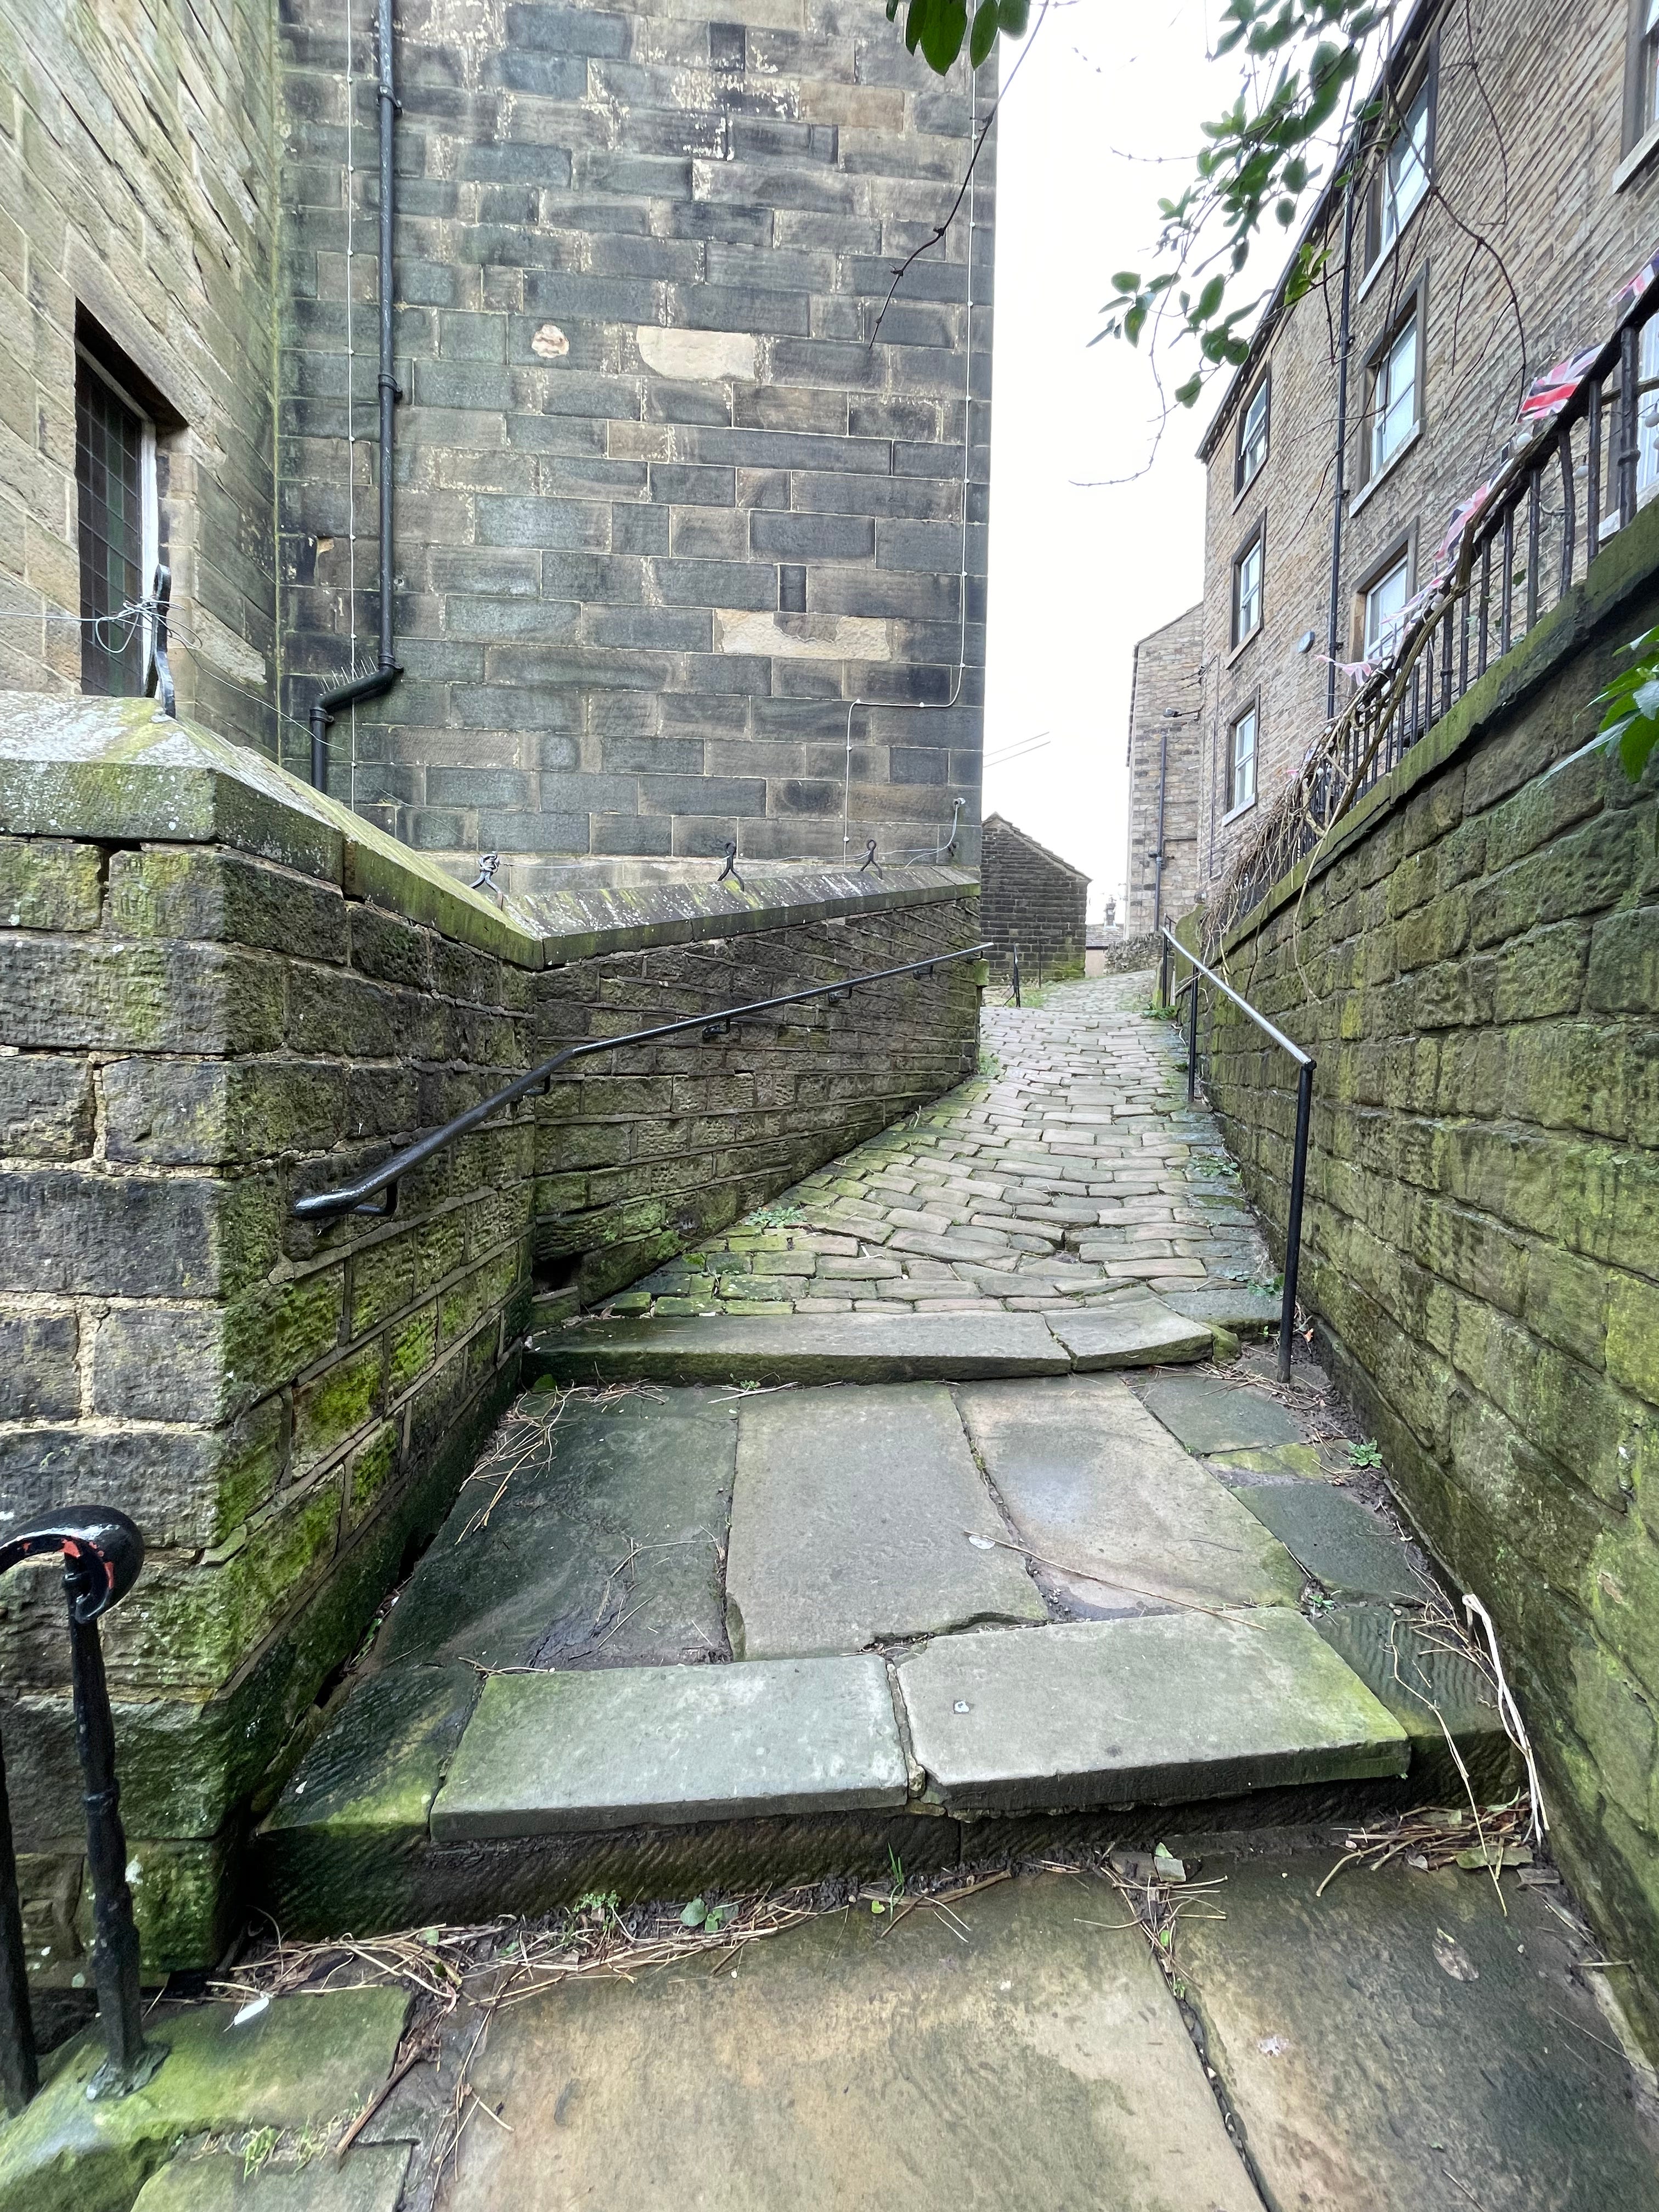
This is the phone shot:
Unfortunately the HP5 was so old it had lost speed and both sheets when processed were feint and grey. Not good.
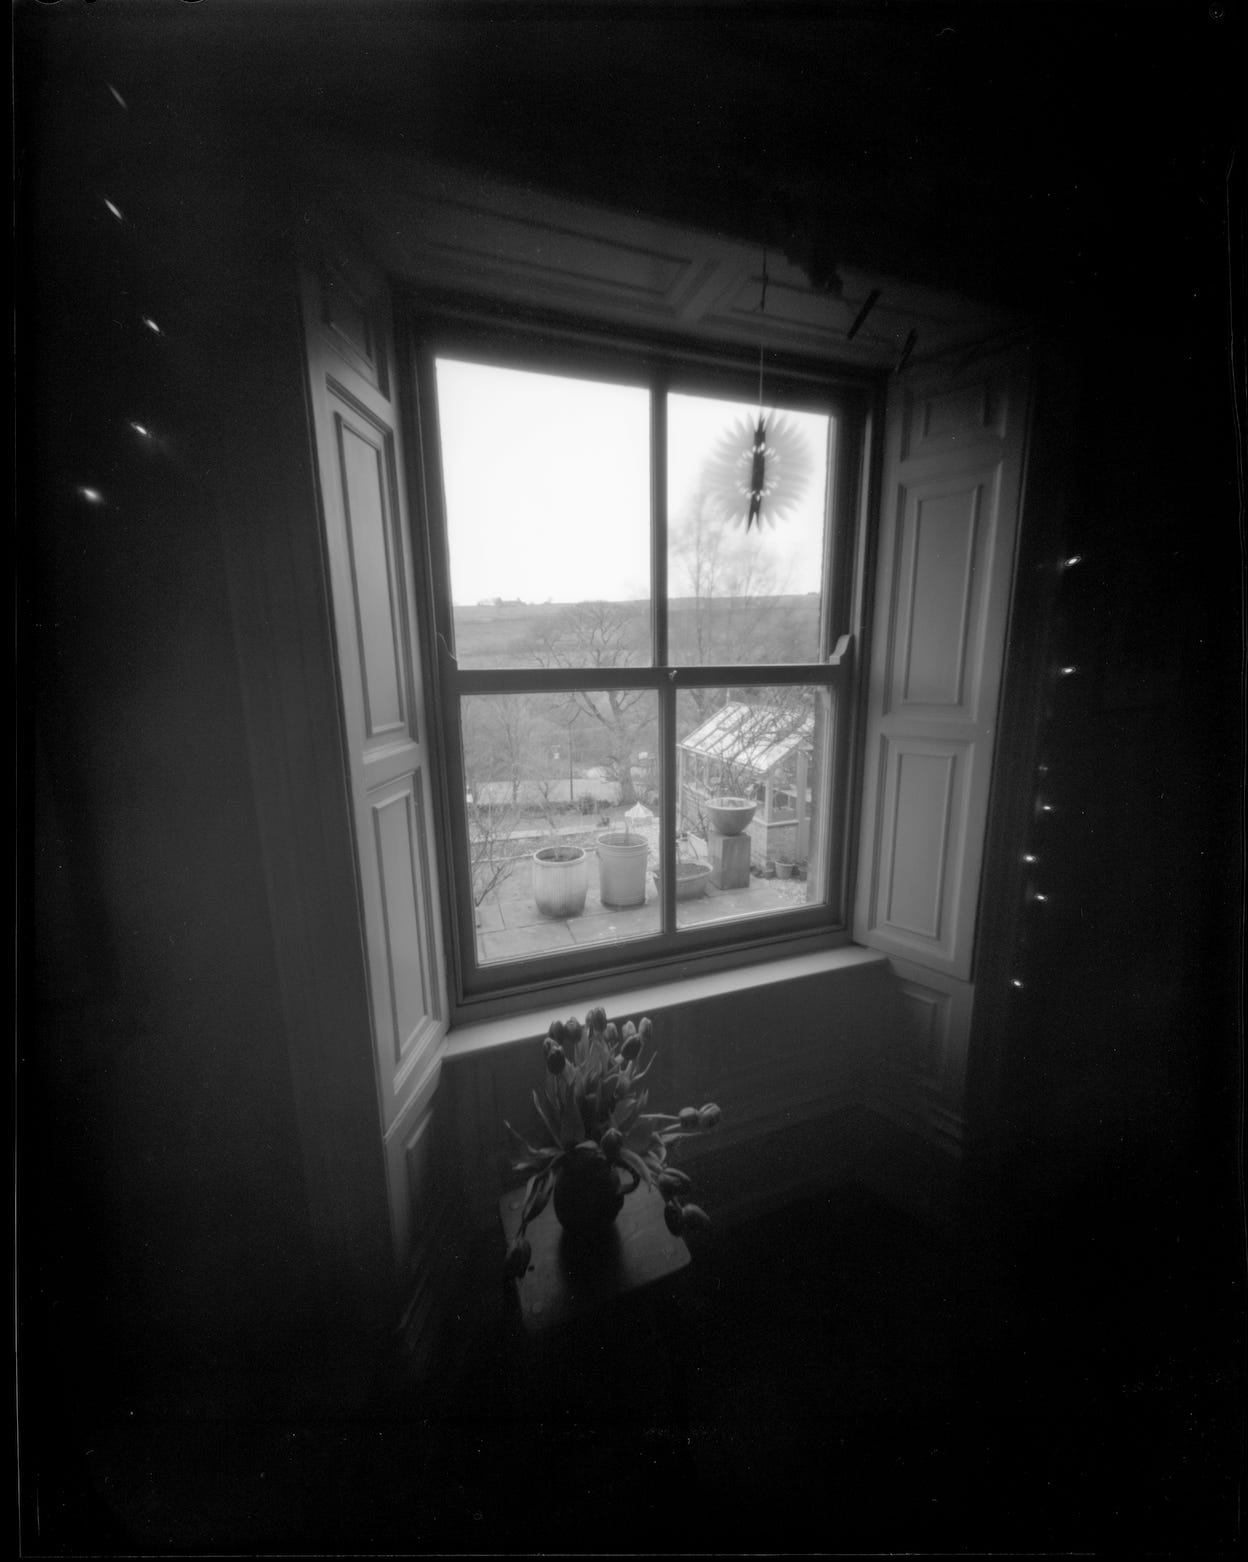
There was enough on the negative to let me know that I had got the thing to work and the angle of view was almost identical, so I loaded up another sheet of the old HP5 and rated it at 100 ISO/ASA instead, and the resulting image was much, much better.
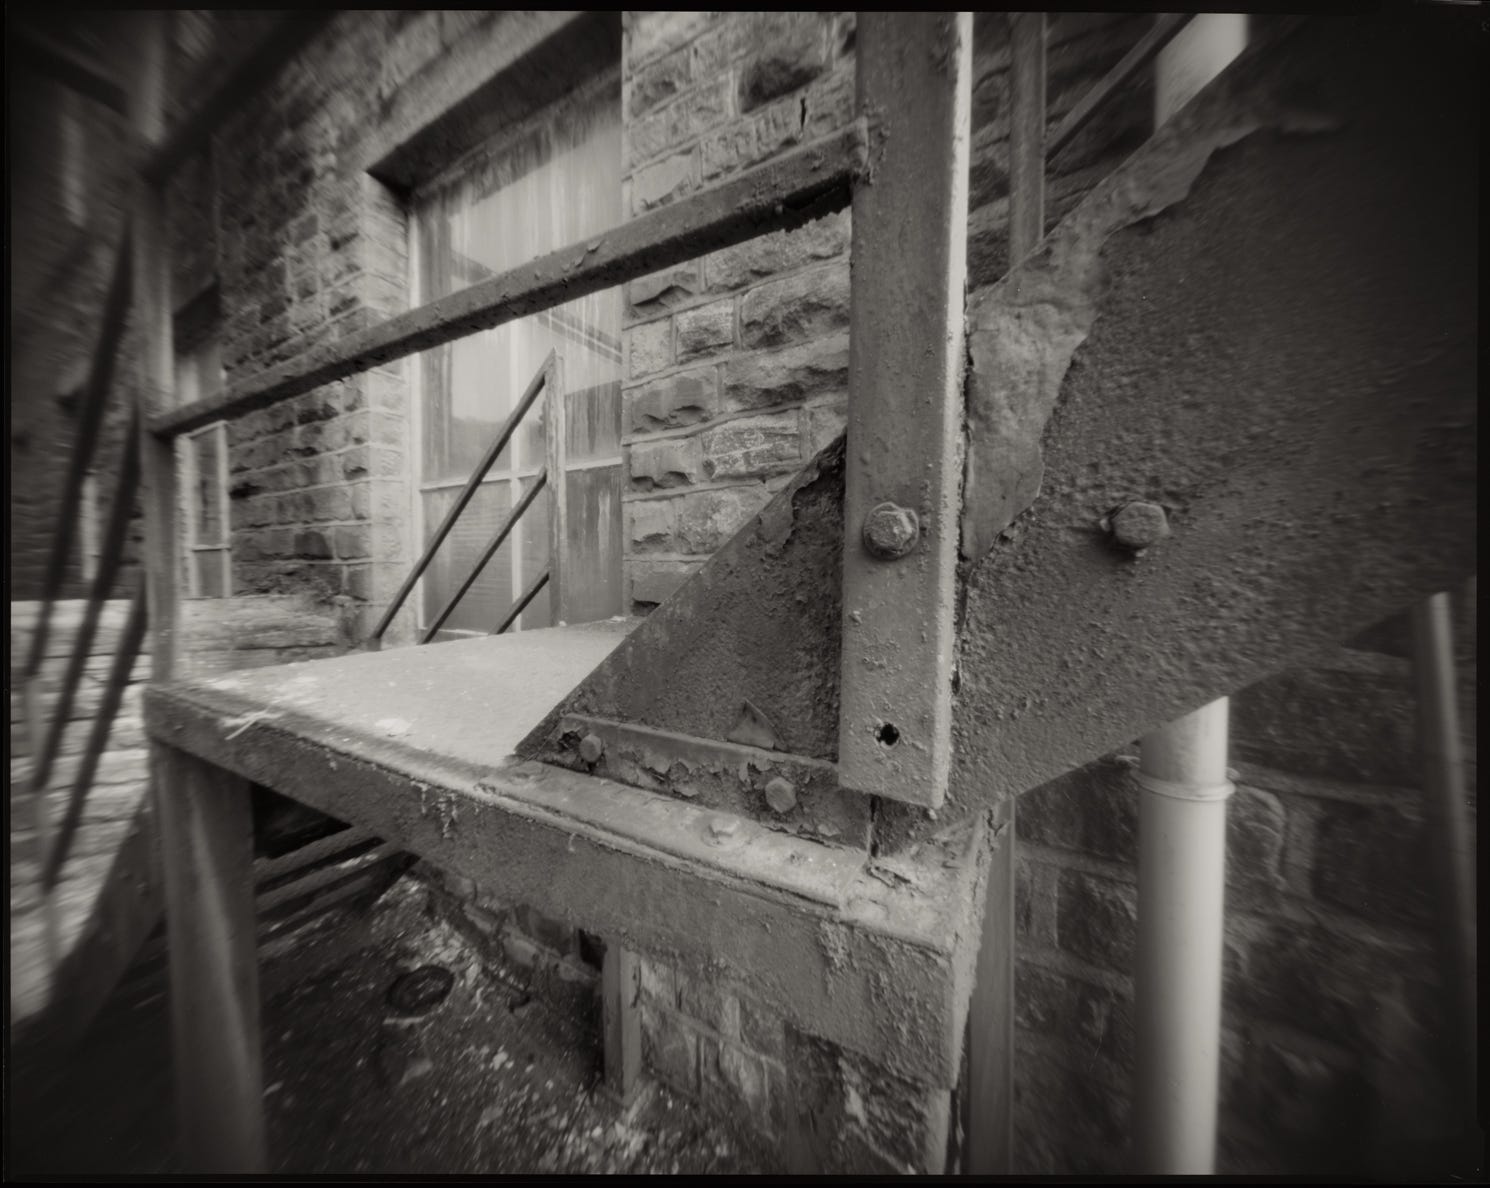
This was the shot, taken behind the church in our town:
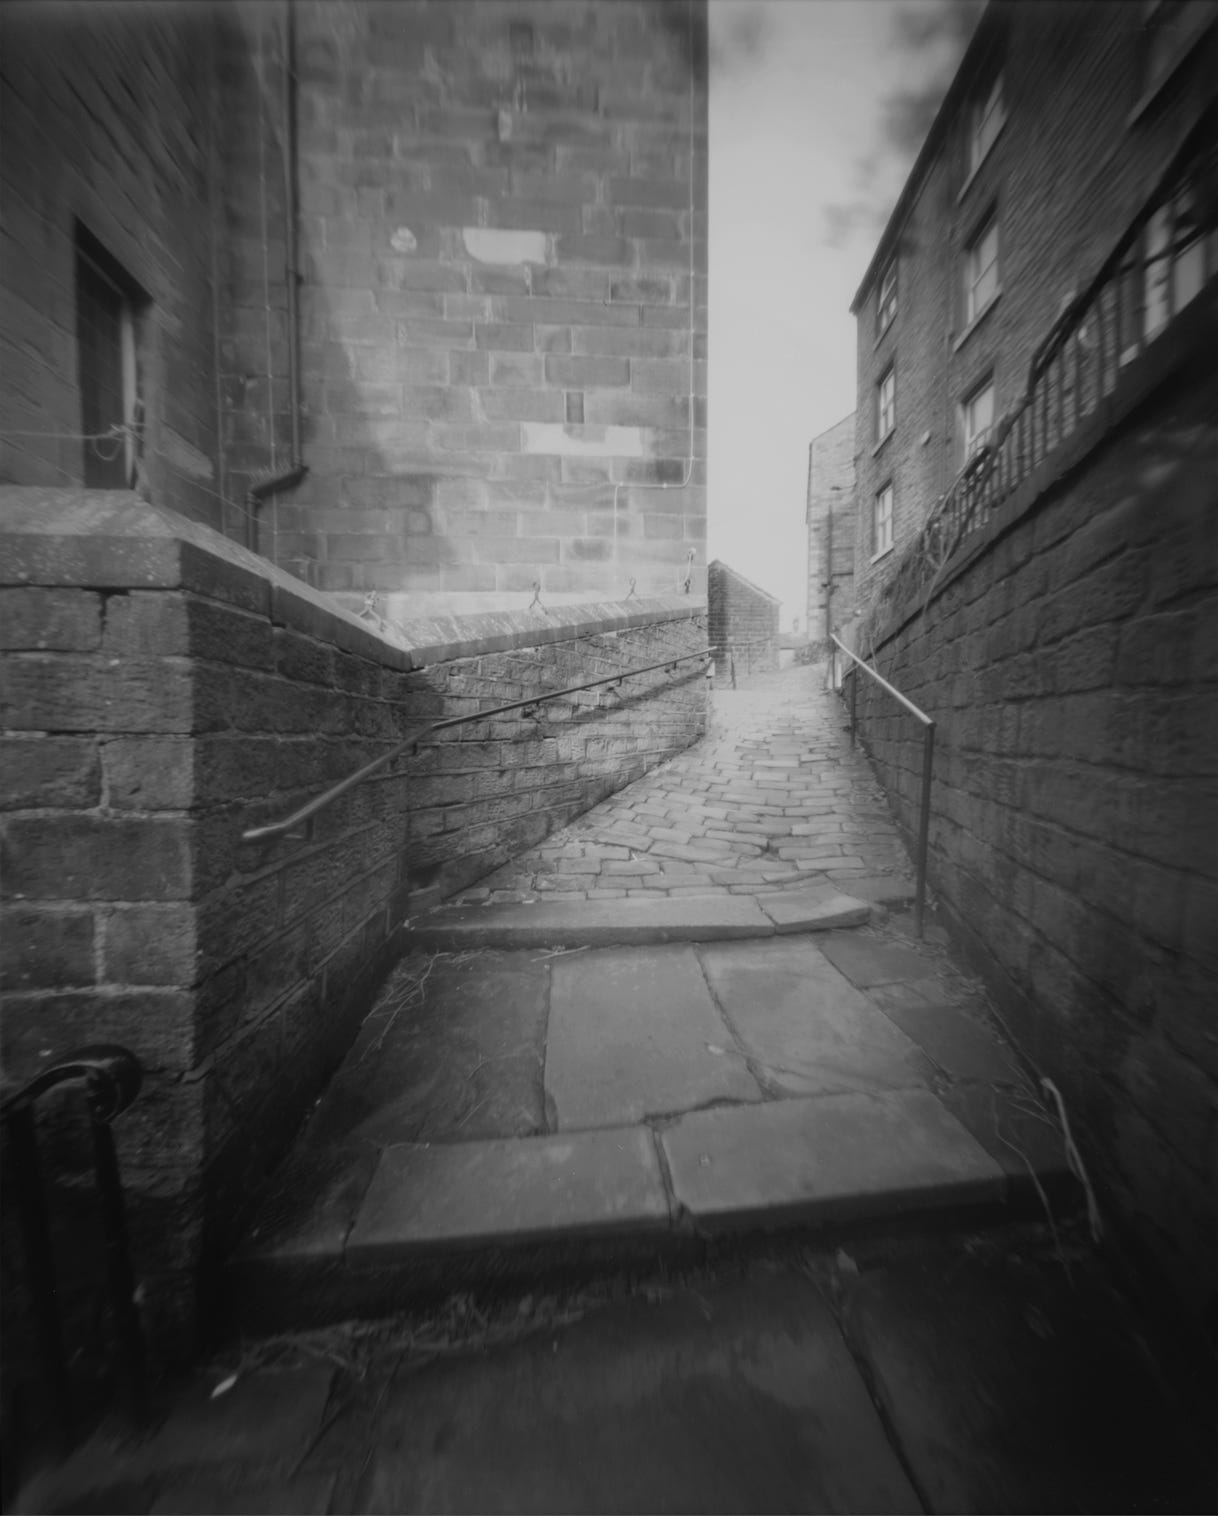
This is the view through the camera and the phone shot for comparison:
Now that I have this facility for previewing my shots, I feel a lot more confident about using it. There should be no more wasted images.
If you find my articles interesting or useful, please spread the word to anyone you can think of who would be interested.
If you have enjoyed this post and the information here and elsewhere on my Substack and you would like to support me, you can subscribe or just buy me a coffee at Ko-fi.com/andrewsandersonphotography You can send as little as £5.00, or more if you are feeling generous. This money goes towards materials used for the tests and printing for these articles. Alternatively you can be a paid subscriber.
Thank you for reading, please let me know your thoughts.
Andrew Sanderson March 2026.
Other places to see my work;
Instagram; http://instagram.com/andrewsandersonphotography
Facebook; https://www.facebook.com/andrew.sanderson.96155/
Original hand made darkroom prints are available from my online shop; www.andrewsandersonphotography.bigcartel.com
I also offer one to one workshops at my darkroom/studio in West Yorkshire, UK. If you are interested please email me at andrewsandersonphoto@gmail.com
Great and creative way to “see” your shot before committing with the film. Impressive!!
Brilliant idea. So does this make you a digital photographer?