Filters for Black and white.
Understanding and using filters.

Coloured filters have been used for black and white photography since the very early days, though their use would only have become widespread after the introduction of panchromatic films.
Their function is to alter the tonal representation of colours in a scene by reducing the light transmission of some colours. For instance; Visualise a red ball on the grass, photographed on a normal black and white film. In this situation the shades of grey could easily be the same for both, but if a red filter is placed over the lens, the green light entering from the grass is greatly reduced. An extra amount of exposure is given to allow the green areas to record on the film, which causes the red ball to appear overexposed because the red light was not retarded. This effect is usually described as; Filters lighten their own colour and darken their opposite. Keeping this phrase in mind will help you understand when a filter is appropriate.
If you are not familiar with the colour wheel you may find it difficult to visualise which colour is the opposite of another. Take a look at this chart and see how they are arranged.

A simple trick to determine the opposite colour of something is to stare at it for a few minutes, then look at some flat area of white. The afterimage on your retina is the opposite colour.
In practical use, filters are mainly used in landscape photography to darken skies and occasionally to lighten foliage. They can of course be used for portraits. If you were doing a portrait of a man with tanned skin and you wished to show the skin darker, you would use a green or blue filter. Conversely an orange or red will lighten his skin tones. With Caucasian sitters, a portrait shot through a red filter gives the skin a ghostly, porcelain look. An old friend of mine and a great photographer, Porl Medlock did a lot of portraits this way.
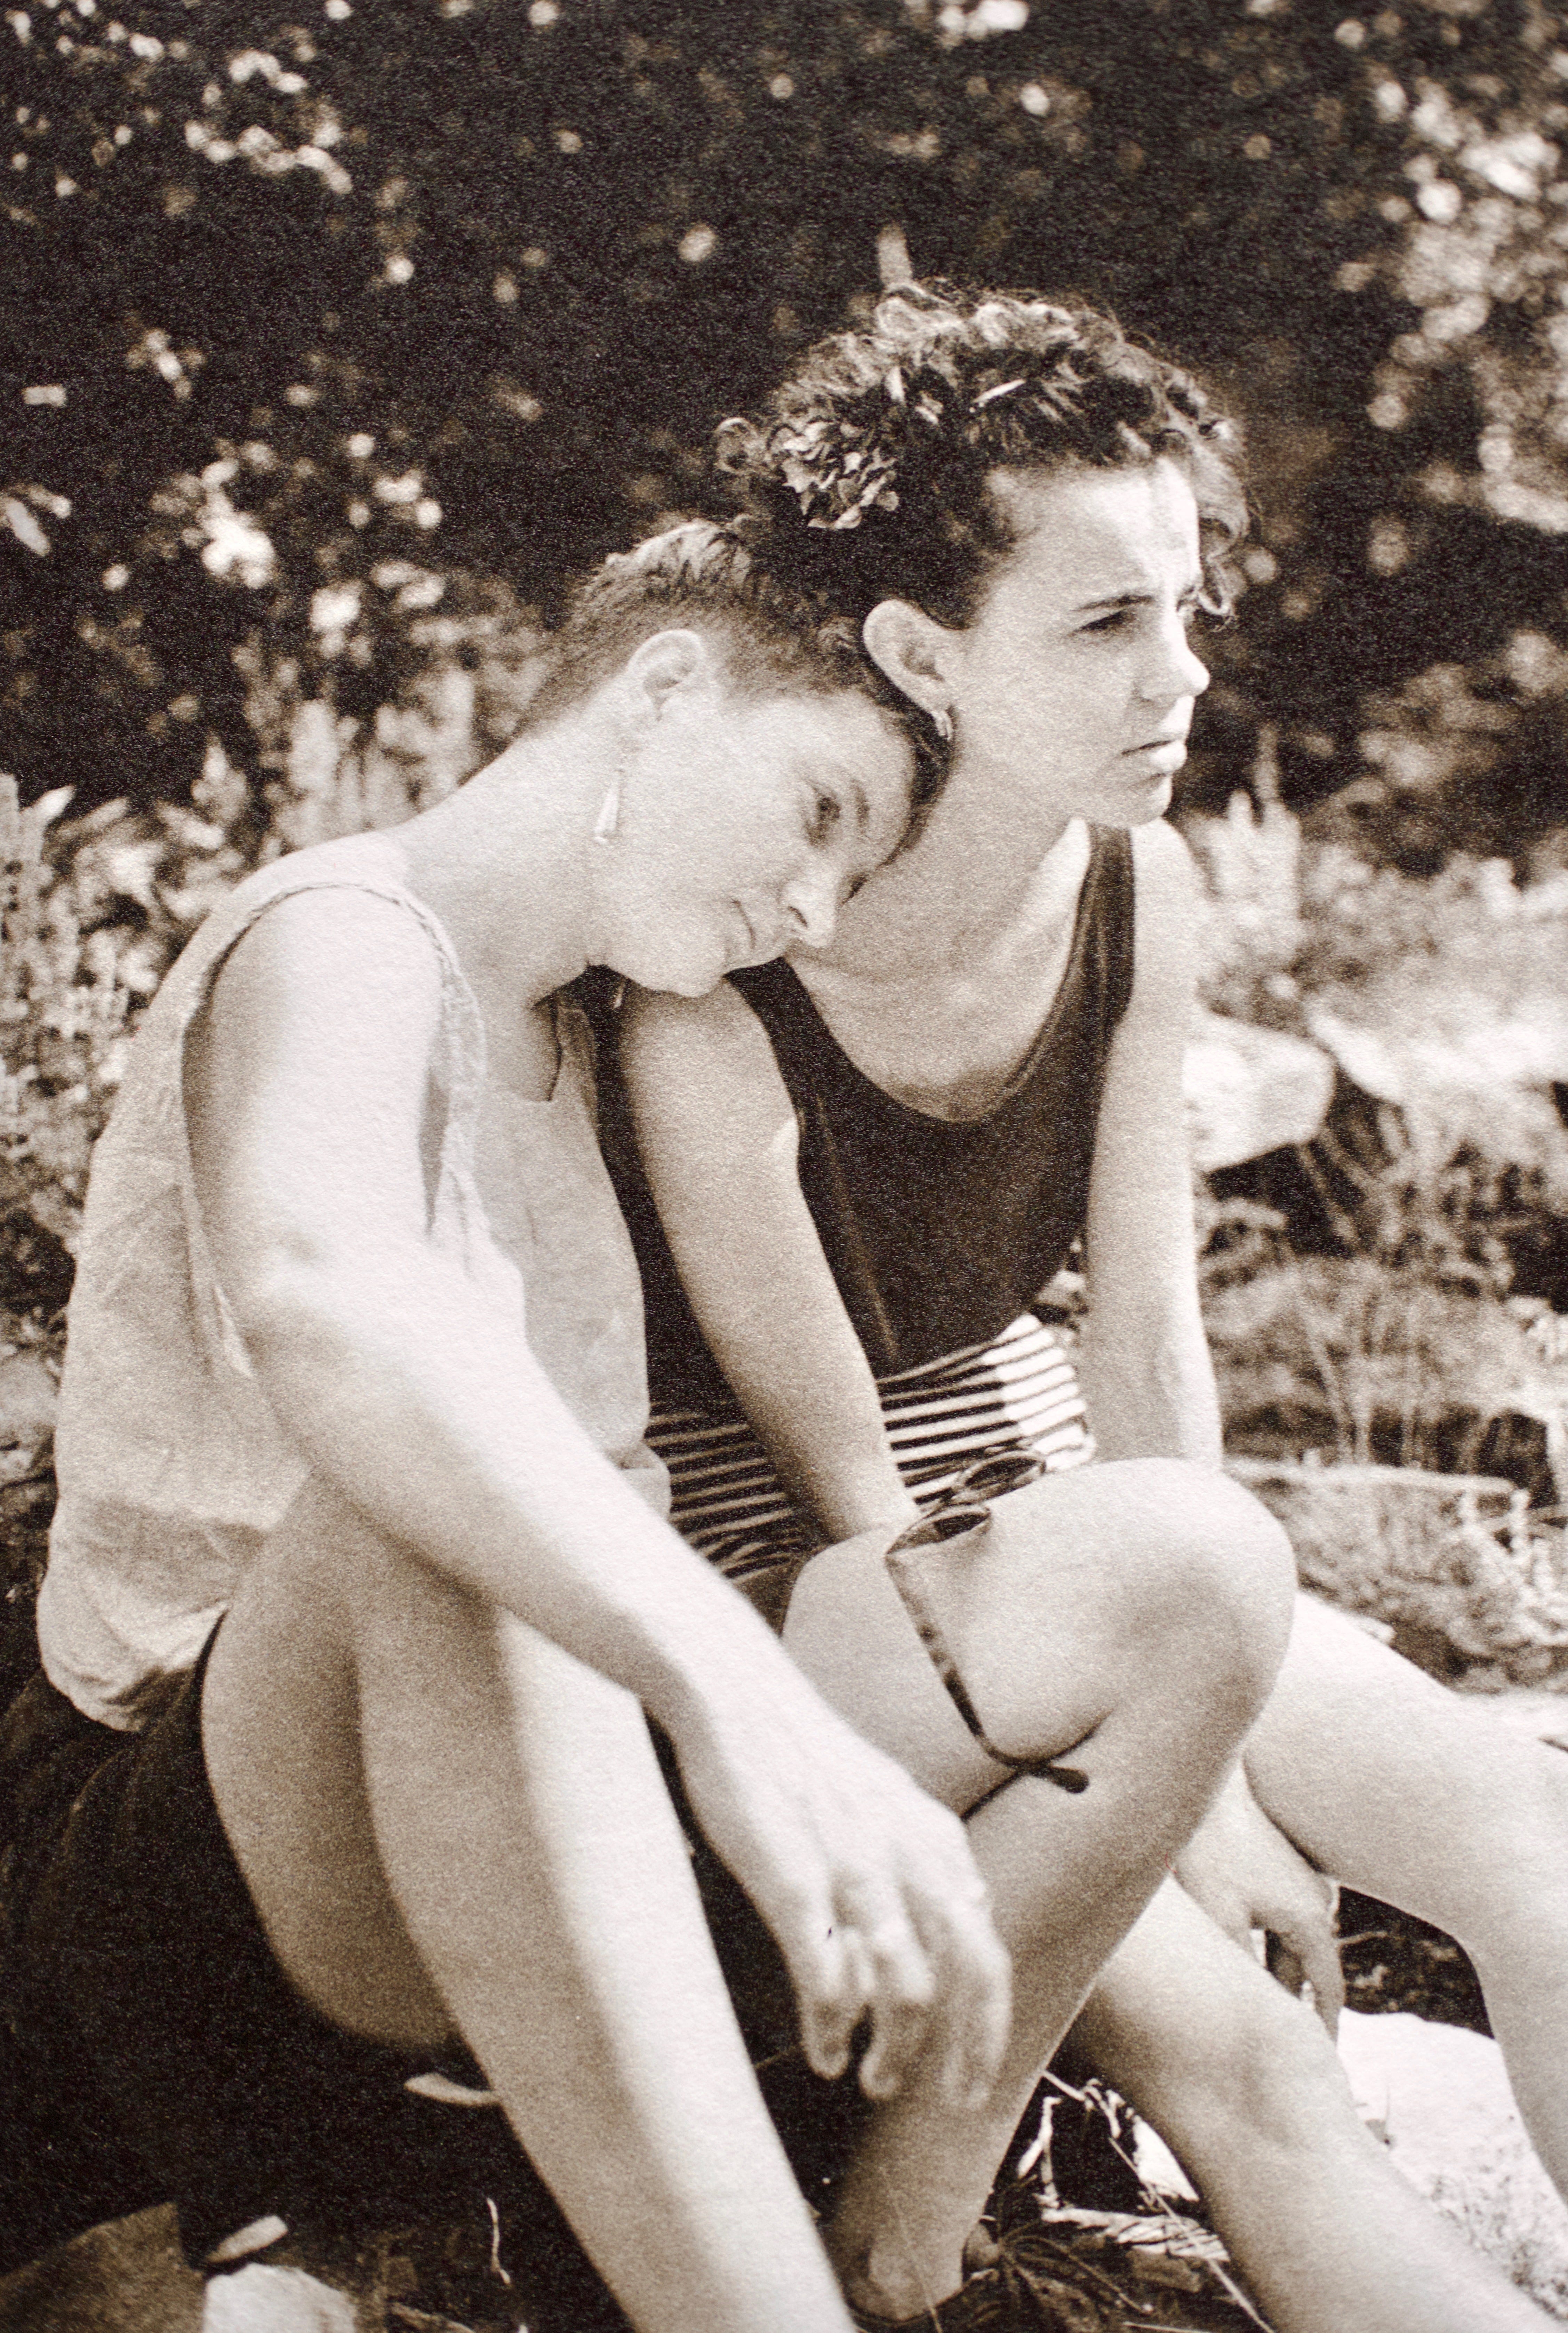
Dee and Susan by Porl Medlock.
Filter factor.
All coloured filters reduce the amount of light passing through and this must be compensated for, generally, the stronger the colour, the more correction is needed. Filter manufacturers sometimes put a number on the edge of the filter, but some don’t. Kokin, with their square filters for instance, give no information about how much to correct for. The usual method for informing the user of the exposure correction needed is to give a filter factor. This is a number that your exposure should be multiplied by, to arrive at the correct exposure. Why this method was universally adopted mystifies me. Why not just give the correction in stops? That would be much more useful out in the field. Who has time to multiply 1/250th of a second by 1.5? Why not just write; “1/2 stop adjustment”?
The following conversion chart gives filter factors and the actual exposure compensation needed in stops.

Metering myth.
The Web is awash with advice for young photographers and not all of it is good advice. Some of it has been around for a long while and myths become perpetuated by people who don’t think carefully about the technique, and/or don’t bother to test the theory. One such myth is that you don’t need to work out your exposure using filter factors, you can get a reliable exposure by using a cameras TTL meter reading with a filter attached. This might be true if you have a neutral density filter or a polariser, but it is certainly not true for coloured filters. The meter does not respond to all of the colours of the spectrum in exactly the same way as the film. Another problem is that the filter will lighten its own colour and darken its opposite, so your exposure could be affected quite strongly by the colours in the scene.
I conducted some tests with my Nikon F3, metering a grey card with and without a filter, noting the results. The camera meter was underexposing by half a stop with a yellow or a yellow green filter, but underexposing a full stop if an orange or red filter was on the lens. You should test this with your own camera, because there will be slight differences with different meters. Older types used a different system (Selenium, CdS, Silicon), so test the camera you will be using and make a note on your filter case if you intend to meter through filters. Personally I always use a hand meter and apply an exposure correction based on the filter factor, plus experience (see next part).
Not all filters are alike.
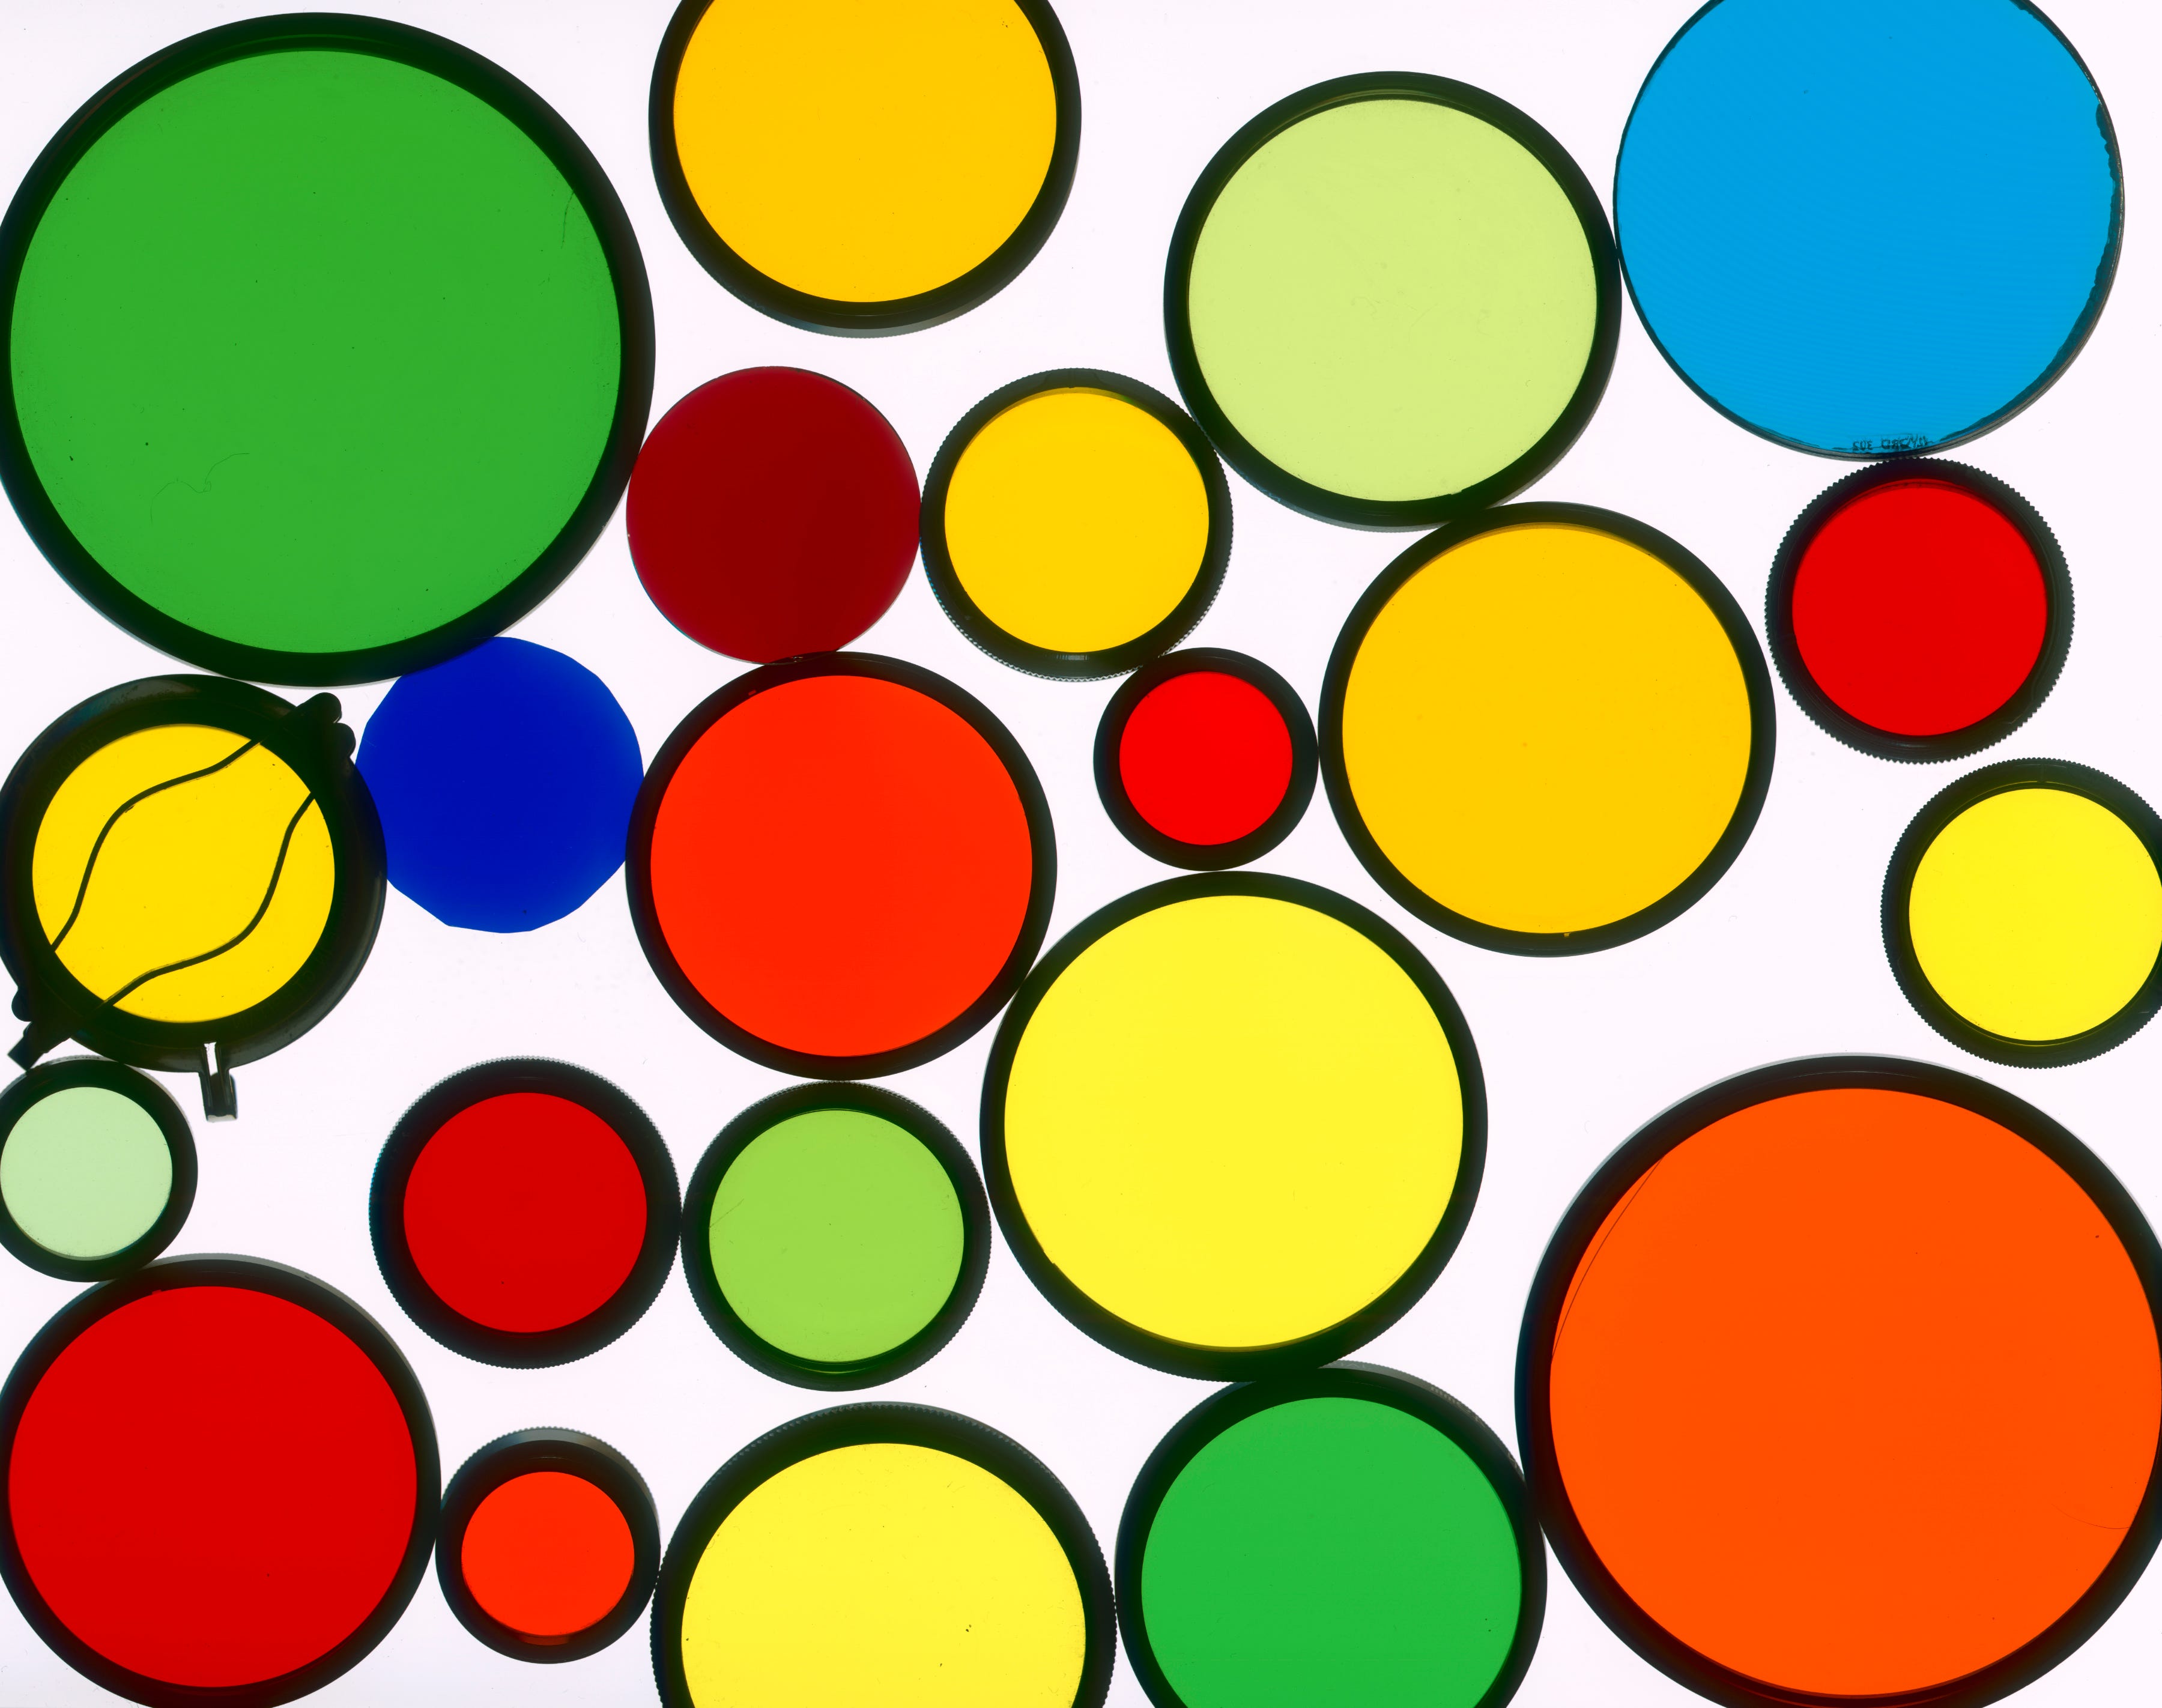
Look at the colours in the image above, there are three types of red, two types of orange and three greens. The charts that give information on filter factors for black and white photography state that a filter factor of 3 should be used with an orange filter (one and two-thirds stops extra). But it can be seen at a glance that the density of these oranges is different, so how can they have the same filter factor? I have a filter for my Rollei twin lens that I have always thought of as a deep yellow, it was made by Minolta. When I looked up the code written on it I found it was a light orange.
I decided to get out all of the filters I had in various sizes and put them on the scanner. I did groups of all similar colours and then placed sections of them side by side for comparison. The variations were quite surprising.

The first two squares are yellow/green filters, the rest are designated green filters, but as you can see, there is quite a difference in hue and intensity between them.
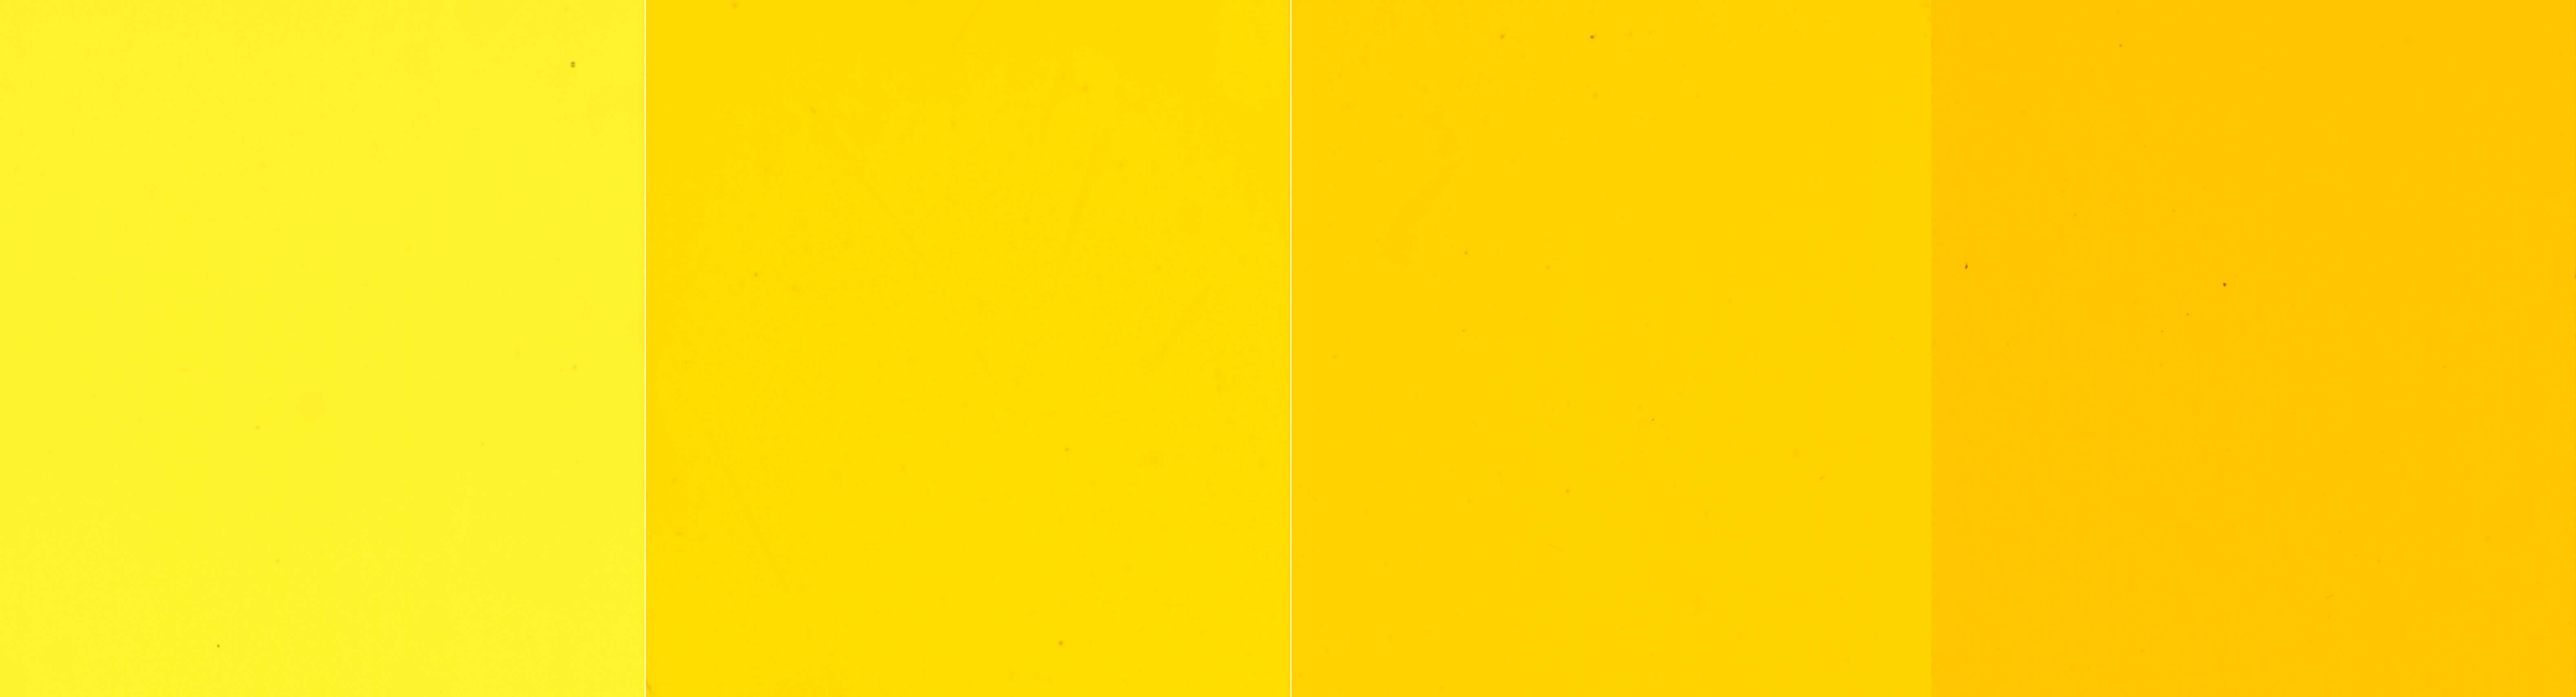
Here are four yellow filters with a marked difference between the first and last. This would make a difference to their effectiveness for darkening blue skies.

With the oranges and reds I found the same problem. The first two in this set of eight squares are designated as orange filters and all of the rest are red. There is about half a stop of exposure difference between the two oranges, which is bad enough, but a huge difference between the reds three and nine. Using just the manufacturers standard filter factor with these red filters would result in quite different exposures and effects.
In some cases you may find a deep red filter which is darker than the usual R25. The one I used to have (before dropping it and breaking it) was ex military. These give a more extreme darkening of blues, but need more adjustment beyond the usual 3 stops for red, nearer to 4.5 stops.
Some films will respond better to these deep reds than others, it’s worth looking up how far into the red end of the spectrum your film will record. If you look at the spectral sensitivity of HP5 and Delta 400 you can see that the Delta extends more into the red making it a better choice.
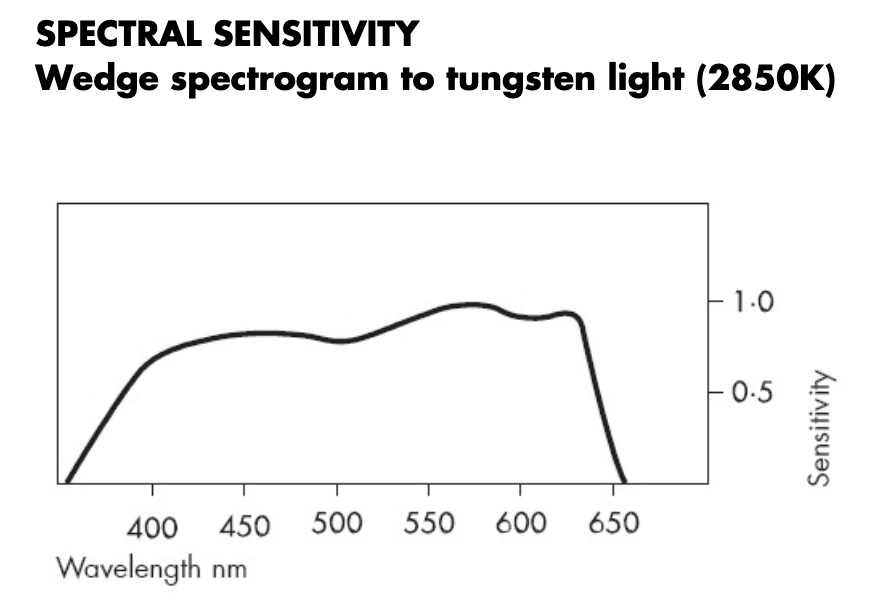
HP5

Delta 400
Filters for other films.
Then of course there are the pseudo infrared films made by Rollei, Ilford, Konica and Efke. Using these with a red filter gives snowy white foliage, but for best results you need to shoot on a sunny day. The Ilford SFX can be shot as a conventional film without a filter, though it still looks slightly odd compared to FP4 or HP5. A slight infrared effect can be achieved with a yellow filter, but use an orange or red for a more extreme look. An infrared filter is best for the full effect.

Ilford SFX without a filter

Ilford SFX with an infra red filter.
The filter factor marked on your filter will not be accurate with SFX film. Refer to the chart below for the correct adjustment.

When should you use a filter?
There is no point using a filter to darken blue sky if you don’t have any blue sky. On those days when the cloud cover gives a white sky, a filter will change nothing and only lose you valuable light. Use filters wisely and choose the colour to give the effect that you desire. A simple test will give you information that you can refer back to when you are out shooting. The next time you have really good clouds and deep blue sky, you could set up the camera on a tripod and do four exposures; The first would be unfiltered, followed by a shot through the yellow, orange and then a red filter. When the film is processed and the final images are viewed, the differences should be obvious.
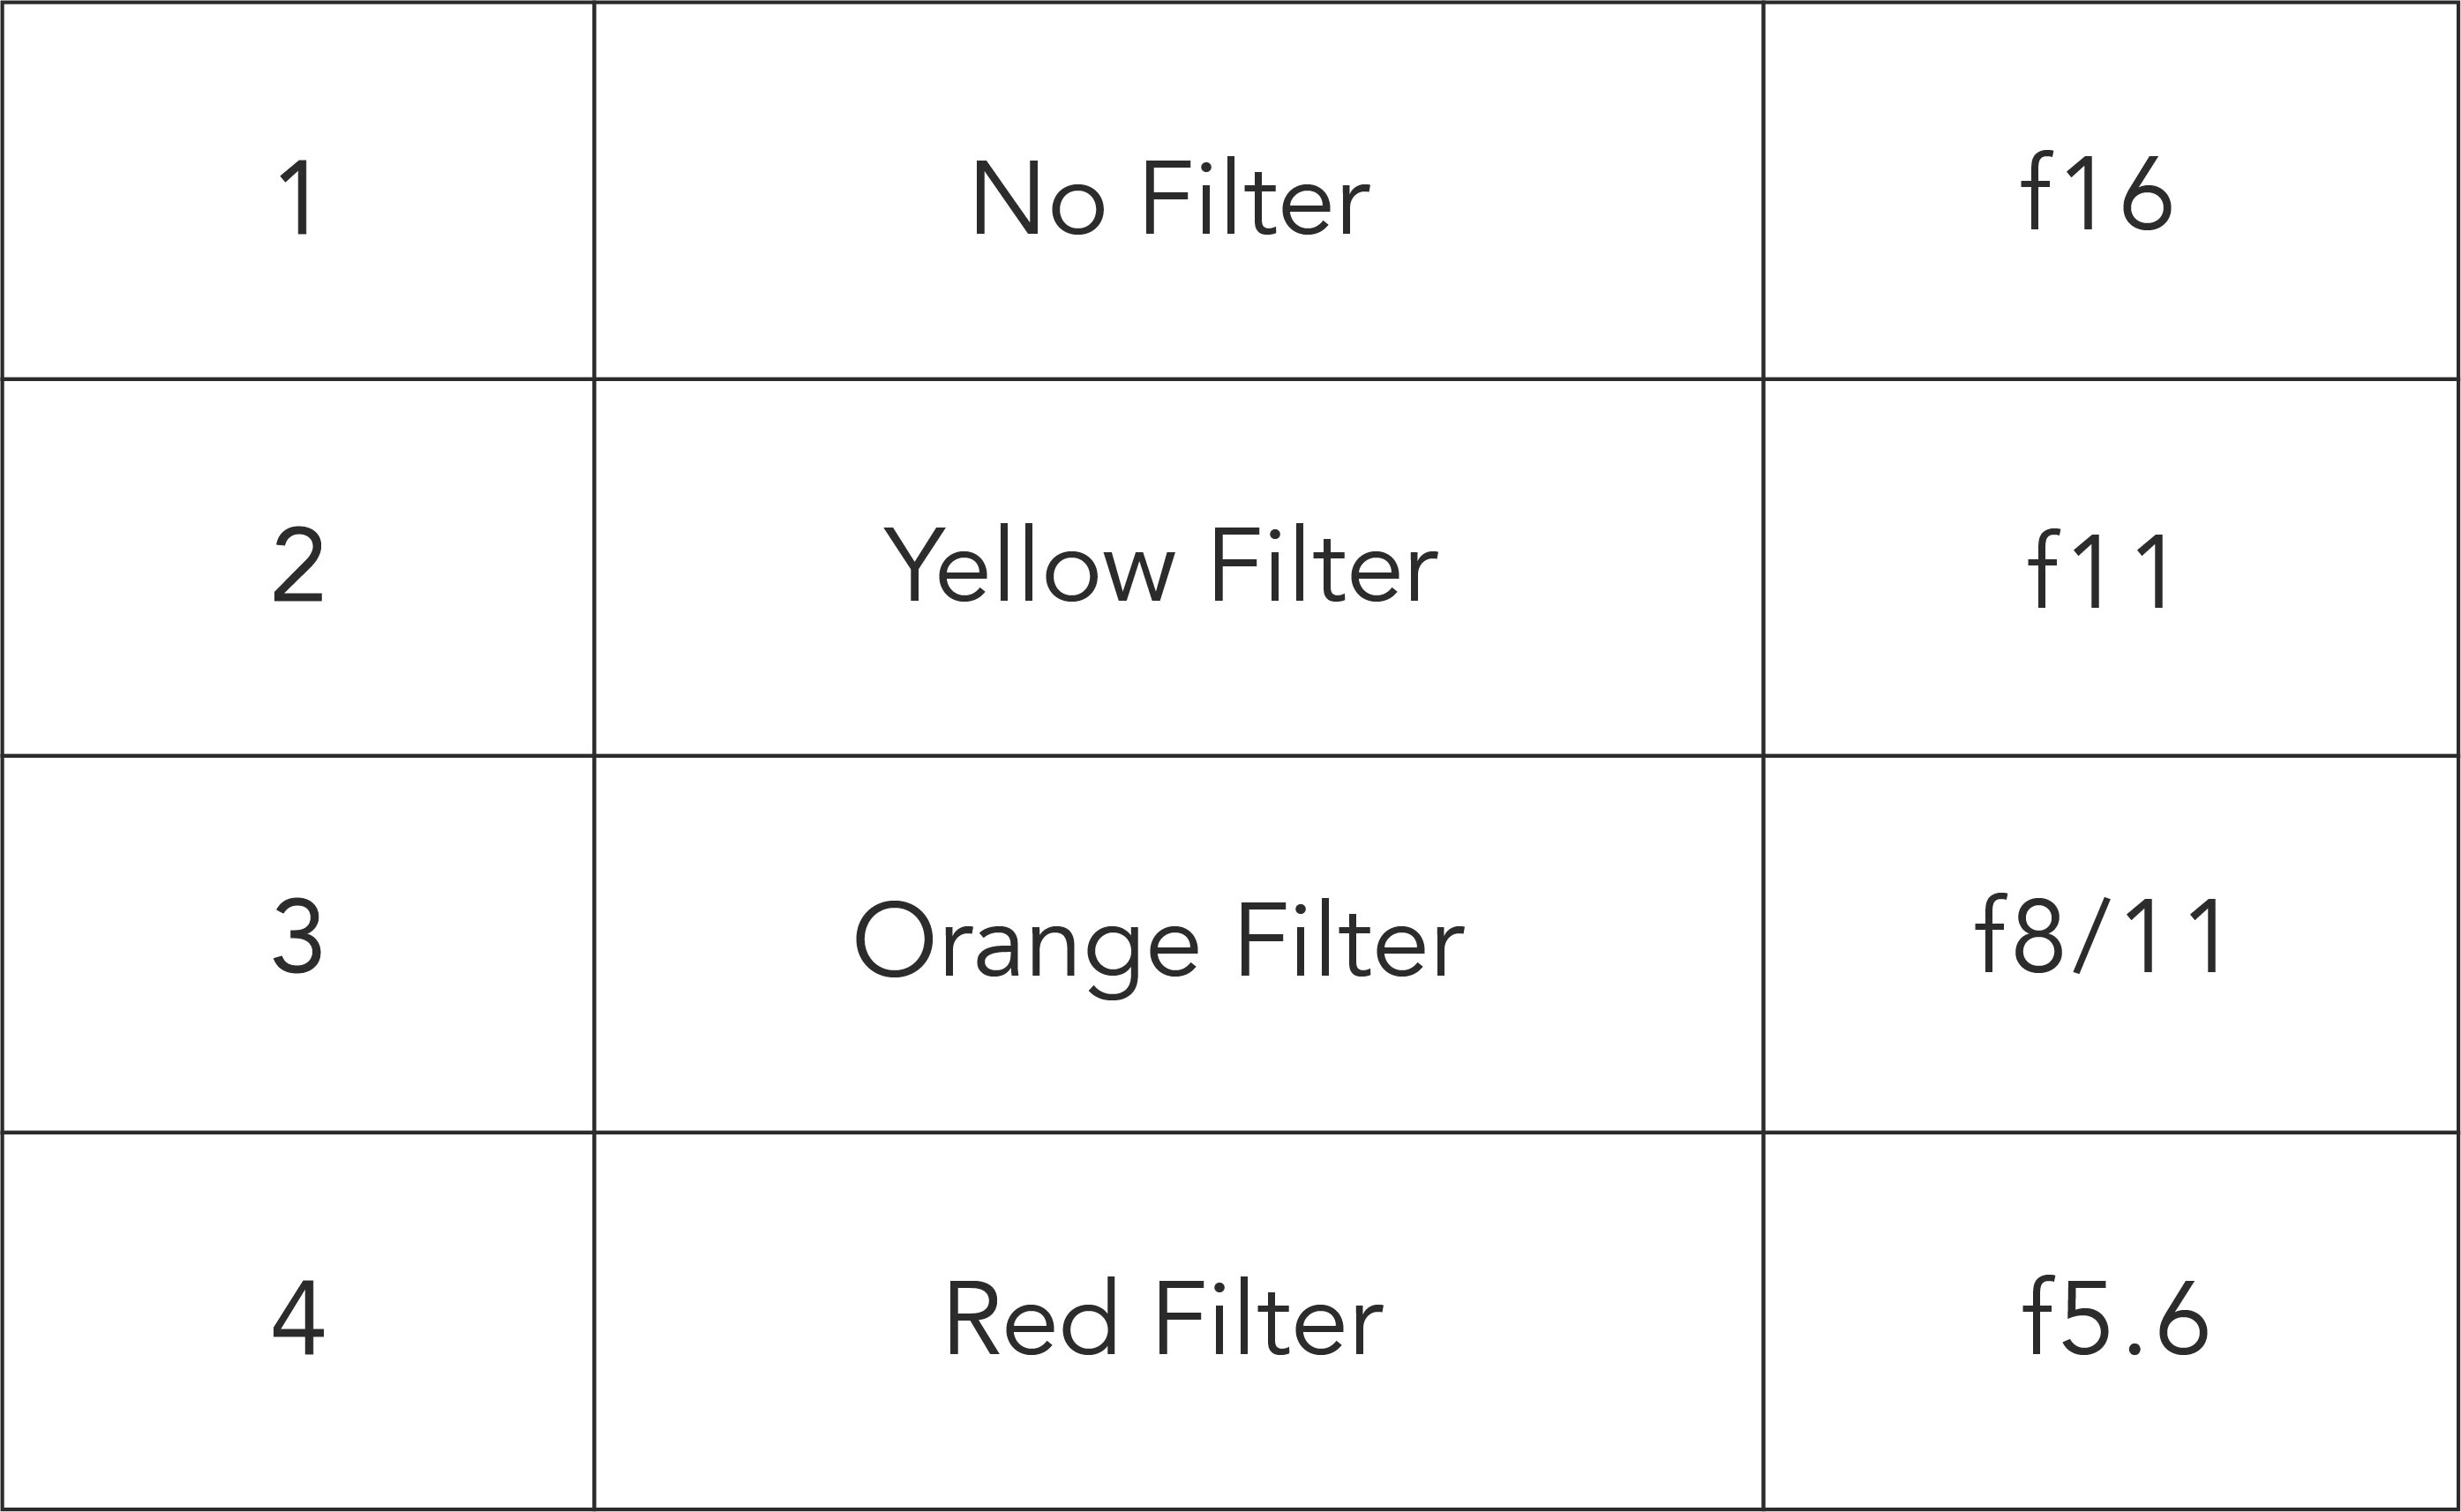
The test.
Work out the shutter speed for your unfiltered shot at f16, set the speed and then use these apertures with the corresponding filters. Planning ahead like this makes the test quicker and then the clouds don’t change too much between shots.
Filter sizes.
How many cameras do you shoot with? Personally I have rather too many and a corresponding large number of different filter sizes. This makes the use of filters a bit of an expensive problem. I think I own filters in about nine different sizes, but a full set of colours in only three sizes. I realised that I didn’t need a full set for every lens size, because a lot of my landscape stuff is shot with the camera on a tripod. This means that I can use a larger filter than I need and just hold it in front of the lens when I am firing the shutter. The 77mm filters I use on my Mamiya RB67 are ideal for this.
Greens and blues.
These colder colours are used less (certainly by me), though reading through the nonsense on the web it would appear that; ‘a green filter should be used for all landscapes because it lightens greens’. In theory it does yes, but go out and test it and you will find that it doesn’t have a strong effect. If you want lighter greens shoot in springtime, or experiment with Ilford SFX, with and without a pale yellow filter.
Deep blue.
Using a deep blue filter will give you the look of Ortho film. Its use is limited, but it can increase the look of atmospheric haze a bit. Tanned or reddish skin will be darkened by it and daffodils and other yellow flowers look black, which is quite novel.
Polarising filters.
I think everyone knows that polarising filters reduce reflections, and this is usually described in terms of photographing window displays, but the effect also happens with water and this applies to the wet surface of leaves and grass. Sometimes it can remove the highlights on foliage, leaving it looking a bit flat and lifeless. My favourite use for the polariser is in conjunction with a deep red filter for much darker skies, though the loss of four and a half stops usually requires the use of a tripod.
Conclusion.
As with most things, don’t rely on the stuff you read online, go out and test things for yourself. For instance, how effective your red filter will be at darkening the sky will depend on the film you are using, the time of day and whether you are in Arizona or London.
Try some out, make notes and see if you like the look, but don’t just use them because you read somewhere that you have to. Make your own mind up based on testing for your materials and location and only use them if they improve your pictures.
Andrew sanderson June 2025.
If you find my articles interesting or useful, please spread the word to anyone you can think of who would be interested.
If you have enjoyed this post and the information here and elsewhere on my Substack and you would like to support me, you can subscribe or just buy me a coffee at Ko-fi.com/andrewsandersonphotography You can send as little as £3.00, or more if you are feeling generous. This money goes towards materials used for the tests and printing for these articles. Alternatively you can be a paid subscriber.
Thank you for reading, please let me know your thoughts.
Great article. I’ve had a similar experience with the various filters I own. I’m not sure there has been a single one that metered correctly TTL compared to the spec provided by the manufacturer. Test twice, shoot once :)
I have to admit to being astonished on my first workshop with you that my favoured yellow/green filter wasn’t being handled correctly by the meter in my Contax 139q. Under by half a stop. I subsequently found red 1.5 stops under, orange 1 stop etc. Crucial information for correct exposure as you highlight in this excellent article.