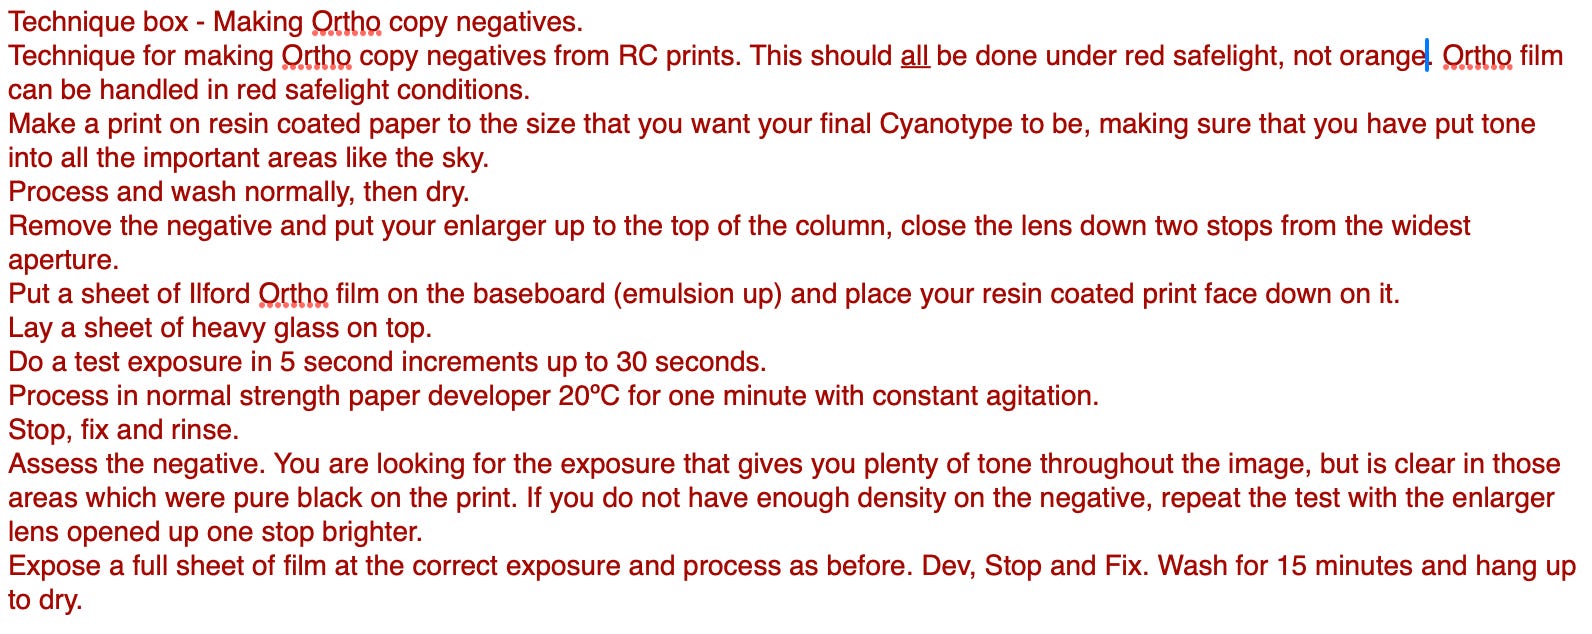
Cyanotype.
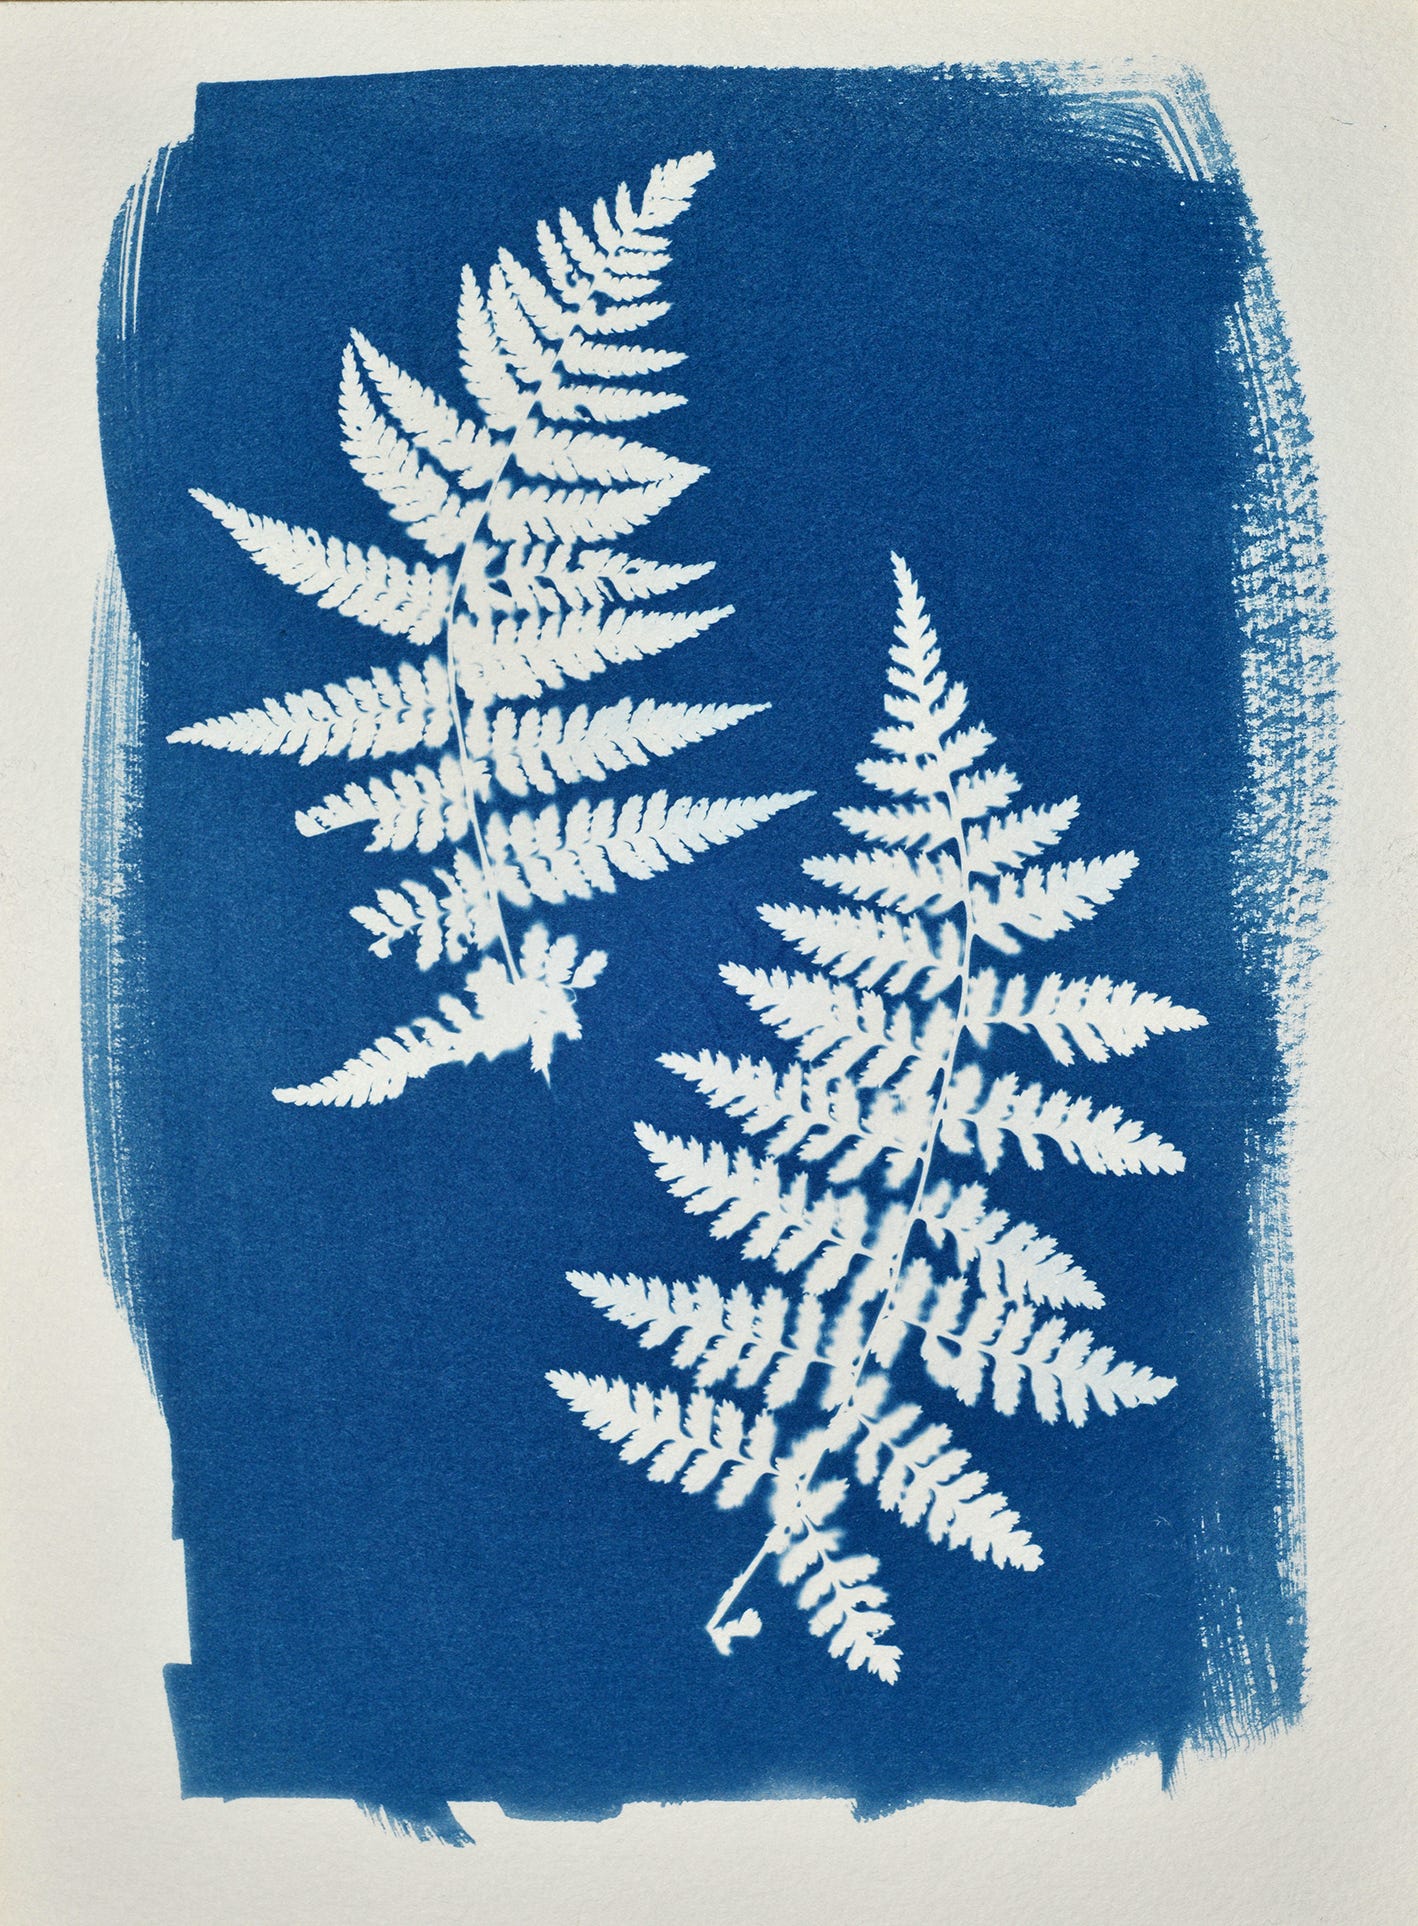
Blue prints are beautiful.

This week’s topic is Cyanotype. A simple, hand made printing process that is easy, interesting and fun. There won’t be many people who are unaware of the cyanotype process, it has become ‘cool’ and trendy in the last twenty years, appearing in books about stylish interiors, clothes shop windows and fashion/lifestyle magazines, as well as the occasional photographic magazine.
Consisting of only two chemicals, Potassium Ferricyanide and Ferric Ammonium Citrate green. It is one of a number of printing techniques that are referred to as ‘Alternative processes’.
As this is a practical article I don’t intend to go over the history of the process, there are plenty of web pages giving historical details which the interested reader can research. Neither will I go into great detail about what exactly is going on chemically. I will cover enough of the chemistry side for you to understand how to use the process and to stay safe. For those of a more scientific bent who would like more detail, Dr Mike Ware has an explanation on his website; https://www.mikeware.co.uk/mikeware/Traditional_Cyanotype.html
The cyanotype process is a great way to get into alternative printing, but it wasn’t the first alternative process that I got into, I began with Gum Printing which was much harder to control. For some reason I avoided trying Cyanotype for many years, and it was only when I saw some done by a friend that decided to give it a go, and when I eventually did, I found it to be really easy. Many believe it is the best place to start, the main reasons being;
A. It is probably the cheapest of all alternative processes.
B. Coating the paper can be done in fairly bright light so you can see exactly where you have painted the solution.
C. It is fairly safe.
D. it is processed in plain water.
Safety.
As you will be working with chemicals I must advise that you wear protective clothing, goggles etc, but don’t let that make you think you are working with exceedingly dangerously substances. Even though the word ‘Cyanide’ appears in one of the chemical names, it is not the deadly version. Caution and careful practice are advised though, getting any chemicals into sore skin, eyes or cuts is a bad idea. If you have a nail biting habit always wear gloves when mixing or using chemicals. Safety data sheets are available on the web for anyone who needs more detail. Here endeth the safety disclaimer. Let’s get on with making interesting images.
Using.
Cyanotype is made up of two simple solutions; Potassium Ferricyanide and Ferric Ammonium Citrate -green (also known as Ammonium iron (III) Citrate). Whichever of the two you see available, make sure you get the green variety not the brown.
The chemicals are bought as crystals/powder and each are dissolved separately in distilled water to make two solutions. Once the solutions are made up they can be stored for quite a while if kept in the dark, preferably in brown glass bottles. These can be bought from most chemist shops in the UK. I have stored these mixtures for three years without a problem, though I once had some for longer that had developed a mould on the Ferric Ammonium Citrate. I didn’t find it to be detrimental to the mixture, I just filtered it out.
The solutions are mixed in equal quantities and then coated onto a surface (Many different surfaces can be used, but to simplify the text I will refer from now on only to paper).
A flat brush is used to spread the mixture onto the paper. Many say it is essential to avoid having a metal ferrule (the bit that holds the hairs to the handle), but if you confine the mixture to the tip of the brush it won’t be a problem. Once mixed together the solution should be used fairly soon. The coating can be done in low room lighting. The mixture is a pale yellow, so look carefully to see that there are no gaps in your coated area, because they will be really obvious when it turns blue.
The paper is then hung up to dry away from daylight and bright artificial light. To judge dryness, the paper should sound crisp when flexed.
Cyanotype paper is not very sensitive to light, so printing has to be done by placing the negative on the paper and giving it a heck of a lot of UV light. Don’t bother trying to expose it under an enlarger, it will take months.
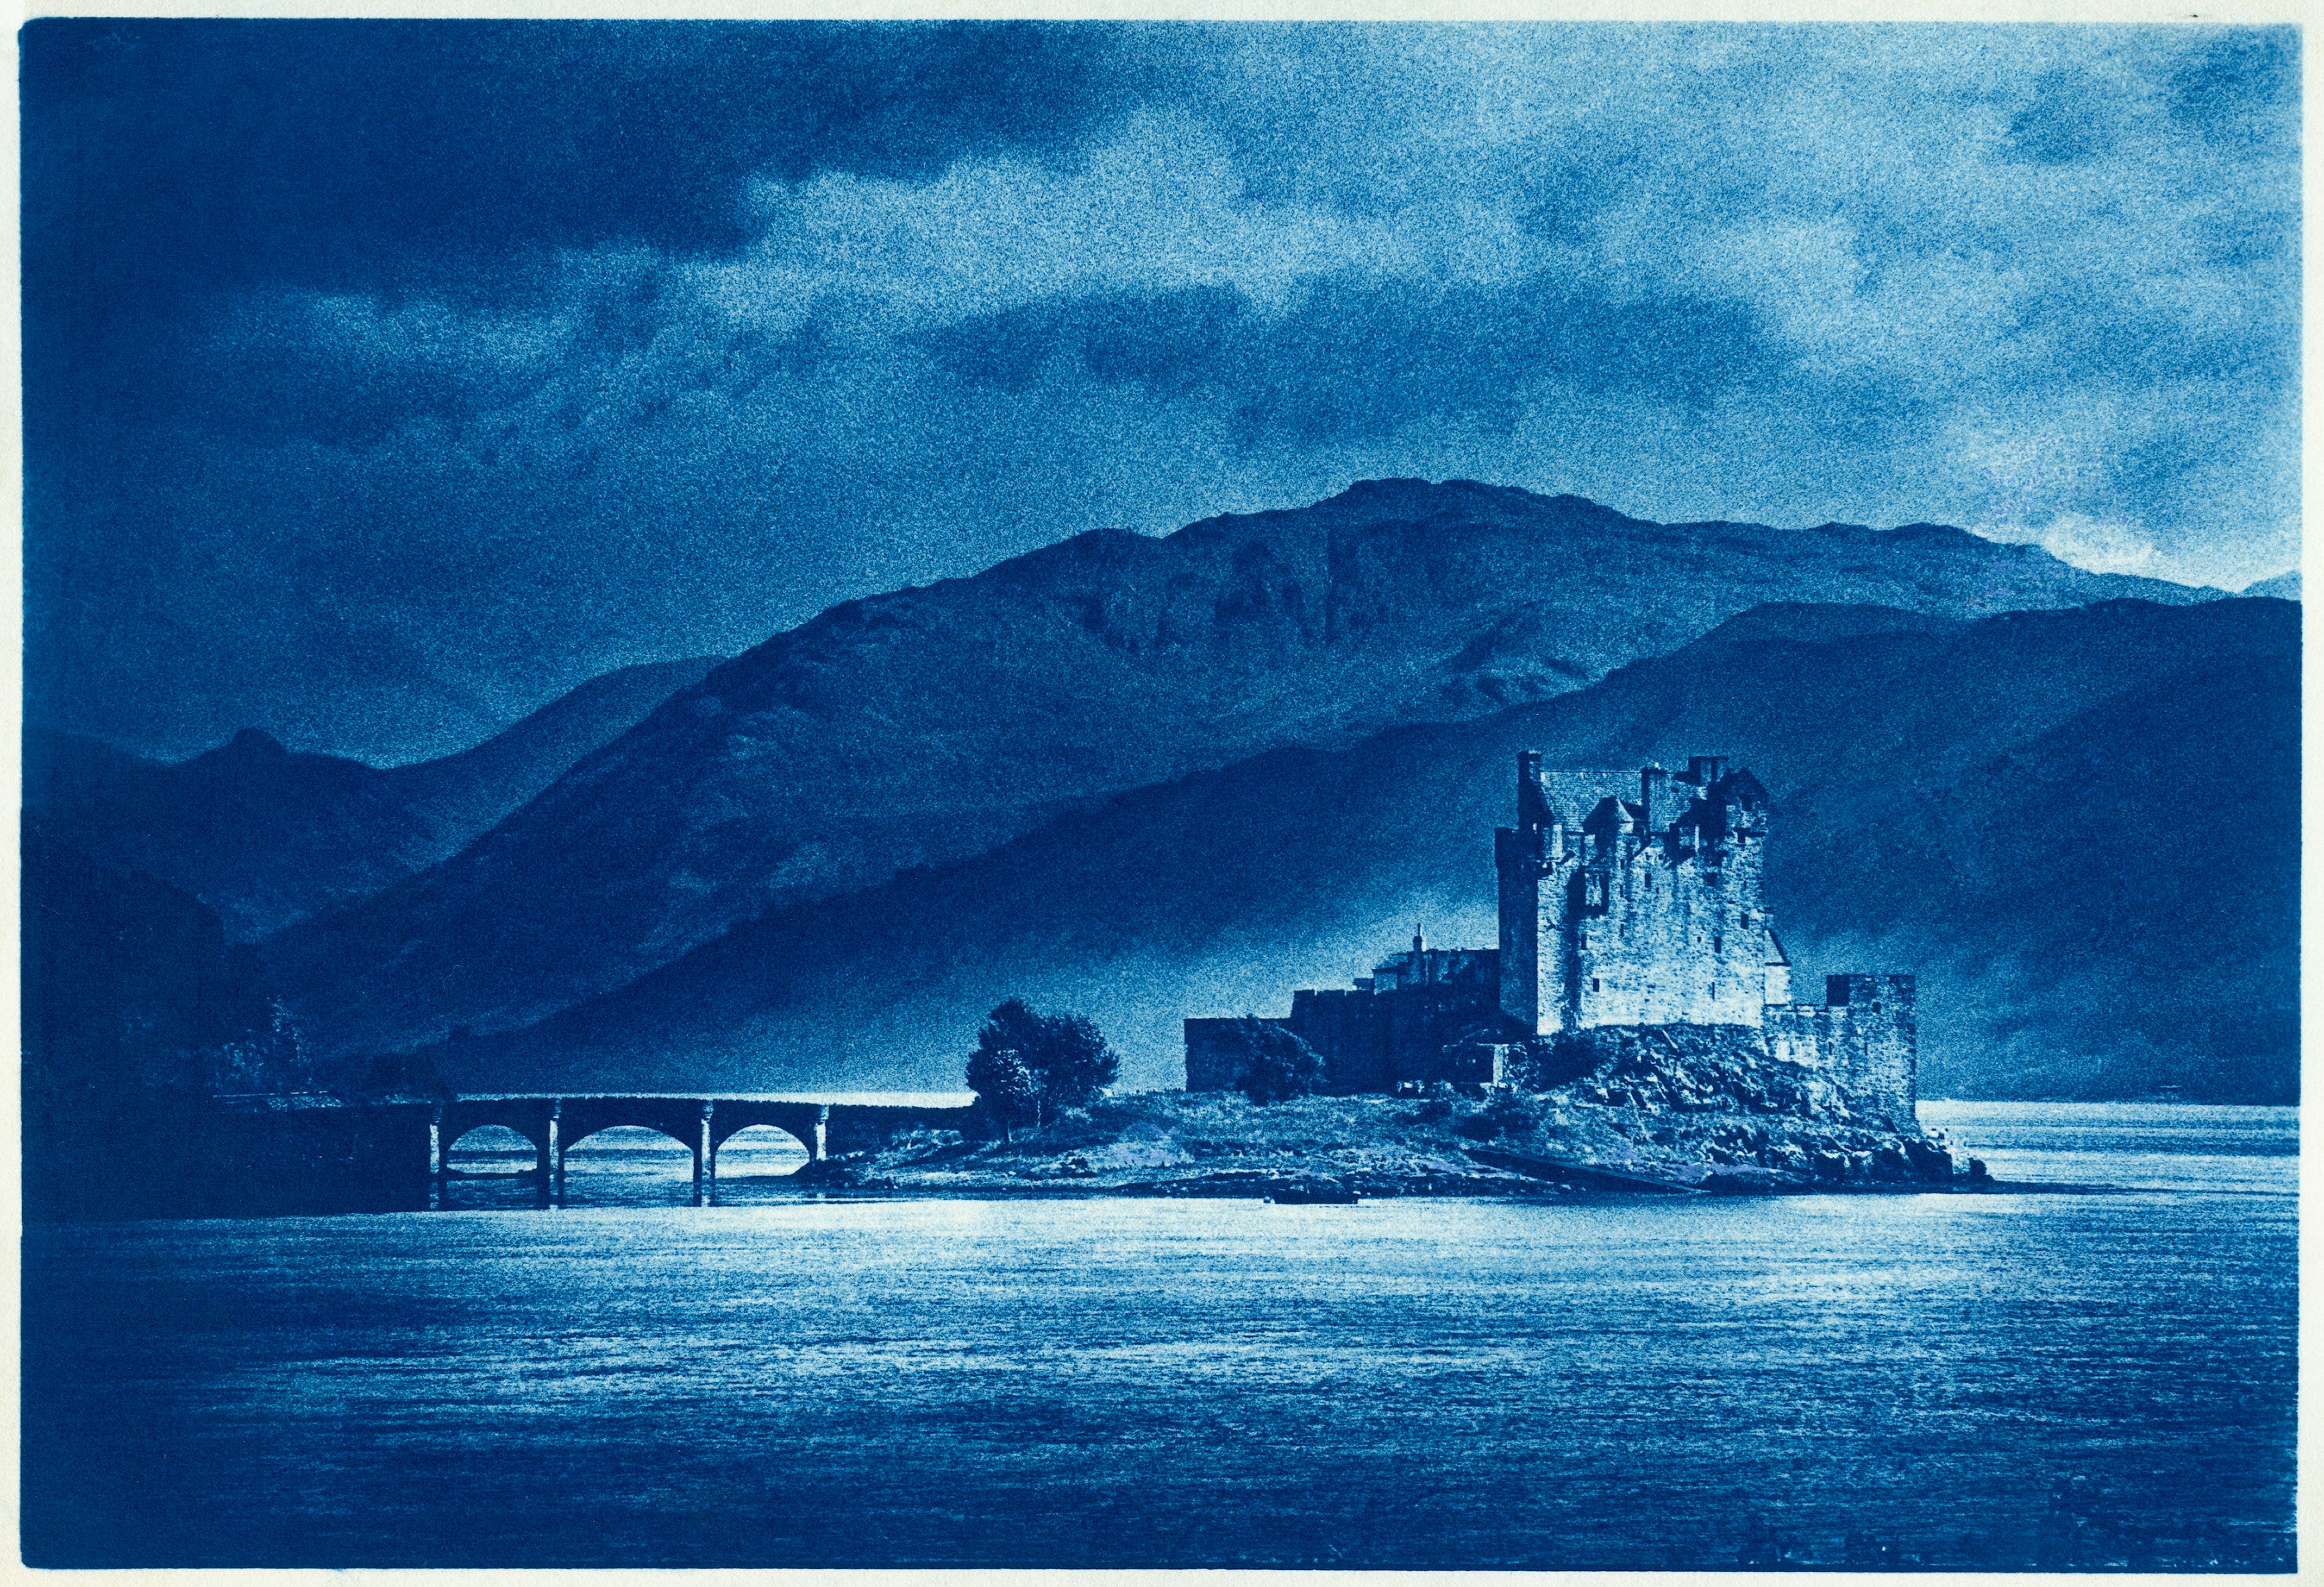
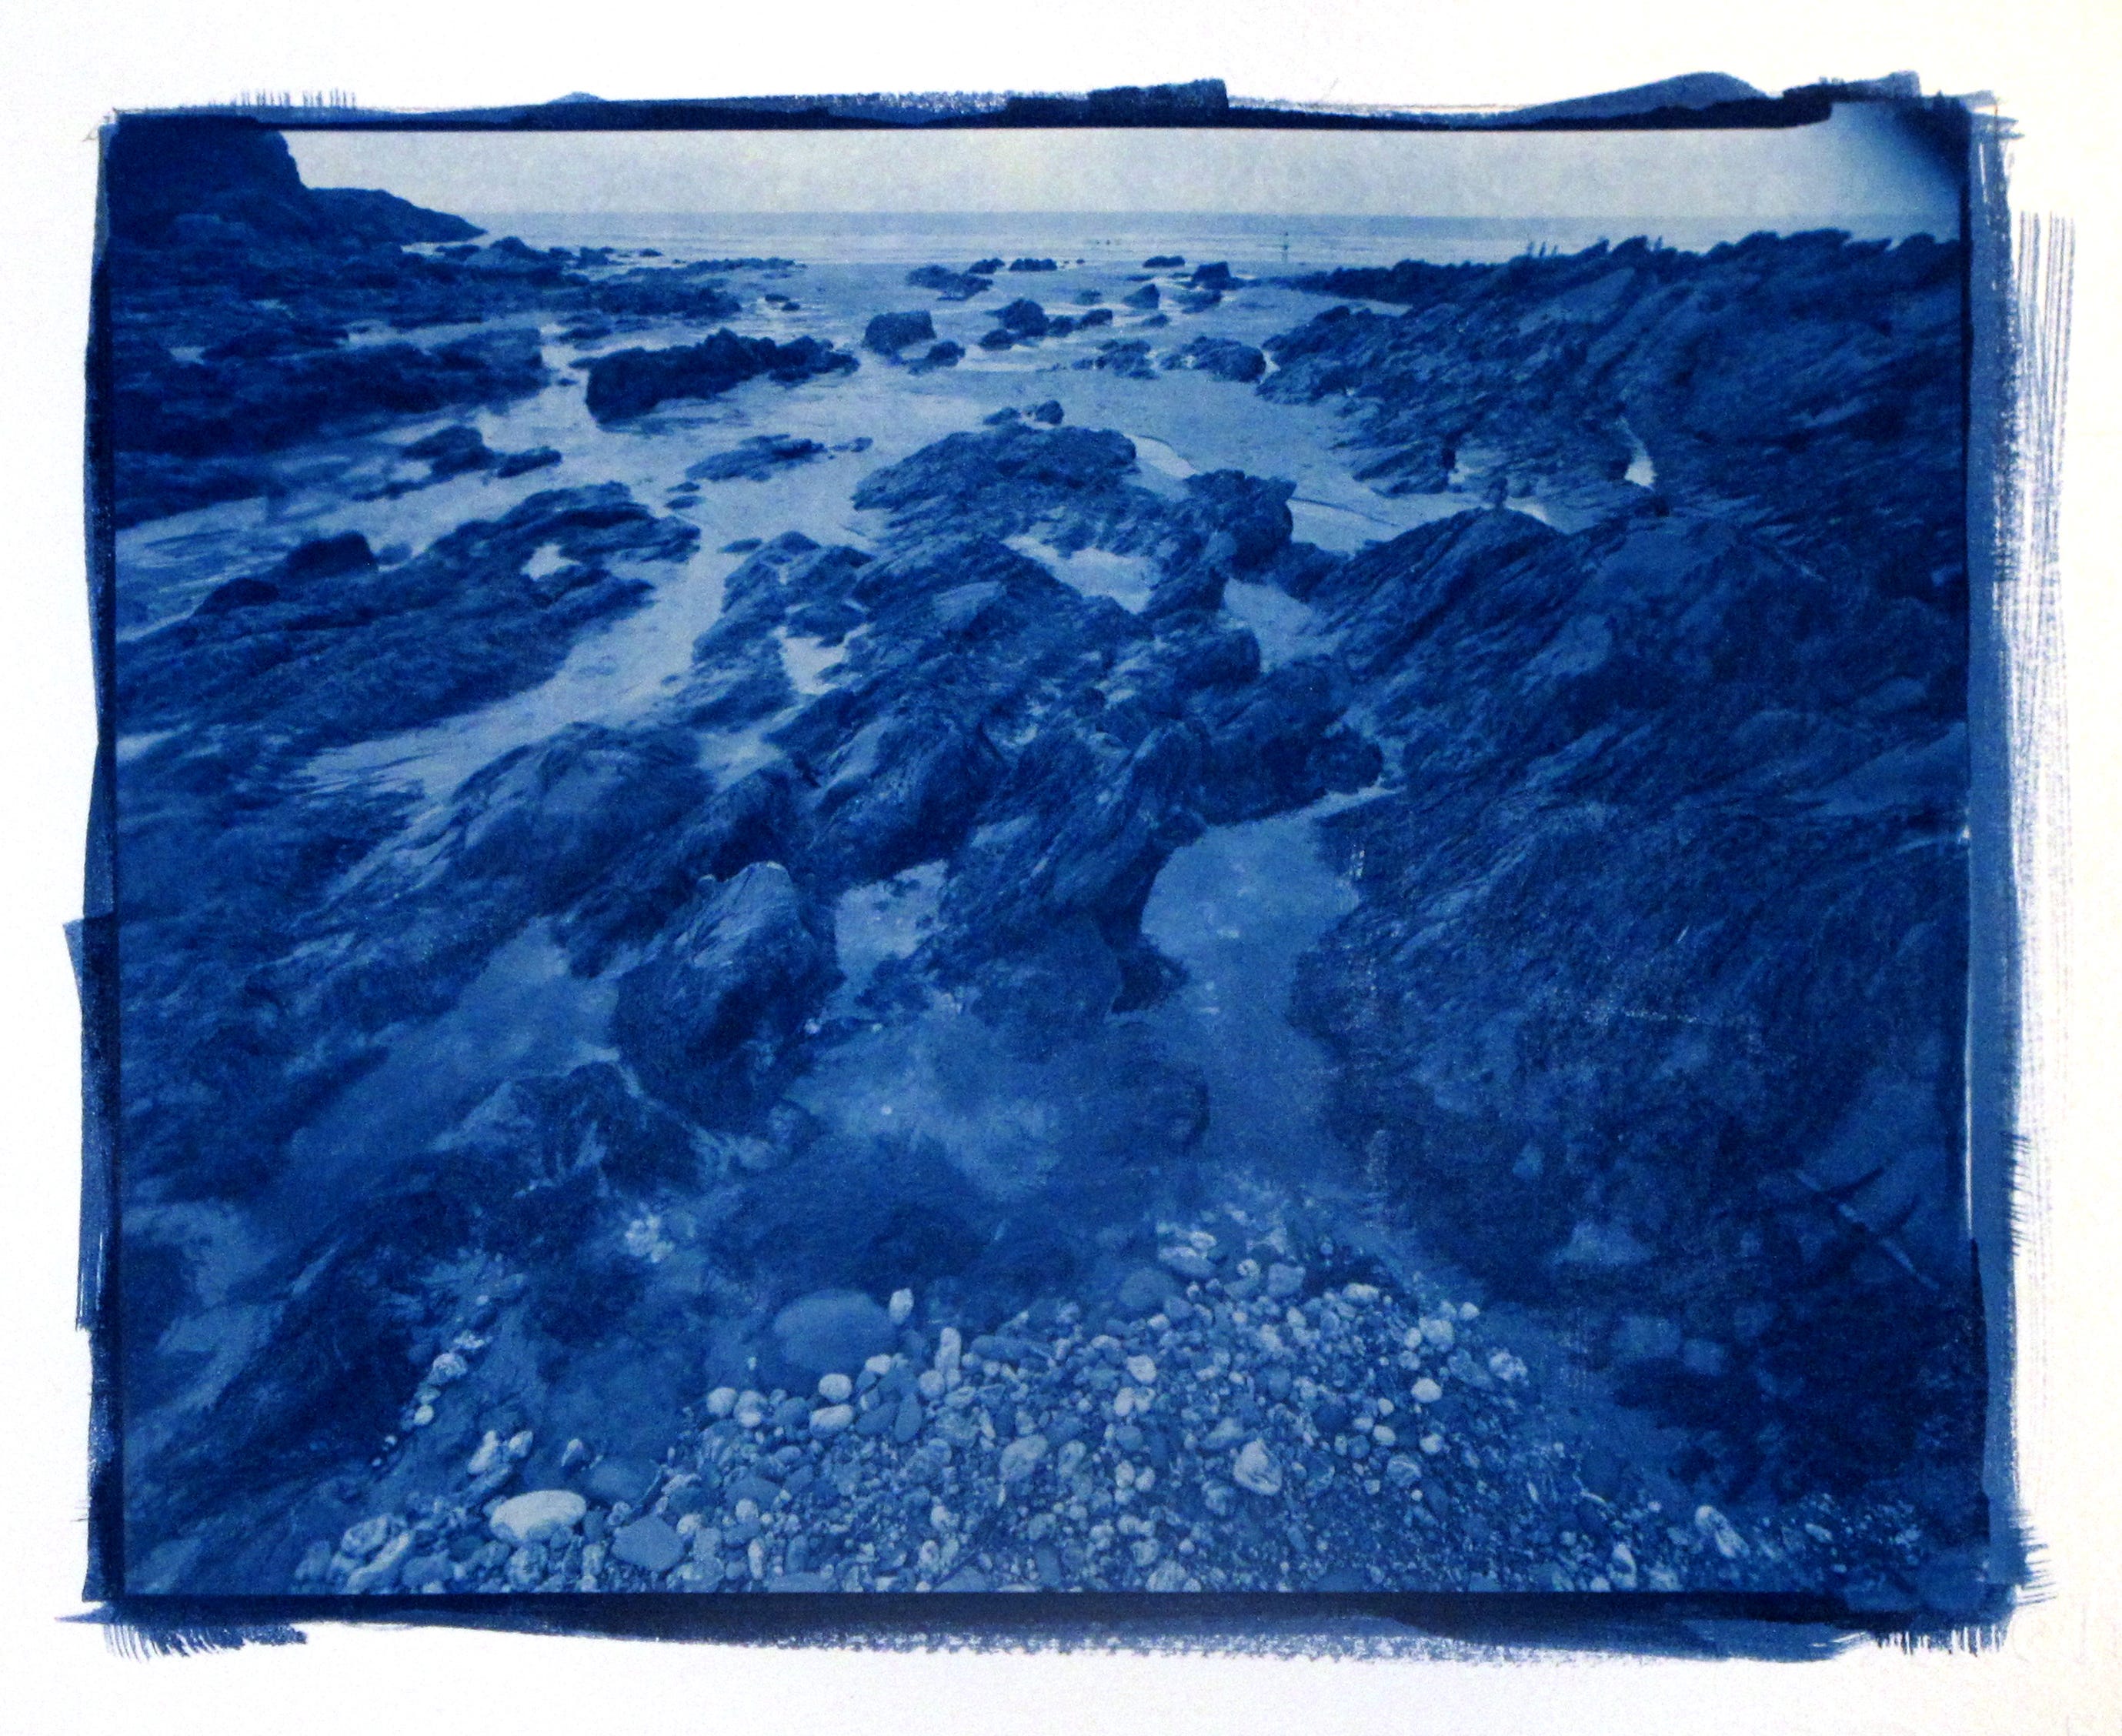
Most people start Cyanotype printing by placing objects on the coated paper, and this can produce nice images. In my own work I tend to use large negatives to make blue landscape or still life prints.
In this scenario, a negative is placed on top of the paper and this is held in place by a strip of masking tape down one side and held flat under thick glass. Paterson contact printing frames (without the plastic strips for holding film) are ideal, but you could use thick MDF board, 5mm glass and a few bulldog clips. It is then exposed to sunlight or UV light and once the exposure has been given, the paper is simply washed in running water and dried.
Judging exposure.
The first question the beginner wants to ask is; ‘How much exposure do I give, and when do I know it has had enough?’ Well, there are a couple of ways to establish this. You could coat up some smaller strips of paper to use as test exposures, then try these before committing yourself to the final image, or you could judge it by eye. Now, to judge by eye you need experience,… If you have areas of coated mixture which are outside of the negative area and are getting maximum UV rays, these will get more exposure than the bits under the negative. Usually, when these bits look to have become a bit solarised it is likely that it has had enough. The uncovered areas though, are no indication of what is going on underneath a negative, which could be thin, normal or dense.
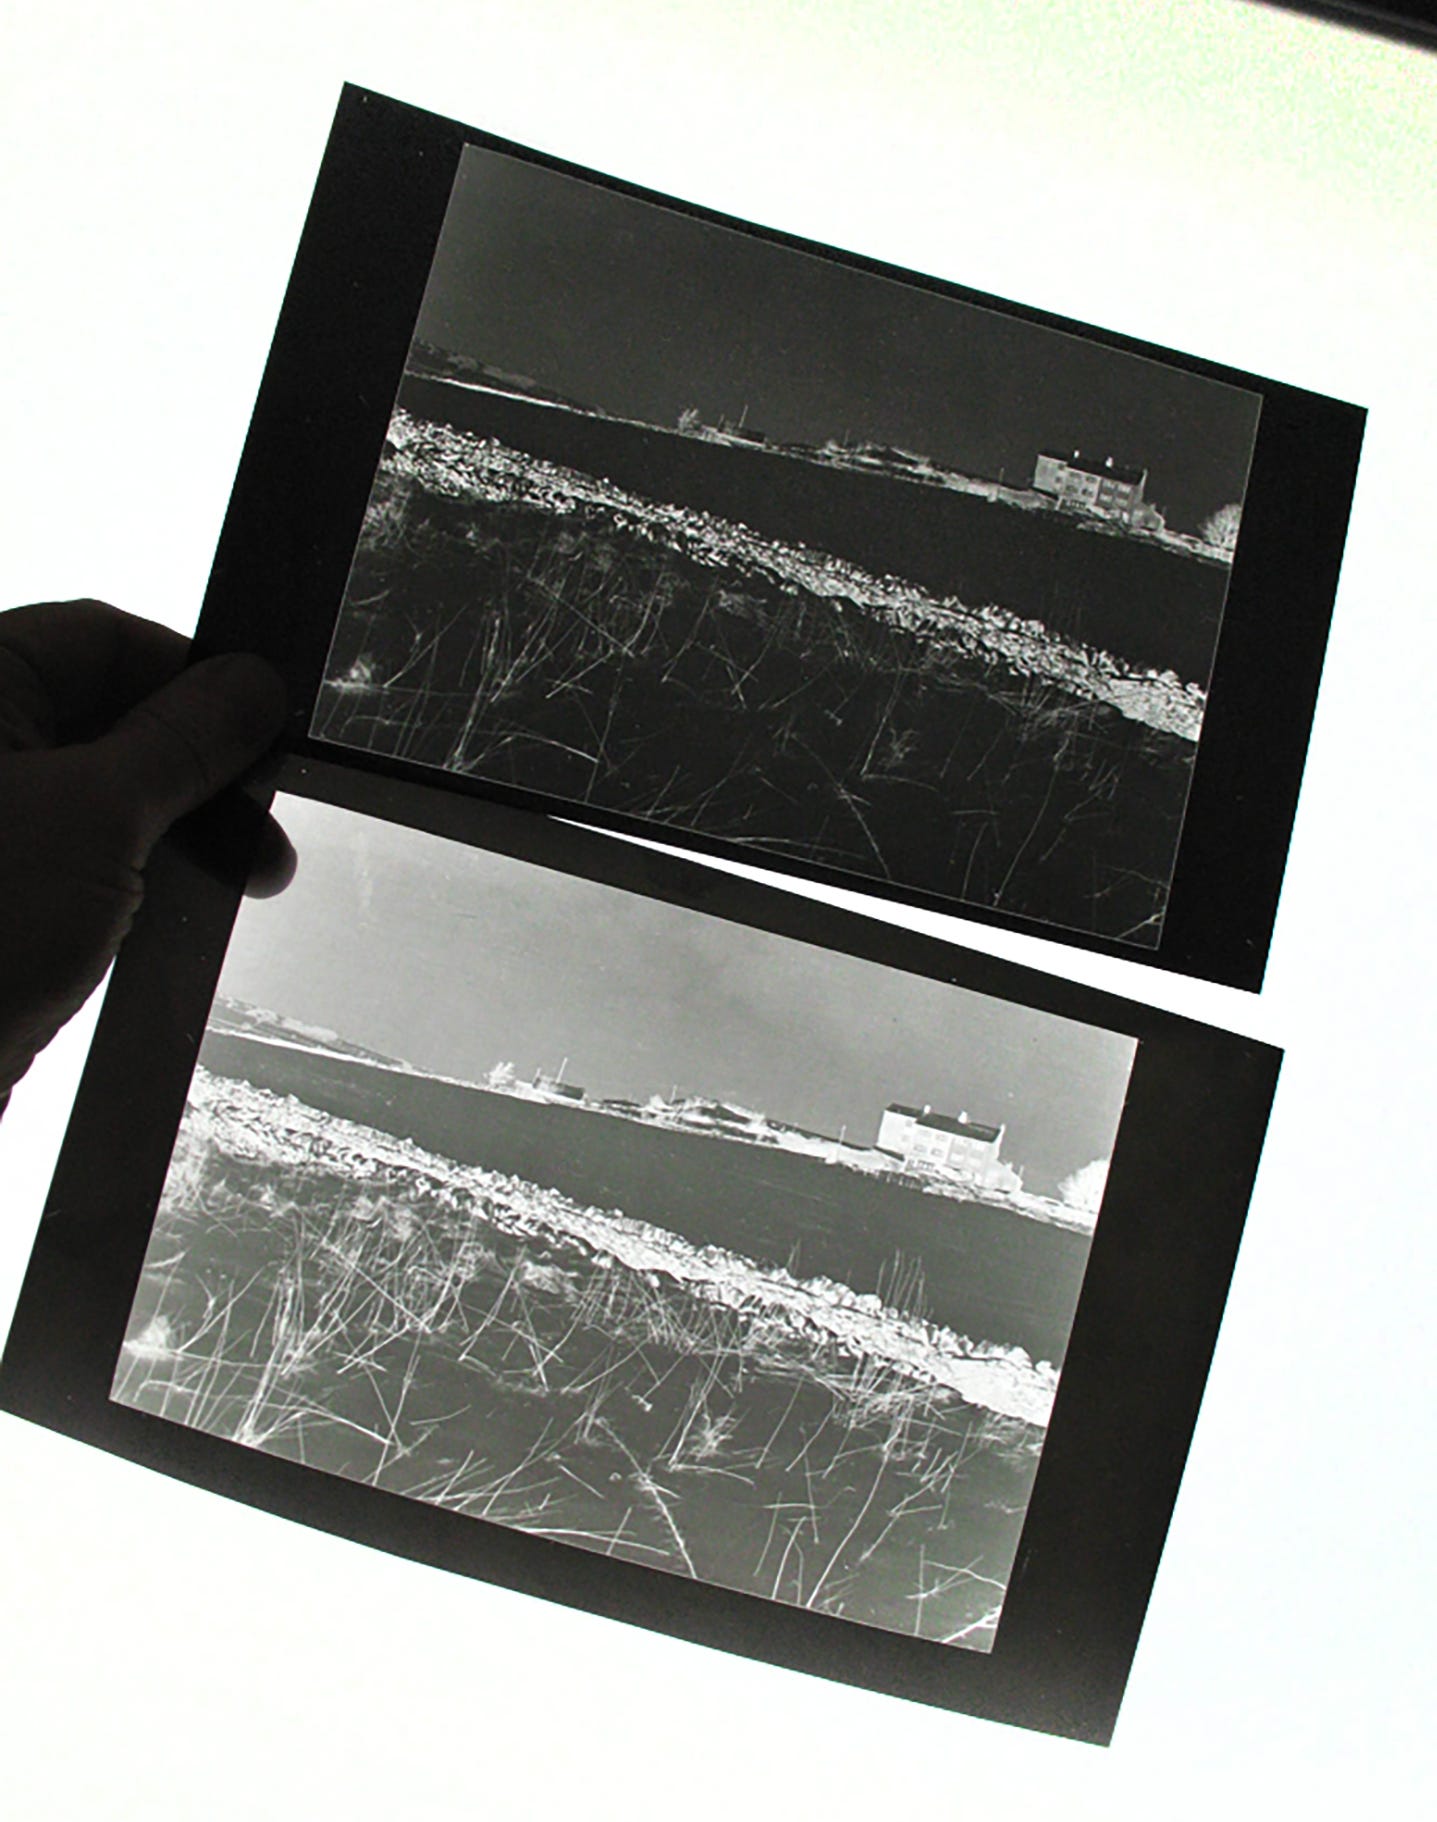
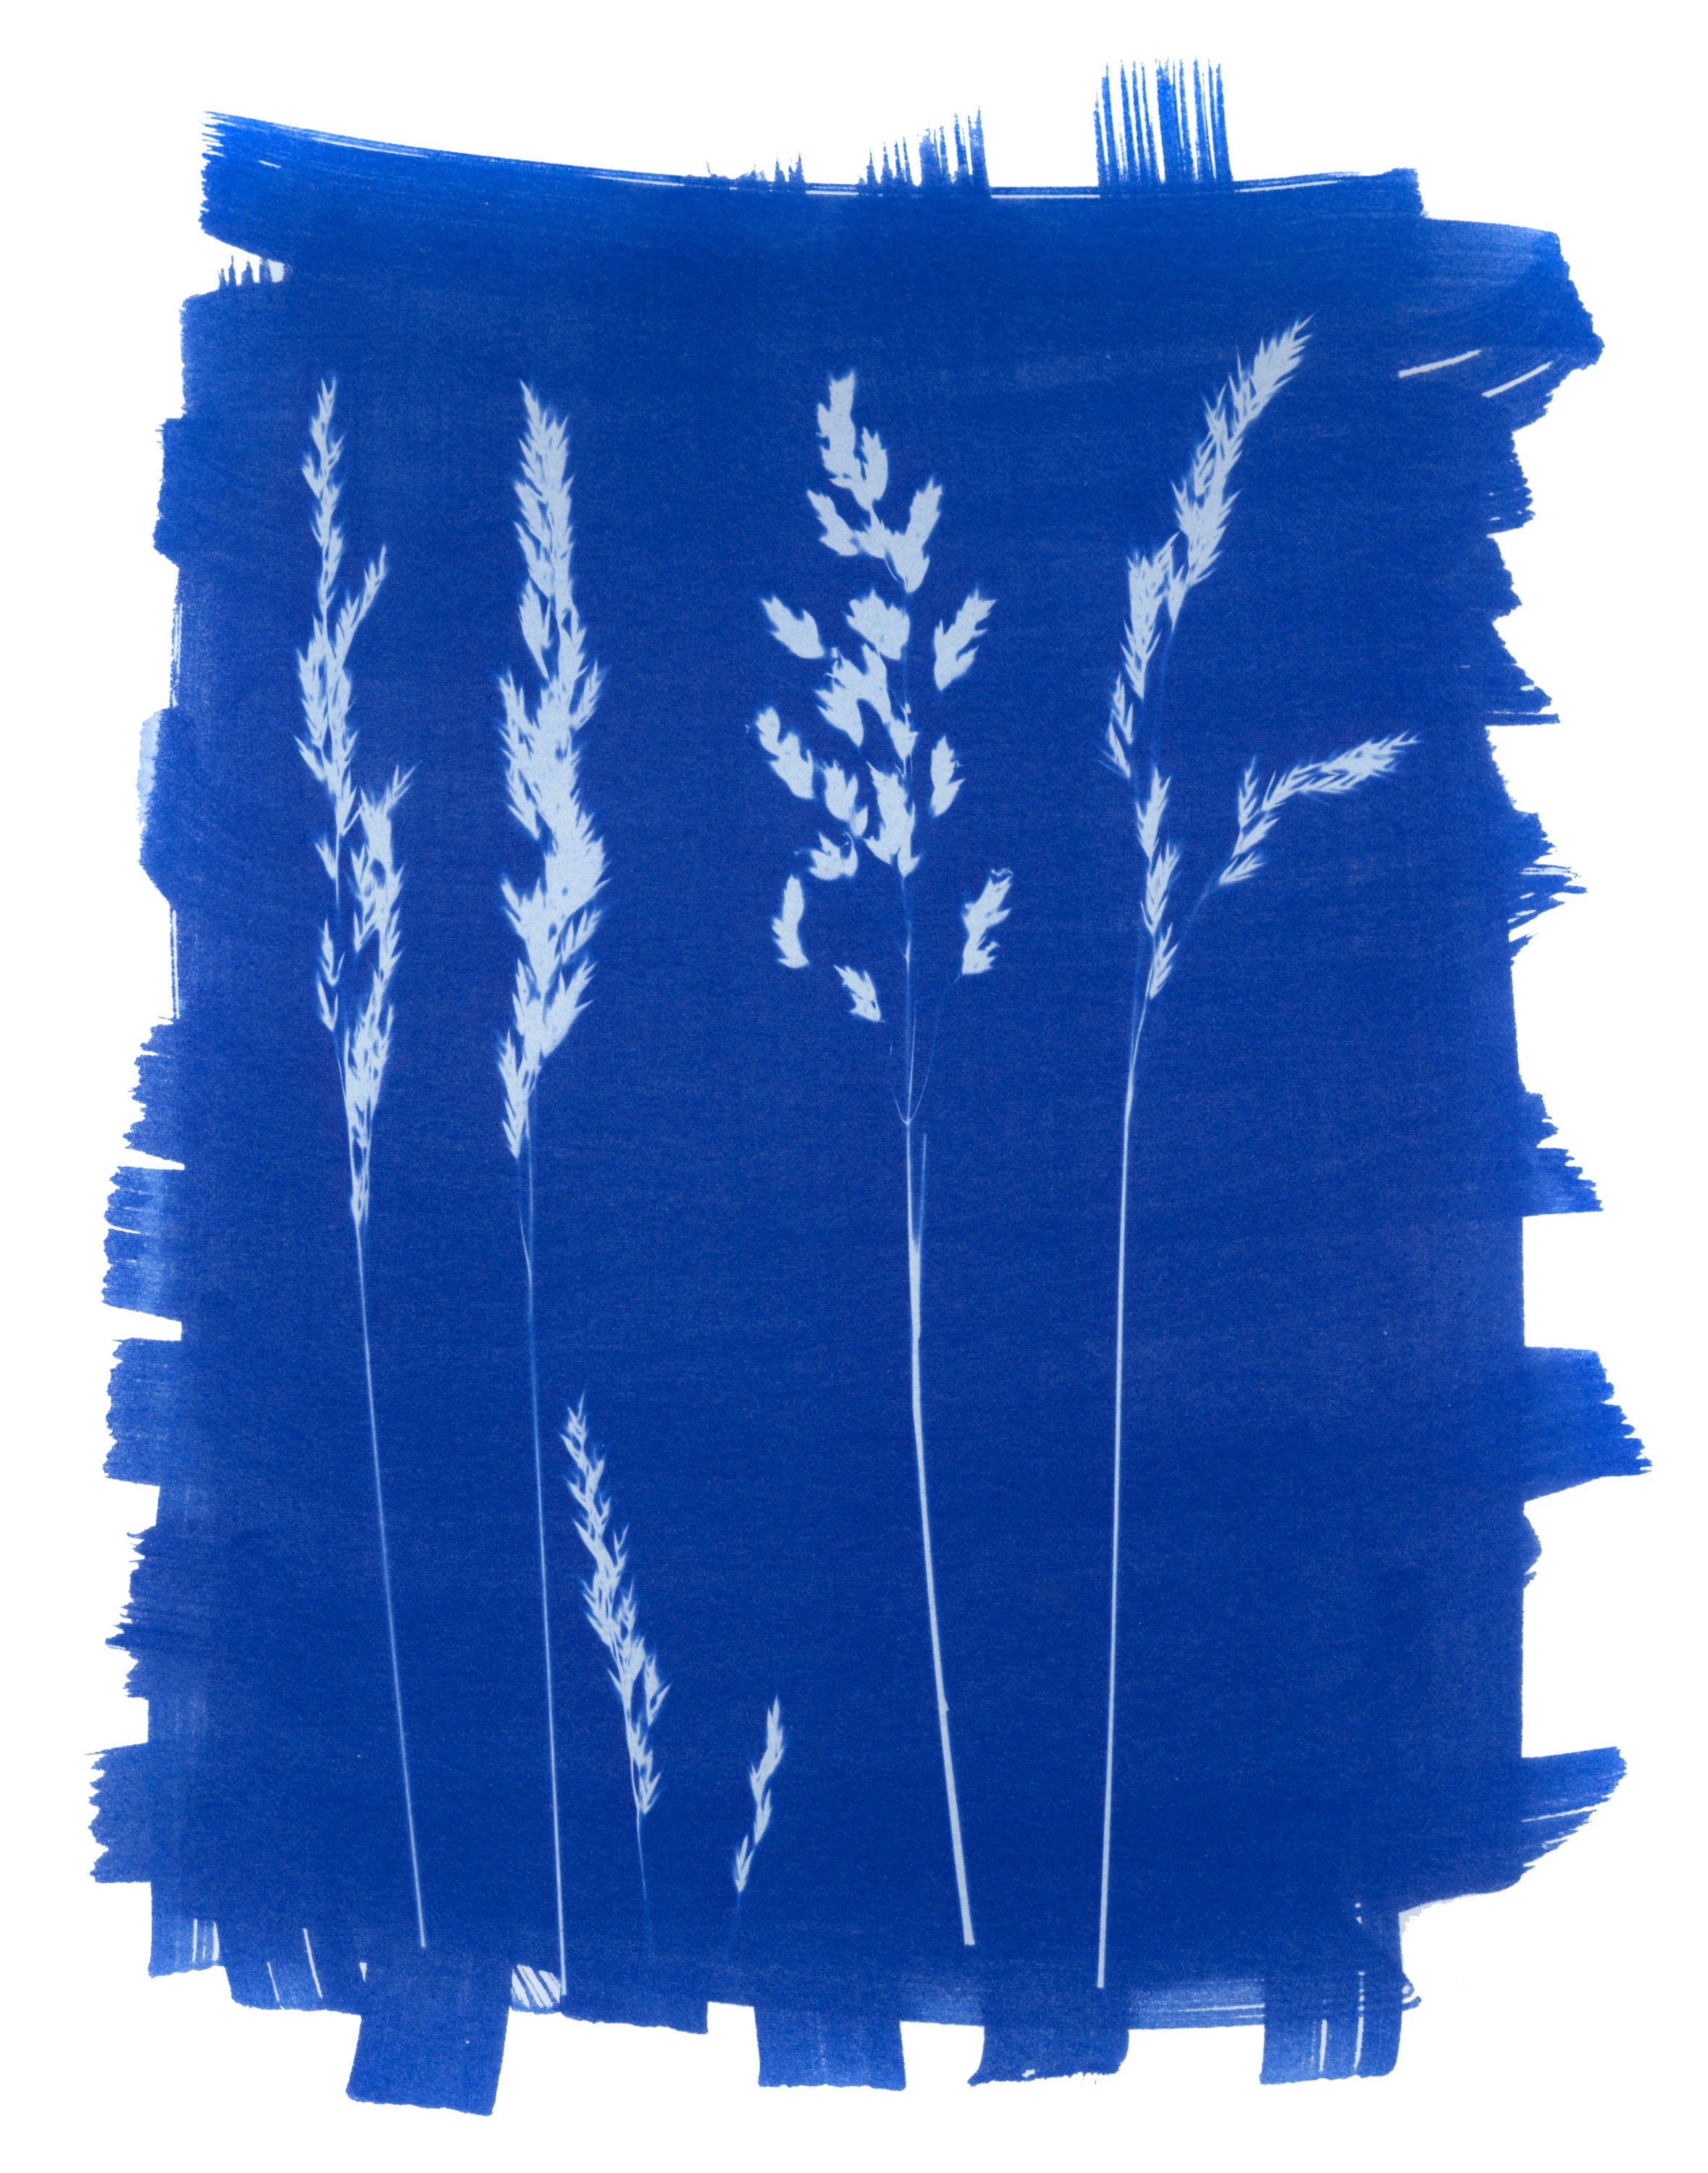
Film negatives are subject to exposure and development variations, and if over processed, can be very dense. If you are using film negatives and you are getting a normal shadow areas (dark tones) with areas of bright white showing no detail, then your negative is too contrasty for this process and is possibly over developed. I use Ortho copy negatives made from resin coated prints (See technique box). These can be made to the correct contrast according to the type of printing process I am using.
Most people use an inkjet printer to make large digital negatives on a clear plastic film.
Digital negatives are a different matter to film, they are not likely to have the problem of being too dense, as the printer cannot lay down enough ink. Many practitioners now prefer this method, as it allows Cyanotypes to be made from digital images or film scans. Pictorico Premium Overhead Transparency Film is generally regarded as the best medium for this purpose.
Making digital negatives can simply be a matter of inverting your image in photoshop and printing it out on this film. Simply inverting your image will not give you the best results though, a straight inversion will leave you with a negative which prints too dark in the shadow areas.

Large format negatives, particularly 10x8 inch negatives are beautiful printed as cyanotypes. Using a large format camera gives negatives of amazing detail and tonality, with corresponding long scale cyanotype prints, -if the negatives are processed correctly that is. Bear in mind though that using a unique negative to print on a hand coated paper puts it at risk, it could easily pick up stains from the coated paper if the mixture has not dried completely.
Equipment.
Before trying the process for yourself it is probably a good idea to make sure you have everything you need. Here is a list of essential items;
Scales for measuring quantity of raw chemicals. (not to be used for food afterwards)
The chemicals. - Potassium Ferricyanide and Ferric Ammonium Citrate (green)
Measuring jug or darkroom equivalent.
Water - most practitioners prefer distilled or de-ionised for making up solutions.
A few plastic spoons for measuring out and stirring.
Storage bottles -make sure they are very clean and are clearly labelled. Brown glass bottles of 100ml size can be bought from most chemist shops.
Watercolour paper or whatever surface you intend to coat on. (Alkaline buffered papers are not suitable)
Brush - you will need a flat brush, preferably a flat, wooden hake brush.
Source of UV light - sunlight or tanning lamps.
Contact printing frame - a sheet of thick glass, a piece of thick board and some bulldog clips will suffice.
Timer
Clean plastic tray for washing the paper
Drying area or washing line
Safety equipment - rubber gloves, goggles etc.
Newspaper to cover work surfaces.
Mixing.
Weigh out 25 grams of Ferric Ammonium Citrate (green) and pour into 100ml of (preferably) distilled water whilst stirring. Use a plastic spoon or glass rod to stir, do not use anything metal. The temperature of the water is not critical, room temp is perfectly fine.
Weigh out 10g of Potassium Ferricyanide and mix with a different 100ml of water, doing as you did with the previous chemical. Keep these solutions in separate sealed brown glass bottles. Store in a cool, dark place.
Papers.
Not all papers will give good results with this process, the reason being that Cyanotype prefers a slightly acid environment and many papers have an alkaline buffer added, this will cause the image to fade. (The reason many recommend distilled water for the mixing of the solutions is because some tap water is quite alkaline and this will be detrimental to the process).
I would suggest a decent quality watercolour paper to begin with, then once you have the process working you can try other surfaces to see if they behave the same way. Different workers have their own preferences when it comes to paper types. Most insist on 100% cotton rag paper. I began with Bockingford, which is easy to obtain and works pretty well, though the surface is quite rough. Dr Ware suggests; ‘Atlantis Silversafe Photostore 200 gsm, Arches Platine 310 gsm, and Whatman Watercolour 290 gsm; but the best results (of course!) are obtained on Ruscombe Mill’s handmade ‘Buxton’. (Dr Ware is responsible for the Buxton paper which he specifically designed for Alt processes). I particularly like Khadi papers https://www.khadi.com/shop/category/khadi-cotton-papers/white-rag-papers The S1W or S2W surface. If you wish to try others there is a page on the alternative photography website which shows results for Cyanotype tests with a number of papers; http://www.alternativephotography.com/wp/paper/tests-in-blue-papers-for-cyanotypes
Mixing and coating.
To use, mix equal quantities of each solution. The total volume of both combined should be enough to cover the paper you plan on using in one session. Coated paper and mixed sensitiser will not last more than two days, often less, so save your concentrates for other prints. I measure out using two syringes which are labeled to avoid cross contamination. Usually 3ml of each should be enough to cover a large part of one A4 sheet. If you are coating test pieces, mix up half as much again.
I should also mention that pre coated paper is available from;
https://cyanotype.co.uk/product/coated-cyanotype-paper
https://solarart.co.uk/product/cyanotype-pre-coated-paper-220gsm-a5-pk10/
https://parallaxphotographic.coop/shop/cyanotype-paper/
Exposure.
Exposure can be given by sunlight or UV light. A portable sun tanning unit is inexpensive and ideal for images up to A4. My tanning unit is designed to tilt back for a better angle towards your face, but for exposing a Cyanotype it needs to be parallel to the contact frame, so I prop mine up.

Sunlight is cheaper, but in the UK sunlight is not always easy to find.
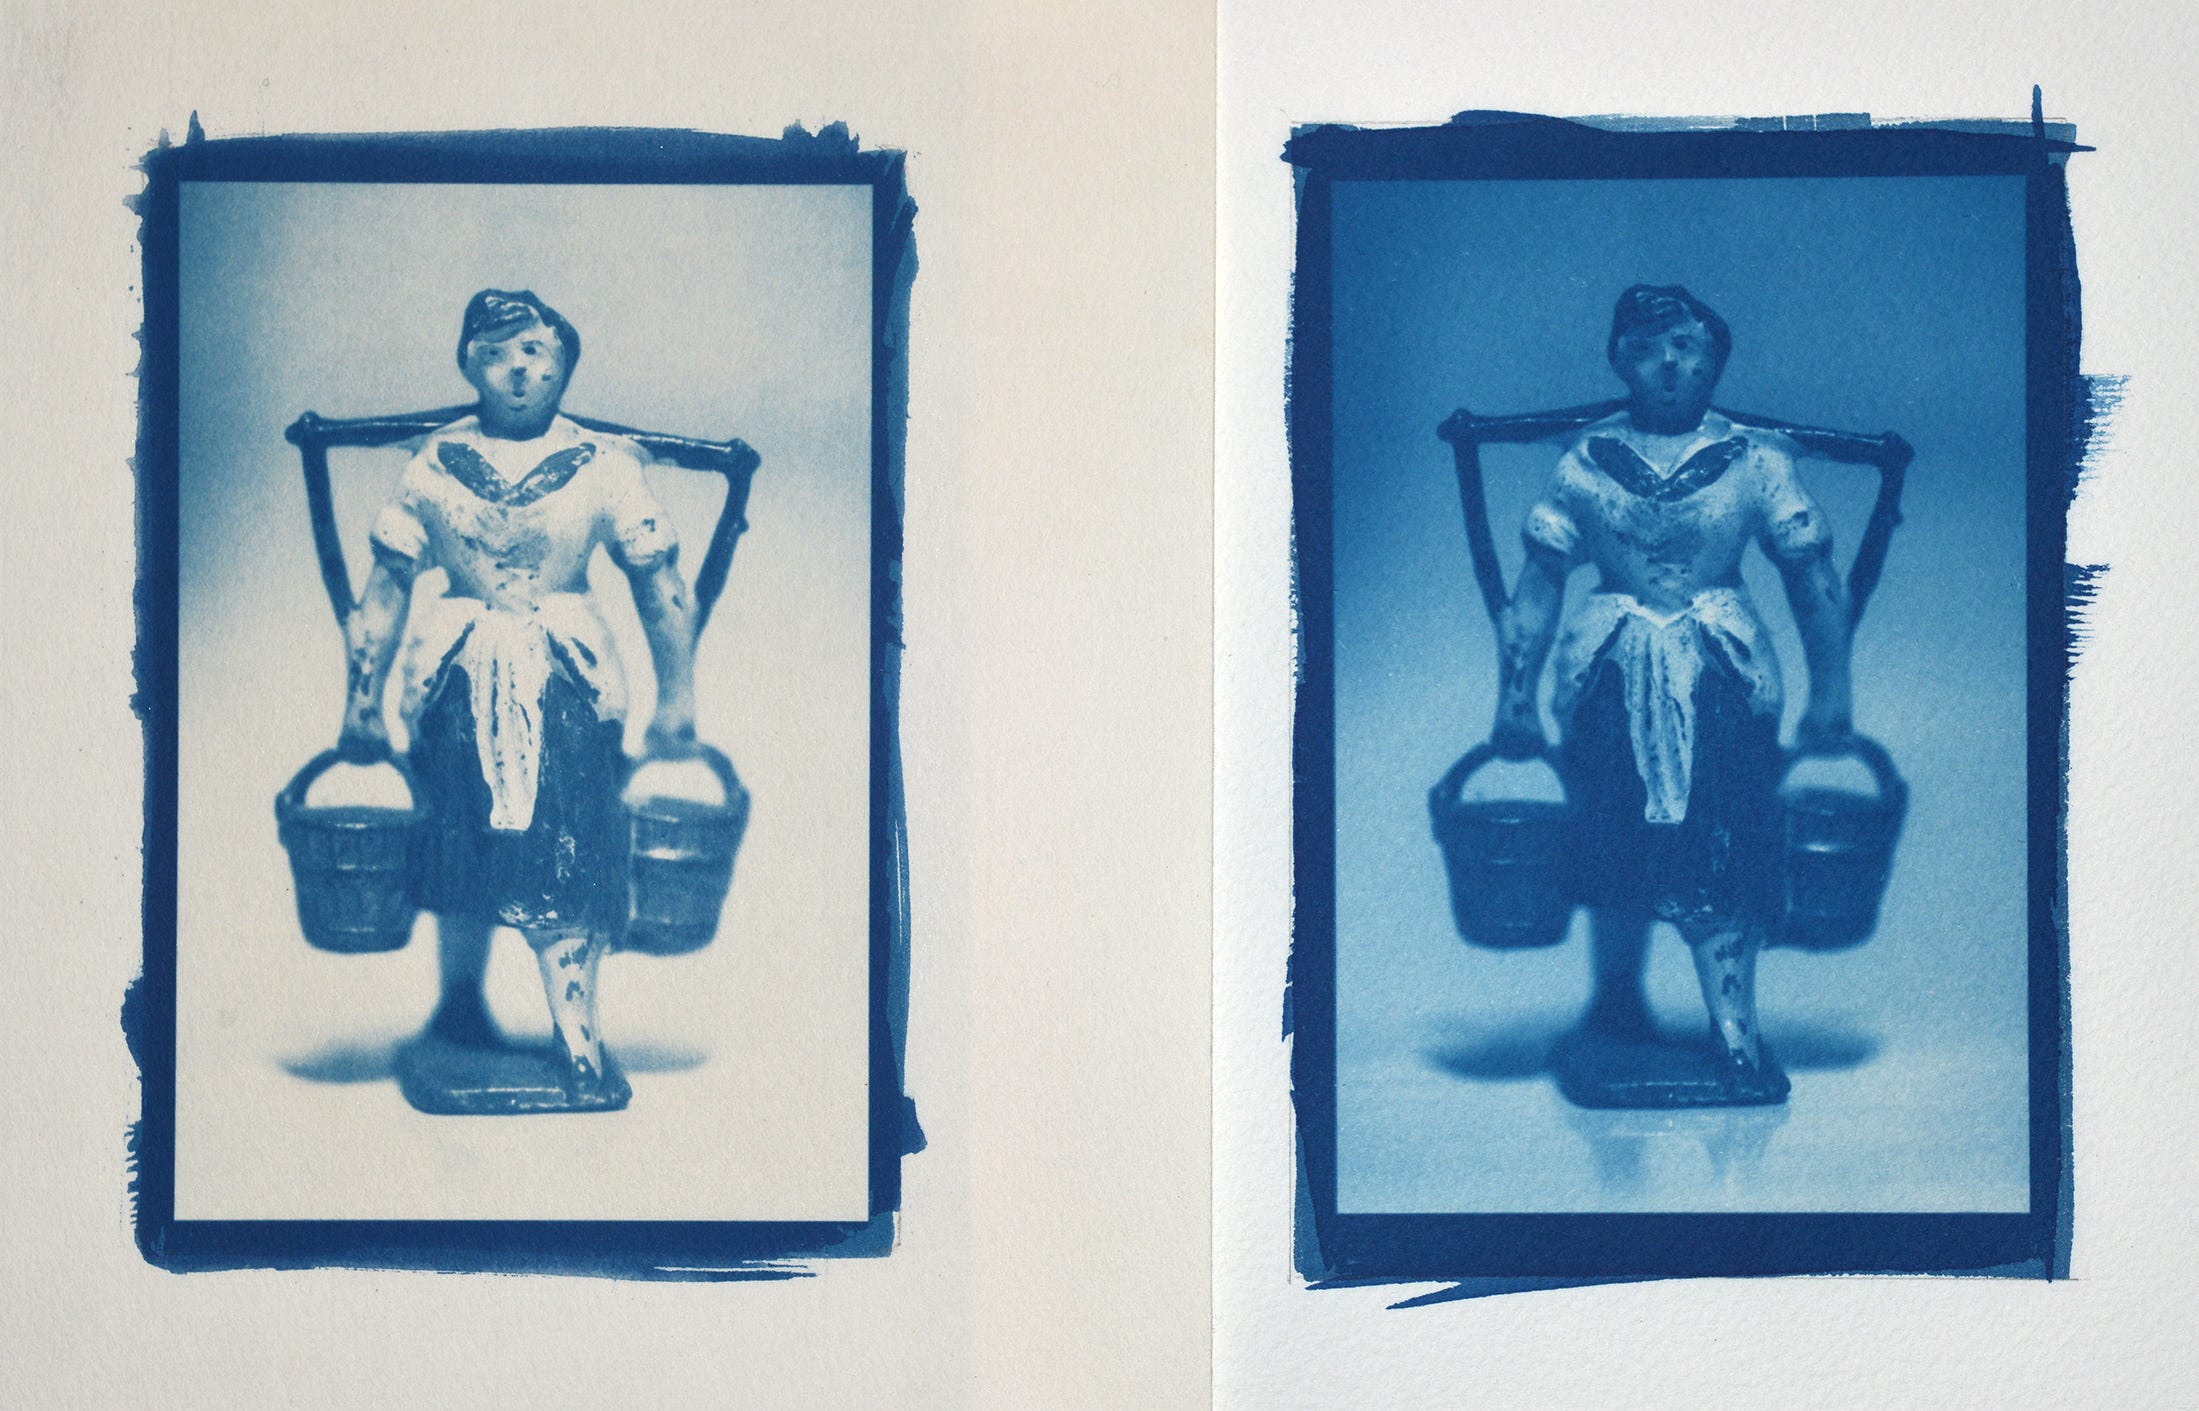
With a face tanning unit at a distance of around 6 inches from the glass expect exposures in the region of 10 - 15 minutes from a normal negative. The image can be seen once the negative has been lifted from the paper, but note that it will lighten in the wash, then darken slightly when it dries. If your print is darker than you require, coat another sheet and reduce your exposure time for the next print. The best way to get it right is to do a test exposure on a separate piece of paper coated from the same mixture before you commit yourself to a final print. Use some black card to partially cover the paper and give five minute increments of exposure. Giving 5, 10, 15, 20, 25, and 30 minutes will tell you what you need to know.
Conclusion.
The process needs a little thought and planning, but once you have made your first print you will realise how easy it is. Give it a go, even if it is only to make some interesting photograms. I think though, that pretty soon you will want to progress to printing from negatives and then you will love the process.
Warning & Disclaimer.
Some of the chemicals used in the processes described in these pages are moderately toxic, and all of them should be regarded as potentially harmful.
Safety Data Sheet for Potassium ferricyanide; https://www.fishersci.com/store/msds?partNumber=P232500&productDescription=POT+FERRICYANIDE+CERT+ACS+500G&vendorId=VN00033897&countryCode=US&language=en
Safety Data Sheet for Ferric Ammonium Citrate Green; https://www.bostick-sullivan.com/wp-content/uploads/2022/03/ferric-ammonium-citrate-green-sds.pdf
It is the responsibility of everyone who choses to work with hazardous materials to inform themselves in advance about the dangers, and to ensure that they take precautions to safeguard themselves, others, and the environment.
The author of these pages hereby denies liability for any consequent damage, injury or loss resulting from the use of the information contained therein.
Thank you for reading. If you find my articles interesting or useful, please spread the word to anyone you can think of who would be interested.
If you have enjoyed this post and the information here and elsewhere on my Substack and you would like to support me, you can subscribe or just buy me a coffee at Ko-fi.com/andrewsandersonphotography You can send as little as £3.00, or more if you are feeling generous. This money goes towards materials used for the tests and printing for these articles. Alternatively you can be a paid subscriber.
Thank you for reading, please let me know your thoughts.
Andrew Sanderson November 2025.
Other places to see my work;
Instagram; http://instagram.com/andrewsandersonphotography
Facebook; https://www.facebook.com/andrew.sanderson.96155/
Original hand made darkroom prints are available from my online shop; www.andrewsandersonphotography.bigcartel.com
Very timely as I look into embarking on Cyanotypes!
@Blackthorn and @Deborah Parkin have some very nice work too.
I must get around to trying this one day.
I will probably buy a kit for Cyanotype to see how I get on with it rather than buy the raw chemicals.