Adrian's enlarger.
Being resourceful.

This week I have been distracted by a family crisis and have not had enough time to prepare a full article, so my friend Adrian Cullen has kindly allowed me to reproduce something that he wrote recently.
Adrian came to me for a workshop in January of 2025 and we worked with my 5x7 camera. I have a very large De Vere enlarger that takes these negatives (It is floor standing and it’s about 8ft high), and although he enjoyed shooting 5x7, Adrian was saying that it wouldn’t be practical for him to invest in such a huge enlarger because of cost and the space needed. I suggested that he could make something smaller if he was only intending to print to 10x8.
I suggested that it could be more compact, have a fixed focus, and could even be used horizontally to save space. A short while after the workshop Adrian told me he had made it and it appeared to work just fine. I sent him a couple of 7x5 negatives to test it with and he was able to fine tune it. Shortly after, he sent me this write up:
My approach to making a homemade horizontal large format (5x7) enlarger.
Enthusiast level enlargers typically accommodate up to 6x9cm on 120 film (medium format) . Large format (LF) enlargers are usually the preserve of professional darkrooms because of their large size and high cost. During a 1:1 darkroom workshop in Holmfirth with Andrew Sanderson we discussed the possibility of me building a simple DIY large format enlarger. Within a few weeks of my return I had the project completed.
It’s pretty small and light and occupies just 50cm of work top space when in use and can then be lifted out of the way and placed on top of cupboard. Robust and beautifully engineered it is not. However it works seamlessly and pretty easily. Constructed from A3 black foam board, an LED light panel and an old large format process lens. The process lens covers 5x7 negatives and with the space I have available I can make 8x10 enlargements ( 9.5x12 should also be possible) . This works for me as 8x10 is my most used enlargement size. Sure it can’t print poster size (at least not easily) but for my purposes its a bargain (total cost around £140).
Features
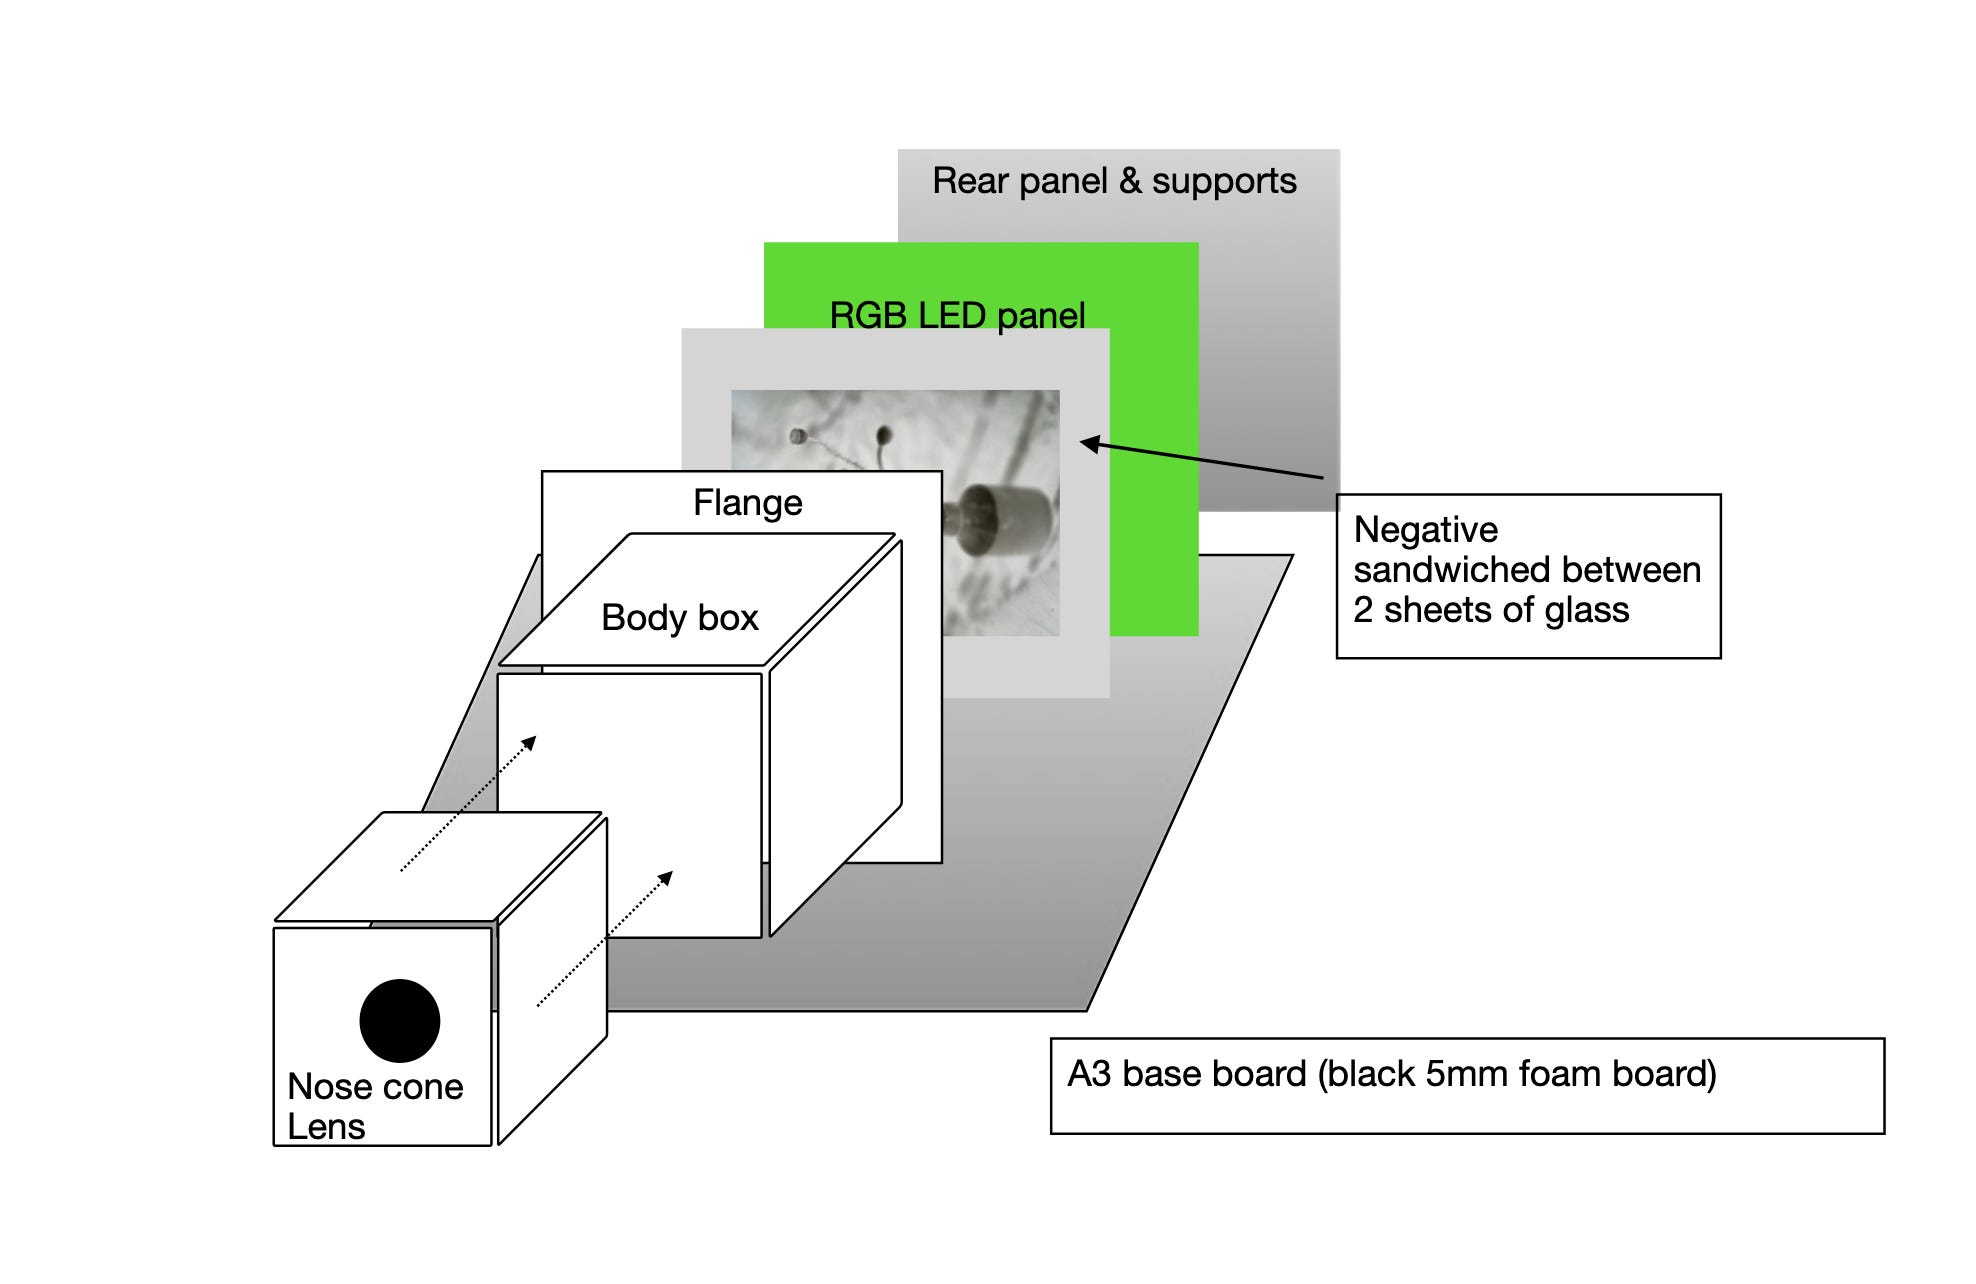
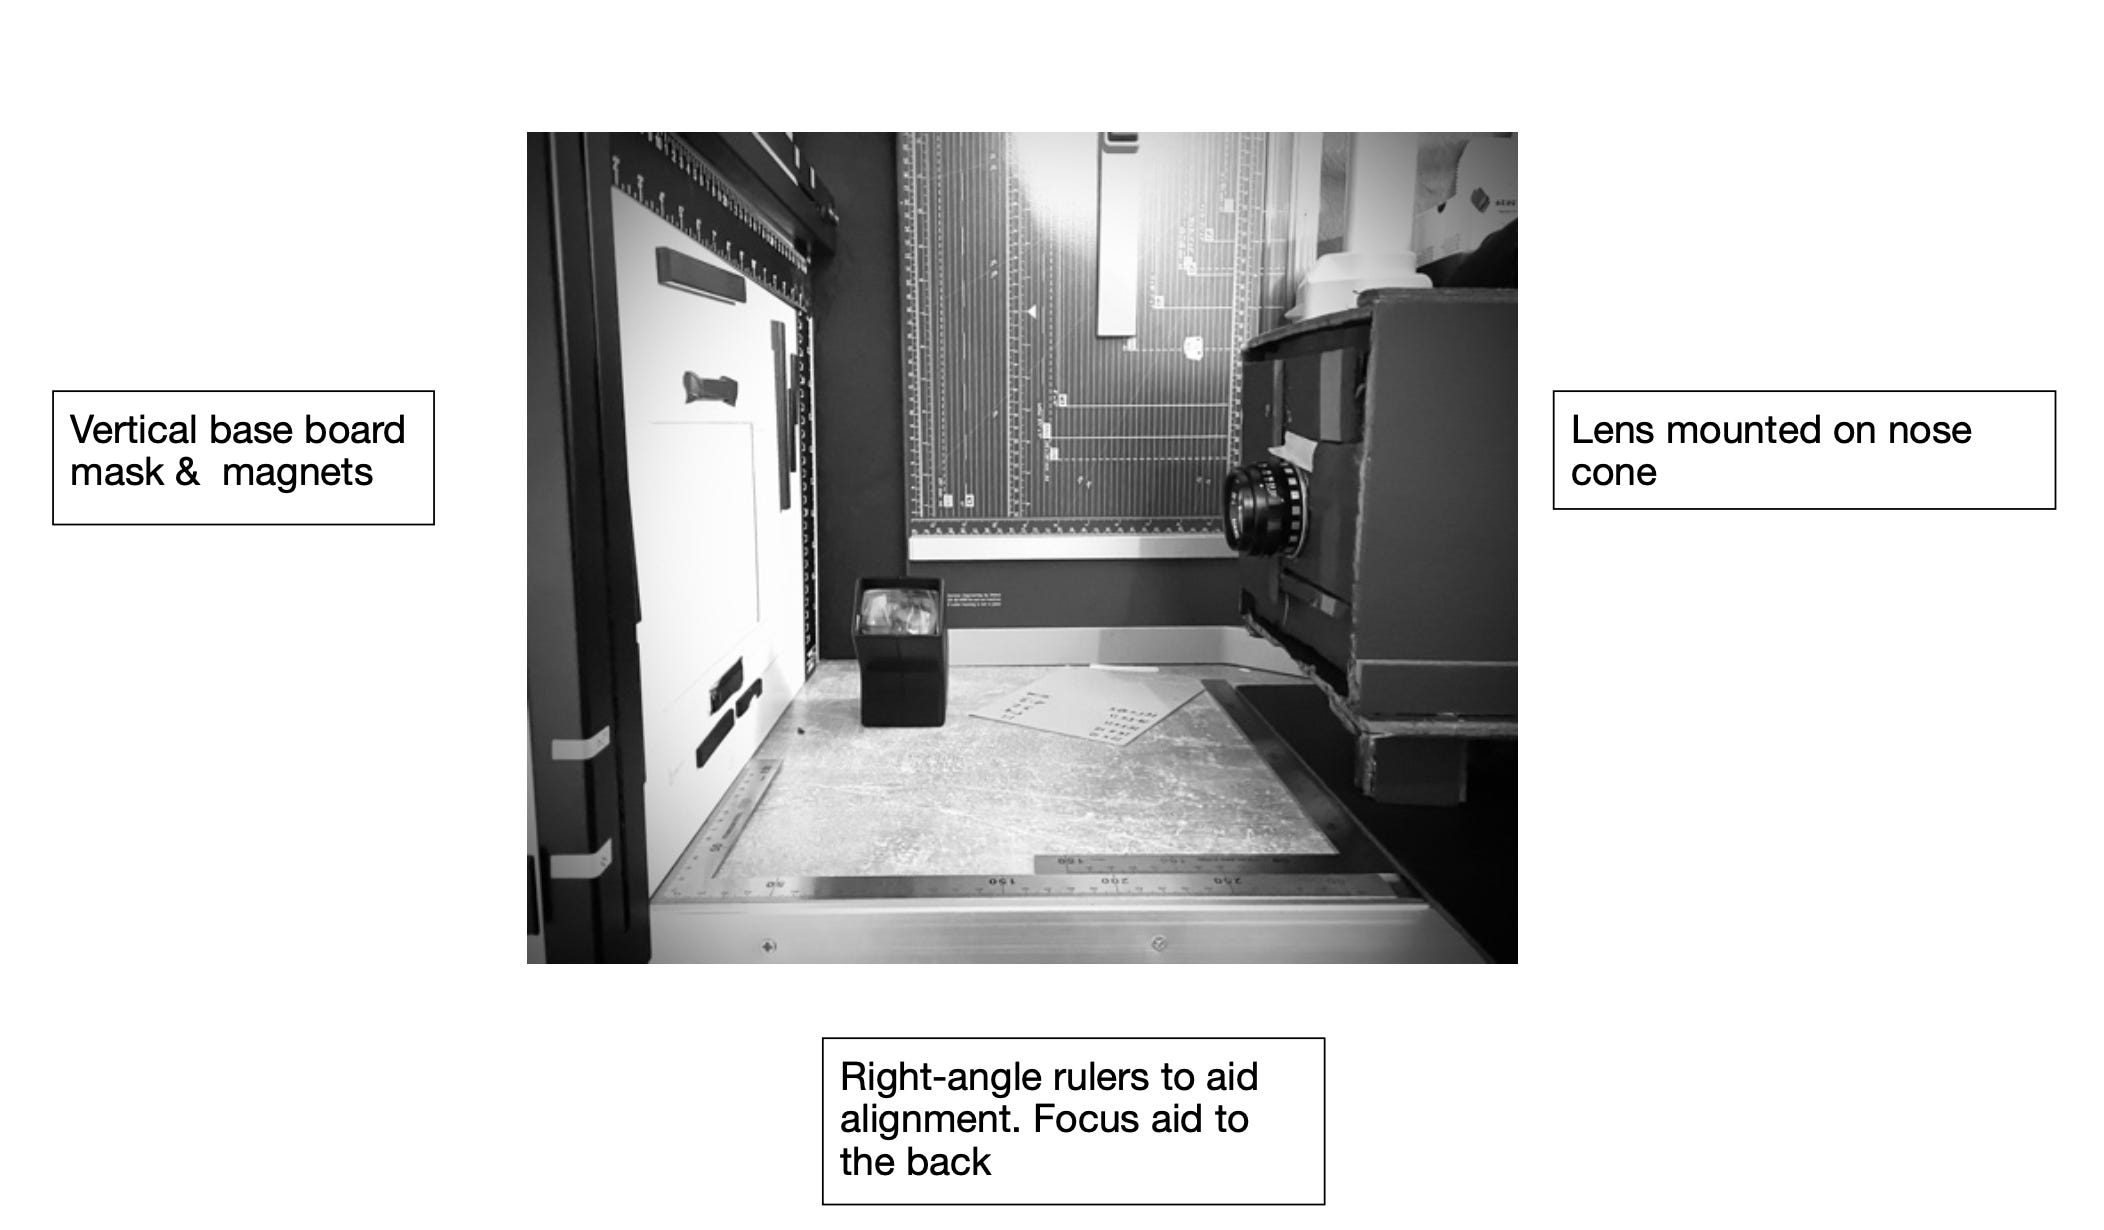
Black 5mm foam board is shaped into two boxes. One slides (nose cone) within the other (body box) which allows focusing on the vertically placed baseboard. An LED light panel (RGB type) which is bright enough to allow for sub 60 second exposures at f16 when using paper negatives in the glass ‘negative carrier’. This can handle negatives of 5x7 inches (12.5 x 17.5cm). The vertically placed (16x12 inch) darkroom easel uses magnetic bars to hold paper and any masking frames flush to the surface and prevent any slippage during exposure.
How’s it going?
Pretty well I think. Its definitely slow to use, mainly related to keeping everything aligned whilst focusing. When not in use I lift it out of the way and stick on the top of the wall cupboards in my small darkroom. Keystone distortion is more of a problem than any lack of sharpness. It is probably not the best set up for architectural prints or any thing requiring absolutely straight lines.
I use a couple of L shaped rulers to help keep the front of the enlarger parallel with the vertical base board. Barry Thornton (who a stickler for such things) wouldn’t be happy with such lack of precision but its suits me for now.
The little Tominon 135mm f4.5 process lens has no difficulty covering 5x7 negative when enlarging to such a modest degree. It’s nice and sharp too.
Since starting to write this up a I have made some modifications to the set up to improve alignment. I modified the lens board by using 2mm plywood and very carefully levelling it to ensure that it is as close as possible to being parallel to the negative holder. I have also added little self adhesive rubber feet to stop the (very light weight) enlarger accidentally being knocked out of position. Finally I have hinged the paper frames which magnetically attach to the vertical “baseboard”. This makes it a little quicker to align the paper and get even borders in the final print.
Is this for you ? Only you can answer that, but I have demonstrated (at least to myself) it is possible (albeit with limitations) to achieve a light weight large format enlarger on a shoestring.
The RGB LED panel was the most costly item but has turned out to be very useful when split grade printing the final print. Green light for highlight tone and Blue for shadow tone. This set up might not be ideal if LF was your main workhorse, but for my dabbling it’s not half bad.
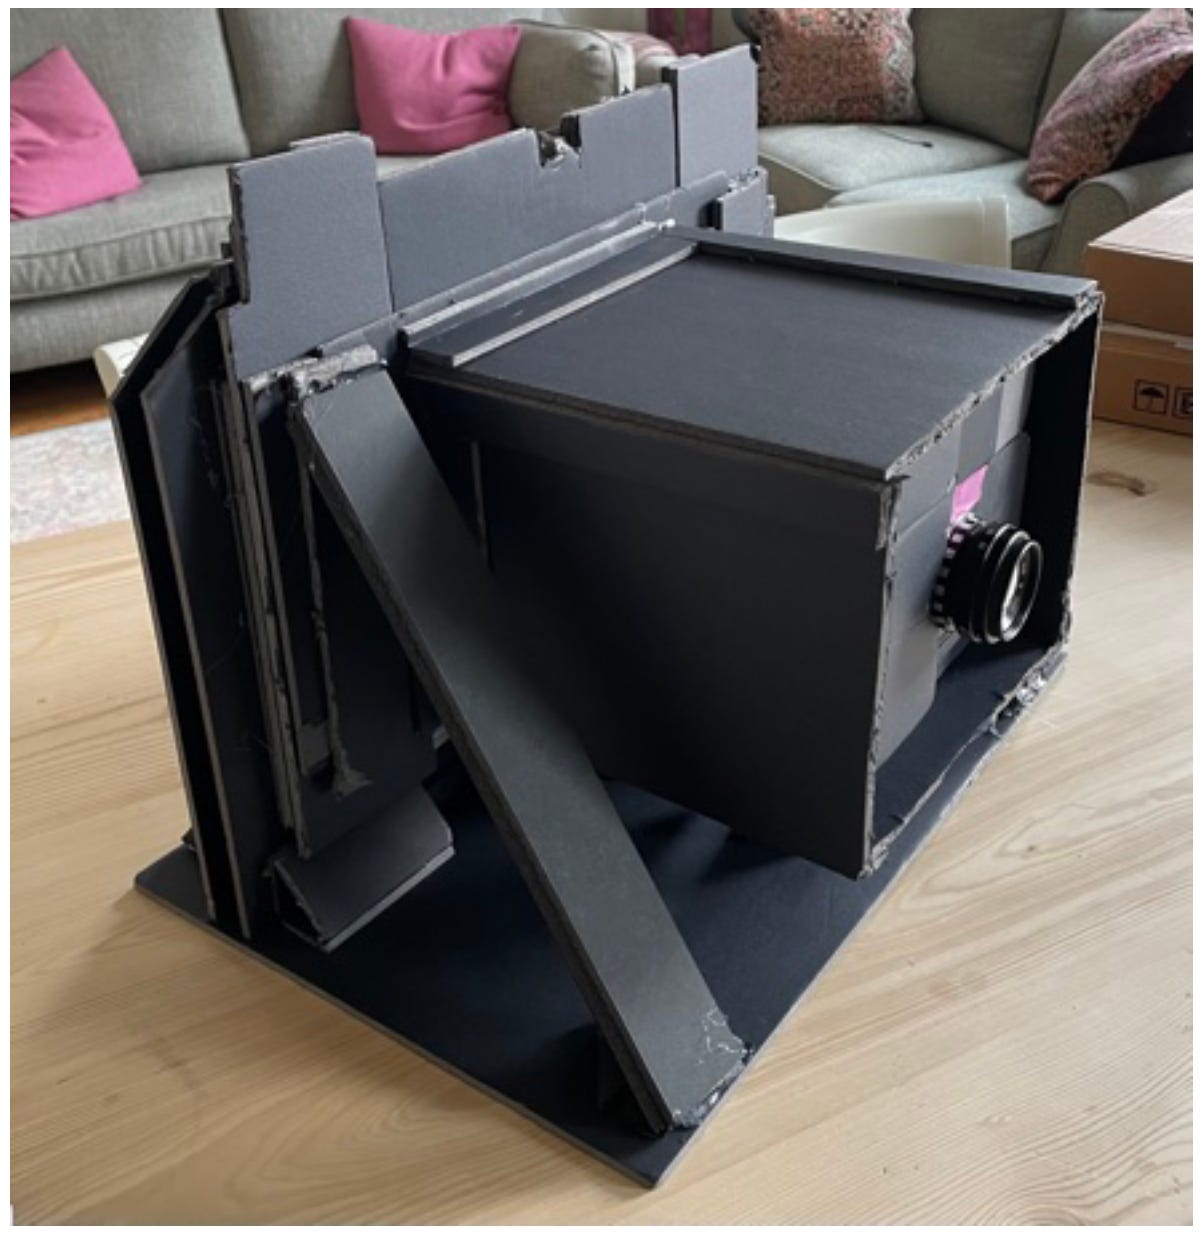
Homemade horizontal LF (5x7) enlarger fitted with 135mm process lens and an A4 LED (RGB) panel. Diagrammatically it looks like this:
In use it looks like this:
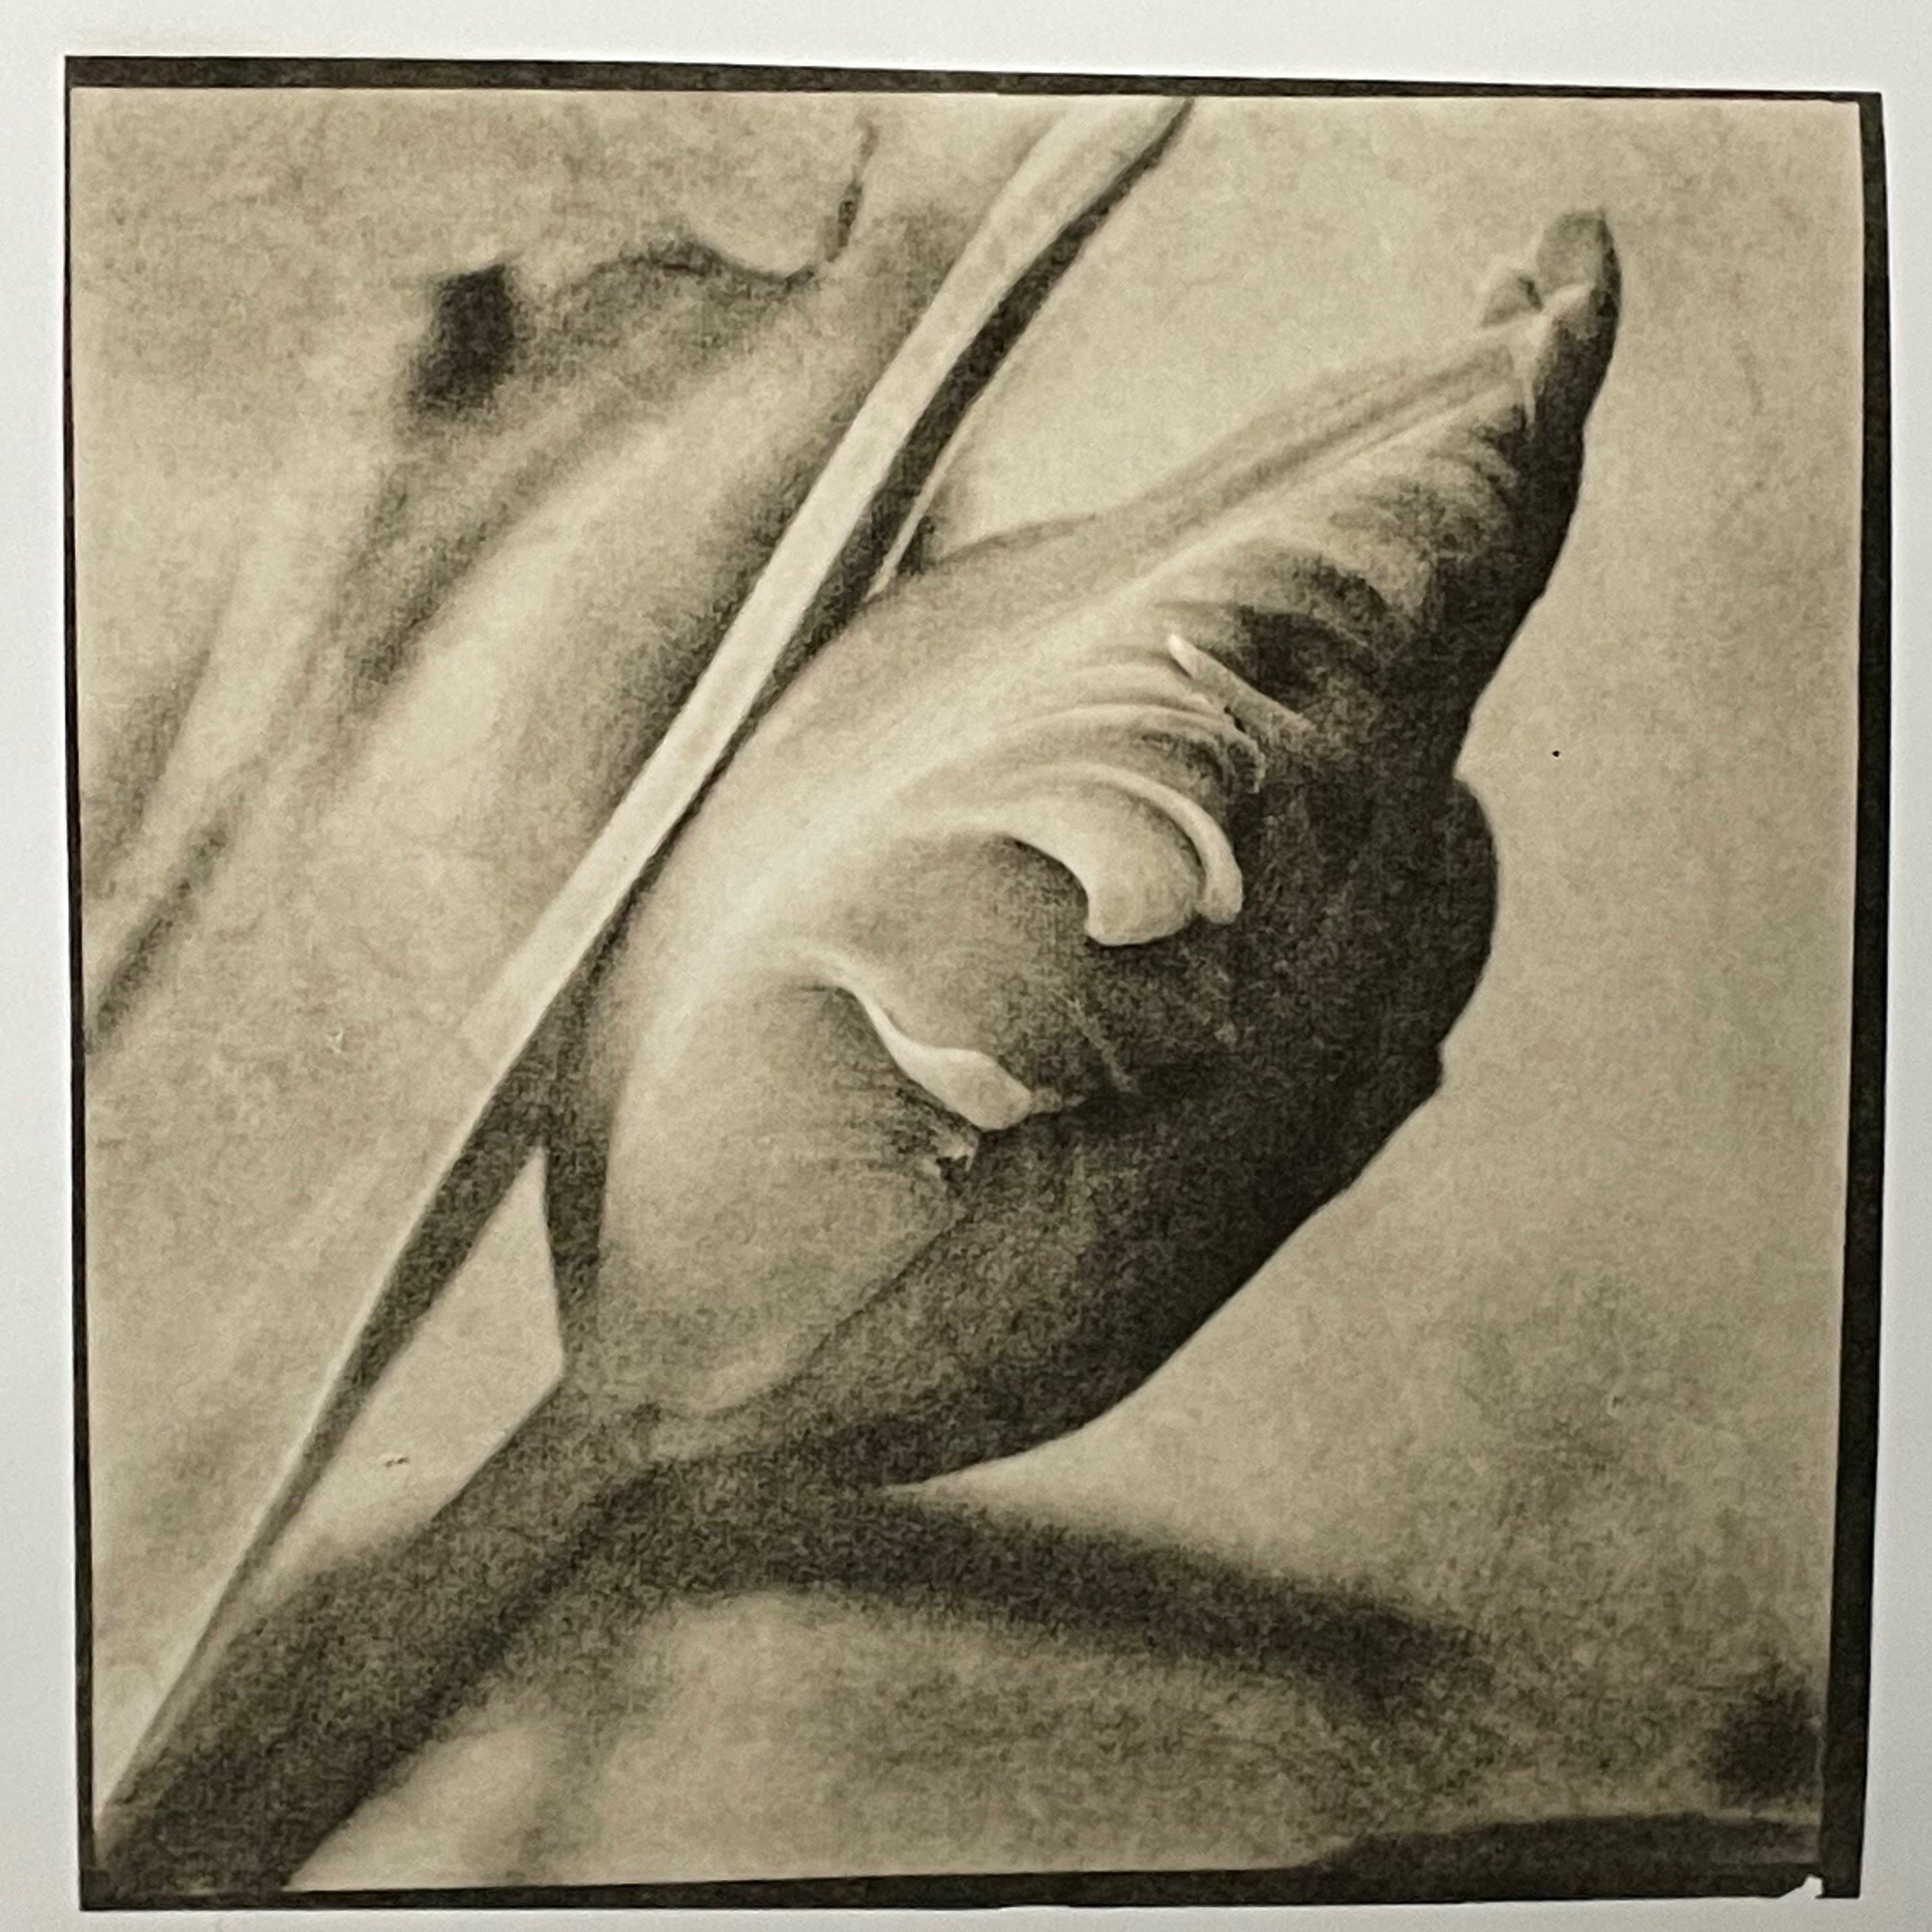
Here are some examples from my first tries with the enlarger. Some are from paper negatives and some from film.
20x20cm lith print from paper negative. The printed black border shows some distortion resulting from poor alignment. Personally I quite like the look but it might drive others wild !!
6x6cm, eliminating edges removes the keystone problem evident in the other image above. Zeiss 120mm + extension tube, Rolleiflex SL66
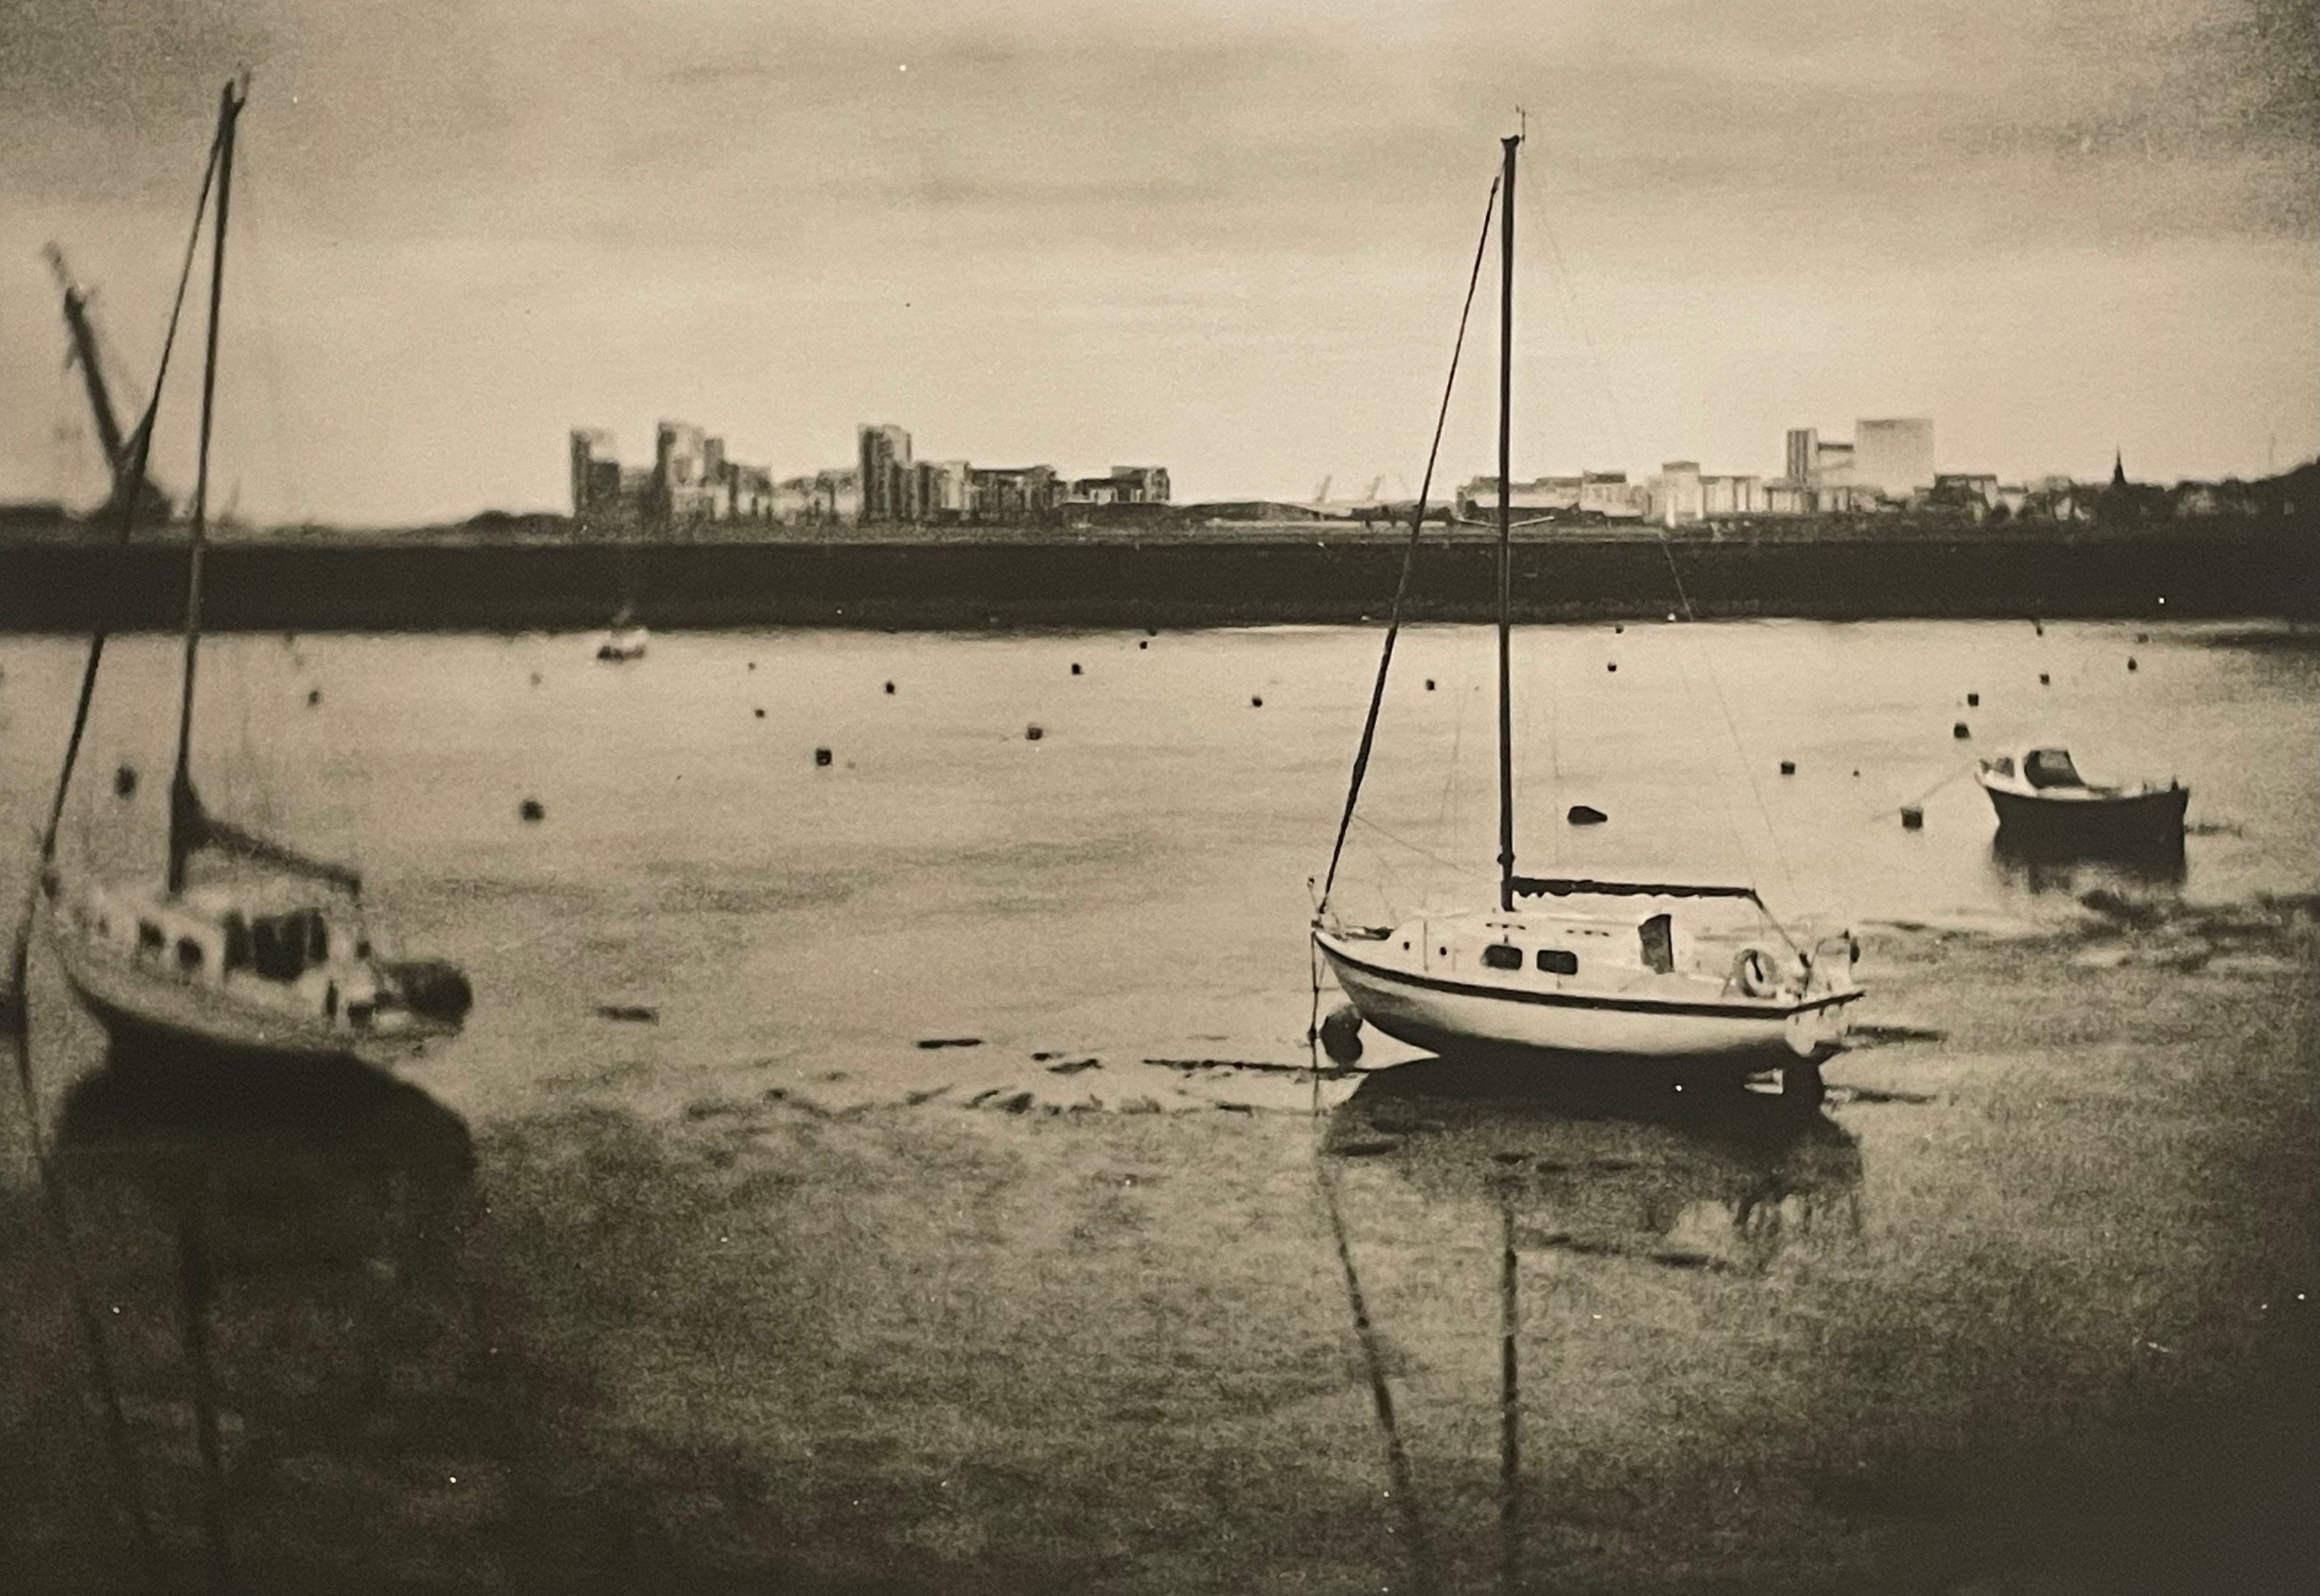
Granton Harbour - 8x10 lith print from 5x7 negative. Industrex x-ray film , Watson & son No.2 cabinet lens.
20x25cm print on MGFB warm tone from paper negative. 35mm source Nikkor 50mm f1.4 Nikon F2
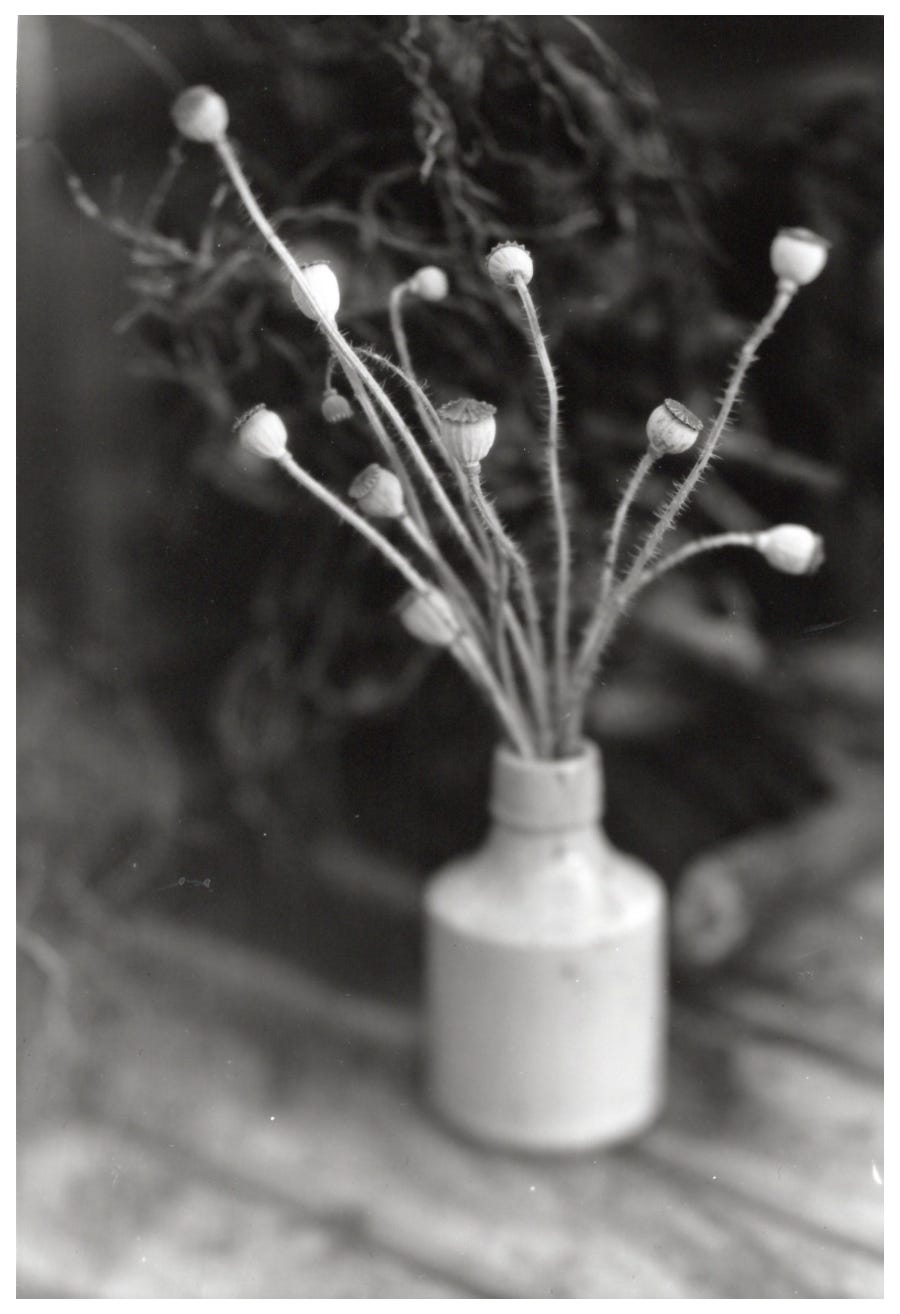
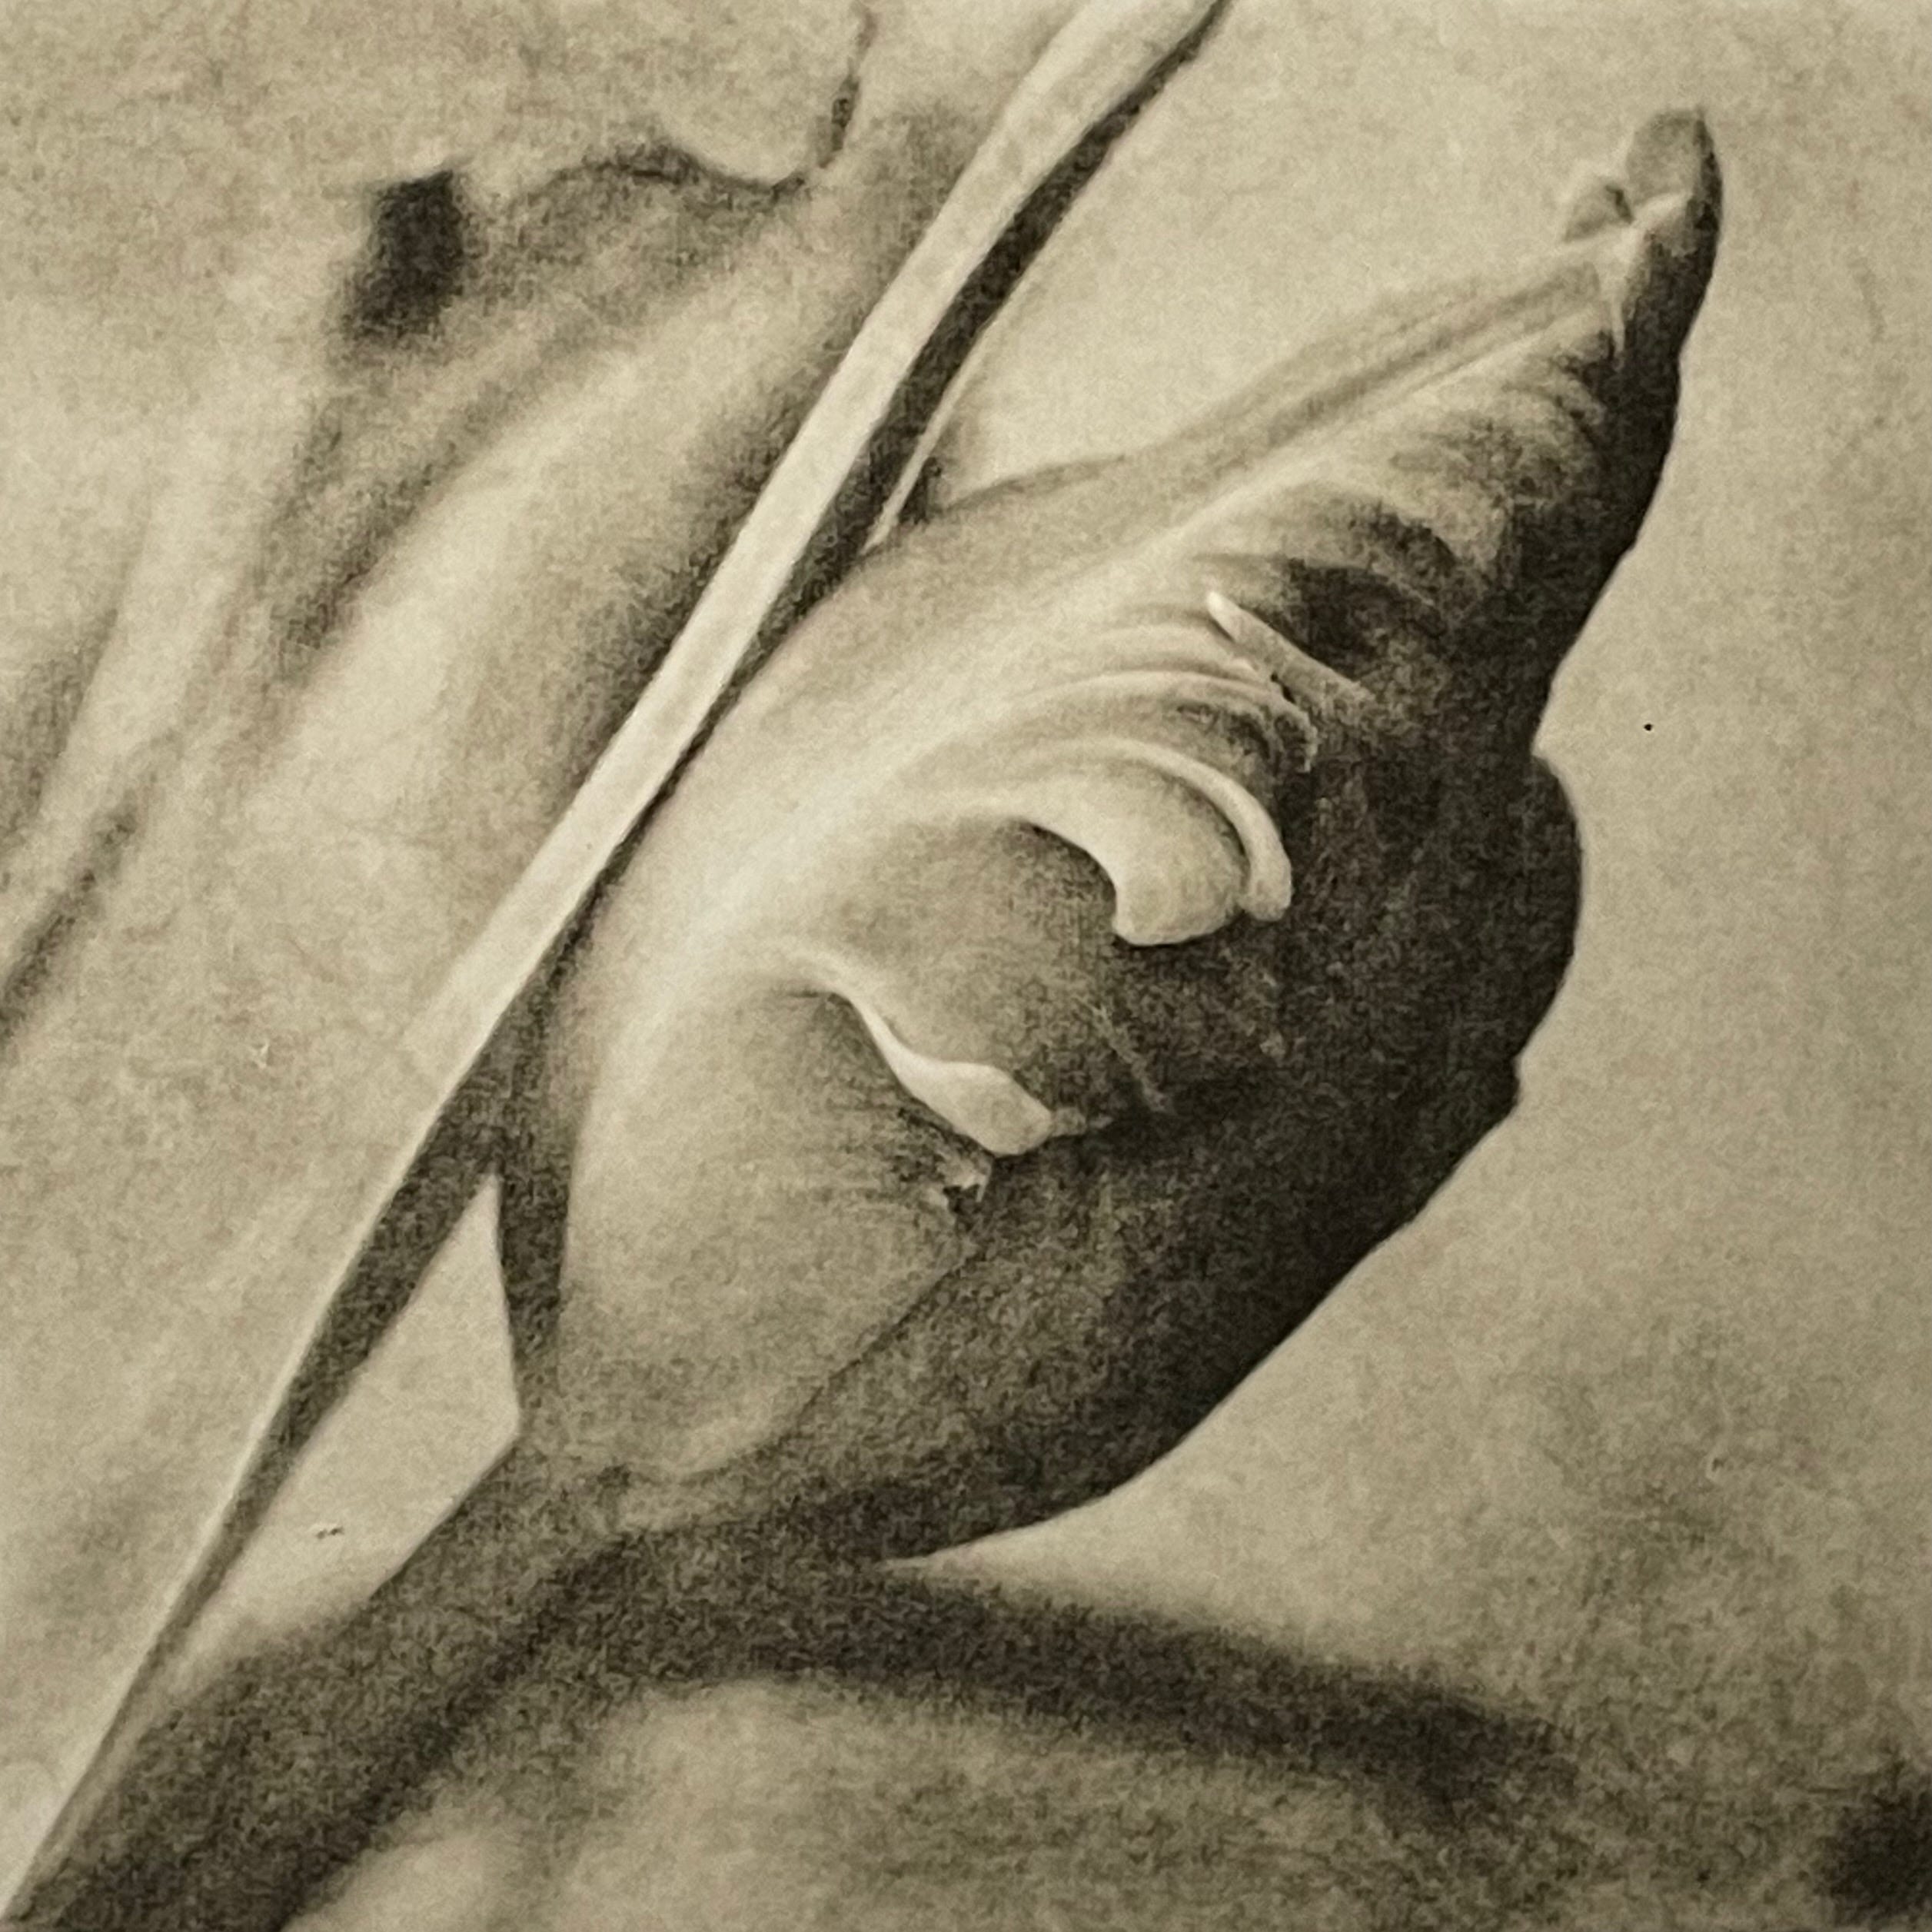
Poppy heads. 25cm Zeiss Tessar (1918)
8x10 print (Ilford MG deluxe RC) from 5x7 Agfa X-ray film negative. Both film and print, developed in ID 11 ( 1+2).
The LED panel is bright leading to very short exposures (circa 4 secs) at f16 with film negatives (as opposed to paper ones which reduce the light quite considerably). I could have lowered the white light output using the controller app and recalibrate the levels of BLUE and GREEN for use with film negatives. Instead for now I have slapped on an ND8 filter to reduce the output to bring the exposure times down to something a bit more realistic.
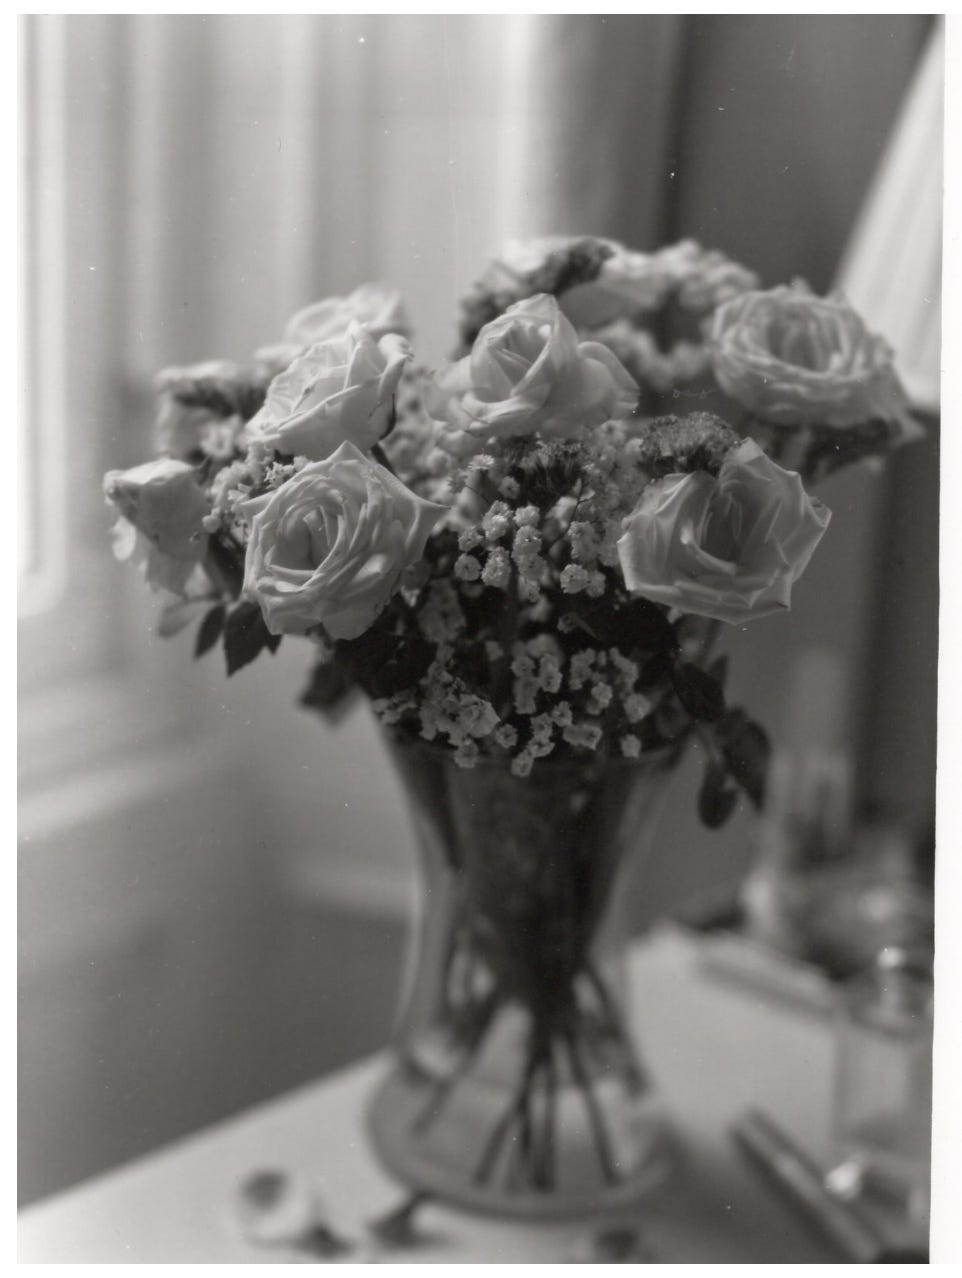
Another Agfa X-ray negative of roses chosen as test subject on a rainy day. The final print was accidentally reversed left to right. This film is double sided emulsion causing me some confusion in loading it into the negative carrier. Dallmeyer 6x8 RR lens (c.1890). Intrepid 5x7.
Equipment.
• Craft knife, cutting board, 60cm metal ruler, set square rulers , spirit level
• Pencil
• Glue gun
For the horizontal enlarger:
• black foam board (5mm)- five to six A3 sheets (£15)
• several A4 sheets of self adhesive black felt (£2)
• LED light panel - Neewer GL1C (RGB 15.5”, 48 watt) - controlled by phone app. (£123)
• one metre square blackout material - to drape over, minimising light leaks (£5)
• enlarger or camera lens of 135mm to 180mm focal length with enough coverage for 5x7 - I used a Tominon 135mm f4.5 (40mm to M42 adapter ring required) (£30)
• M42 camera mount (taken from a broken Zenit E), an M42/Nikon F adapter would also work (£5).
For the vertical negative carrier
• two old pieces of flat glass from picture frames approx 30x25cm
• thin card to create masks , flat magnets taped onto the masks
• adhesive tape ( to make sure nothing moves)
• joiners bull dog clip (optional)
For the vertical baseboard
• 16x12 metal enlarging easel (any flat (ferrous) metal surface would work)
• numerous bar magnets to hold test strips and whole sheets of paper in place
• mounting board cut to create apertures for 5x5, 5x7, 8x8, 8x10 inches etc
• Kaiser focus finder (Focuscop) - big image area works well.
Adrian Cullen 2026.
———————————————————————————————-
An interesting project that doesn’t cost a lot, and opens up a world of possibilities for different kinds of work. My home made cameras and other devices are usually made from thick cardboard or MDF board. Adrian used black foam board and I think I might get myself some for my next project. We have been messaging each other this week because Adrian has made a simple 10x8 box camera with a fixed lens, something I had been planning too. I currently have something similar already, but it is a pinhole camera. I think a future article could be written on home made cameras, I have made many over the years, but only a few survive.
—- ————————————————————————————————
If you find my articles interesting or useful, please spread the word to anyone you can think of who would be interested.
If you have enjoyed this post and the information here and elsewhere on my Substack and you would like to support me, you can subscribe or just buy me a coffee at Ko-fi.com/andrewsandersonphotography You can send as little as £5.00, or more if you are feeling generous. This money goes towards materials used for the tests and printing for these articles. Alternatively you can be a paid subscriber.
Thank you for reading, please let me know your thoughts.
Andrew Sanderson February 2026.
Other places to see my work;
Instagram; http://instagram.com/andrewsandersonphotography
Facebook; https://www.facebook.com/andrew.sanderson.96155/
Original hand made darkroom prints are available from my online shop; www.andrewsandersonphotography.bigcartel.com
I also offer one to one workshops at my darkroom/studio in West Yorkshire, UK. If you are interested please email me at andrewsandersonphoto@gmail.com
Resourceful indeed! I made a lightbox for camera scans of negatives uo tp 6X9 CM out of foam board, an LED panel, and 2 layers of diffusion. Works like a charm.
And my Dad, probably in the 1930s or 40s, made an enlarger from a utility light reflector and wooden box with a slot for a negative carrier, and a modified back for his 6X9 Recomar camera. Slip the camera onto the enlarger, focus the camera's lens with the camera's bellows, and Bob's your uncle. In hindsight I wish I'd photographed it.
Where there is a will, there is a way.
Brilliant & innovative solution.